Boo!
 [1]
[1]
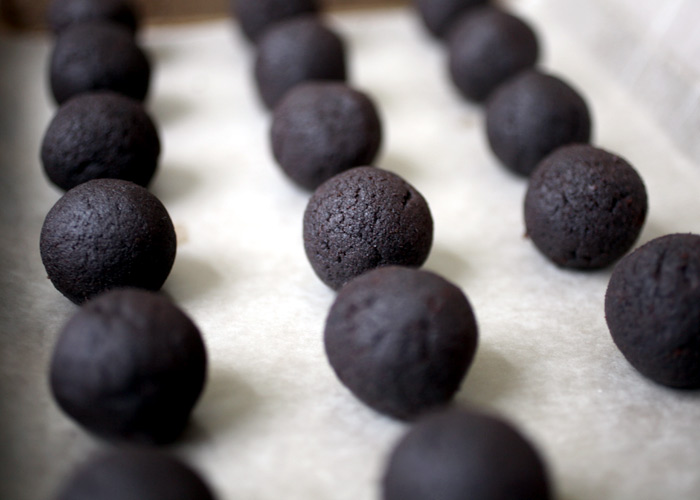
I set out to make a few fun Halloween cake pops Sunday.
 [2]
[2]
I baked cake, crumbled it, mixed it with frosting, rolled into balls and then molded them into different shapes to play with. I had big plans. (Basic Cake Pop Instructions here. [3])
Then I realized I didn’t have any of the right candy coating colors on hand for my plans… I was out. Boo…Hoo! … Okay, time to switch gears.
I did have white. I always try to keep white and chocolate in the house.
 [4]
[4]
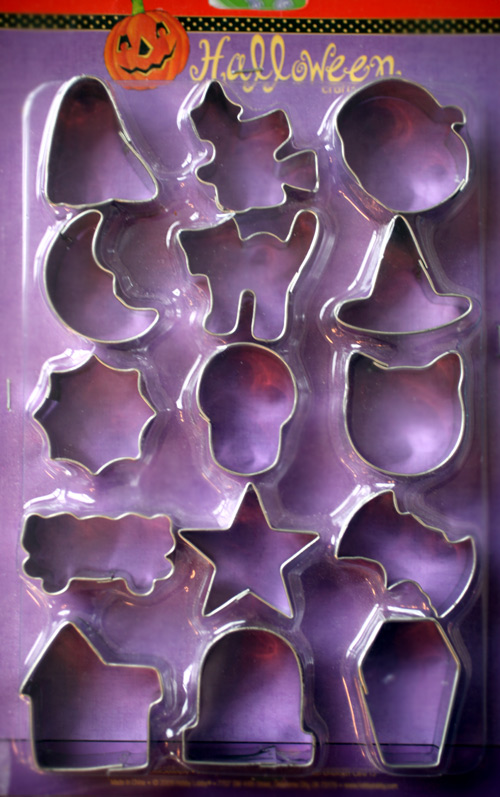
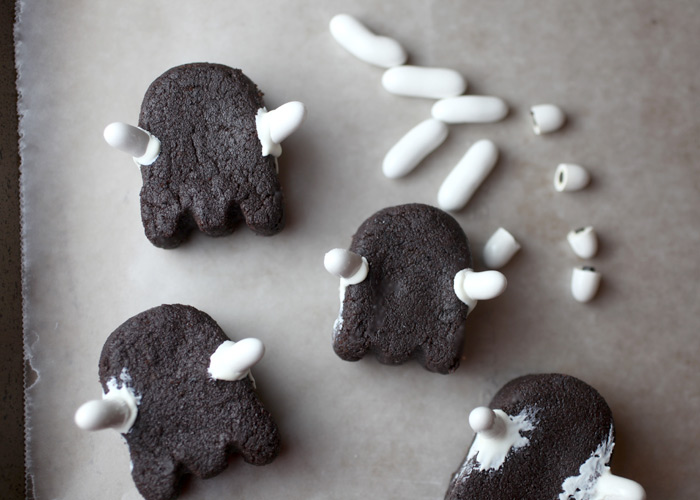
And I still had these cutters sitting on the counter from the other day [5] because I wanted to use them again soon. And soon turned out to be Sunday.
One of the cutters inspired a cute quick variation to the ghosts I’ve made before [6].
 [7]
[7]
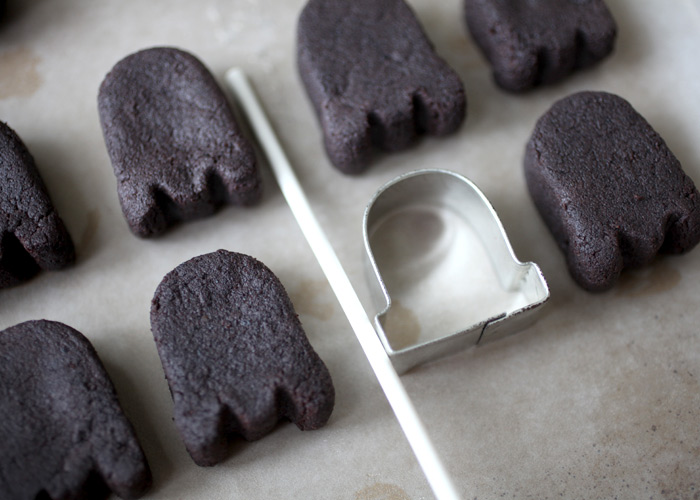
I thought the grave mini cutter would work great to make ghost shapes. And it did.
Just press the ball inside and use the height of the cutter to help mold the shape.
Remove and press the ends down so the sides are flat.
And don’t worry… you can totally hand shape these even if you don’t have a similar cutter.
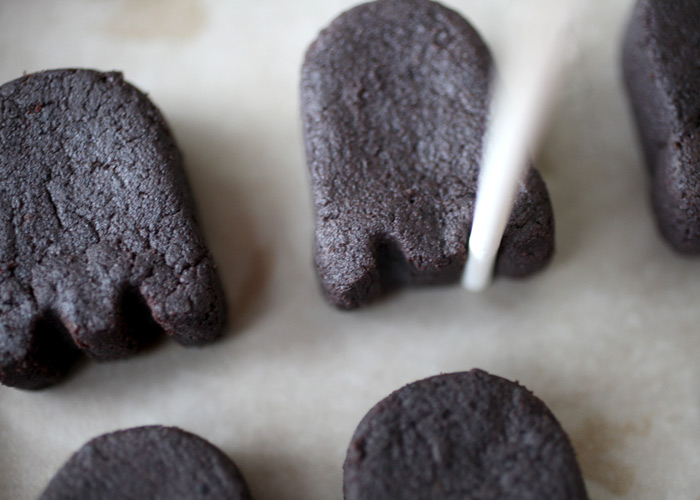
Flatten the rolled balls and then shape them with the aid of wax paper. It helps a lot. Promise.
Just press, slide and rotate the shape against a wax paper covered baking sheet and it will help form flat and smooth sides.
 [8]
[8]
Then just use a lollipop stick to press into the bottom of your ghost.
And now I have a sudden urge to make Pac Man Cake Pops.
 [9]
[9]
For arms, you can use white licorice pastilles. Good and Plenty candies would work, too – they are just a little bit thicker.
Cut about a 1/3 of the candy off using kitchen scissors. And then attach the cut end of the candy to the shaped cake with melted white candy coating. If there is excess (see bottom right) use your finger to spread it in a thin layer on the surface of the cake. This is mainly so you don’t have a big lump show through the coating after you dip.
 [10]
[10]
While the coating is wet, attach an orange sixlet candy under one of the arms. Or any other similar candies … M&M’s would work – they’d just be flatter. Hold candy in place until set.
Let the cake pops dry and draw faces and a handle for the bucket using a black edible ink pen. I like Americolor Gourmet Writing Pens by the way.
 [11]
[11]
Boo-tiful!
I’m pretty happy with how these turned out as an impromptu pop.
If you would like to use these tags for Halloween, you can download the tags here. [12]
 [13]
[13]
Enjoy!
And I’ll try to get around to some more pops before Halloween. When I stock up again on candy coating! : )
This delicious recipe brought to you by Bakerella
https://www.bakerella.com/boo/
URLs in this post:
[1] Image: http://www.flickr.com/photos/bakerella/8042517245/
[2] Image: http://www.flickr.com/photos/bakerella/8042533316/
[3] Basic Cake Pop Instructions here.: http://www.bakerella.com/hope-these-put-a-smile-on-your-face/
[4] Image: http://www.flickr.com/photos/bakerella/8042533470/
[5] from the other day: http://www.bakerella.com/homemade-oreos/
[6] ghosts I’ve made before: http://www.bakerella.com/trick-or-treats/
[7] Image: http://www.flickr.com/photos/bakerella/8042532250/
[8] Image: http://www.flickr.com/photos/bakerella/8042532168/
[9] Image: http://www.flickr.com/photos/bakerella/8042530604/
[10] Image: http://www.flickr.com/photos/bakerella/8042529298/
[11] Image: http://www.flickr.com/photos/bakerella/8042515589/
[12] download the tags here.: http://www.bakerella.com/tags/
[13] Image: http://www.flickr.com/photos/bakerella/8042526276/