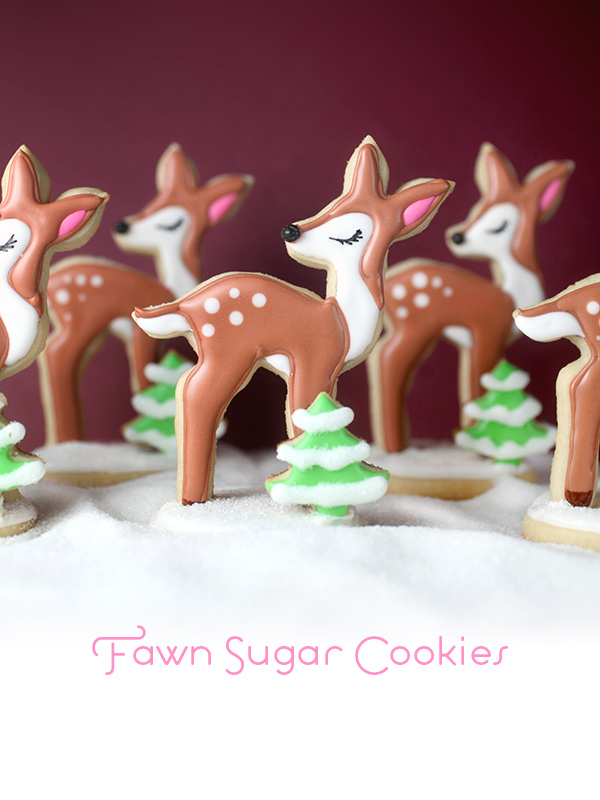
Cookies to Fawn Over
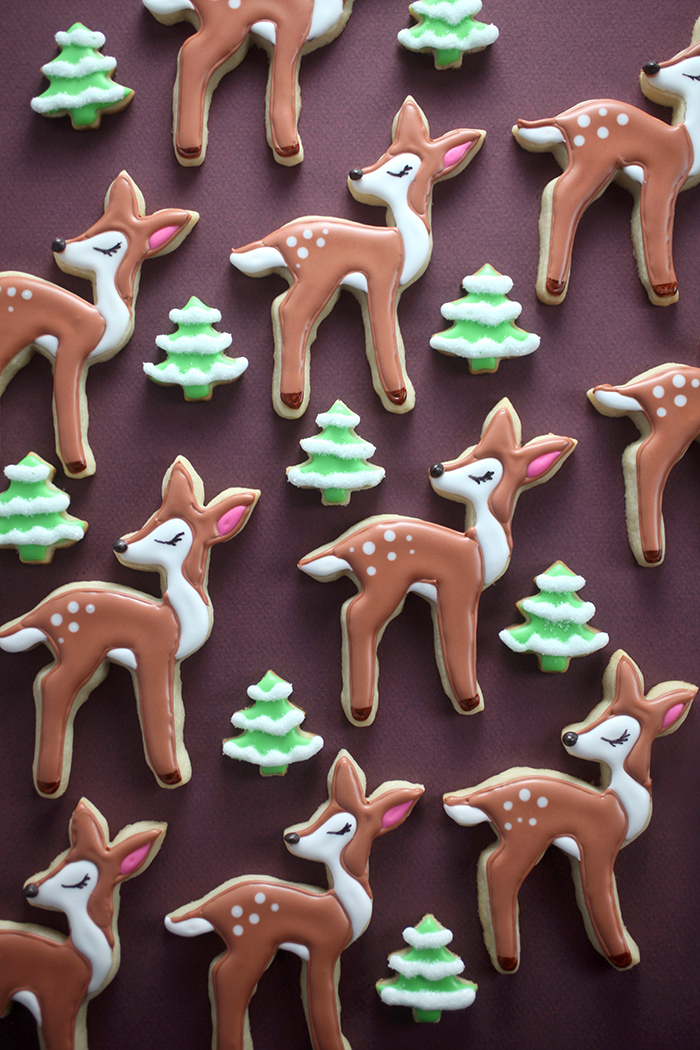
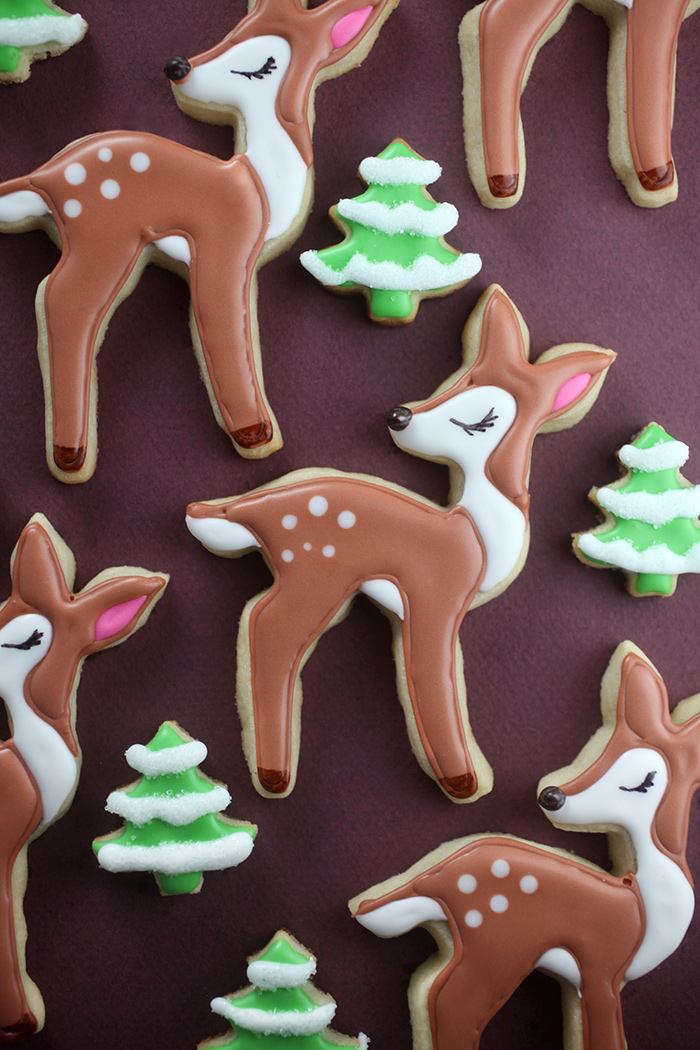
I made the sweetest baby deer cookies to give to my nieces the other day and I’m so happy with how they turned out. I say that because each time I pipe cookies, I get nervous right before drawing on them with royal icing. I’m much better with a pencil. These turned out totally cute though. Yay and Happy Holidays!
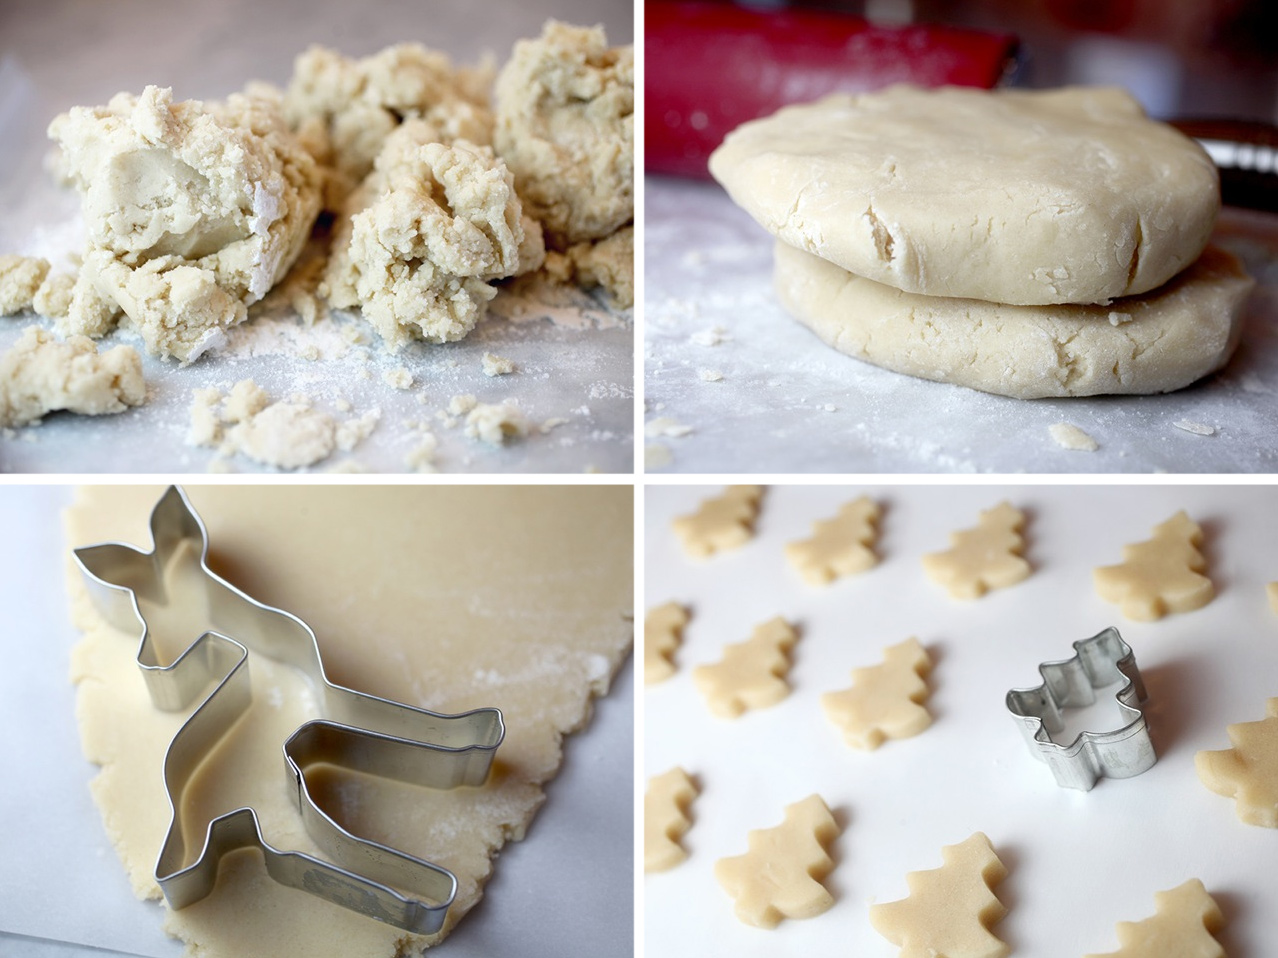
Here’s a link to the fawn cookie cutter [3] I used. I just love the sweet shape and I’ve been admiring it on pinterest and instagram for a while… so I finally ordered one.
Also… Here’s the sugar cookie and royal icing [4] recipe I used.
You’ll need royal icing in brown, green, pink and white. I just guesstimated how much of each. Brown and white with the most, a little green and a tiny amount of pink.
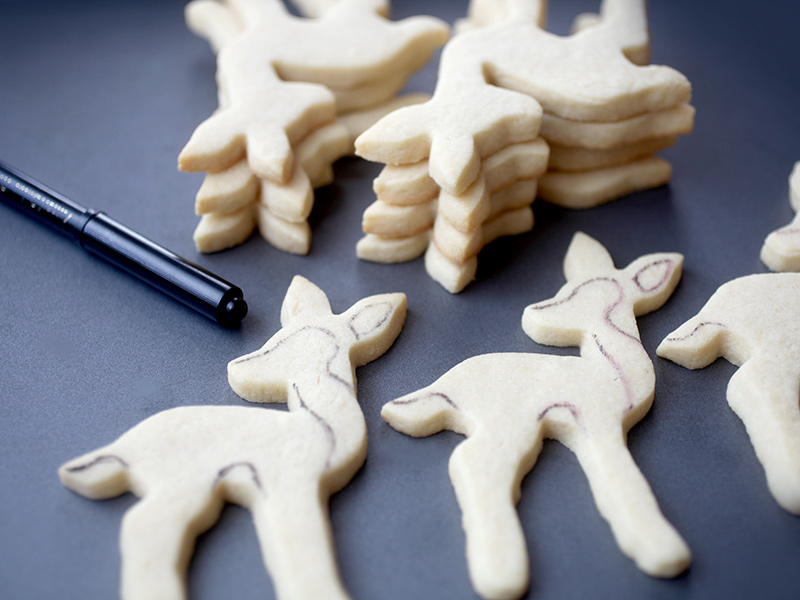
Now for decorating… You can totally pipe the deer in one color, or give them more detail. I went for more detail, but I didn’t want to take any chances on screwing them up, so I used a black edible ink writing pen to draw on the cookies first. This is much easier than winging it for me.
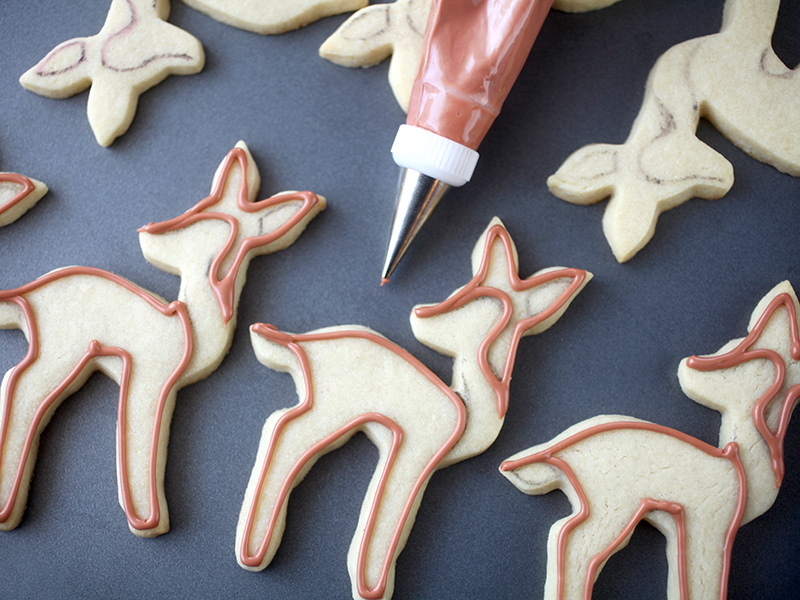
When you’re ready to pipe, just trace over the outlines with icing. Brown first.
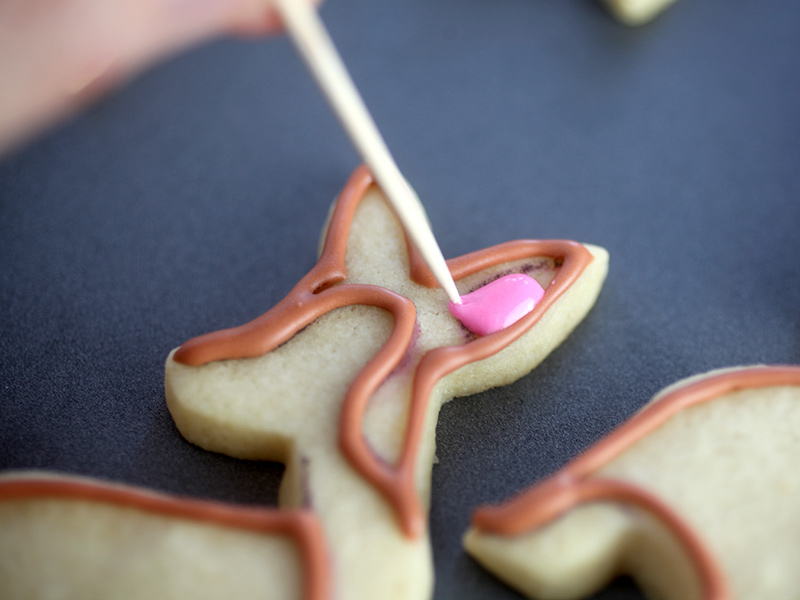
While the outline was still drying, I carefully piped a little pink ear and used a toothpick to coerce the royal icing gently in the shape I wanted.
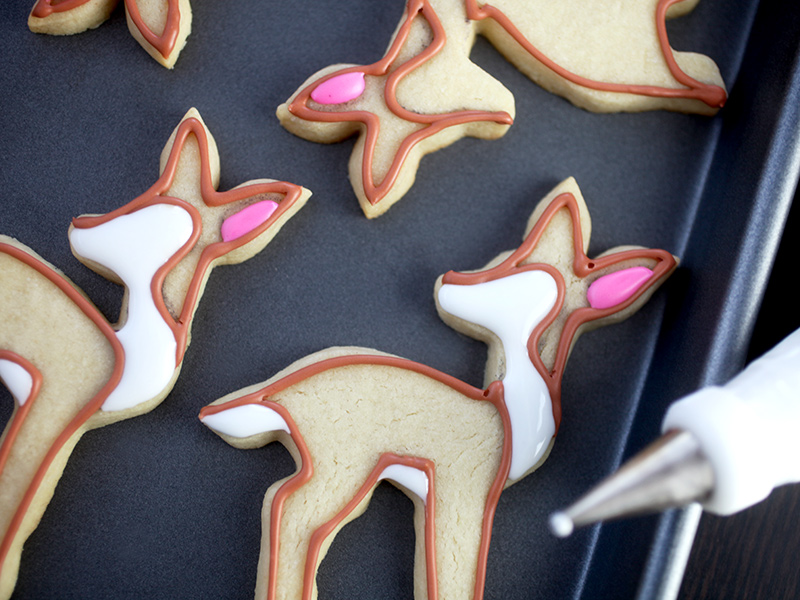
Next up, I filled in the white tail, tummy and face areas. I didn’t use outline icing here, I just piped and filled at the same time with royal icing that’s slightly more fluid than the outline piping consistency.
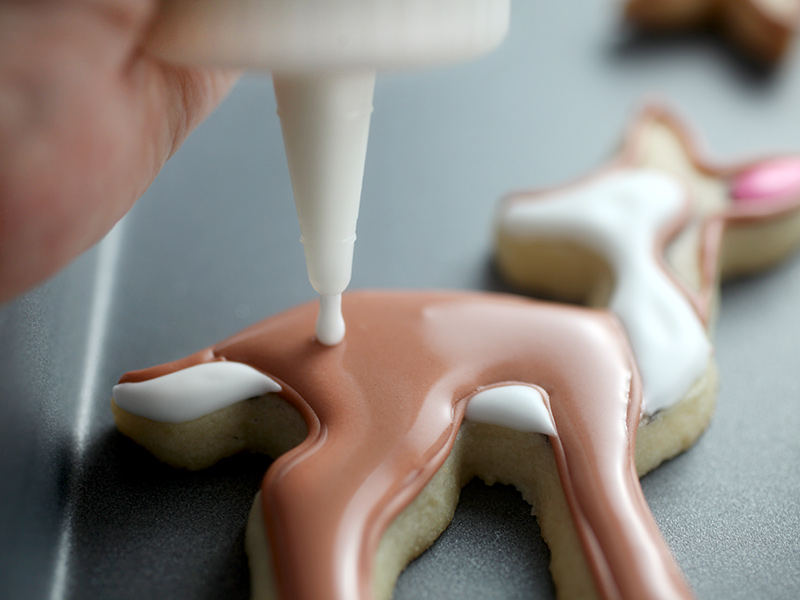
Now the fun part. With the brown outlined, go ahead and fill in the body with flood consistence brown royal icing. And while the icing is still wet, pipe teeny-tiny dots with flood consistency white royal icing.
I like to use a decorator bag fitted with a no.2 tip for outlining and usually a small squeeze bottle when filling in with color.
Okay, now let dry. Let dry. dry.
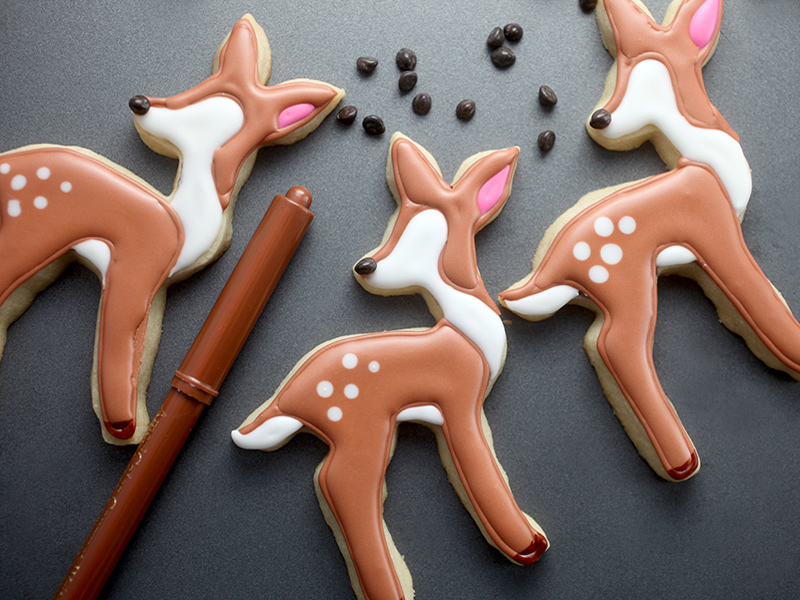
Then you can draw on hooves with a brown (or black) edible ink writing pen.
To finish the faces, attach tiny noses with royal icing as glue. I used rainbow chip sprinkles. The brown ones make the perfect little nose.
See… super cute. I went easy on the eyes and drew them closed with long eyelashes using the black edible ink writing pen again. Sooo handy and the closed eyes make them seem even sweeter.
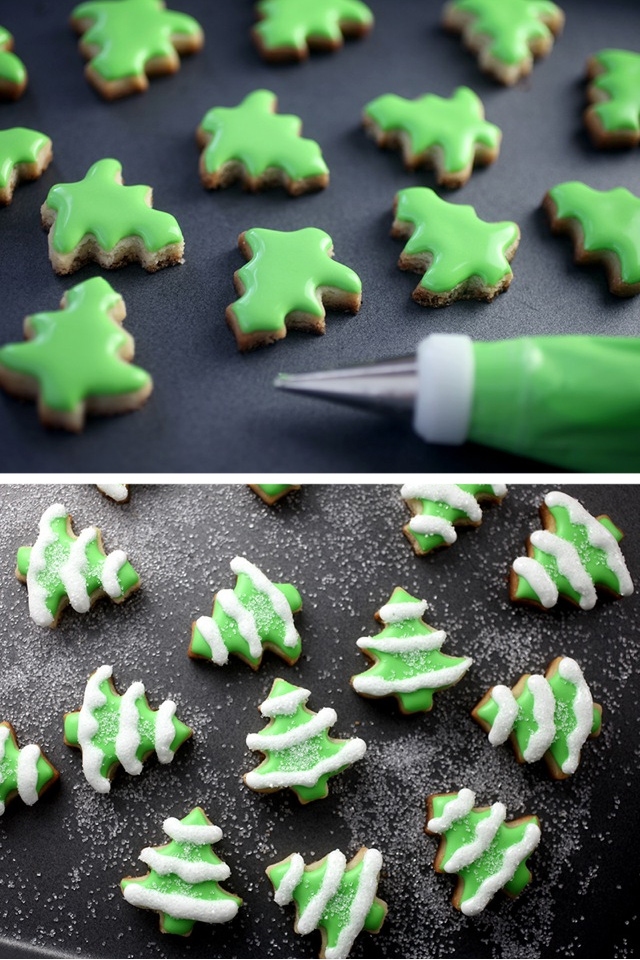
The trees are easy peasy. Cover the surface of the cookie in green royal icing and let dry completely. Then pipe on wavy lines of white icing and sprinkle with white sanding sugar before the icing dries.
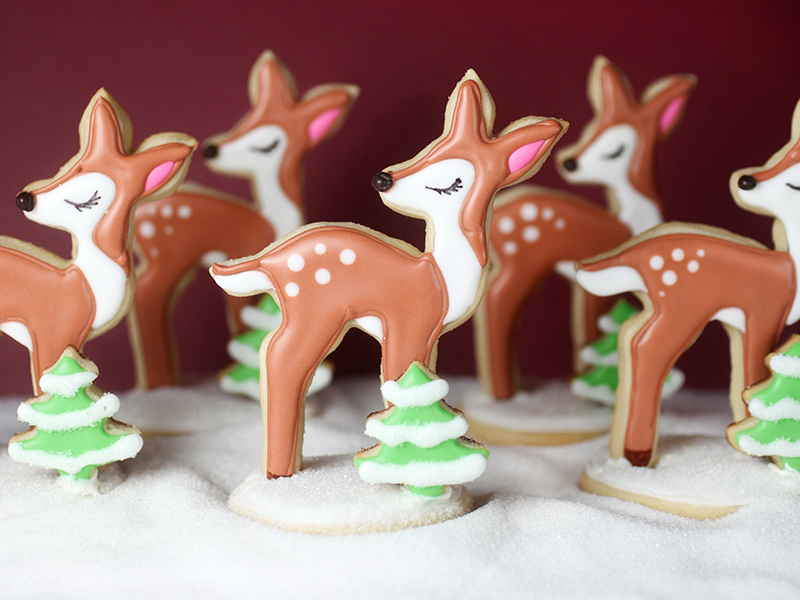
You don’t have to decorate tiny trees, but they’re going to make the next step tree-mendously adorable.
See what I mean?
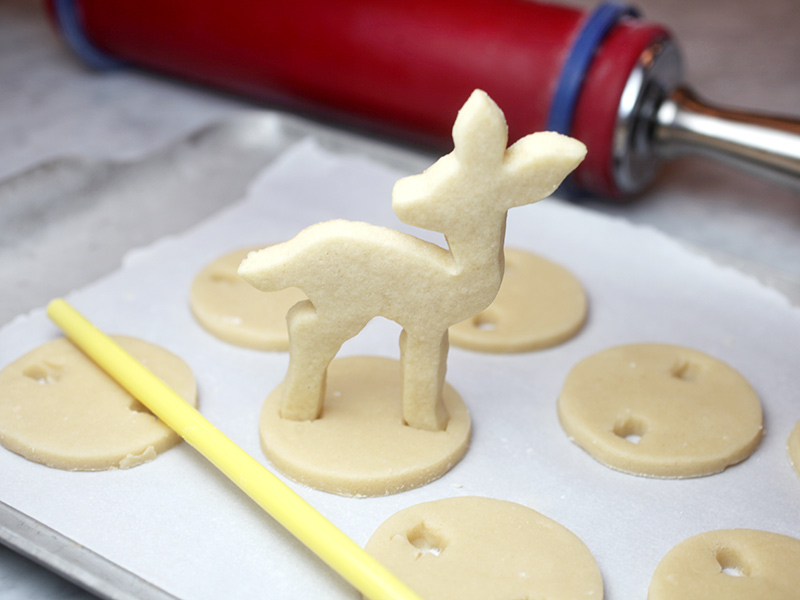
Okay, back up to cutting deer and tree shapes out of the dough and throw in a few round circles that are a little wider in width than the deer’s legs. Use the fawn cutter to make marks in the dough that match the leg spacing and then grab a straw. Press the straw down in the cookie dough a few times to remove dough where the legs will go.
After the circles bake, you can reuse the straw to immediately remove any cookie that may have spread. The openings in the circle make it easier for the deer to stand while you attach it to the base.
Not shown: Pipe and fill circles with white royal icing and sprinkle with sanding sugar. Then when the circles and decorated deer are completely dry, fill the holes with a small amount of melted white candy coating (it dries more quickly than the royal icing). Place a decorated deer into the candy coating and hold in place while the coating sets. Then attach a tiny tree with more melted candy coating. Sprinkle sanding sugar on any of the exposed coating so it appears seamless with the rest of the cookie base.
Enjoy!
URLs in this post:
[1] Image: http://www.bakerella.com/site/../images/2015/12/IMG_4761.jpg
[2] Image: http://www.bakerella.com/site/../images/2015/12/makingdough.jpg
[3] fawn cookie cutter: https://www.etsy.com/listing/159649723/fawn-cookie-cutter-baby-deer-cookie
[4] sugar cookie and royal icing: http://www.bakerella.com/peppermint-candy-sugar-cookies/
[5] Image: http://www.bakerella.com/site/../images/2015/12/IMG_4594.jpg
[6] Image: http://www.bakerella.com/site/../images/2015/12/IMG_4609.jpg
[7] Image: http://www.bakerella.com/site/../images/2015/12/IMG_4640.jpg
[8] Image: http://www.bakerella.com/site/../images/2015/12/IMG_4646.jpg
[9] Image: http://www.bakerella.com/site/../images/2015/12/IMG_4672.jpg
[10] Image: http://www.bakerella.com/site/../images/2015/12/IMG_4683.jpg
[11] Image: http://www.bakerella.com/site/../images/2015/12/IMG_4824.jpg
[12] Image: http://www.bakerella.com/site/../images/2015/12/decoratingtrees.jpg
[13] Image: http://www.bakerella.com/site/../images/2015/12/IMG_4895.jpg
[14] Image: http://www.bakerella.com/site/../images/2015/12/IMG_4584.jpg
[15] Image: http://www.bakerella.com/site/../images/2015/12/IMG_4876.jpg
