Handy Peach Pies
 [1]
[1]
It’s time for pie.
 [2]
[2]
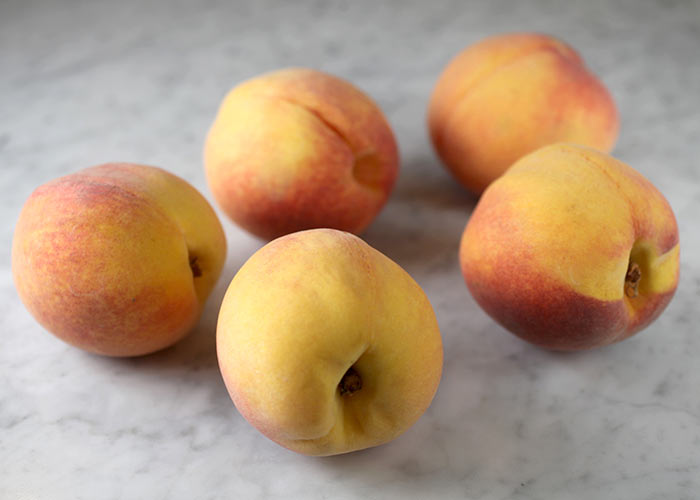
And peaches.
 [3]
[3]
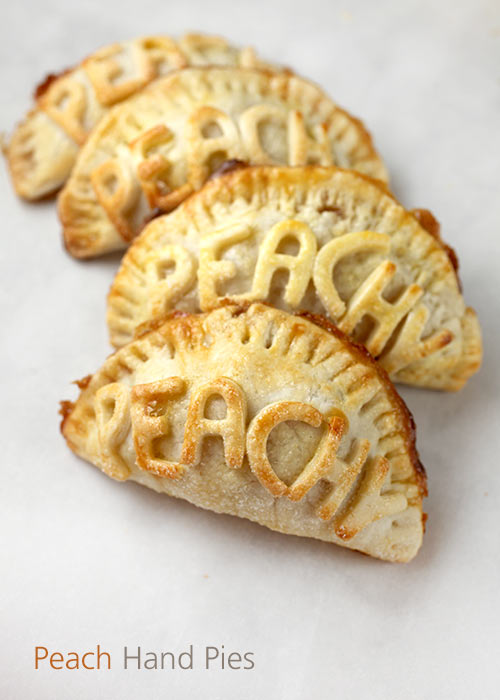
Pretty little peachy hand pies.
Yeah, I’m not sure what’s happening today. Fruit and pie. Instead of chocolate and cake. I never do that. I must be dieting.
Or pieting.
 [4]
[4]
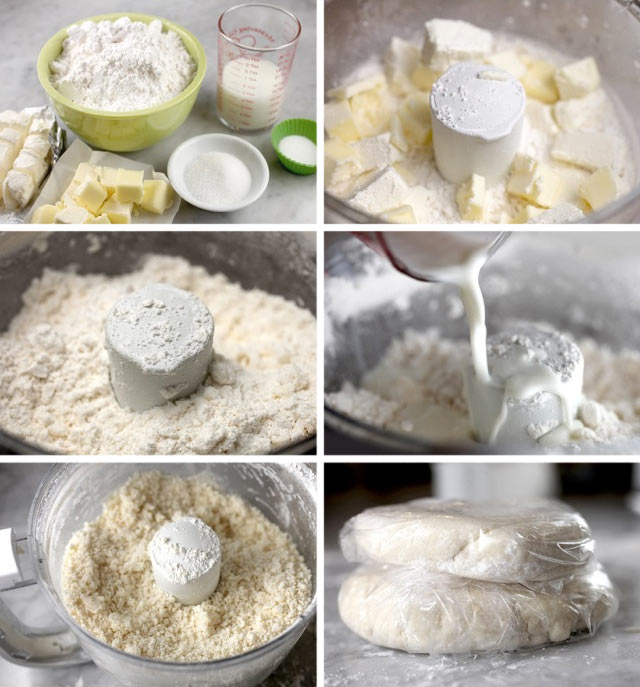
That means pie crusting is happening. This pie dough is made with added cream cheese in the dough. Yummo!
 [5]
[5]
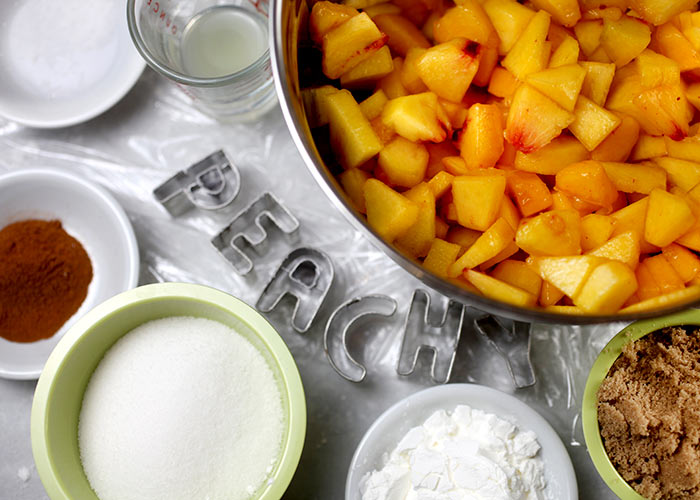
And peachy pie filling… you’ll need diced peaches, sugar, brown sugar, corn starch, cinnamon, lemon juice, and salt.
 [6]
[6]
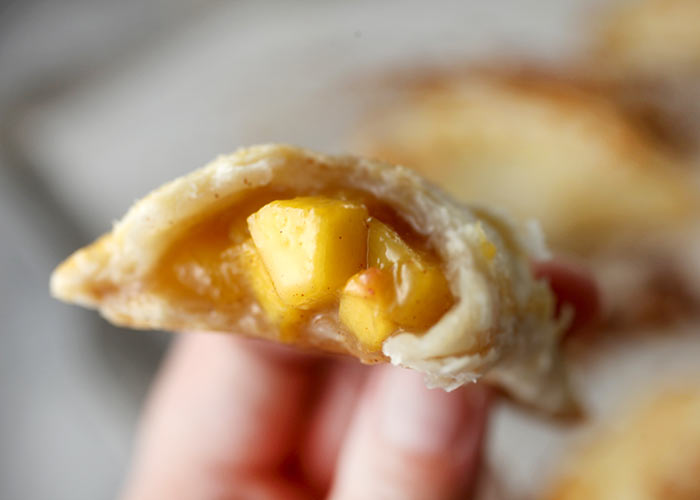
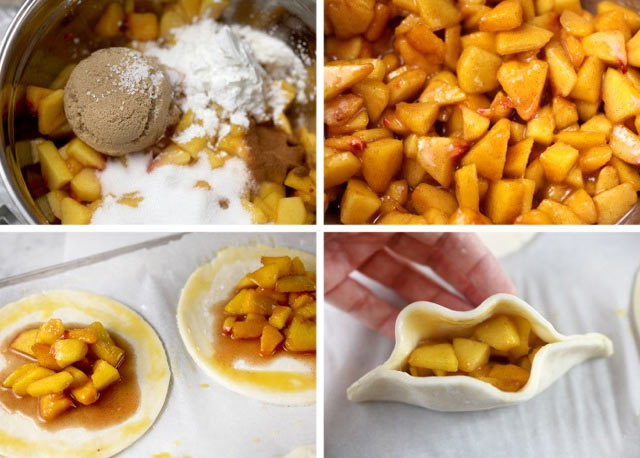
Toss the filling ingredients together and spoon a small amount in the center of circles cut out from the pie crust dough. Fold the circles together and seal the edges.
You want to keep all those juices tucked inside as much as possible.
 [7]
[7]
Then crimp the edges with a fork.
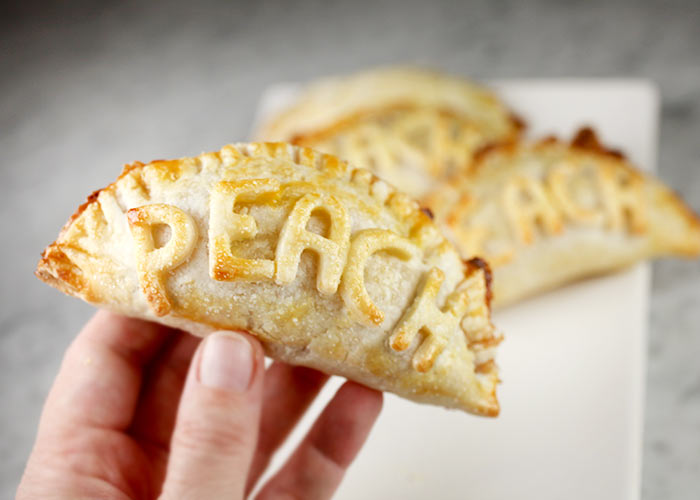
I cut out cute little letters for my pies with these mini alphabet cutters [8]. This would be super fun to do if you were making pies in different flavors. Helpful and handy at the same time.
Here’s how to make them:
Source: Adapted from Handheld Pies, 2011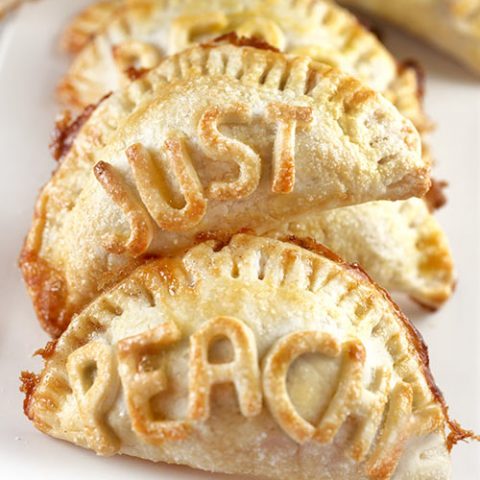
Handy Peach Pies
Ingredients
PIE CRUST
PEACH FILLING
Instructions
Notes
 [9]
[9]
There you have it. Peach hand pies.
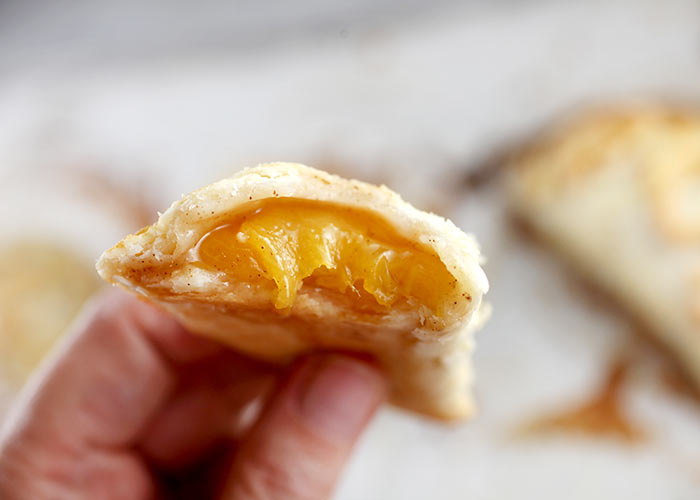 [10]
[10]
They’re kind of handy… and definitely yummy…
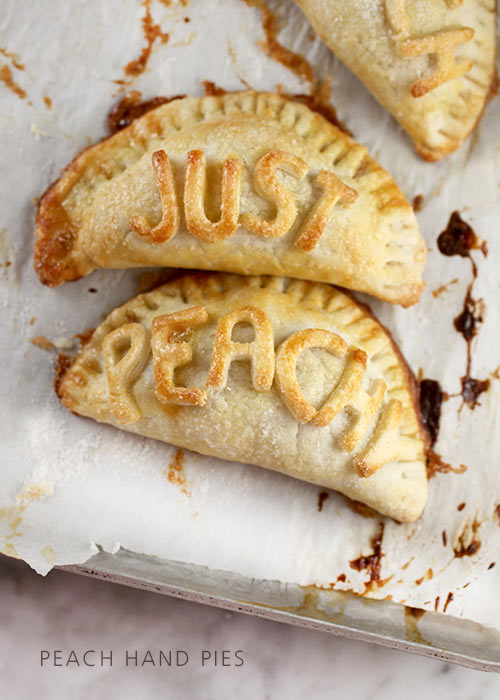 [11]
[11]
… and Just Peachy.
This delicious recipe brought to you by Bakerella
https://www.bakerella.com/handy-peach-pies/
URLs in this post:
[1] Image: http://www.flickr.com/photos/bakerella/9594961457/
[2] Image: http://www.flickr.com/photos/bakerella/9597752262/
[3] Image: http://www.flickr.com/photos/bakerella/9597752490/
[4] Image: http://www.flickr.com/photos/bakerella/9597752672/
[5] Image: http://www.flickr.com/photos/bakerella/9594961195/
[6] Image: http://www.flickr.com/photos/bakerella/9594961559/
[7] Image: http://www.flickr.com/photos/bakerella/9597752680/
[8] mini alphabet cutters: http://www.amazon.com/Fox-Run-26-Piece-Alphabet-Cookie/dp/B0000VLP6M/
[9] Image: http://www.flickr.com/photos/bakerella/9594961451/
[10] Image: http://www.flickr.com/photos/bakerella/9594961415/
[11] Image: http://www.flickr.com/photos/bakerella/9597753282/