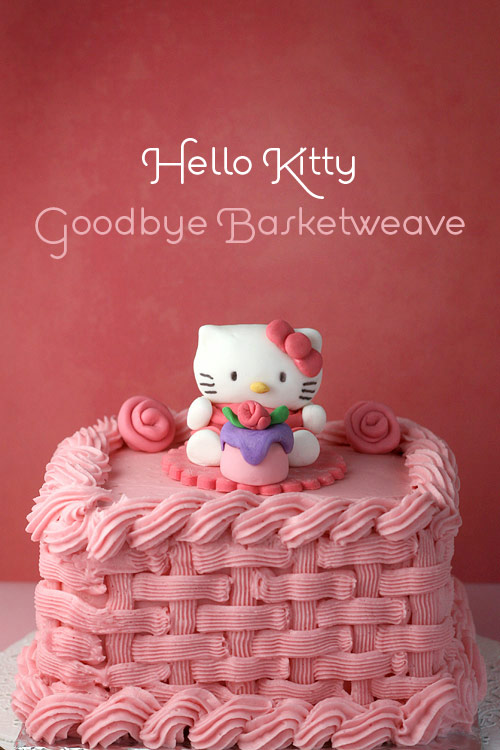
Hello Kitty, Goodbye Basketweave
Did I mention that I stink at piping! If I haven’t, let me say it now. I stink at piping!
My niece had her 1st birthday the other day and I wanted to make a little cake just for her. I decided to try my hand at piping a basketweave design. But, I guess I should have practiced first because it didn’t come out exactly like I had hoped. I started by piping all the vertical stripes. Big mistake. Then I piped all the short horizontal stripes. This wouldn’t have looked so bad if I could have at least made my lines straight. But, since I stink at piping, this is what you get.
 [1]
[1]
See those horizontal stripes, they should look like they’re tucked under the vertical ones. (I’ll show you the right way in a bit).
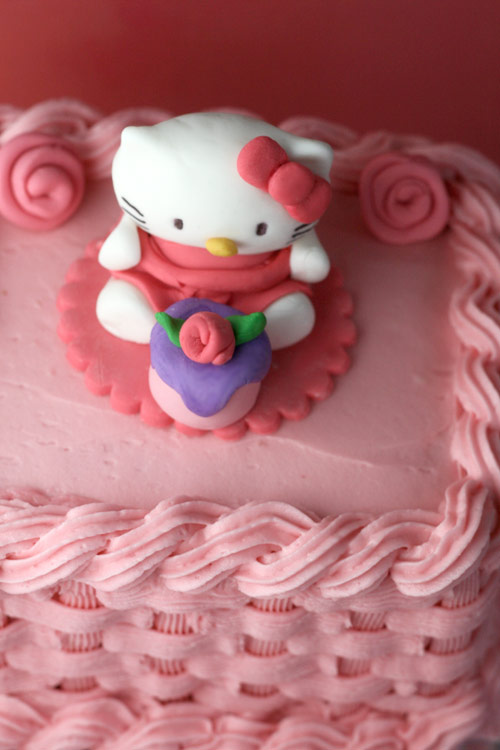
But, if we just look at it from above, it looks pretty good. Almost straight, even.
 [2]
[2]
I do love the little Hello Kitty topper I made though.
 [3]
[3]
It was molded from rolled fondant [4] that was tinted with different icing colors [5]
. The whiskers and eyes were drawn with an edible ink pen [6]
.
 [7]
[7]
Just too cute!
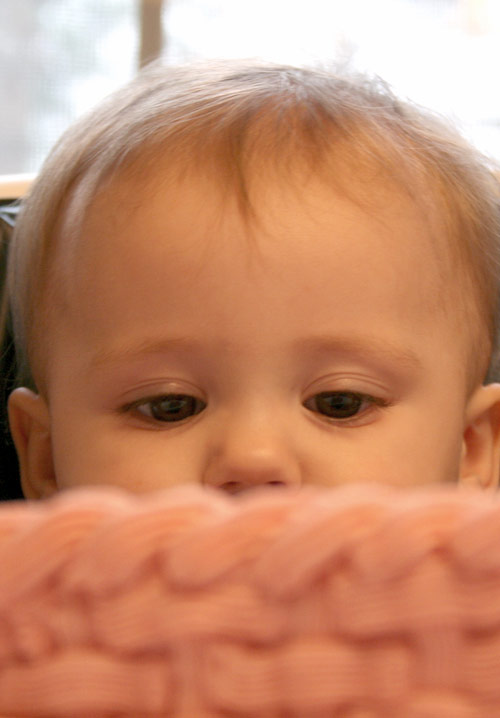
Now, let’s see what the birthday girl thought about my poor piping skills.
 [8]
[8]
Hmmm… she’s really thinking about it.
 [9]
[9]
Yay! I don’t think she noticed.
Want to try piping a basketweave?
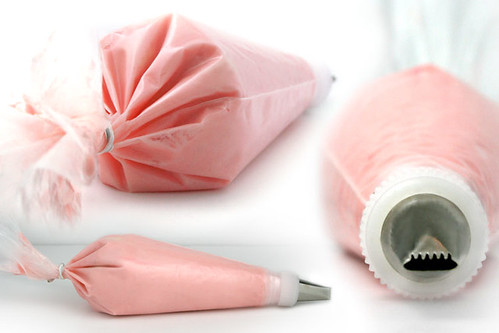
Make some buttercream frosting (recipe here [10]). Tint it with the icing color [5] you want and get the following:
one decorating bag [11]
one coupler [12]
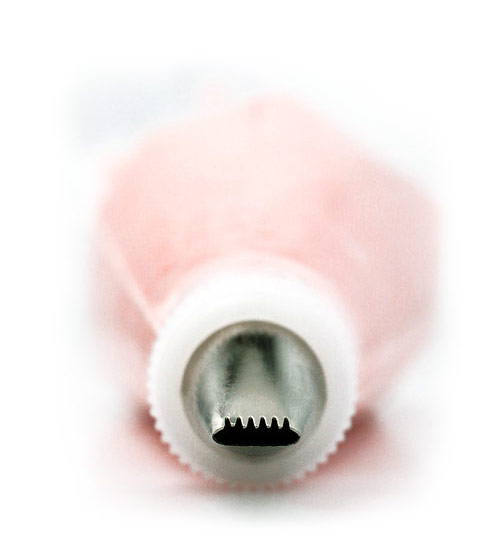
one decorating Tip #47 [13]
Here’s what it all looks like…
 [14]
[14]
Don’t be scared. It has teeth, but it won’t bite. Promise.
 [15]
[15]
Once your bag is ready, take a look at the diagram below. It’s from Wilton’s Course Book 2: Flowers and Borders [16].
It’s too bad I didn’t look at this first. Oh well… at least you guys can do a better job.
 [17]
[17]
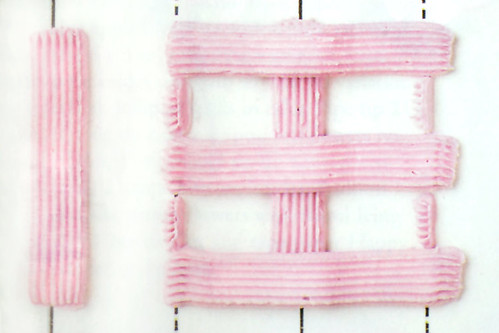
- Basically, you pipe a vertical stripe first.
- Then pipe horizontal stripes with spacers in between to make sure your widths stay consistent.
 [18]
[18]
- Then you draw another vertical stripe covering the ends of the first set of horizontal stripes.
- Then you pipe another set of horizontal stripes. Start by burying your tip under the first vertical stripe to hide the end.
- Then you draw another vertical stripe to cover the ends of the second set of horizontal stripes.
- Take a deep breath. Take your time. Repeat.
That’s the abbreviated version. Hope the pictures help. The The Wilton Course Book [16] gives much better directions.
Good luck!
And if your wondering. I used the same cake and frosting recipe from here [10].
And rope border was made with decorating tip #21 [19].
These instructions are for your personal use only. To create Hello Kitty products for commercial sale, you must obtain permission from Sanrio. Visit http://www.sanrio.com/business opportunities/.
This delicious recipe brought to you by Bakerella
https://www.bakerella.com/hello-kitty-goodbye-basketweave/
URLs in this post:
[1] Image: http://www.flickr.com/photos/bakerella/3165226389/
[2] Image: http://www.flickr.com/photos/bakerella/3165226223/
[3] Image: http://www.flickr.com/photos/bakerella/3166055102/
[4] rolled fondant: http://www.amazon.com/gp/redirect.html?ie=UTF8&location=http%3A%2F%2Fwww.amazon.com%2Fs%3Fie%3DUTF8%26rs%3D%26ref%255F%3Dsr%255Fnr%255Fseeall%255F5%26keywords%3Drolled%2520fondant%26qid%3D1231052380%26rh%3Di%253Aaps%252Ck%253Arolled%2520fondant%252Ci%253Agarden&tag=bakerella-20&linkCode=ur2&camp=1789&creative=390957
[5] icing colors: http://www.amazon.com/gp/redirect.html?ie=UTF8&location=http%3A%2F%2Fwww.amazon.com%2Fs%3Fie%3DUTF8%26rs%3D%26ref%255F%3Dsr%255Fnr%255Fseeall%255F1%26keywords%3Dicing%2520colors%26qid%3D1231052432%26rh%3Di%253Aaps%252Ck%253Aicing%2520colors%252Ci%253Agarden&tag=bakerella-20&linkCode=ur2&camp=1789&creative=390957
[6] edible ink pen: http://www.amazon.com/gp/product/B0012DPVVC?ie=UTF8&tag=bakerella-20&linkCode=as2&camp=1789&creative=390957&creativeASIN=B0012DPVVC
[7] Image: http://www.flickr.com/photos/bakerella/3165226089/
[8] Image: http://www.flickr.com/photos/bakerella/3166055382/
[9] Image: http://www.flickr.com/photos/bakerella/3166055270/
[10] recipe here: http://bakerella.blogspot.com/2008/11/finally-i-found-it.html
[11] decorating bag: http://www.amazon.com/gp/product/B0000CFN5N?ie=UTF8&tag=bakerella-20&linkCode=as2&camp=1789&creative=390957&creativeASIN=B0000CFN5N
[12] coupler: http://www.amazon.com/gp/product/B0000VLE3G?ie=UTF8&tag=bakerella-20&linkCode=as2&camp=1789&creative=390957&creativeASIN=B0000VLE3G
[13] decorating Tip #47: http://www.amazon.com/gp/product/B0000VLD3C?ie=UTF8&tag=bakerella-20&linkCode=as2&camp=1789&creative=390957&creativeASIN=B0000VLD3C
[14] Image: http://www.flickr.com/photos/bakerella/3165224565/
[15] Image: http://www.flickr.com/photos/bakerella/3166053830/
[16] Wilton’s Course Book 2: Flowers and Borders: http://www.amazon.com/gp/product/B0001XXBFM?ie=UTF8&tag=bakerella-20&linkCode=as2&camp=1789&creative=390957&creativeASIN=B0001XXBFM
[17] Image: http://www.flickr.com/photos/bakerella/3165224327/
[18] Image: http://www.flickr.com/photos/bakerella/3165224437/
[19] decorating tip #21: http://www.amazon.com/gp/product/B0000VLCX8?ie=UTF8&tag=bakerella-20&linkCode=as2&camp=1789&creative=390957&creativeASIN=B0000VLCX8