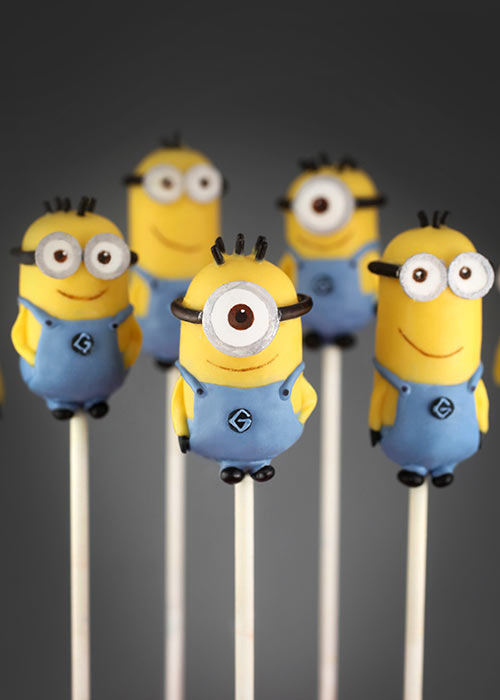
Despicable Me 2 is coming out soon (July 3, that is) and I made these mini Minions for the movie release. I was super excited to be asked to make them because I know a bunch of you have wanted decorating ideas on these in the past.
So here goes. I hope you like them.
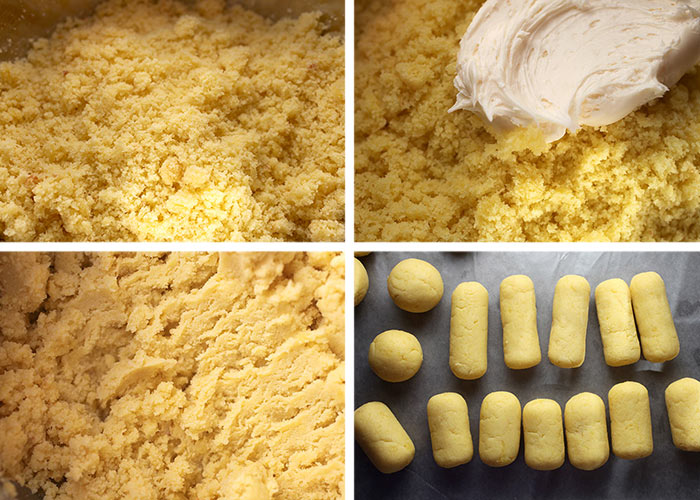
Crumbled cake. Frosting. Mixing. And shaping. You guys know the drill.
But if you don’t, I have a link at the bottom of the post for the full instructions on how to make them.
But pictures are way better, right.
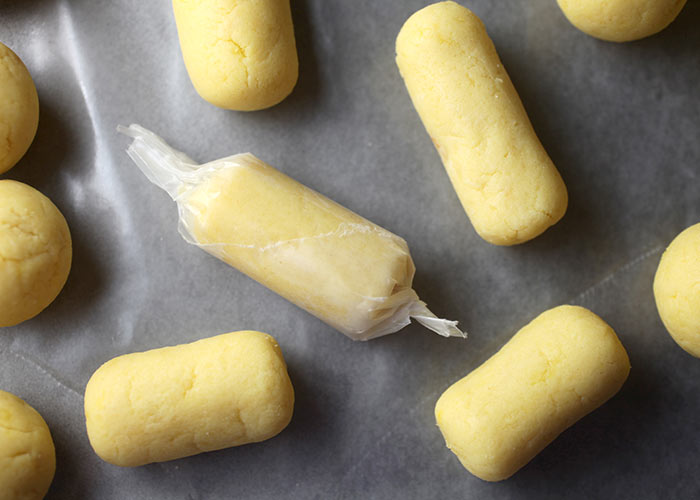
Okay, here’s a little tip I want to share on shaping. I think it really helps to get smoother edges. After you roll your mixture into evenly sized cake balls, you can use wax paper to help shape. I do this all the time for shapes that need sharper edges like boxes and such. You can simply slide the shape along a wax-paper covered surface and rotate.
And in the case of cylinders like these, start the shape of your cake ball cylinders by hand and then roll them up in a strip of wax paper. Twist the ends and then squeeze together while rolling on a flat surface to get smooth sides. It really works great.
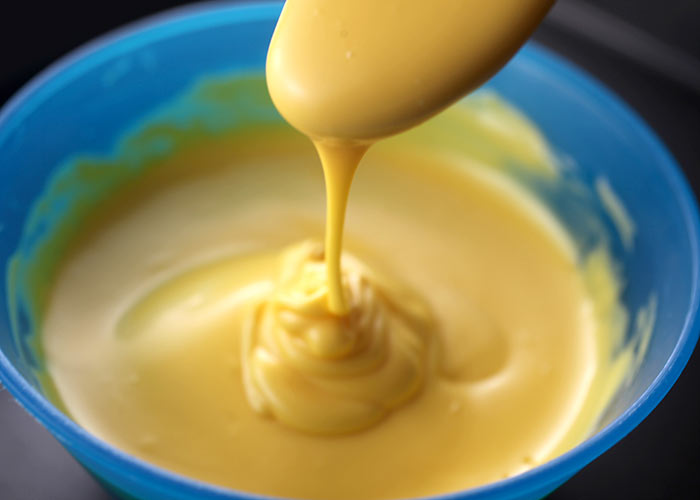
After your cake balls are shaped and chilled until firm, it’s time to dip……
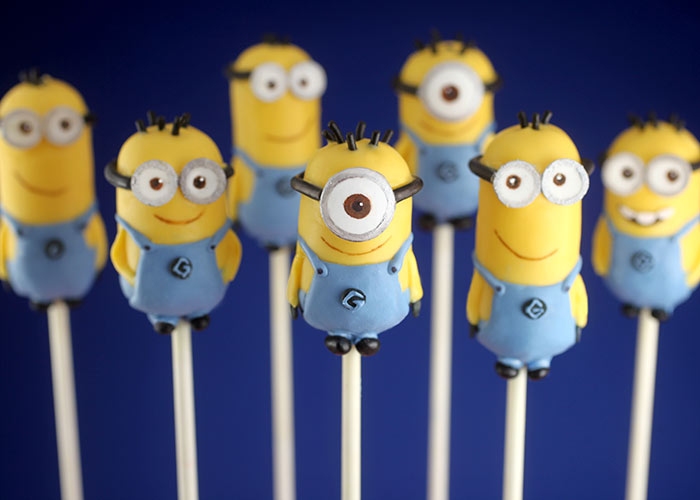
And decorate! The fun part.
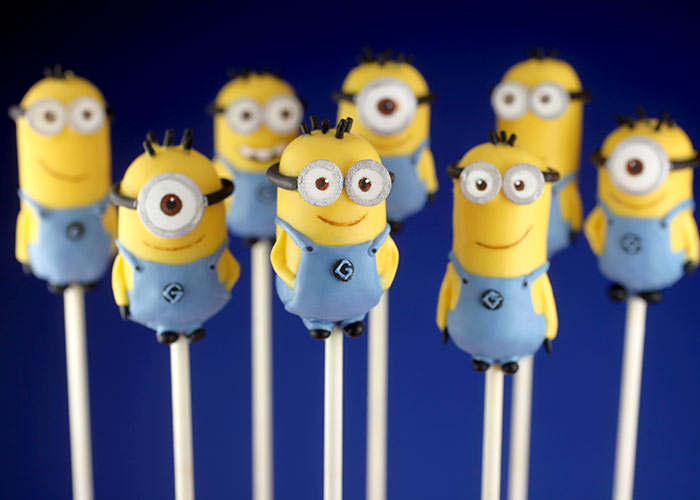
Hi Carl, Tom and Tim!
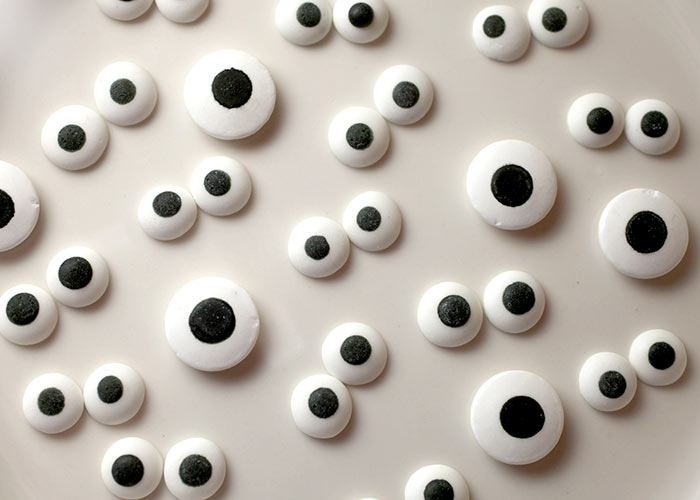
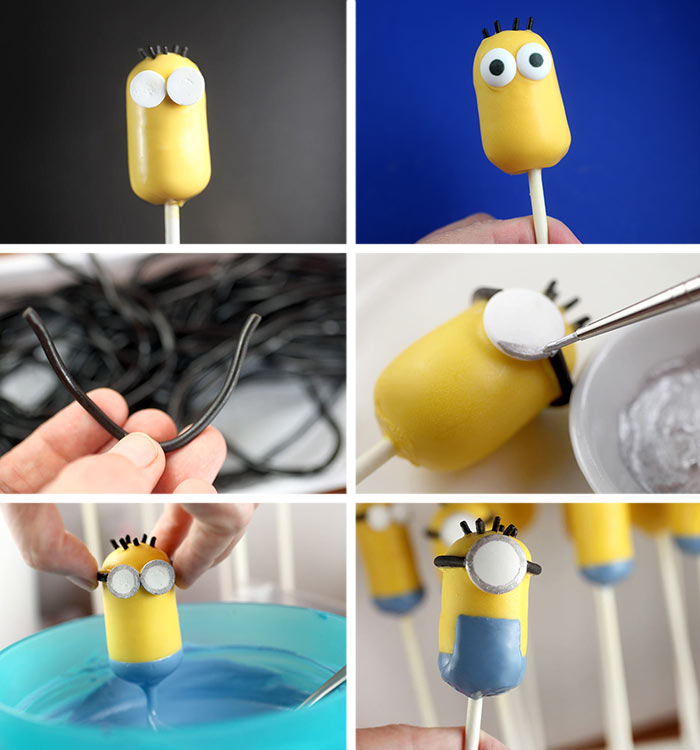
I found these candy eyes in two sizes and they made making the minions a blast. I found them at Hobby Lobby if you have one in your area, but you can also use white M&M’s, candy necklace pieces or even piped white coating for a similar look.
My first plan was to use the eyes like you see them, but I ended up turning them over instead. For two reasons… one, the Minions’ eyes are brown with black pupils so I could use the solid white side to draw on them. And two, if you turn the smaller eyes over, the backs are flat instead of curved and it looked more like their goggles were really raised off of their faces that way.
I know. Overkill and you can totally use the black sides and they will still look cute. But I wanted to try and make them look as close to the original as I could. Because I’m crazy.
To decorate…
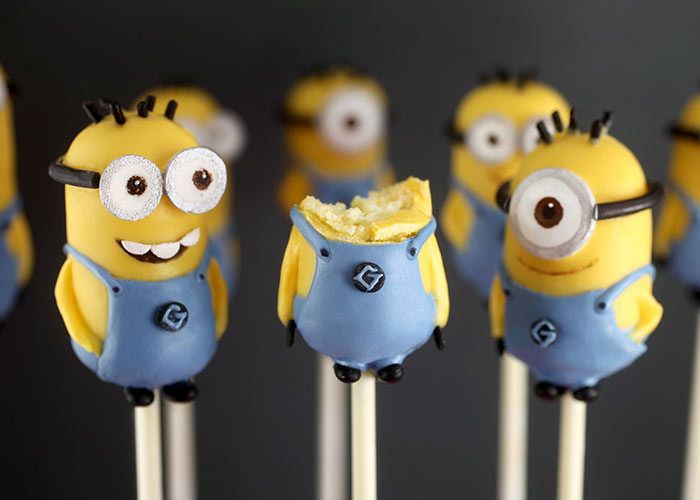
- Dip in yellow coating and before the coating dries, attach a candy eye on front and insert some black or chocolate jimmies on the top for hair.
- For the goggles, you can use licorice strings to make the bands. Just cut to the length you need and attach to the pop with candy coating and let dry. Or pipe bands with black tinted candy coating.
- When dry, you can paint the rims on the goggles using silver luster dust and a small brush.
- For the overalls, gently twist the Minions off the stick so you can take them for another little dip. Submerge the bottom fourth of the minion body into blue candy coating and let dry.
- To finish the overalls, pipe the bibs on front using a toothpick or squeeze bottle and more blue candy coating. Use a toothpick to quickly smooth the surface before it dries. Then pipe the straps starting at the top of the overall bib.
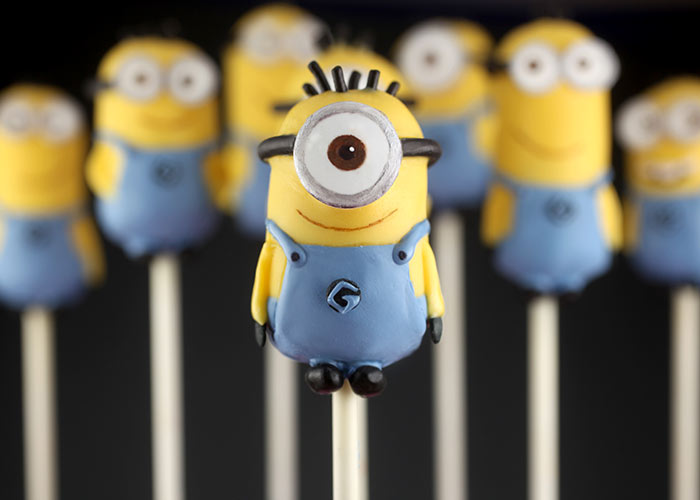
Super cute.
- To finish decorating, draw eyes and a mouth with a brown edible ink pen. Then, complete the eyes with a black pen and dot the pupils with white candy coating. (Here’s another tip when it comes to drawing on candy coating with an edible ink pen. You can use a toothpick to gently scrape it off the surface of the pop. Doing so can help you create straighter lines if you mess up while drawing. You can also use a toothpick to shave away candy coating and make smoother edges or straighter lines. Just don’t press too hard.)
- You can totally stop there and they will be awesome, but if you are compulsive and crazy like me, you can add more detail to your Minions.
- Use a toothpick to apply yellow coating in a line on the side of each pop for arms and add a black confetti sprinkle attached at the end for gloves.
- Apply two dots of blue coating on the bottom of each minion body and attach two coated black sunflower seeds for shoes.
- Draw on two black dots for overall buttons with your edible ink pen and attach a black confetti sprinkle on the overall fronts. Use a toothpick dipped lightly in blue coating and draw a G on each confetti sprinkle for their patch. Again. They’ll be just as sweet arm and legless and you won’t be hairless by the time you finish. : )
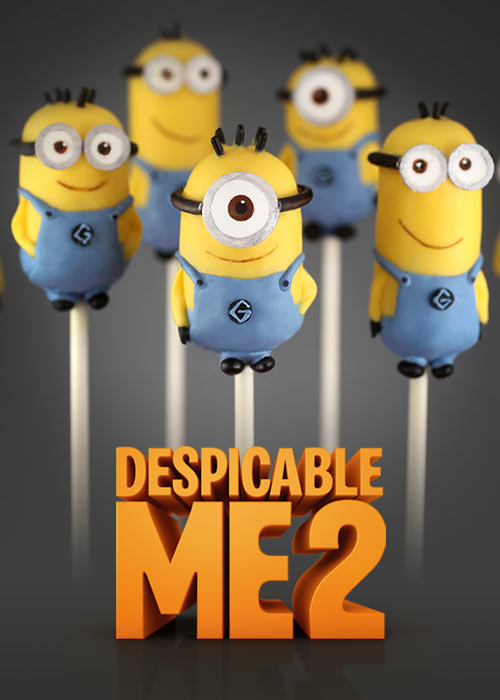
Minions! Yay!
But I also made something more from the movie.

I started with these shapes.
Circles. Easy enough.
And really rounded cones. You can use the wax paper trick for those.
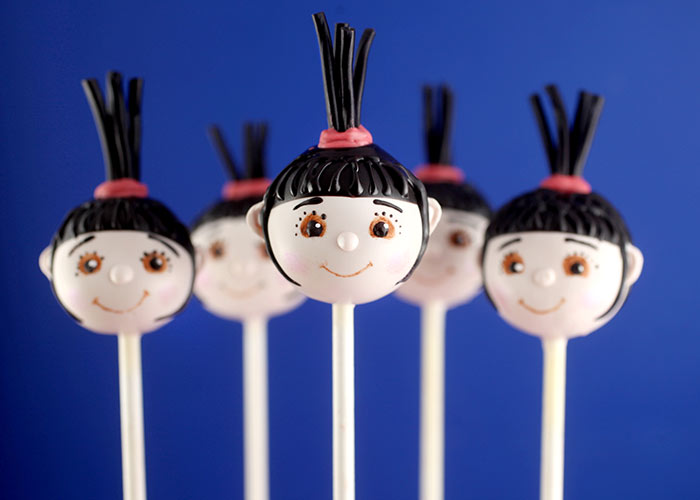
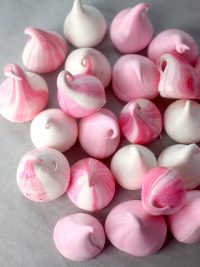
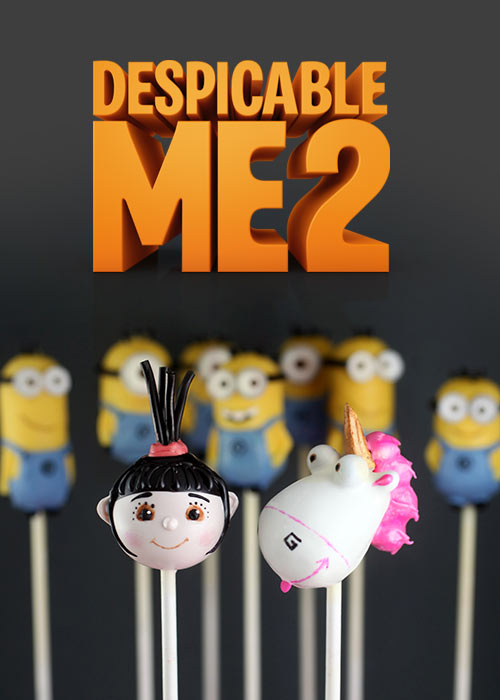
The balls became little Agnes.
So adorable. And these are neat because I only used one candy to decorate. The rest was all melted candy coating. So you can do a lot with a little.
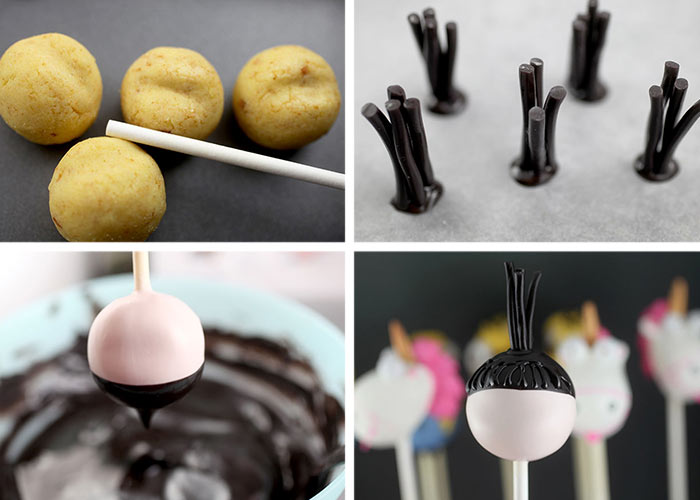
- To create Agnes, make a small indention in the front of each ball. It’s all about details. The impression will help them look more like faces instead of round balls. Dip them in candy coating tinted using white and pink or peach to create a flesh color.
- For her ponytail, I used licorice strings again, cut into short pieces. To make it easier to attach, I made the ponytails first by dotting some black candy coating on wax paper and attaching the licorice. This made the ponytail one unit and it was much easier than trying to attach the pieces on the top of the rounded pop.
- When the ponytails are ready, dip the top of each Agnes’ head in black candy coating and attach her ponytail right on top before the coating dries.
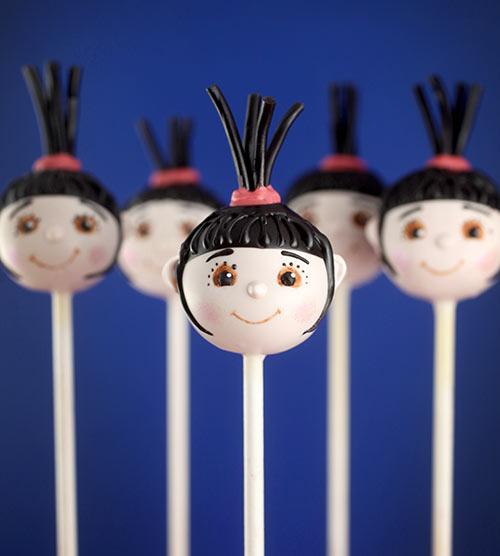
- For her sweet little face, draw eyes and mouth with a brown edible ink pen. Draw on eyebrows and dot on eyes and eyelashes with black candy coating and a toothpick.
- Add bangs using a toothpick dipped in black candy coating to draw on hair. This will tie in the look to the licorice pieces, too.
- Then dot on noses and ears with more flesh tinted candy coating and make her hair band by drawing on red candy coating.
- Give her sweet little cheeks by brushing on dry pink luster dust.
Now Agnes wouldn’t be complete without her favorite stuffed animal.
Want to see?
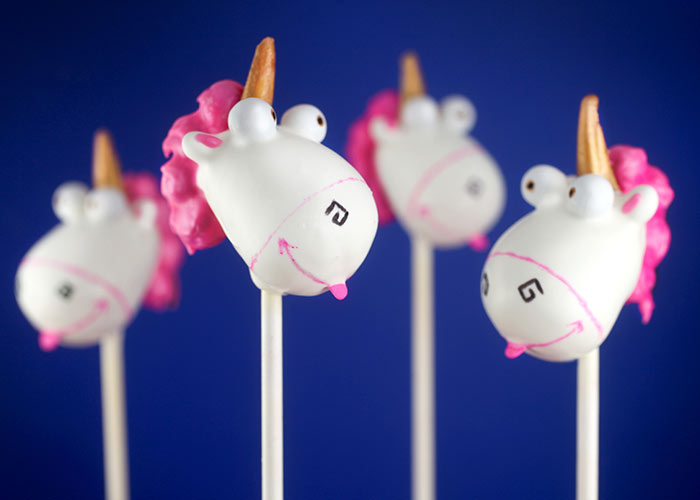
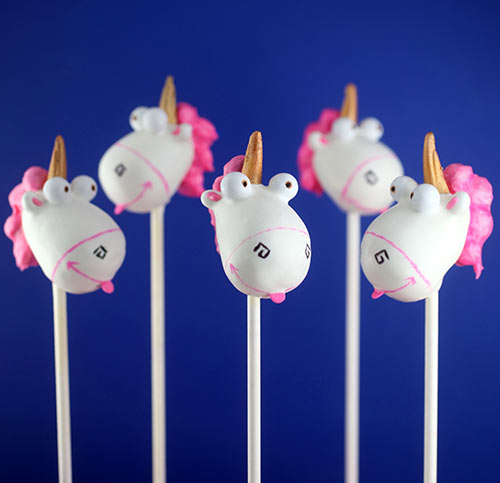
It’s so fluffy!!!!! Or yummy in this case.
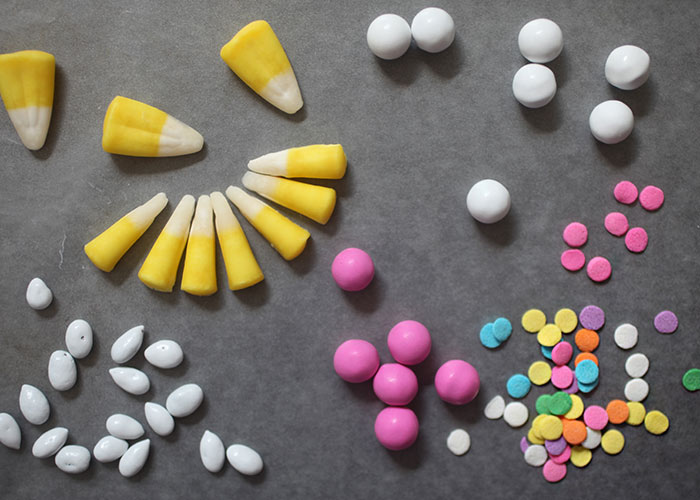
For the unicorn, I used candy corn… sixlets for eyes and hair, sunflower seeds for ears and confetti sprinkles for tongues.
Let me show you.
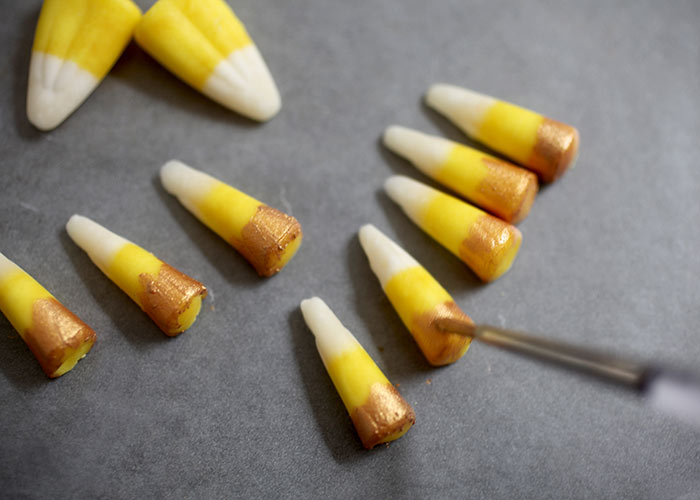
For the unicorn horn, I had some pastel colored candy corn and cut them in half. Then I painted the bottoms with gold luster dust. Painting the bottoms first is helpful so you don’t get luster dust on the head if you paint them after they are dipped. And you can use other candy corn colors, too since you are painting over them.
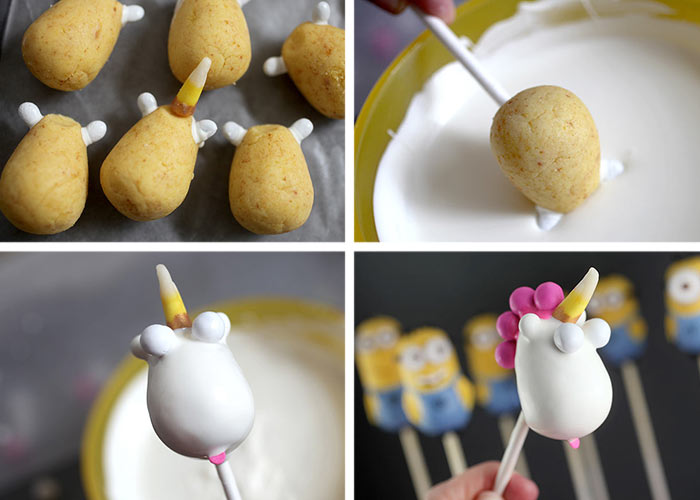
The ears were sunflower seeds attached to the cake ball shape, so when they were dipped it created one overall shape.
After dipping, immediately attach the horn, eyes and insert the tongue.
When dry, attach sixlets to the back for hair using melted dark pink candy coating. The sixlets work great and give the hair substance.
Then you can finish painting the horns with luster dust.
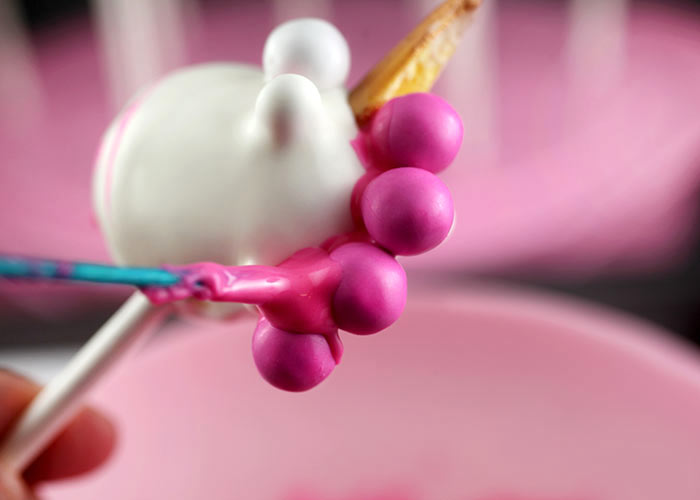
To make them look more like a main, use the pink candy coating (Merckens brand) and draw on the surface of the candies. Drag the toothpick through to simulate hair.
Voila. Unicorns with big voluminous manes.
Want to see one more.
Did you know there are new minions in this movie. Evil ones. Eeek.
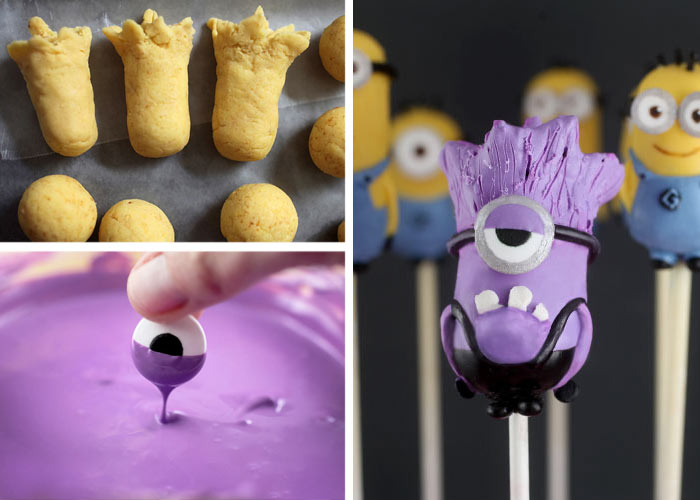
I only made one of these but, it’s basically the same idea as the yellow minions, but with different colors, gnarly teeth and crazy hair.
Despicable Me 2 Cake Pop Instructions
Enjoy! And I can’t wait to see these guys on the big screen.
Hey, who did that?!?
Disclosure: I was compensated to make Despicable Me Cake Pops for the upcoming movie release. I love these little guys though and I only make things on the site that I think you’ll enjoy, too. I hope they make you smile.