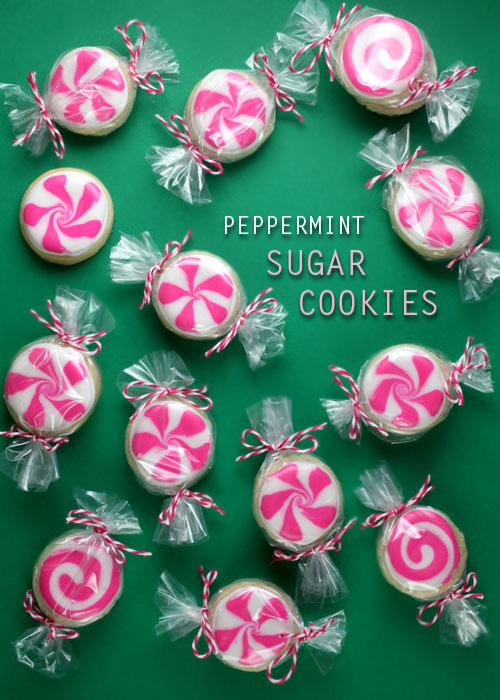
Peppermint Candy Sugar Cookies
 [1]
[1]
Happy National Cookie Day! I thought I’d remind just you in case you needed an excuse to enjoy a cookie today.
These bite-size sugar cookies are super fun and pretty easy to make and decorate. But I think the best part about them is how they are packaged to look like peppermint candy.
I have so many small treat bags on hand for wrapping cake pops and I was looking at them the other day and thought to myself that they could make cute little wrappers for some peppermint candy decorated cookies.
They had to be small cookies though… to fit in the bags after being baked and decorated. But small is good. Bite-size is even better. Cuter. More fun! So off I went to make some cookies … so I could turn around and make them look like candy.
Totally makes sense.
 [2]
[2]
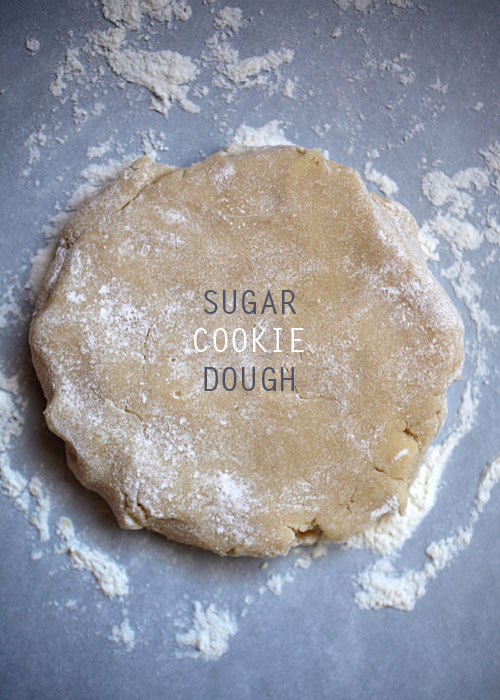
I love this sugar cookie dough. It is so easy to work with. The basic recipe I worked from is by my friend Bridget at Bake at 350 [3].
 [4]
[4]
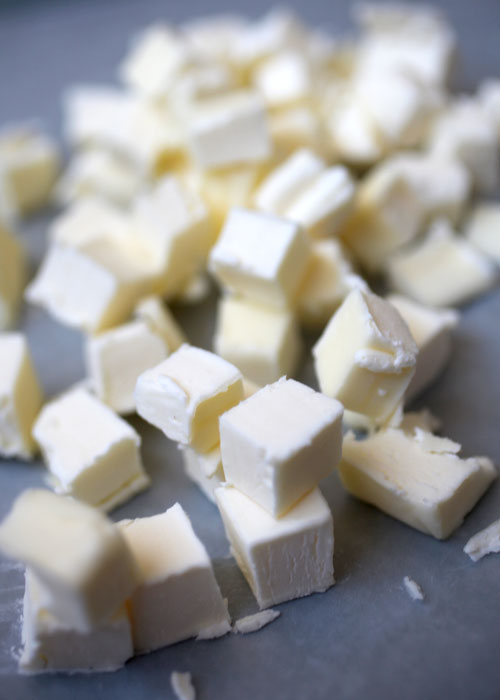
I especially love it because it uses cold butter. No waiting for it to get to room temperature. I am terrible about remembering to set out my butter ahead of time anyway. Plus there’s no waiting for the dough to chill before you roll. Just mix and go.
I like that. A lot.
Just get to mixing and you’ll be ready in no time to start cutting out cookie shapes. The fun part.
 [5]
[5]
Just look at that dough. So smooth and thick. Dough like this makes me giddy inside.
 [6]
[6]
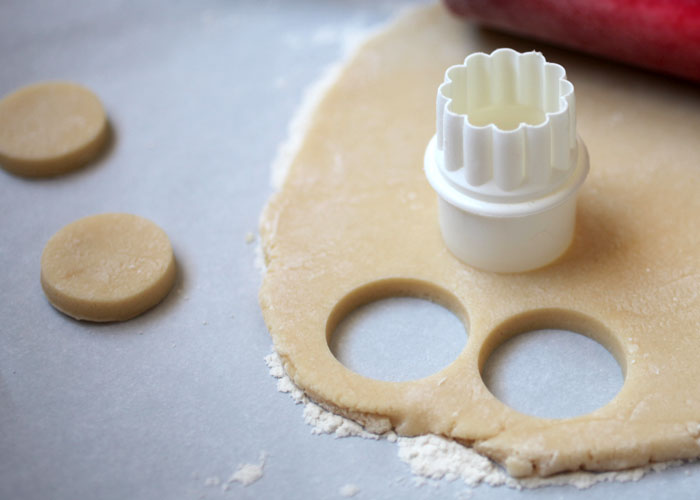
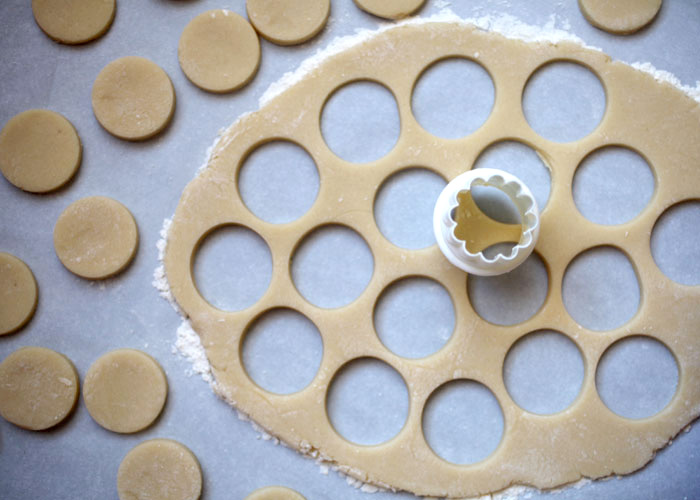
I used a 1.5 inch round cutter for my circles. It needs to be small so when the cookies bake, they are still small enough to fit inside the treat bag with enough room to tie off the ends.
 [7]
[7]
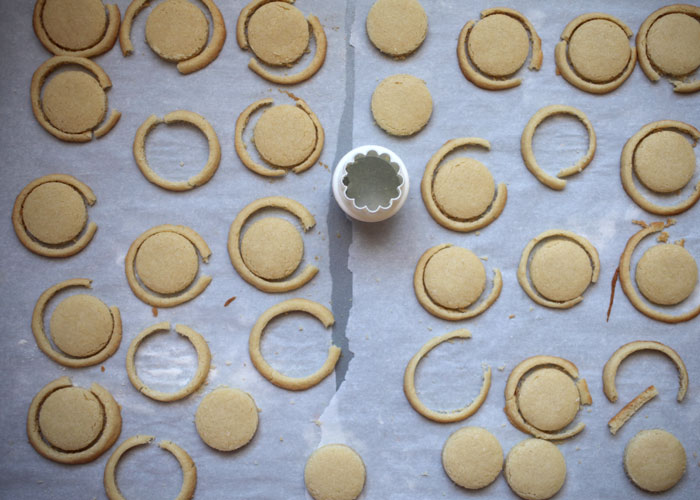
If you bake right away, the dough will probably spread some, but that’s perfectly okay. While the cookies are still warm, just use the same cutter to recut your shapes and trim off the excess so they stay the size you need them.
If you freeze the sugar cookie shapes for a few minutes, they won’t spread as much during baking. Just place the cutter on top and compare… if they look a lot larger than the cutter, then trim them down. If they are just a little larger than the cutter, you can leave them with their nice and pretty edges.
When cool, whip up some royal icing and start piping.
 [8]
[8]
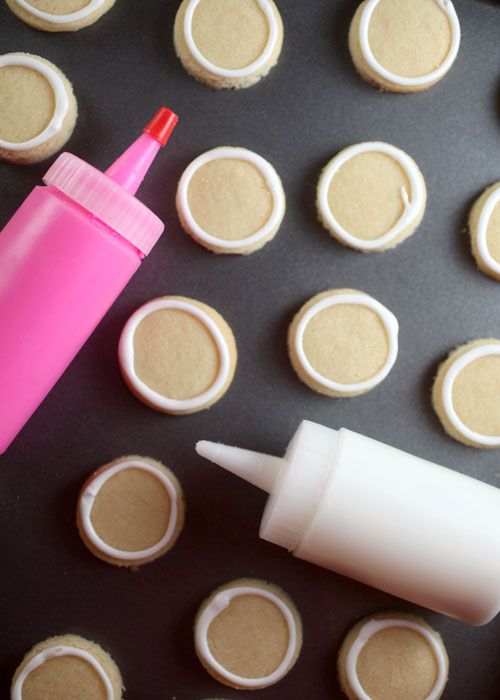
I used white for the base and pink for the swirls, but you can also do green and red to make even more festive peppermints.
First pipe the border of all the cookies in white royal icing for the outline.
I also tinted my white icing with white gel color to make them brighter and more opaque.
 [9]
[9]
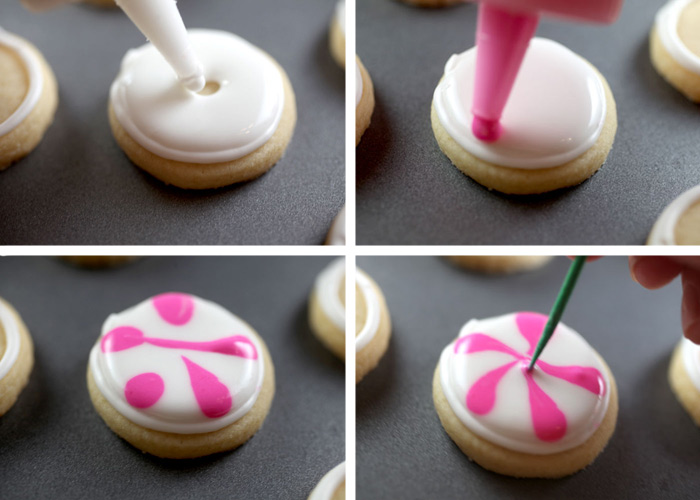
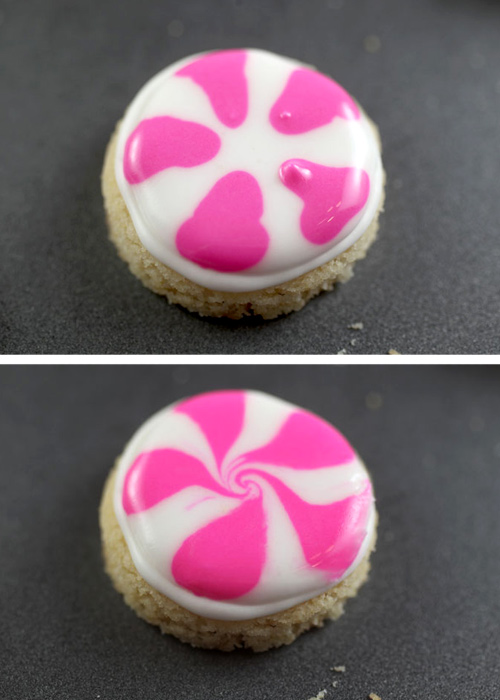
Then add a tiny bit of water to the icing to make a flood icing for the centers. Fill the center of a cookie with the white icing and while the icing is wet, add five drops of pink royal icing with the same flood consistency as the white to the perimeter of the cookies, pulling in towards the center slightly. Then just use a toothpick to gently guide the pink icing toward the center while also creating curving shapes. Nice clean edges, too.
 [10]
[10]
But I also trimmed down quite a few. Still cute. For thicker swirls, pipe more of a triangular shape with the pink icing stopping short of the center. Use the toothpick to smooth and curve the pink icing in the same curving direction for each triangle shape, directing it towards the center. When you get close to the center, gently make a tiny swirl in the middle while touching the five points of the pink icing.
 [11]
[11]
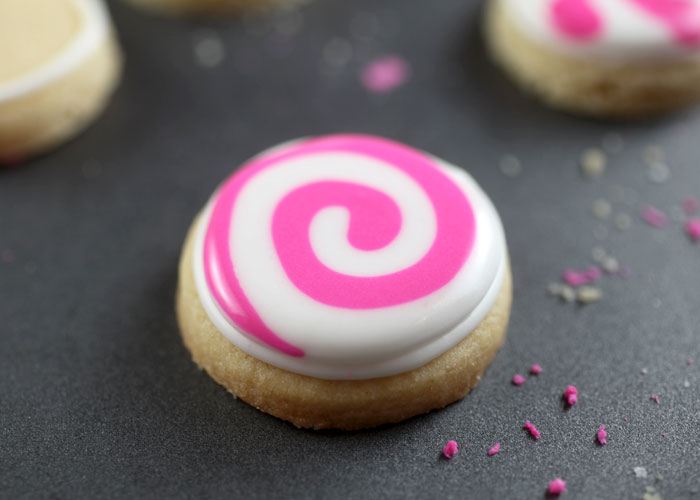
Or just pipe pretty swirls. Much quicker, and just as cute.
 [12]
[12]
Maybe even cuter.
 [13]
[13]
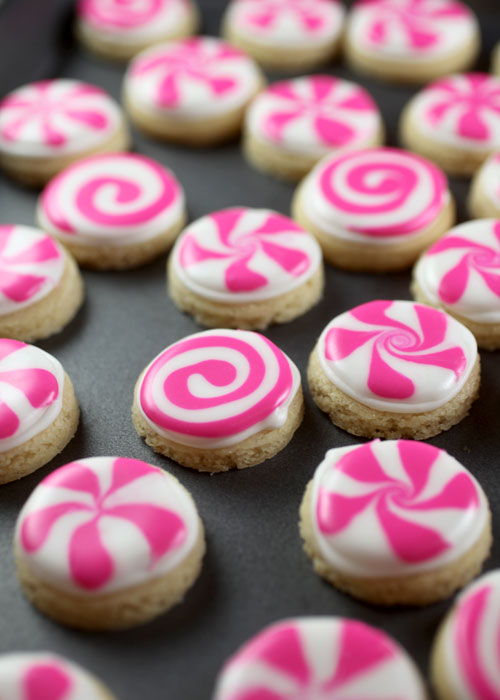
When they are completely dry (wait 24 hours to make sure), then it’s time to wrap them up.
 [14]
[14]
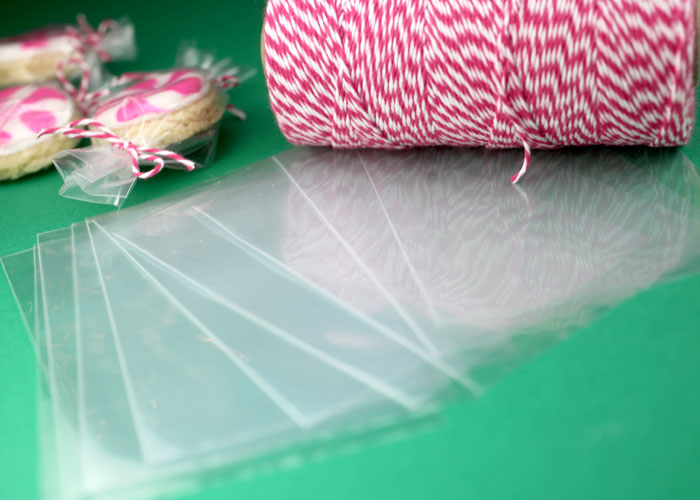
You’ll need some treat bags and twine. I used these 3X4 treat bags to go with the 1.5 inch cutter I used.
But you can certainly use bigger bags and a larger cutter. Just make sure whatever round cutter you use that it will give you enough room to tie the ends of the treat bags around your cookies. To test beforehand, cut out a piece of cardboard or something thick to the size of your cutter and place inside the bag to see if you have enough room to tie each end.
 [15]
[15]
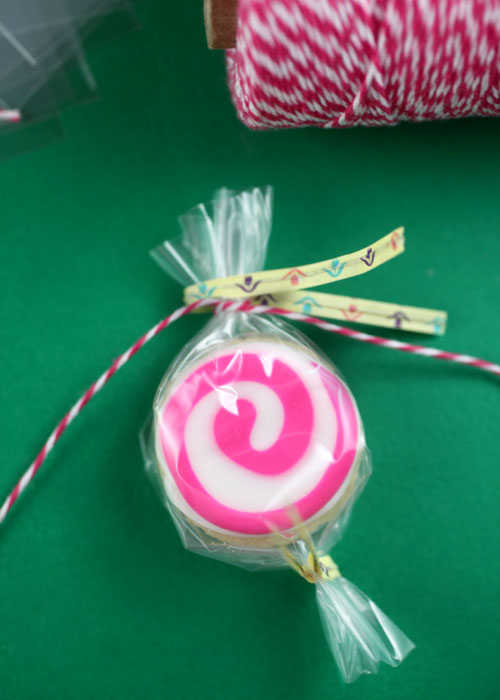
The little bags can be slippery, so I used a twist tie to clamp the bag together so I could easily tie the string. A big help.
And of course if you have enough twist ties, you could just use those by themselves. Try cutting them in half or thirds so you can get more out and so you won’t have long ends sticking out around your cookies.
When both ends are secure, then snip off the bottom of the bag if you like so you can open it and fan it out like the other side.
 [16]
[16]
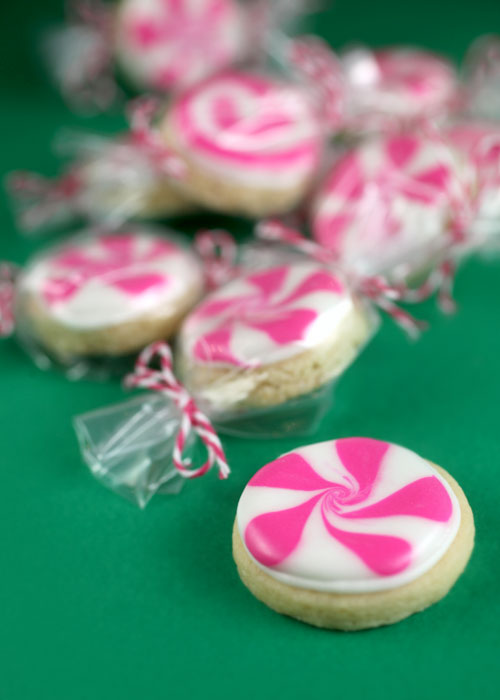
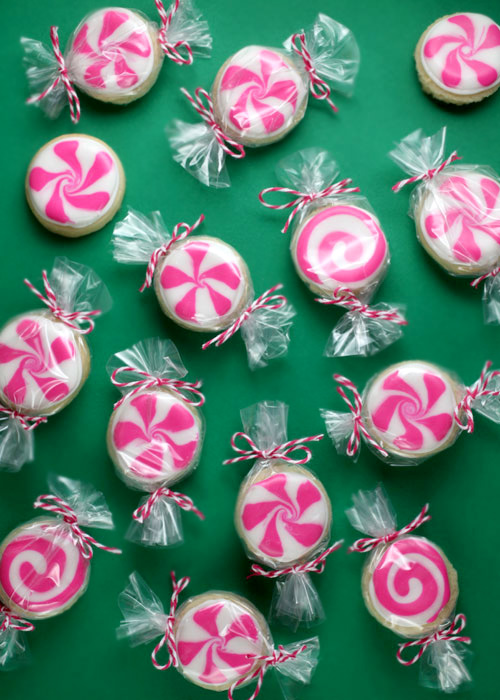
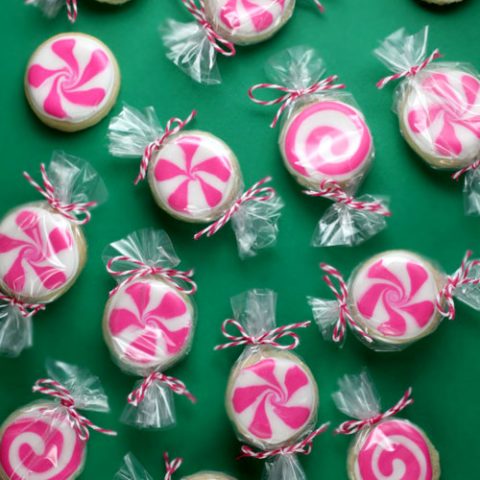
And that’s all there is to it for these sweet little peppermint candy cookies.
Perfect for giving out during the holidays. Individually or by the handful. : )
Peppermint Candy Sugar Cookies
Ingredients
SUGAR COOKIES
- 3 cups unbleached, all-purpose flour
- 2 teaspoons baking powder
- 1 cup (2 sticks) salted butter, cold and cut into cubes
- 1 cup sugar
- 1 egg
- 3/4 teaspoon pure vanilla extract
- 1/2 teaspoon almond extract
- 1.5 inch round cutter
ROYAL ICING
- 1/2 cup meringue powder
- 1 scant cup (almost full) water
- 2 pounds (32 ounces) powdered sugar
- 2 teaspoons light corn syrup
- 1 teaspoon peppermint extract (if desired)
- Super white gel icing color
- Pink, red or green icing color
- Small squeeze bottles
- Toothpicks
- 3X4 Treat bags
- Twine or Twist ties
Instructions
- FOR THE COOKIES: Preheat oven to 350 degrees and line baking sheets with parchment paper.
- In a medium bowl, whisk together flour and baking powder and set aside.
- Cream butter and sugar in the bowl of a stand mixer fitted with a paddle attachment until light and fluffy. Beat in the egg and extracts mixing until combined. Add the flour mixture one cup at a time, mixing on low until just combined. Scrape down the sides and bottom of the bowl as needed. After the last addition, the mixture will look thick and crumbly.
- Now you're ready to roll. Line rolling surface with wax paper. Dust surface and coat your rolling pin with flour. Roll a portion of the dough on the flour-coated surface and knead it together until smooth. Roll dough 1/4 inch thick. Dip the round cutter in flour and cut as many circles out of the dough as you can. Remove scraps, re-knead and repeat. Make sure to reflour the work surface too.
- Place cookies on prepared cookie sheet. (You can easily lift them as the dough is sturdy.) You can also roll directly on to parchment paper, remove scraps and transfer the parchment paper to the cookie sheet.
- Place cookies in freezer for about 10 minutes. Then bake for 9-12 minutes. Remove from oven when done and let cool for a couple of minutes on the baking tray. Use the cookie cutter again to trim cookies to size if desired. Then transfer to a wire rack to cool completely.
- FOR THE ICING: When cool, mix royal icing in the large bowl of a stand mixer with the paddle attachment. Mix together meringue powder, peppermint extract (optional) and water until foamy and combined.
- Sift in the powdered sugar, add the corn syrup and mix on low until incorporated. Scrape down sides of bowl and beat for 5 minutes on medium-low. Increase to medium-high and continue beating just until icing is glossy and stiff peaks form. Tint a small portion of the royal icing pink. If you like add a few drops of white gel color to the remaining white icing.
- With a squeeze bottle, pipe and outline the cookies in white. Then thin the icing to create a flood consistency. Add a few drops of water at a time to the white icing until it is the consistency of thick syrup. Repeat with the pink icing. Use the squeeze bottle to fill the center of the outlined cookie with white flood icing. Pipe dots of pink around the perimeter and use a toothpick to pull the pink toward the center of the cookie to create the peppermint design. (See photos above). Repeat with the remaining cookies and let dry for 24 hours. (Note: If the pink icing sits on the surface of the white without sinking in, then thin the icings a bit more.
Notes
Source: Adapted with permission from Decorating Cookies by Bridget Edwards, 2012
 [17]
[17]
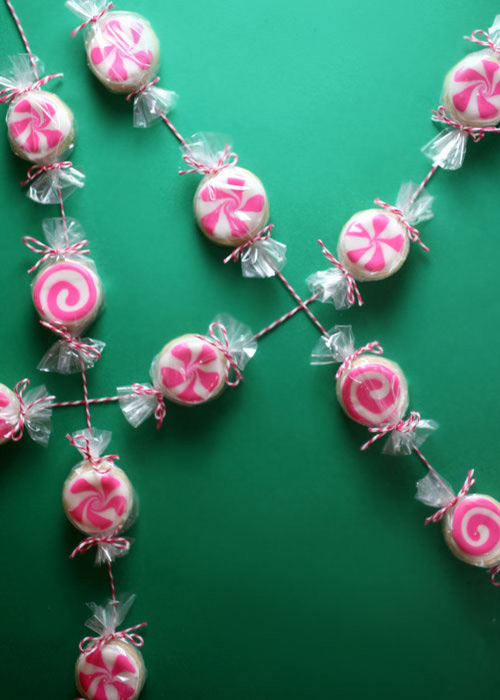
Oh yeah – I also placed them on top of some of the twine to see what they would look like as garland.
I hope somebody does this.
Edible decorations are so much more fun.
________________________________________________________________
This delicious recipe brought to you by Bakerella
https://www.bakerella.com/peppermint-candy-sugar-cookies/
URLs in this post:
[1] Image: http://www.flickr.com/photos/bakerella/8242634969/
[2] Image: http://www.flickr.com/photos/bakerella/8242635679/
[3] Bake at 350: http://bakeat350.blogspot.com/2008/04/taste-of-yellow-yellow-rose-sugar.html
[4] Image: http://www.flickr.com/photos/bakerella/8242635549/
[5] Image: http://www.flickr.com/photos/bakerella/8242635755/
[6] Image: http://www.flickr.com/photos/bakerella/8242635853/
[7] Image: http://www.flickr.com/photos/bakerella/8243704576/
[8] Image: http://www.flickr.com/photos/bakerella/8242636083/
[9] Image: http://www.flickr.com/photos/bakerella/8242634743/
[10] Image: http://www.flickr.com/photos/bakerella/8243703234/
[11] Image: http://www.flickr.com/photos/bakerella/8243704122/
[12] Image: http://www.flickr.com/photos/bakerella/8243704052/
[13] Image: http://www.flickr.com/photos/bakerella/8243703796/
[14] Image: http://www.flickr.com/photos/bakerella/8243703950/
[15] Image: http://www.flickr.com/photos/bakerella/8242635221/
[16] Image: http://www.flickr.com/photos/bakerella/8242635081/
[17] Image: http://www.flickr.com/photos/bakerella/8242634823/