Wicked Good Chocolate Peanut Butter Pudding Cups. They’re from the book, Sticky, Chewy, Messy, Gooey Treats for Kids by Jill O’Connor and just as good as their name states. Jill sent me and my niece a copy of her book as a little thank you for a post I did inspired by her Cheesecake Pops. We had a hard time deciding which recipe to try first, but we kept coming back to these pudding cups. They were really fun to make and even more fun to eat. You’ll see what I mean in a minute. And the best part… I didn’t have to do any of the work. My little helper did it all.
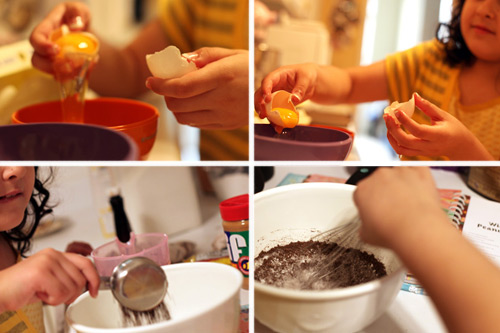
From separating the egg yolks, to the measuring and mixing.

She cooked the pudding.
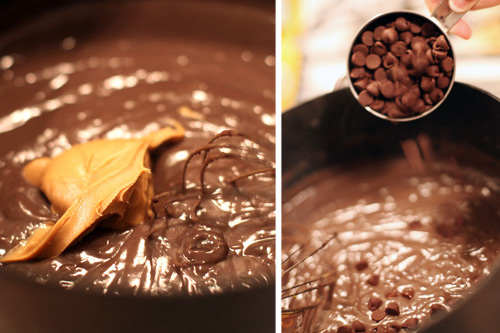
And mixed in the peanut butter… (thank you, Jill) … and the extra chocolate chips … Oh my!
Let the pudding chill for at least four hours before eating.
Here’s a link to the Pudding Recipe so you can print it out.
Now, here’s the best part.
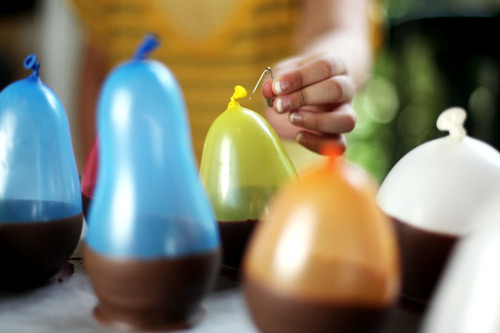
It involves balloons to make bowls.
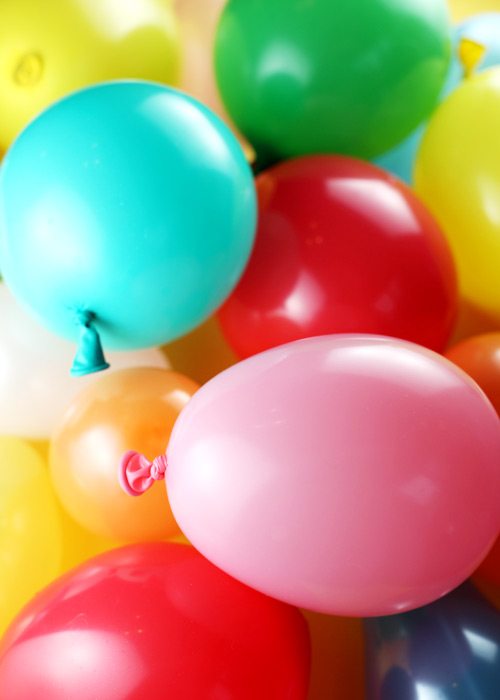
Okay, I did help a little bit here. We blew up regular size balloons about halfway so they were still small, but found that water balloons worked best. They are a perfect size for this project, just hard to fill with air instead of water. I about busted a lung.
After you blow up the balloons, wash them off and let them dry. And before you use each one, spray a little non-stick cooking spray on each. Just a little.
Okay, here’s what you do.
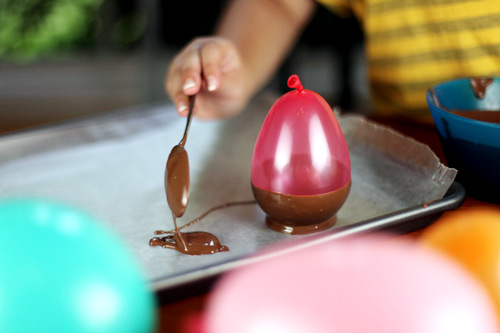
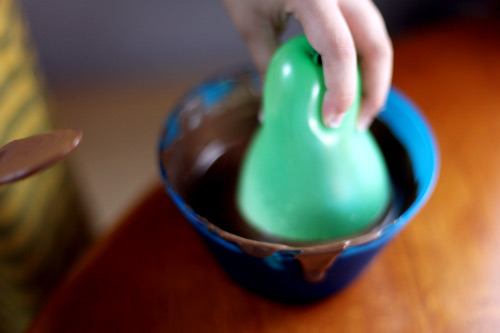
Melt some semi-sweet chocolate, white chocolate or confectionery coating. I used the same candy coating I use for cake pops. Let it cool slightly before using. It doesn’t need to be super hot.
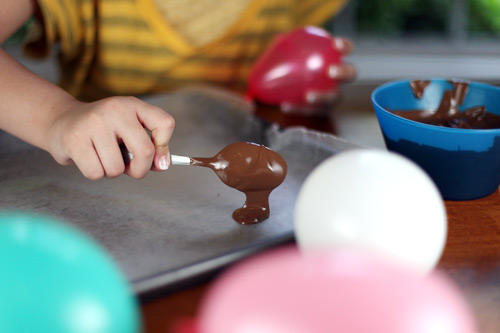
Spoon a small amount on a wax-paper-covered baking sheet.
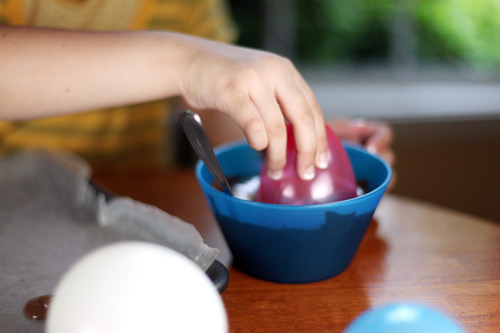
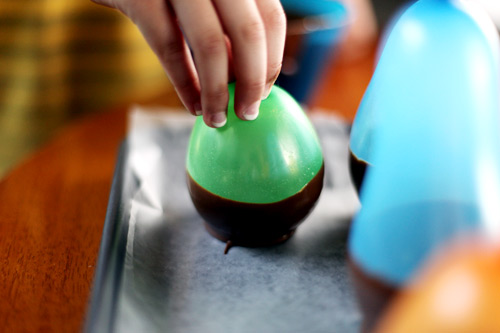
Then take one of your prepared balloons and dip it in the chocolate. Dip it in enough so the chocolate makes a bowl shape around the balloon.
Remove from the chocolate and place the balloon gently on top of the chocolate waiting on the baking sheet.
And repeat.
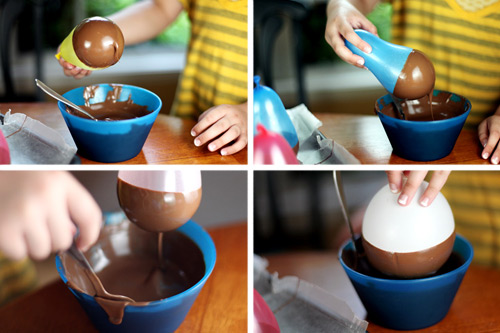
Repeat. Repeat. Repeat.

It’s as easy as one…
two…
three!

And like I said earlier … just fun.
She was so proud. And so was I.
You can place the tray of balloon bowls in the refrigerator to speed up the drying time.
Then it’s time for the really fun part.
Pop them all with a pin.

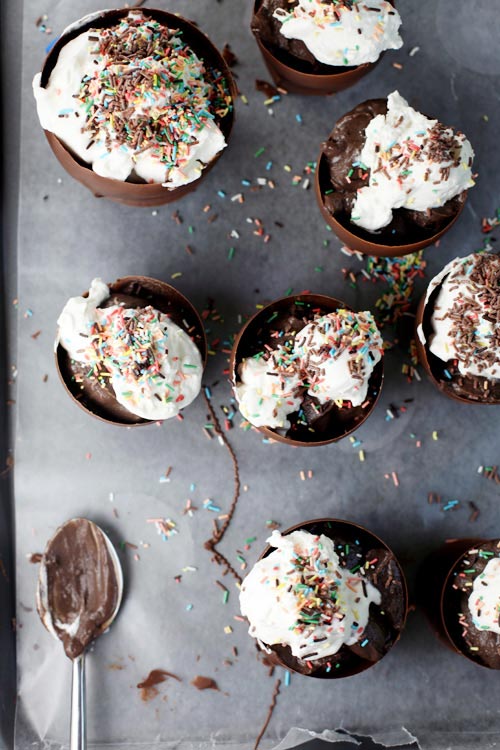
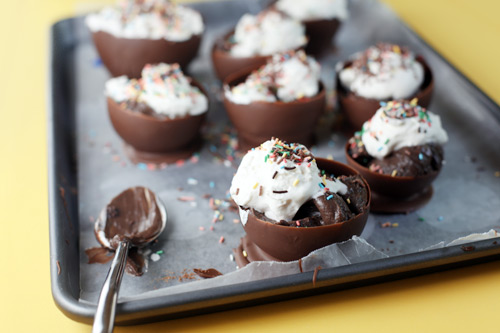
Gently remove the balloon carnage from the inside of the cups and they are ready to go. If you want, you can also serve other treats in them like ice cream.

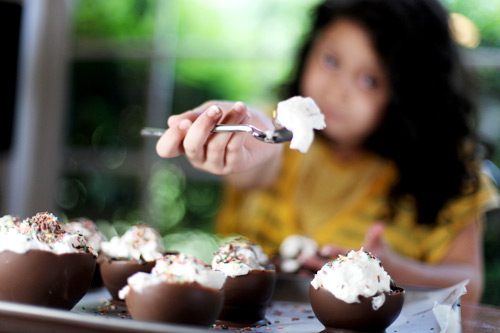
But we had wicked good pudding waiting in the fridge. Fill each cup as full as you want.
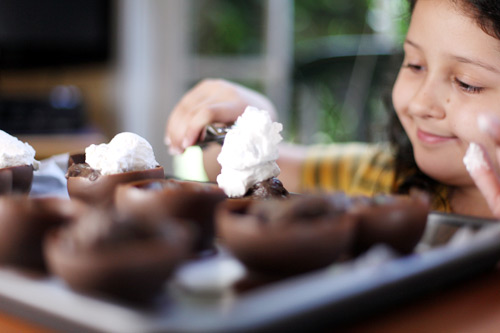
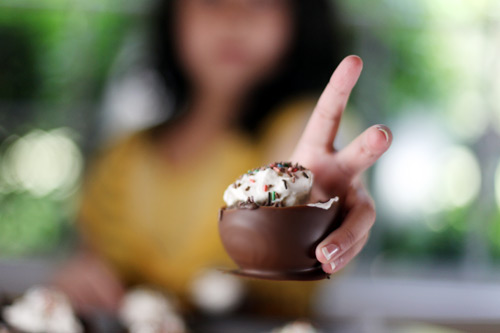
Then you can top them off with whipped cream.
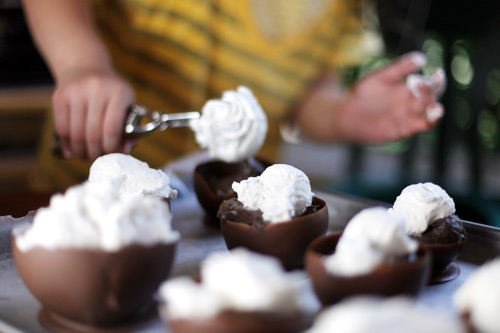
Lots and lots of whipped cream.
To make Jill’s Sweetened Whipped Cream, just chill a metal bowl and beaters in the freezer for about 15 minutes (to help whip the cream faster). Then combine 2 cups heavy cream, 1/2 cup powdered sugar and 1 teaspoon vanilla. Beat on medium-low using a mixer until the cream starts to thicken. Then increase speed to medium-high and beat until firm peaks form.
And yep, my niece made that too. Tired arms and all.
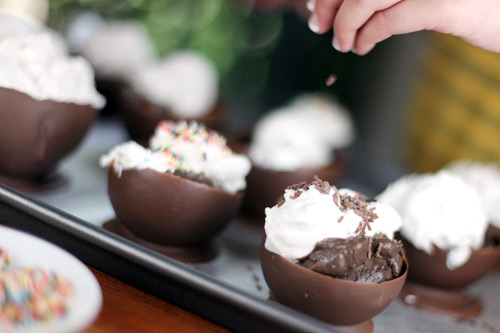
Finally, you can add some sprinkles. As few…
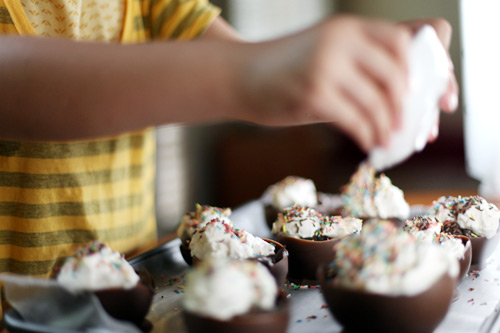
or as many as you like.
Want some?
Come on… you know you do.
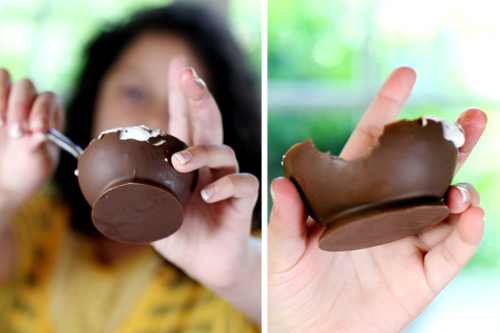
And when you’re all finished, you can eat the bowl, too.
Enjoy making a mess!
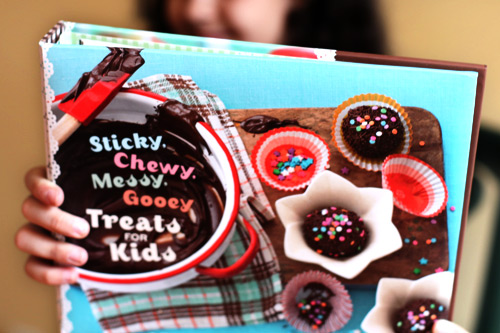
And, check out Jill’s book. I think you’ll be glad you did.
Sticky, Chewy, Messy, Gooey Treats for Kids
and the original…
Here’s a link to the Pudding Recipe so you can print it out.