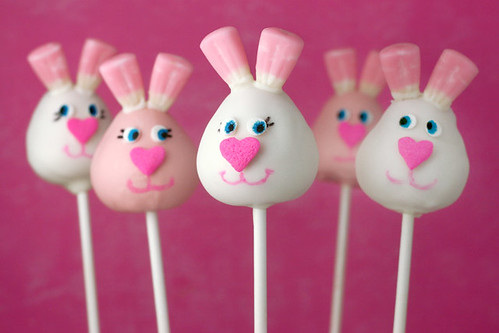
The Easter Chick Cake Pops from last week were certainly cute. FYI, the all body ones with feet were hands down the winner. Actually it was a beat down. I almost feel sorry for the other chicks. Thanks everyone for your input. But, even with all their cuteness, I couldn’t let Easter pass by without trying my hand at some bunnies. So, here they are…

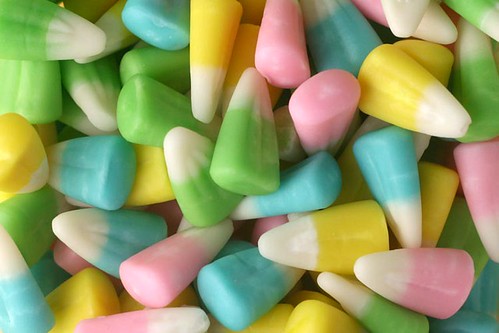
Check out those ears! I found some pastel “Bunny Corn” at The Fresh Market. SCORE! Yes, it really said that on the container. So cute. The name alone practically made me buy them, not to mention, as soon as I saw them, I thought … bunny pops. By the way, I have a new appreciation for candy corn. Growing up, these were always shunned at Halloween. I mean orange and brown candy never really appealed to me. But this year, I actually ate some at Thanksgiving when I made Turkey Cake Pops and was sold. I had always thought… assumed… they were hard candies. But they’re not. They’re soft little bites of sugar.
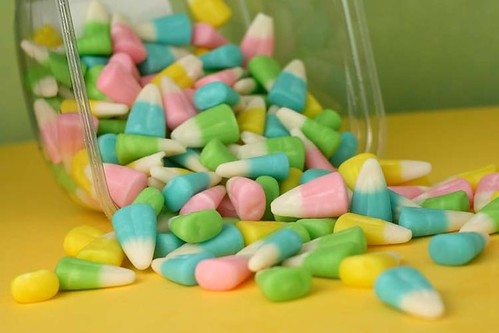
They’re actually good and taste even better in pretty colors! I can’t quit looking at them. They just make me happy!
Now, if you were really ambitious, you could make bunnies in coordinating candy corn colors. Blue bunnies, yellow bunnies, pink bunnies and even green ones. Not me. It was enough in pink and white. Those of you that have made pops before know what I mean.
I hope you can find the bunny corn somewhere, but if not, just check out a candy aisle near you and get creative for the bunny ears.
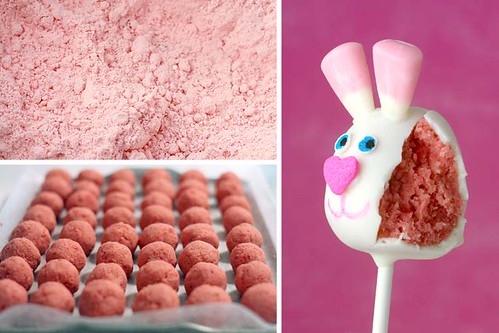
I made these with a strawberry cake mix for convenience. Now, I’m not a big strawberry fan, but they were extra YUMMY!
Here’s what I used to decorate:
Pink Candy Melts
White Candy Melts
Jumbo Heart Sprinkles![]()
Pastel Confetti Sprinkles![]()
Pink, Blue & Black edible ink pens![]()
Paper Lollipop Sticks
Styrofoam Block![]()
Paramount Crystals
Pastel Candy Corn
Toothpicks
To decorate:
- Shape the balls into a bunny head shape.
- Dip in candy coating color of your choice and let dry.
- Use the rounded side of a cookie cutter and cut of the end of the candy corn. Dip the end in a little bit of the melted candy coating and adhere it to the top of the bunny head. Hold in place until it sets. If your candy coating isn’t too hot, this should just take a few seconds.
- Let the bunny heads with ears sit in the styrofoam block until all the ears are dry.
- When dry, use a little bit of melted candy coating to glue the facial features on. Use a toothpick and dab a little of the coating in position for the eyes and nose and adhere the sprinkles.
- When the eyes and noses are dry, use your pens to draw on the mouth. Then draw on the eye color and pupils.
(Read the full instructions for making Cake Pops before you begin.)
Note: to get smoother covered pops, make sure your bowl is deep enough to submerge the entire pop. Try to dip it in one dunking motion and remove. If the chocolate is too thick, add some paramount crystals or some shortening to the melted candy coating to thin it out. Remove the pop, holding it in your left hand. tap your left wrist lightly with your right hand and rotate the lollipop stick over your bowl. The excess chocolate should fall off, smoothing out the coating at the same time. Also, make sure the coating surrounds the stick at the base to secure it.
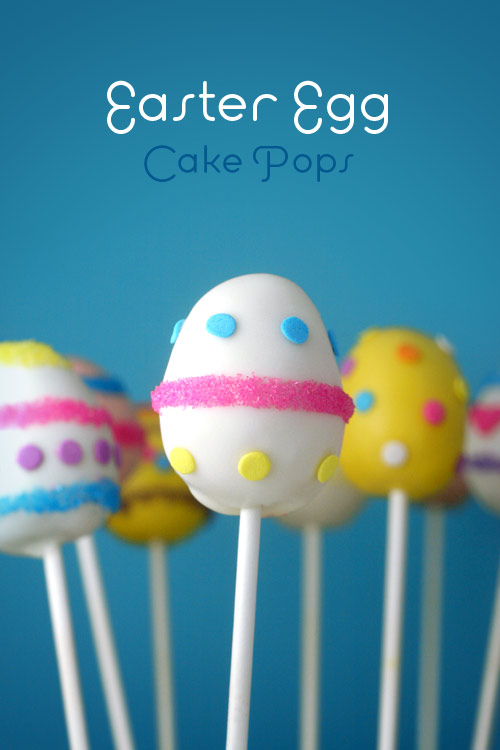
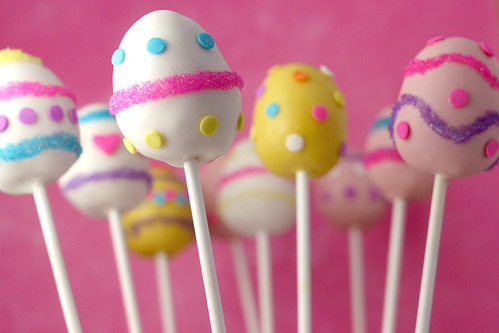
So, there you have it… Easter Bunny Cake Pops. But, we can’t have Easter bunnies without Easter eggs. I mean they do go hand in hand, right!
Stop the cuteness!
Stop it, I say!
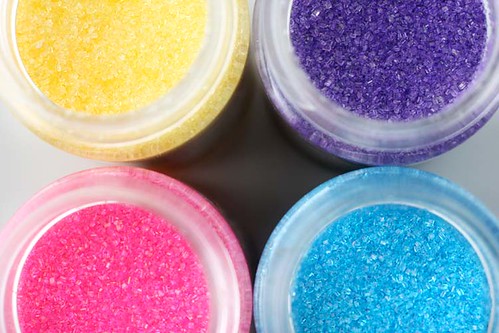
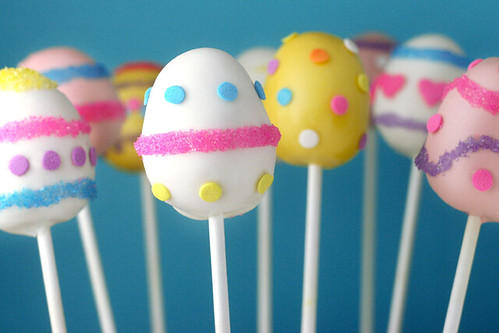
Don’t even look at these sprinkles or you’ll be hypnotized. Hurry, close your eyes or the next thing you know, you’ll have Easter eggs popping up all over your kitchen.
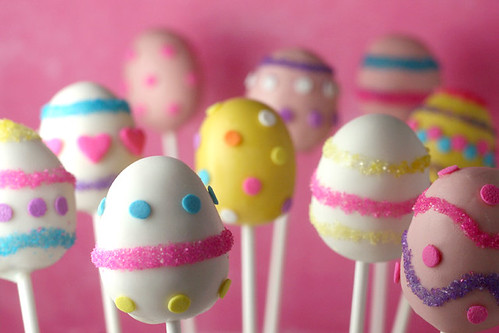
I warned you.
Here’s what I used to decorate:
Pink Candy Melts
Yellow Candy Melts![]()
White Candy Melts![]()
Pastel Confetti Sprinkles![]()
Sanding Sugars![]()
Light Corn Syrup![]()
Paper Lollipop Sticks![]()
Styrofoam Block![]()
Paramount Crystals![]()
Small Paintbrush
Toothpicks
To decorate:
- Shape the cake balls into an egg shape.
- Dip in candy coating color of your choice.
- Let sit in the styrofoam block until dry.
- When dry, use a small paint brush to paint on a thin layer of corn syrup in a line around the egg. Do one line at a time. Right after you paint on the syrup, sprinkle on one of the sanding colors until all of the corn syrup is covered. Use a bowl sprinkle over.
- Repeat with varying designs and colors.
- You could probably also do this with the melted candy color, but this time I was experimenting and tried the corn syrup.
- For the confetti sprinkles, either dab a little bit of the candy color with your toothpick and glue on the sprinkle shapes or use a little bit of the corn syrup to act as the glue. The corn syrup will take a little longer to dry.
- Dry completely.
(Read the full instructions for making Cake Pops before you begin.)
Enjoy!