School starts back this week for my nieces which seems super early. I mean I’m just now getting used to it being summer, and haven’t even taken any time off yet.
And now it’s the season’s signal that summer is almost over. Bummer.
But I thought I would make some cheerful Back to School sweets for the occasion. And also because for some strange reason I can’t get the song Back to School Again from Grease 2 out of my head. Maybe I shouldn’t admit that. I’m probably one of the few that’s seen the movie more than once. On purpose. I especially like when Michelle Pfeiffer sings Cool Rider. Cooo-ooo-ooo-ool Rider. Raise your hand if you like it, too. How many of you hear crickets right now and have no idea what I’m talking about. That’s okay. I’ll stop and talk about cake.
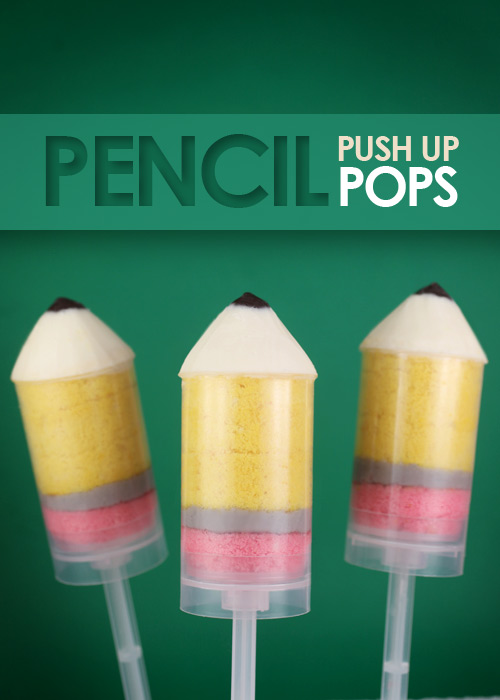
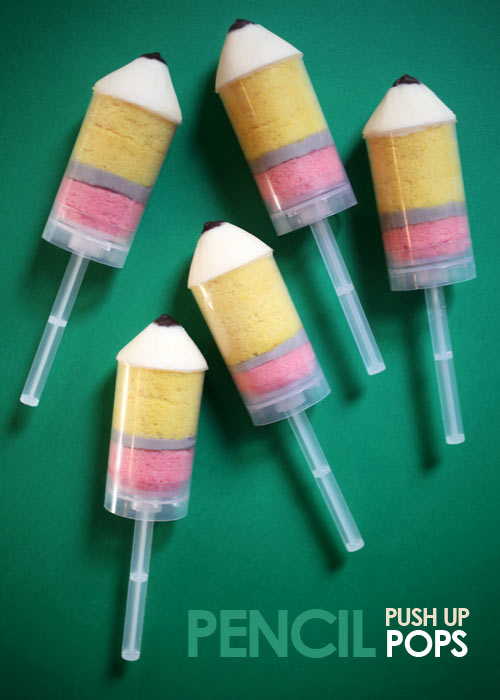
I made some Push Up Pops. They’ve been on my list since my friend Courtney’s book, Push Up Pops came out.
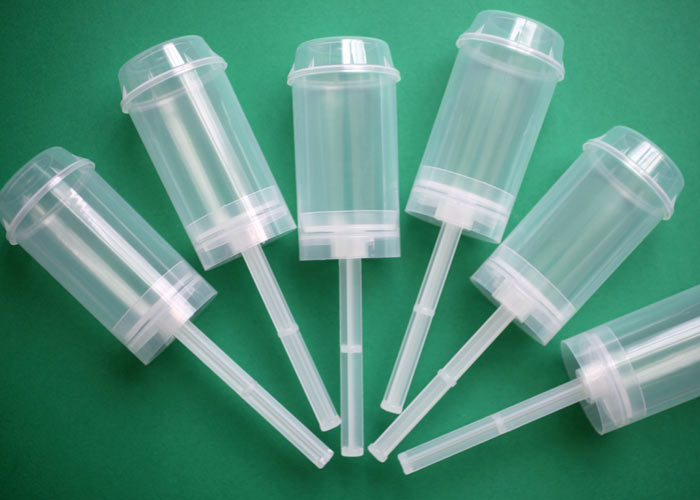
I bought a bunch of these containers and they’ve just been sitting in a box waiting to be used… until this weekend when I thought they’d make a cute shape for pencils.
Short, stubby pencils.
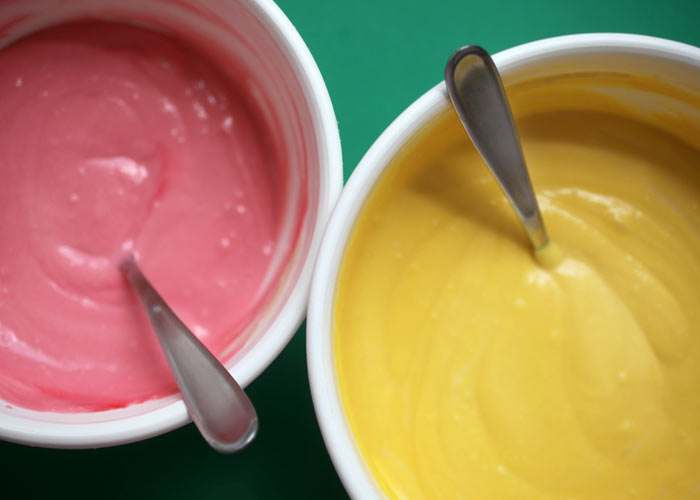
To start, just tint cake batter pink and yellow.
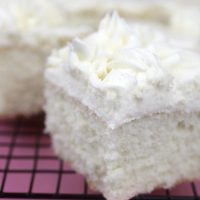
I used this vanilla cake recipe and divided the batter to tint 1/3 of it with pink food coloring and 2/3 of the batter with yellow food coloring.
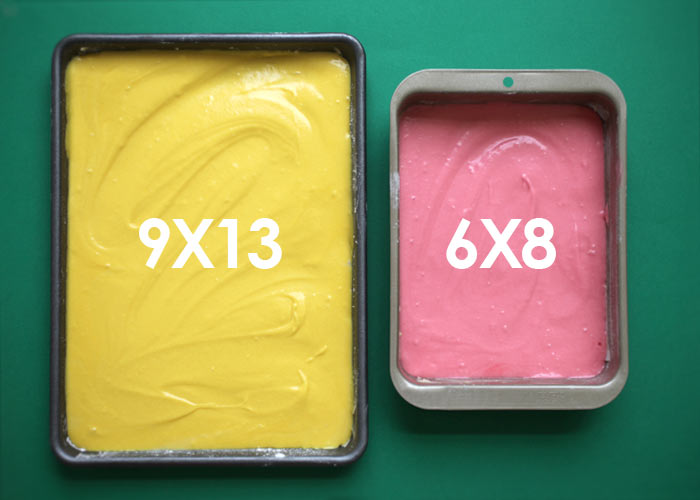
Then I poured it in two greased and floured baking pans. If you don’t have a 6 X 8, just use something close or even a round cake pan.
Bake them for about 18 minutes or until done.
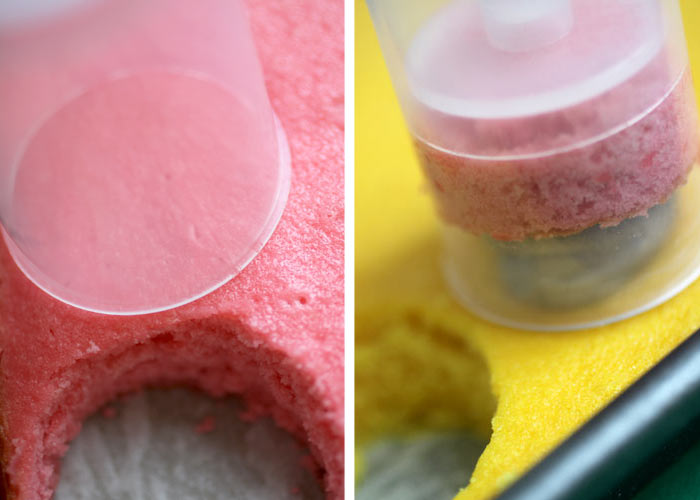
When the cake is baked and cooled, you can use the push up pop containers to cut out your cake.
Cut the pink first for erasers. Then you can pipe some tinted gray frosting on the yellow cake layer and place your container right on top to cut it out. As you press them together the frosting will flatten out in between. Then press another yellow layer into the container or continue until the container is filled to the edge with cake.
This method worked fine, but some of the browned edges of the bottom of the cakes were showing through the containers making it look like I had horizontal lines in my pencils.
So I added an extra step to get rid of them.
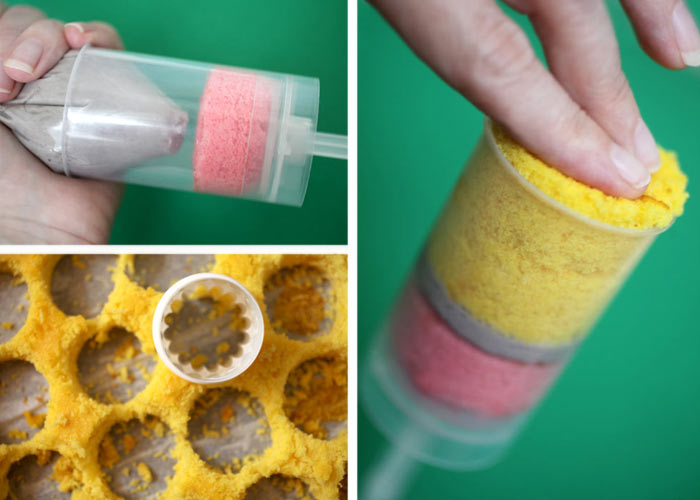
I used a small round cutter the same size as the opening of the container and cut out individual circles first. Then, I used a knife to shave the thin layer of browned cake from the bottom of the layers. This worked great and made the yellow cake layers look a lot more seamless.
To assemble, press the pink layer in the bottom of the container and pipe some of the gray frosting in the center. Then press the two yellow layers on top one at a time.
Now for the pencil tips. You just need frosting and chocolate chips.
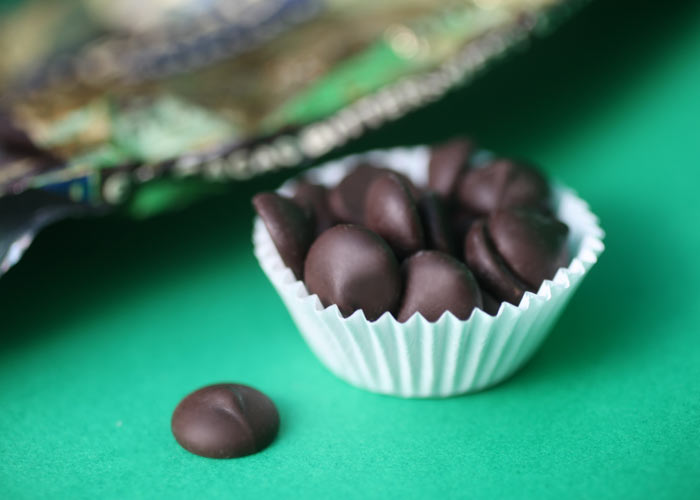
I used Ghiradelli chips because they are wide and flat and were a good proportion for my short little pencils.
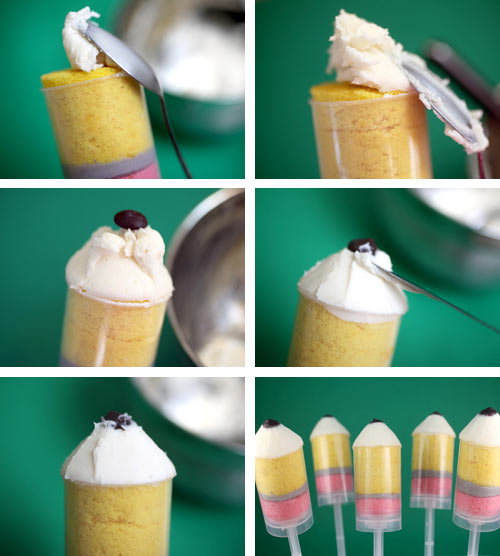
Apply the frosting with a spoon and pull down against the edge of the container. Repeat until all sides are covered and you have the beginnings of a pointed shape. Then place a chocolate chip on top and with a sharp non-serrated knife, smooth out the frosting. Allow some of the frosting to overlap the bottom of the chip so it appears flush. Once you get a pretty good shape going, just place the container in the freezer a few minutes for the frosting to firm up a bit. Then it will be easier to shape. You can also run your knife under warm water, wipe it off and use it to aid in smoothing the surface. Once shaped, wipe any frosting off the tip of the chip with a dot of water.
Pencil Push Pops
You’ll need:
Vanilla Cake And Frosting (Recipe here)
Yellow food coloring
Pink food coloring
Black food coloring
Push Up Pop Containers
Circle cutters (optional)
Non-serrated knife
Ghiradelli Chocolate Chips
How To Recap:
- Make the vanilla cake batter. Divide batter so you have 1/3 in one bowl and 2/3 in another. Tint 1/3 of the batter with pink food coloring or a few drops of red. Tint the other bowl of batter yellow. Add drops of color until you get a shade you like.
- Pour the yellow batter into a 9X13 baking sheet or pan and the pink batter into a 6X8 or similar size pan. Bake for about 18 minutes at 350 degrees. Let cool.
- Make frosting and tint 1/4 with a few drops black food coloring reserving the rest. Start with a drop at a time until you achieve gray. Place gray frosting in a ziploc bag and cut the tip off one end so you can use it to pipe the frosting.
- Use the Push Up Pop container to cut out a pink cake circle. Add frosting on top of the yellow layer and place container on top of the frosting. Press container into the cake so that the two layers sandwich the frosting. Add another layer of yellow cake.
- If your cake has brown edges, use a cookie cutter to cut the circles first and then gently saw off the brown edges with a knife. Place the pink circle in the push up pop container and then pipe the frosting on. Then place two yellow cake layers on top or enough until the cake meets the top edge of the container.
- Use the reserved untinted frosting to form a mounded triangle on top of the container. Add a chocolate chip and use a knife to smooth out the frosting like illustrated above.
Eat and Enjoy!
And check out my friend Courtney’s book for lots of fun Push Up Pop Recipes.