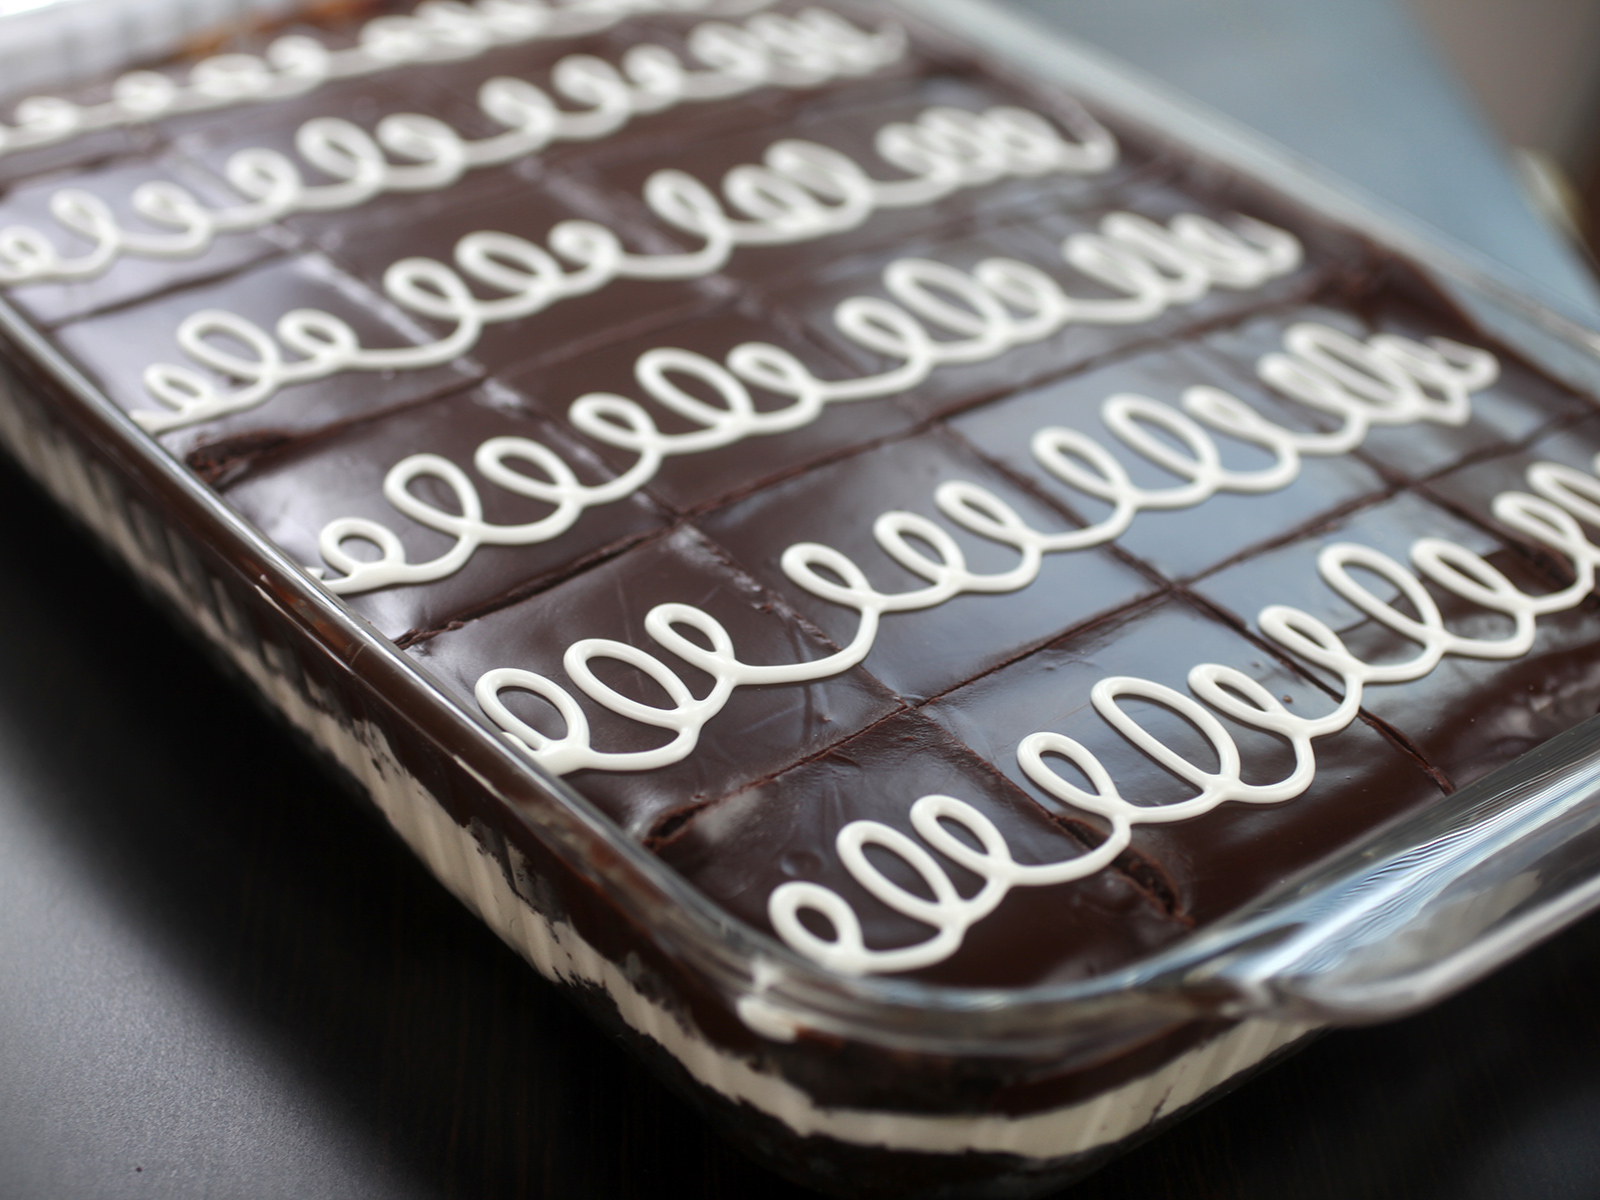
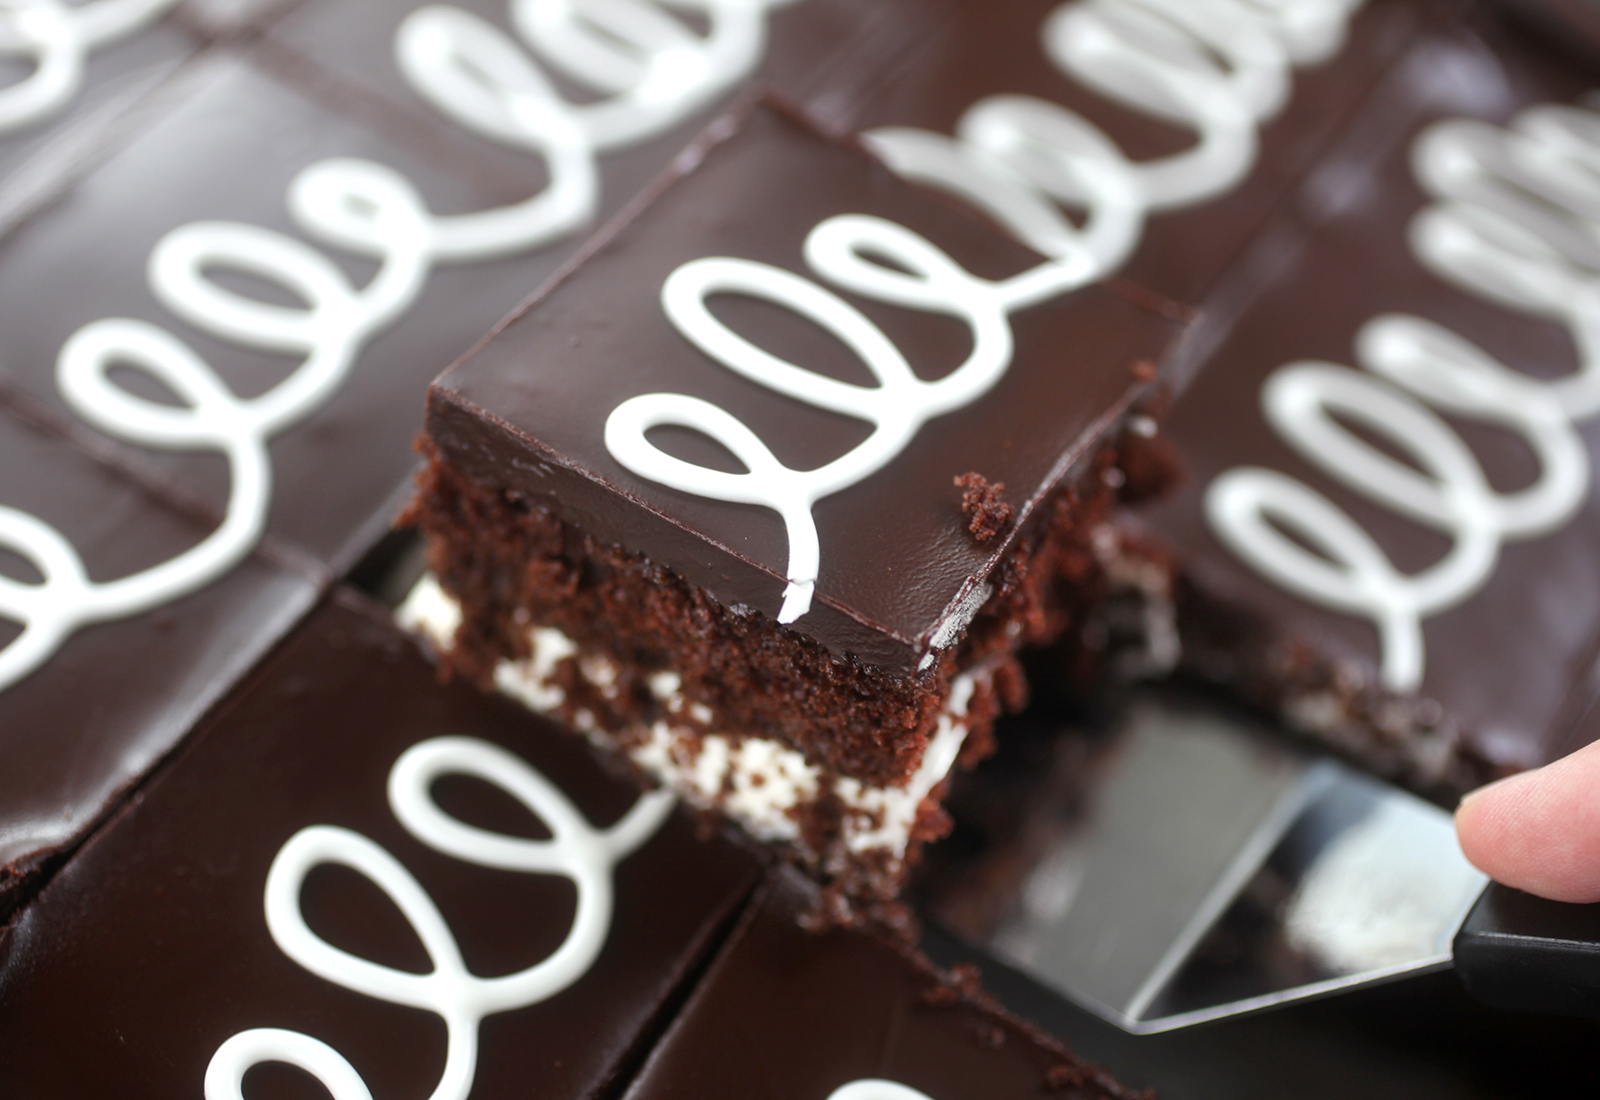
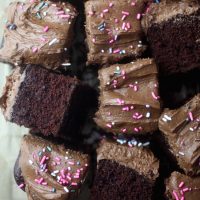
You really need to make this cake. It’s like ridiculously good. The perfect chocolate cake with marshmallow cream frosting, chocolate ganache and pretty vanilla swirls to top it off. It’s basically a hostess cupcake, but super-sized. And I’ll say it again … soooo gooooood!
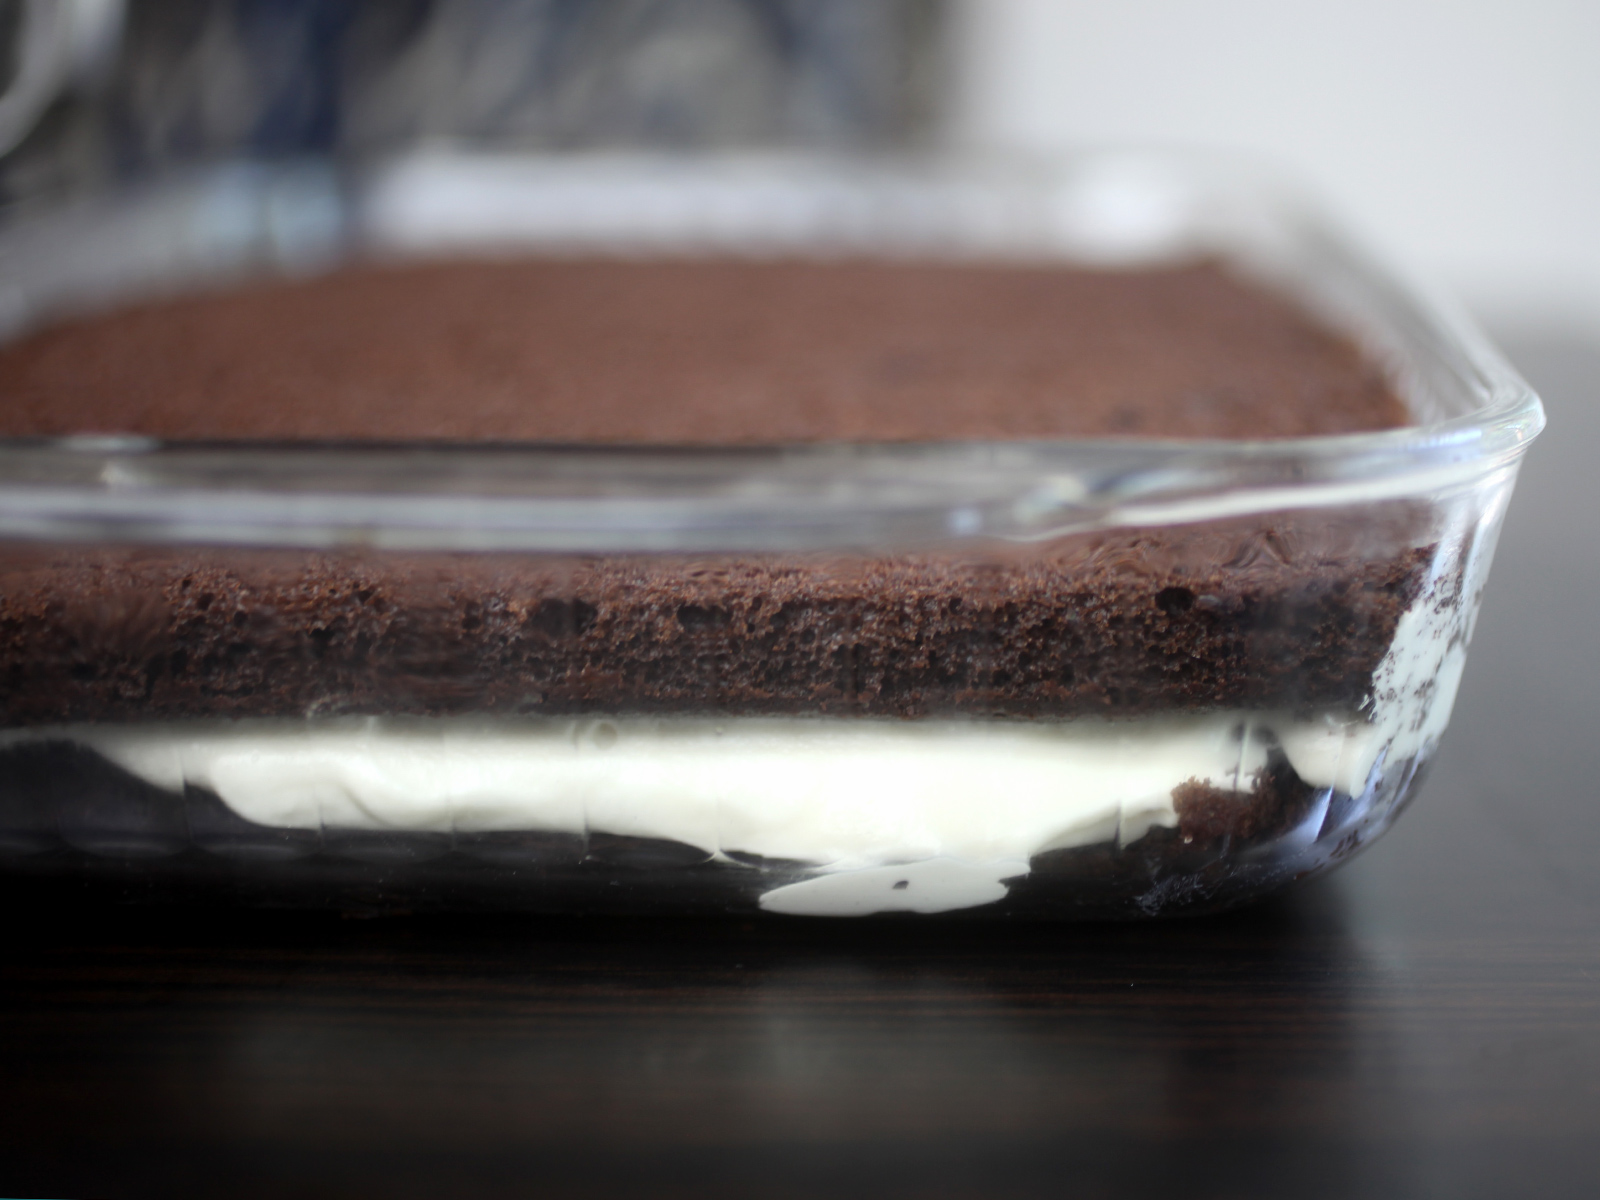
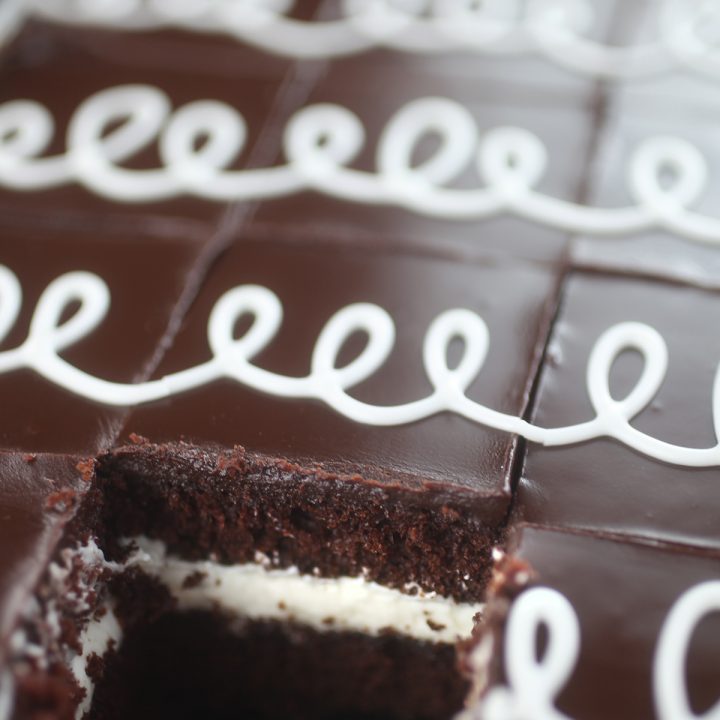
Plus, look at that cake to filling ratio. That is what I’m talking about.
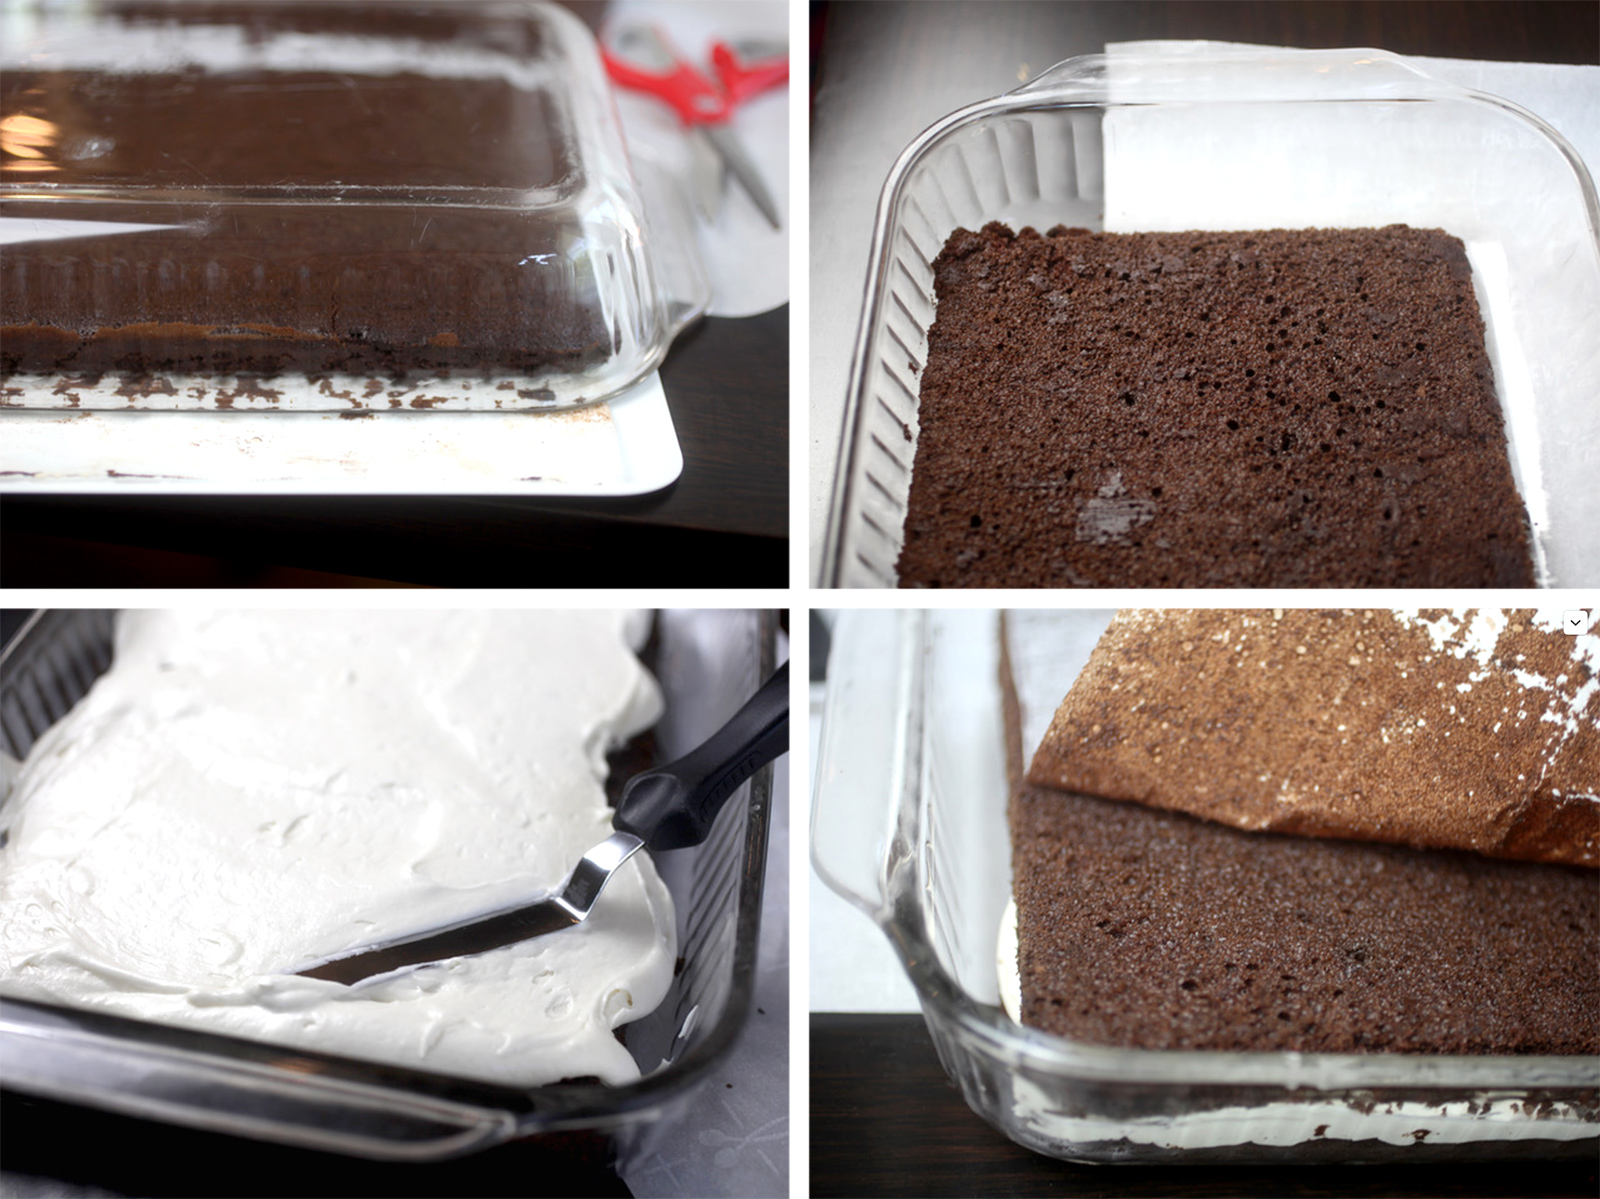
The cake is baked in a roughly 12 X 18 rimmed sheet pan that is greased and lined with parchment paper and then greased again on top of the parchment paper and dusted with cocoa. (I like to use cocoa instead of flour for chocolate cakes). Allow some of the parchment paper to overlap on either side of the pan to aid in transferring the cake later on.
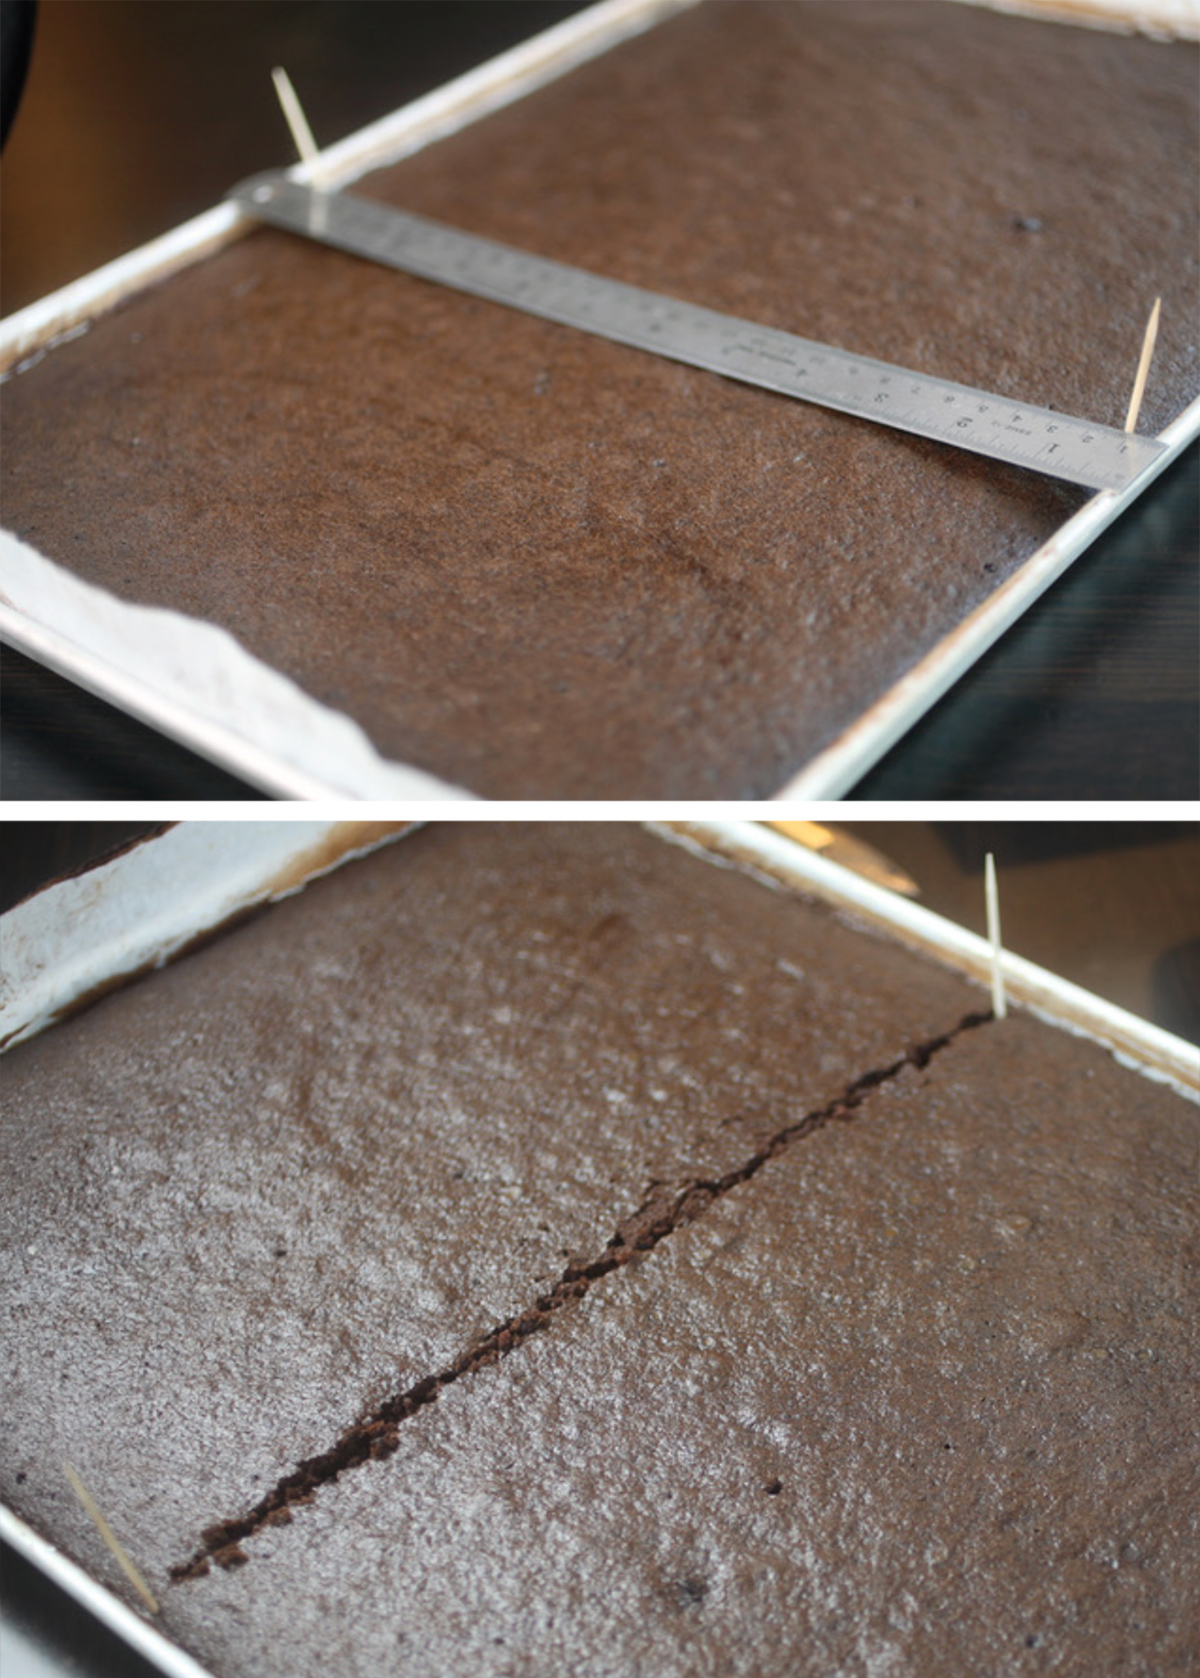
Then the cake is divided in two sections. Measure the cake to get exactly equal layers and cut the cake in half while still in the pan.
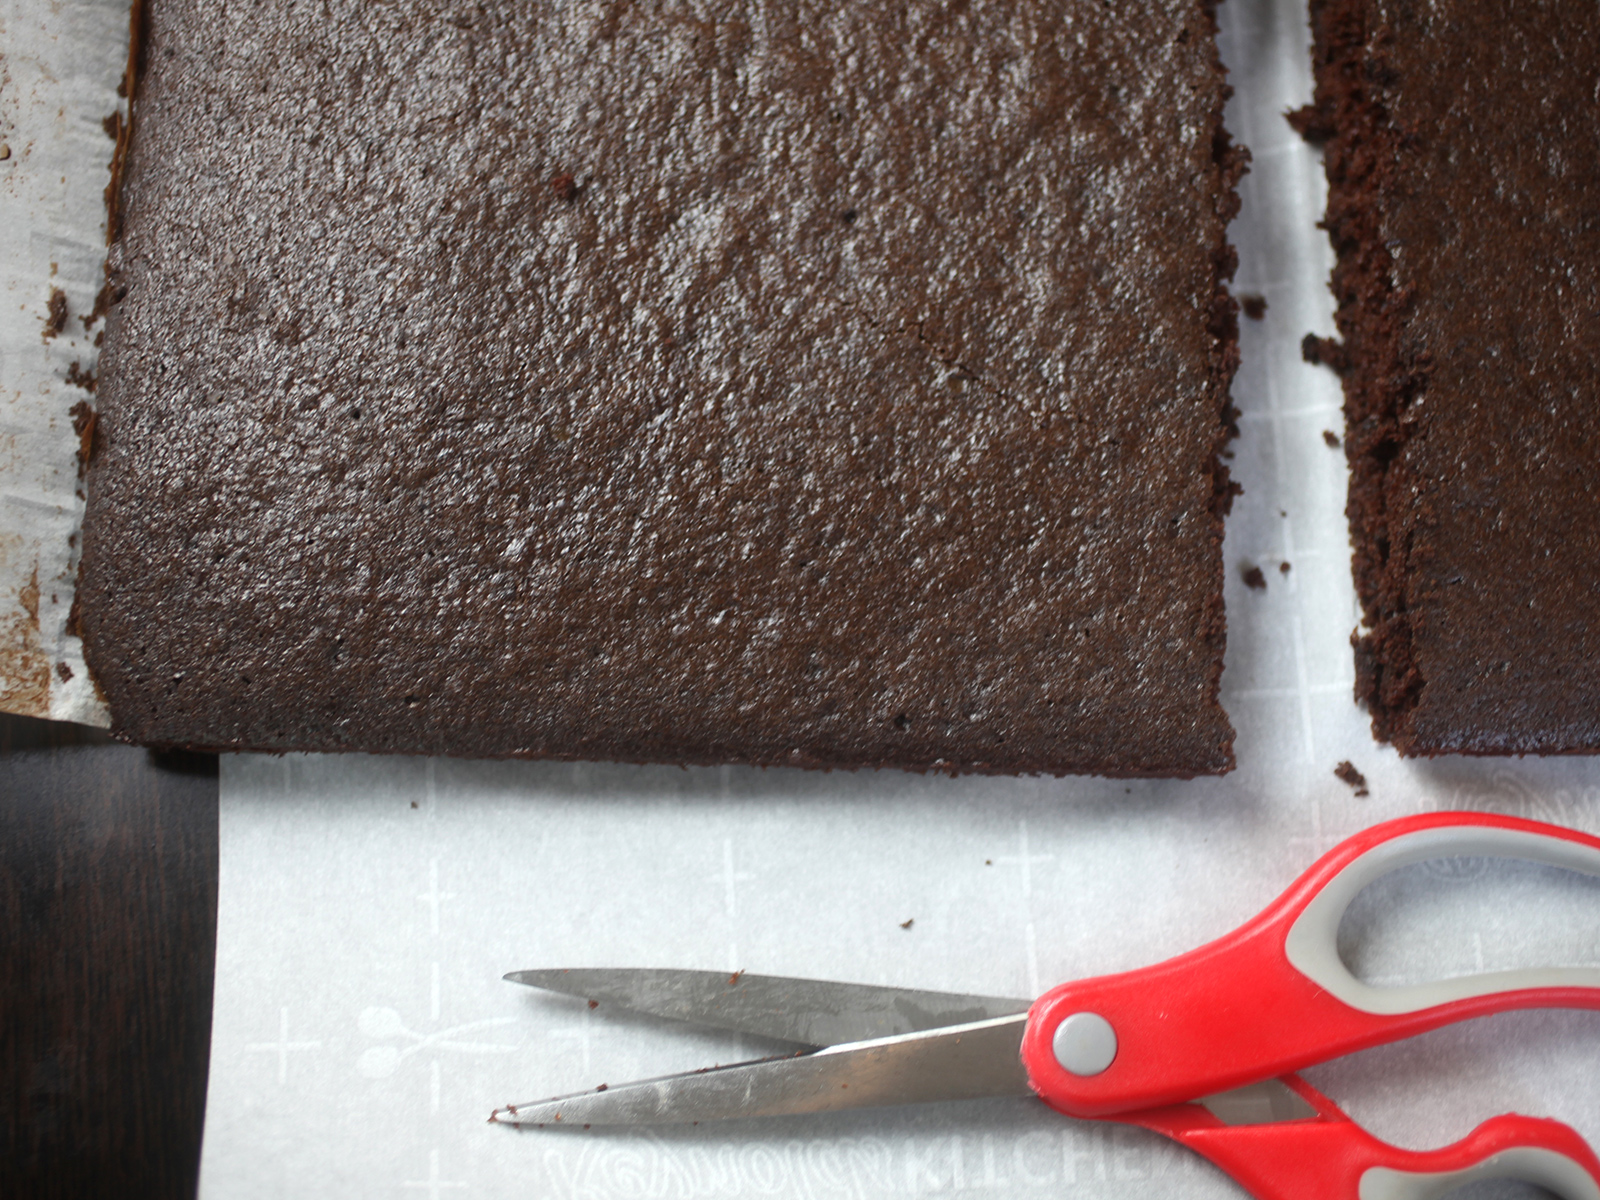
Then carefully remove the cake using the parchment paper that overhangs the pan. Once removed, use kitchen scissors, to cut through the parchment paper in the same spot that the cake has already been cut in half. Do this so you can handle each cake layer separately without it tearing apart.
Now that you have two equal layers, you’ll want to transfer and assemble them in a 9 X 13 inch covered baking dish. You’ll need the depth and you’ll appreciate the lid as you snack on this over the next few days.
Transfer the first layer with the help of a rimless cookie sheet. Place a cake layer, parchment paper side down, on the cookie sheet and place the baking dish on top. Holding the cookie sheet against the baking dish, flip it over and the cake layer will fall into place into the bottom of the dish. Remove the parchment paper and then pipe and frost an even layer of marshmallow cream frosting.
To transfer the second layer, you can’t flip the baking dish, so place the cake layer on the rimless cookie sheet and carefully transfer using the cookie sheet for support and your hands for guidance. Get it right the first time because you really can’t readjust it at this point. Remove the parchment paper.
Press the top layer gently into the filling and make sure the layers are as flat and even as possible.
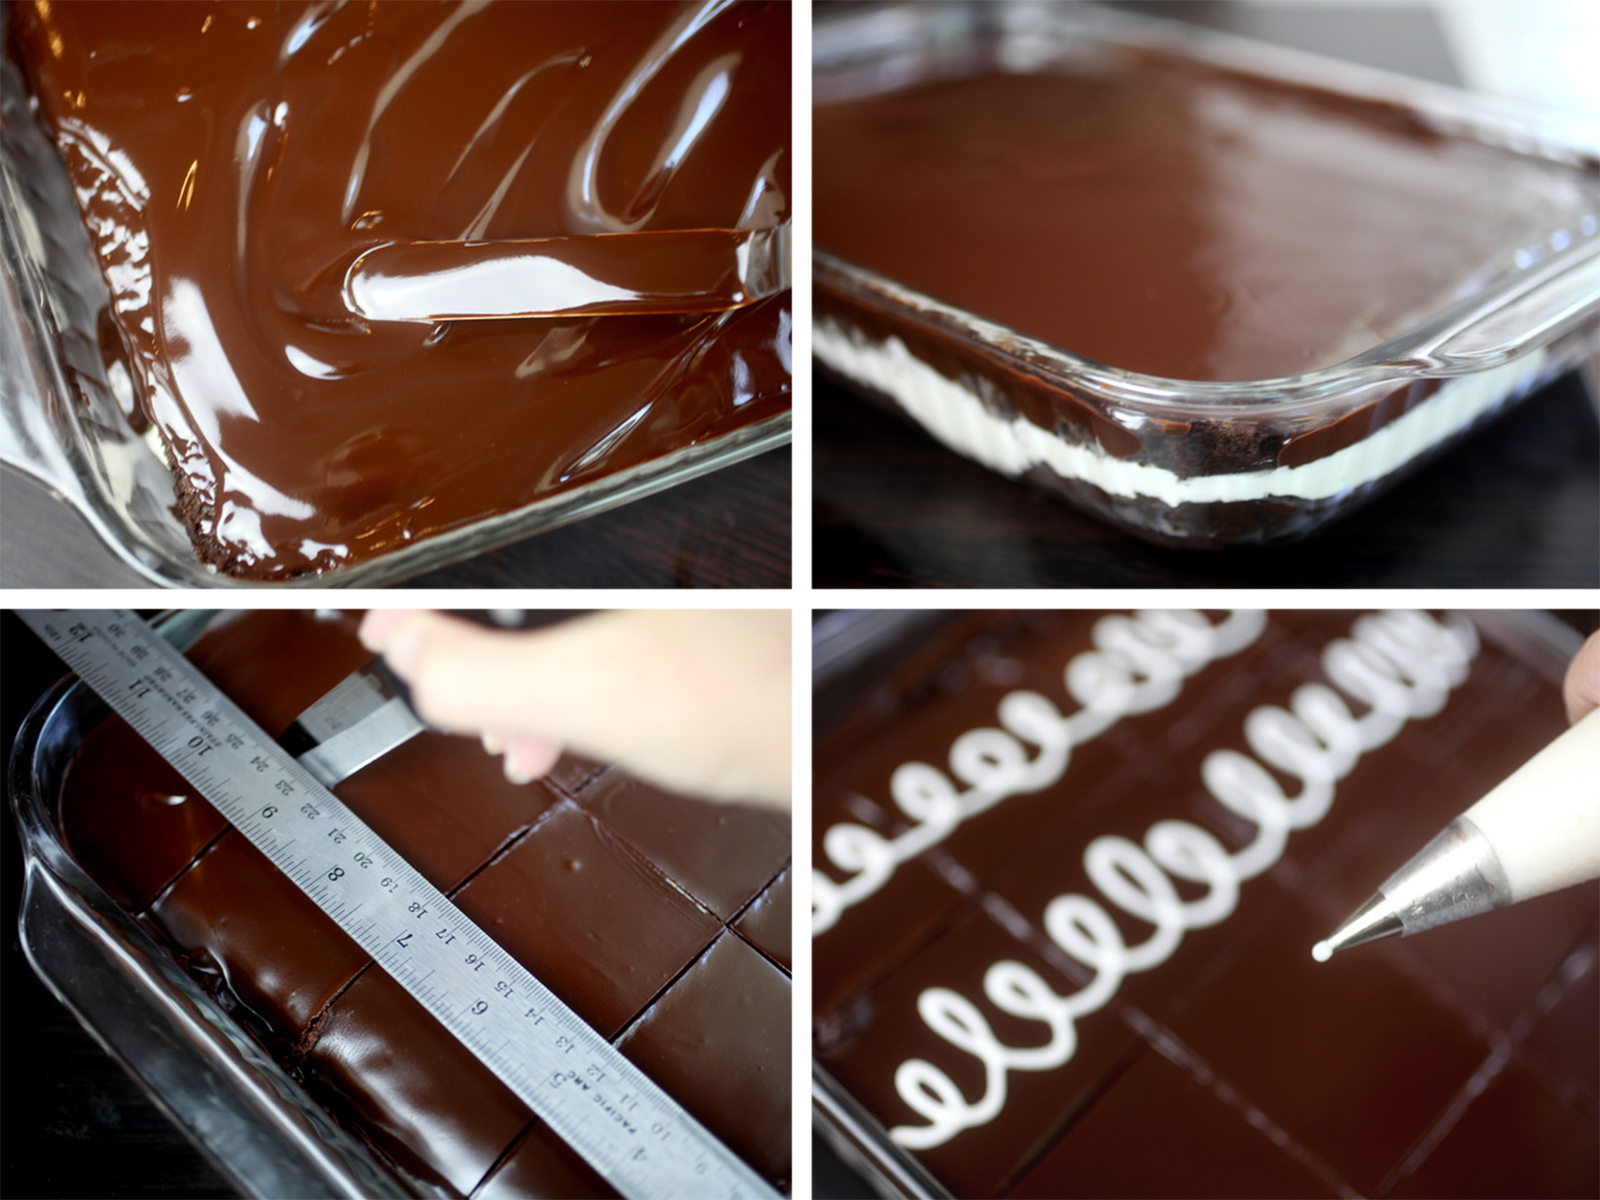
Now the really good part. Lather the top of the cake in decadent chocolate ganache. Oh my gosh. Yes so much ganache. Spread evenly and give the dish a little jiggle and the ganache will settle into a smooth surface. And look as shiny as glass. Let rest for several minutes.
Once the ganache is almost set, but still somewhat shiny, go ahead and cut the cake into even squares. You can use a ruler for guidance as long as it is sturdy and large enough to rest on the edges of the baking dish and without sinking into the ganache. Just be careful… you wouldn’t want to mess up that beautiful glossy chocolate.
Tip: When cutting, use a sharpe non-serrated knife. Wipe it off and run it under hot water between each cut to help guarantee nice clean lines.
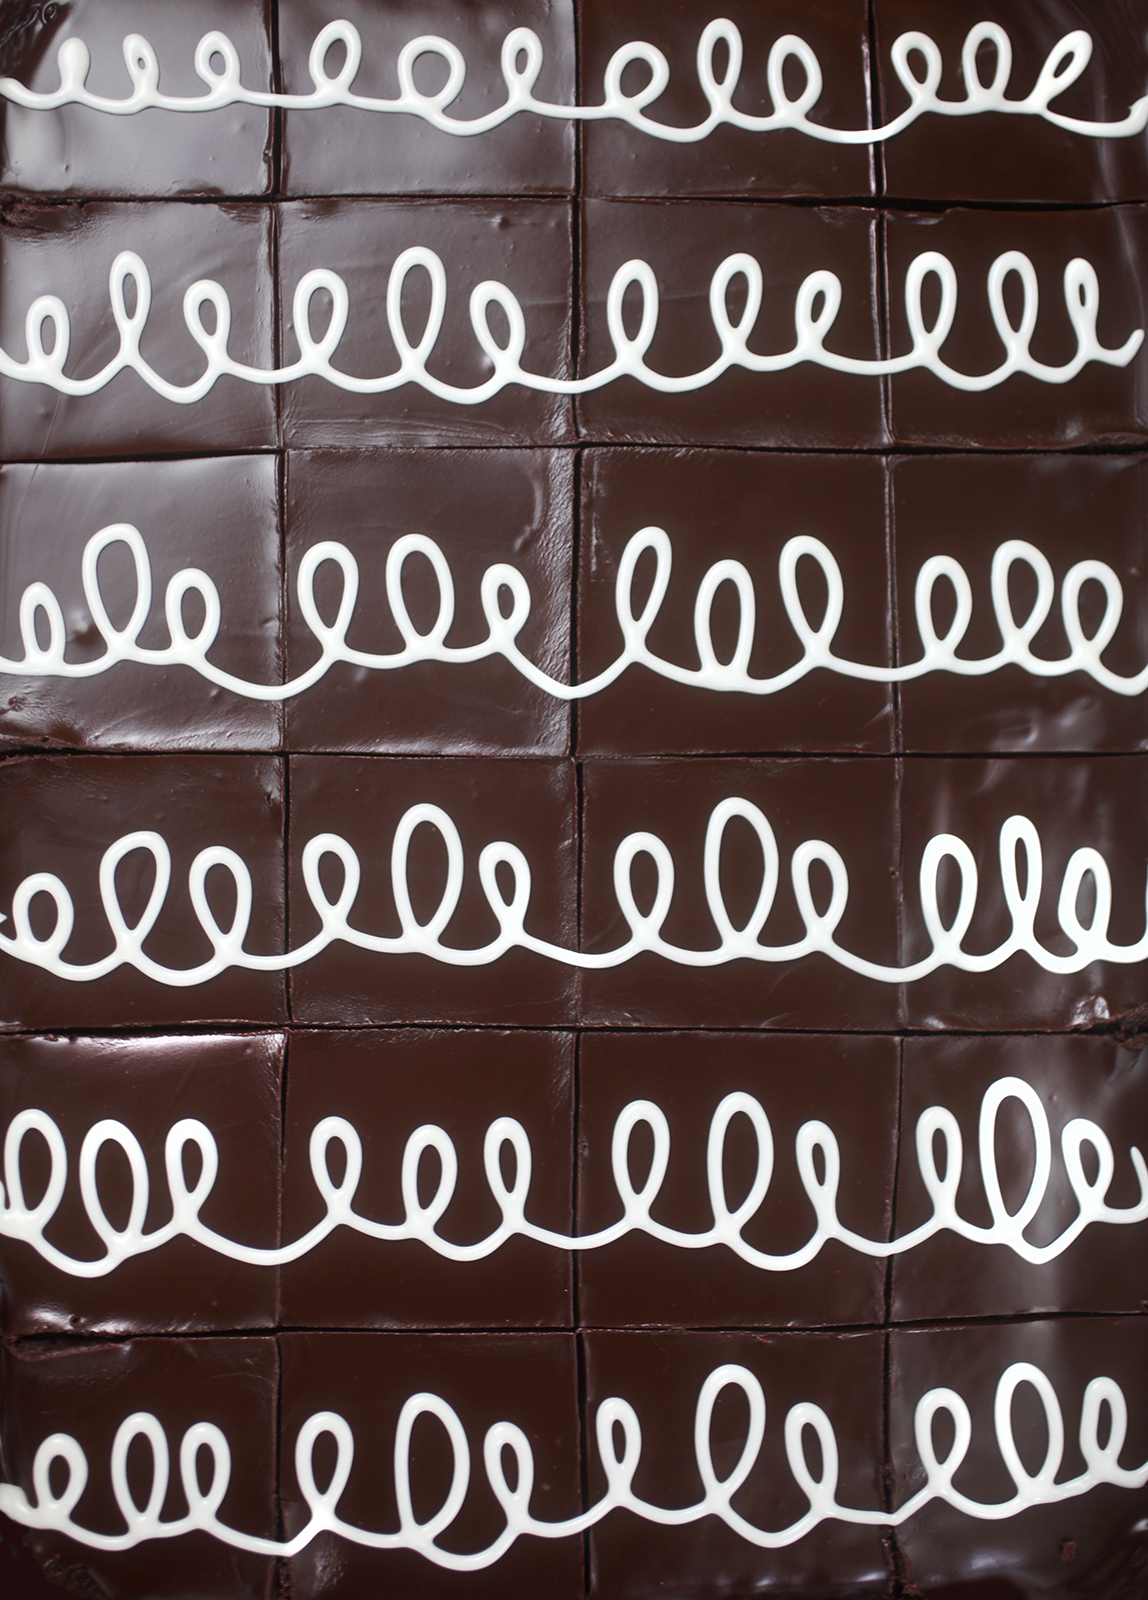
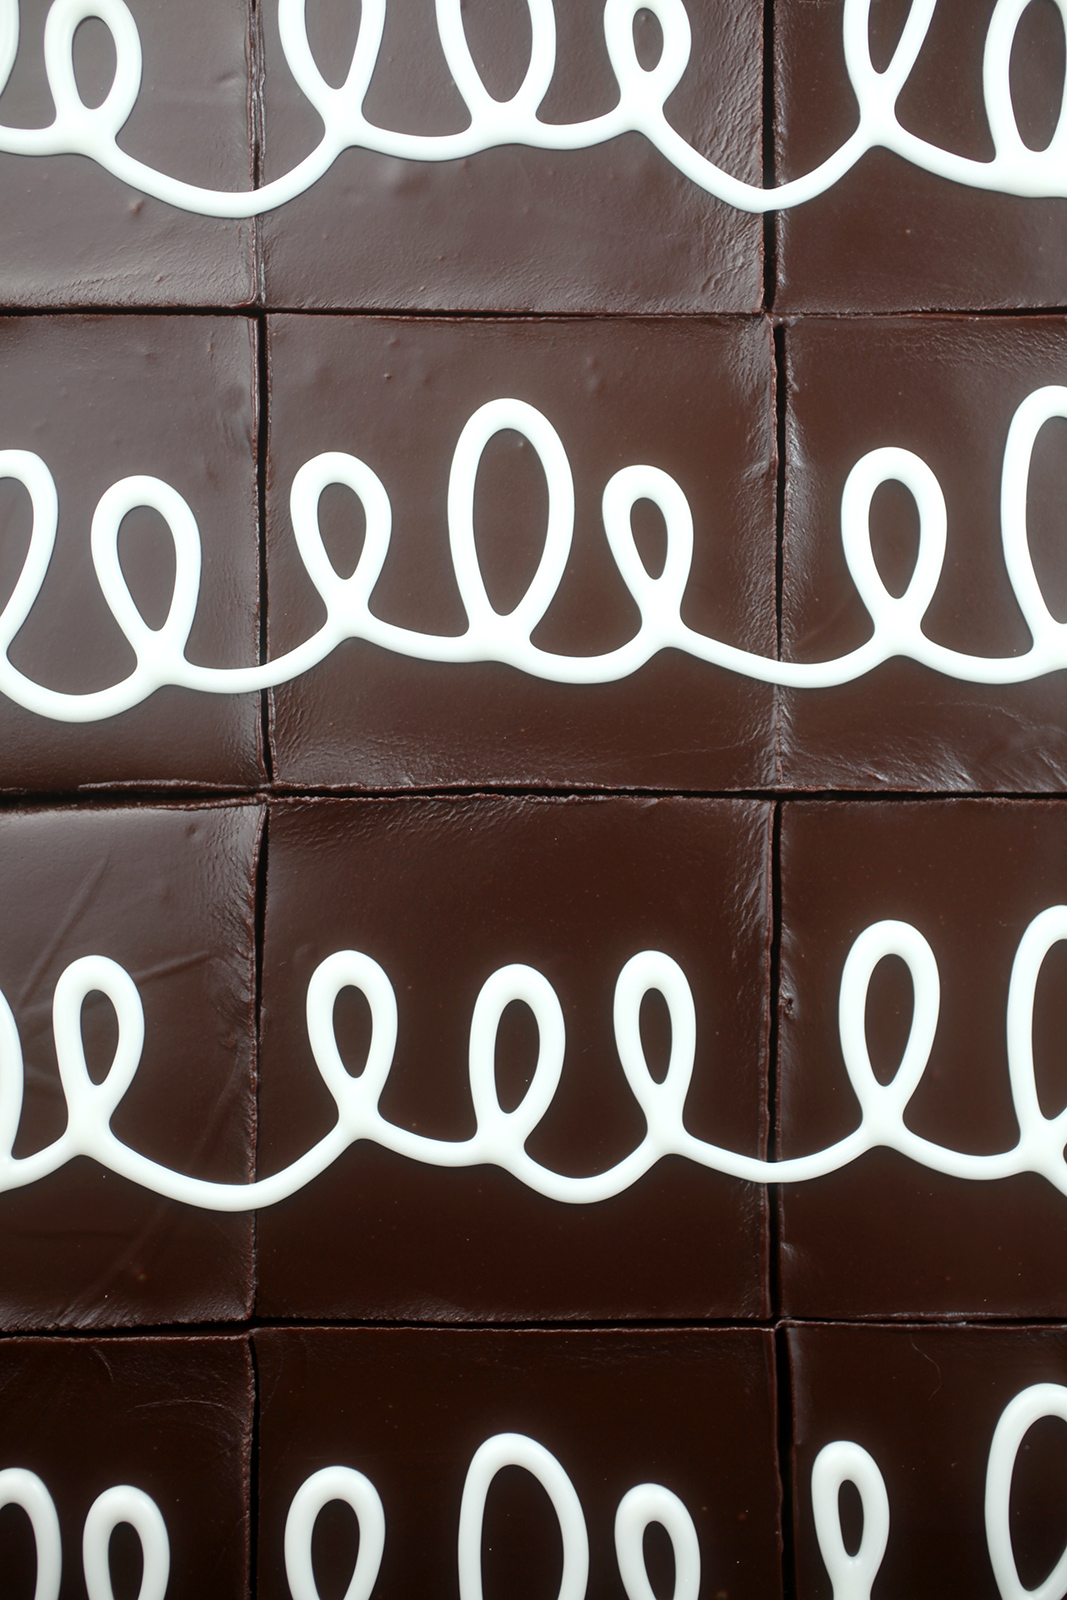
Now start swirling.
Use a decorating bag fitted with a Wilton #3 tip for big, bold swirls.
So classic and pretty.
Yield: 24 cake squares
Hostess with the Mostess Chocolate Snack Cake
Prep Time45 minutes
Cook Time15 minutes
Additional Time15 minutes
Total Time1 hour15 minutes
Ingredients
Devil’s Food Cake
¾ cup natural unsweetened cocoa
2/3 cup hot water
1 cup buttermilk
1 ¾ cups all-purpose flour
1 ½ teaspoon baking soda
½ teaspoon kosher salt
¾ cup unsalted butter, room temperature
1 cup granulated sugar
½ cup light brown sugar, firmly packed
3 large eggs
2 teaspoons vanilla
Cream Filling
2 cups confectioners’ sugar
6 Tbsp unsalted butter, room temperature
7 oz jar marshmallow crème
1 tsp vanilla
4 Tbsp heavy cream
Ganache
3 tbsp unsalted butter, softened
10 oz bittersweet chocolate, finely chopped
1 Tbsp light corn syrup
1/3 cup heavy cream
Vanilla Icing
1 cup confectioner’s sugar
1/2 tsp vanilla
1 Tbsp milk
You’ll also need:
9 X 13 baking dish, covered preferred
12 X 18 rimmed baking sheet
Unrimmed cookie sheet larger than 9 X 13
Offset spatula
Piping bag and Wilton #3 tip
metal ruler (helpful when cutting)
mini offset spatula (very helpful when lifting cake squares)
Instructions
Make the CAKE Preheat oven to 350 degrees Fahrenheit. Grease the bottom and sides of a 12 X 18 inch sheet pan and line the bottom with parchment paper allowing a few inches to overlap each end. Grease the top of the paper and dust the pan with cocoa.
In a bowl, whisk cocoa powder into the hot water. Cool to lukewarm and whisk in the buttermilk. In another bowl, sift together the flour, baking soda and salt.
In the bowl of a mixer fitted with the paddle attachment, beat the butter and sugars on medium speed until combined. Add eggs one at a time, beating well after each addition. Add vanilla along with the final egg. Reduce speed to low and add dry ingredients in three additions alternating with the buttermilk mixture in 2 additions. Beat until combined.
Pour batter into prepared pan. Bake for about 15 minutes until a toothpick inserted in the center comes out clean. Let cool in the pan. Cut a straight line down the center of the cake so you have two sheets roughly 9 X 12 inches. When cool gently lift cake out of sheet pan holding the parchment paper on either end. Place on counter and with kitchen scissors, cut down the center to separate the two pieces of cake while still keeping them on the parchment paper. This will help in transferring.
Transfer one 9 X 12 cake layer section to a 9 X 13 baking dish with the help of a rimless cookie sheet. Place one of the cake layers, parchment paper side down, on the cookie sheet and place the baking dish on top. Holding the cookie sheet against the baking dish, carefully flip it over and the cake layer will fall into place. Remove the parchment paper.
Make the CRÈME FILLING In the bowl of a mixer, sift the sugar over the butter. Using the paddle attachment, beat on medium speed until lightened. Add marshmallow crème, vanilla and heavy cream and beat until fluffy.
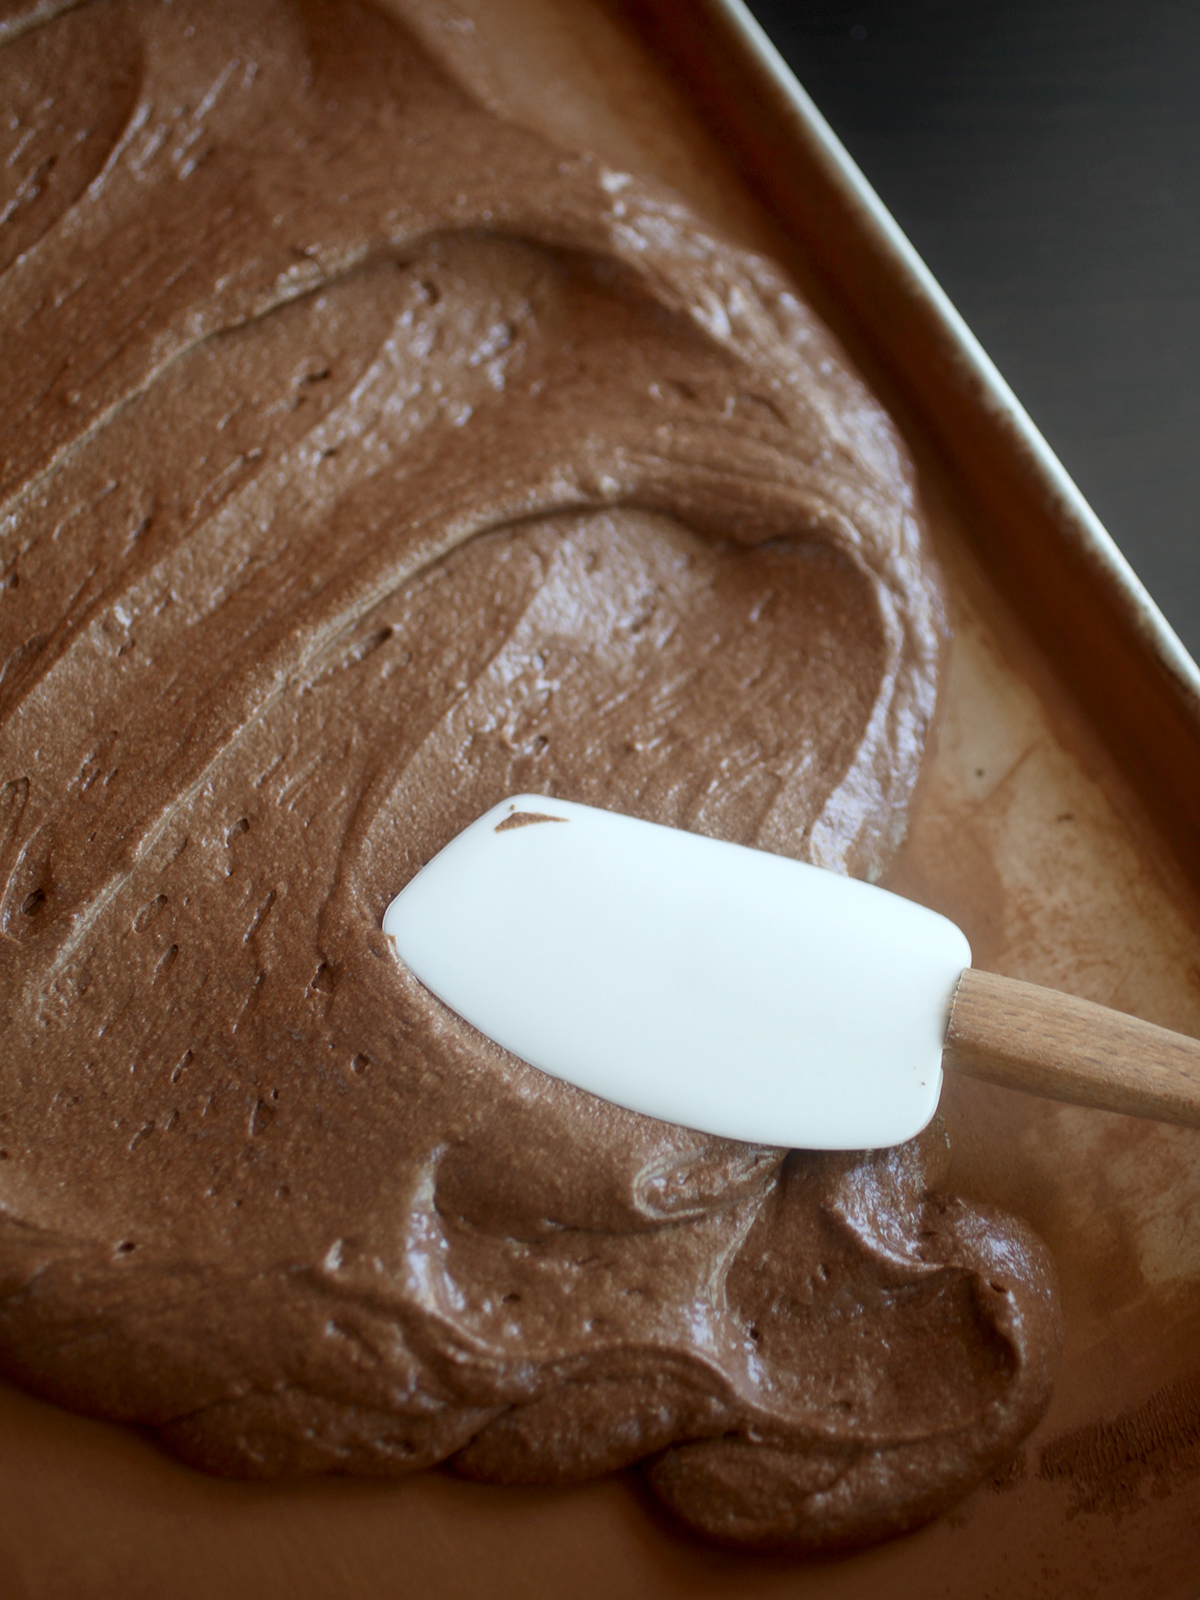
Pipe thick lines of the marshmallow cream filling on top of the cake and then spread evenly with an offset spatula to avoid getting too many cake crumbs mixed in the filling.
To transfer the second layer, you can't flip the baking dish this time, so place the cake layer on the rimless cookie sheet and carefully transfer using the cookie sheet for support and your hands for guidance. Get it right the first time because you really can't readjust it at this point. Remove the parchment paper on the top layer.
Make the GANACHE In a heatproof bowl set over, but not touching barely simmering water in a saucepan, melt the butter and chocolate with the corn syrup and cream, stirring constantly with a wire whisk until smooth. Let cool slightly.
Pour prepared chocolate ganache on top of the cake, spread evenly and allow to set. When almost set and still slightly shiny, cut the cake into 24 even cake squares using a sharp unserrated knife. Run the knife under hot water in between each cut for smooth edges.
Make the VANILLA ICING In a small bowl, stir together the confectioners’ sugar, vanilla and milk until smooth. You can add a little more sugar or milk to make the consistency thicker or thinner.
Finally, pipe vanilla icing swirls across each row of squares using a decorating bag fitted with a #3 Wilton tip. Serve squares using a small spatula and enjoy!
I have this mini spatula I use all the time. It’s one of my favorite kitchen tools. Especially for brownies and snack cakes like this one. Highly recommend.
And I highly recommend taking a big bit out of this cake. I think you’ll fall in love!
Great recipe! A little bit of effort but worth it. I made this almost as written-I baked it up in one 9×13 pan @325F convection, took about 30”, instant read thermometer was 197F. After the cake cooled completely on a wire rack, I placed it in the freezer for a bit to firm it up before I torted it, then assembled in the same (cleaned) 9×13 pan. I did flip it so the bottom was now the top so I had a flatter surface; did require a little care as to not tear/break anything. Everything came together nicely, although my decorative icing was too loose and the loops filled in, so it looked like a bunch of weird squiggly lines. Cake was soft, with a tight crumb, and good chocolate flavor. The filling was a tad too sweet for me, but others liked it (I still might cut down on either the sugar or fluff next time). Looking forward to making this for potlucks; dinner parties; even work events.
I made this cake for my mother’s birthday dinner. It was a HUGE hit! I’d just like to note: for me, taking the cakes out of the pan proved difficult! They were SO moist ( I know, terrible problem to have) that both of mine split. Totally fine, as I managed to get them together just fine, and once the filling & ganache were on you couldn’t tell. I just wondered if you had any tips to avoid this?
Thanks!
Best way to make ganache ever!! Fool proof. I just used my heavy bottomed sauce pan but it worked beautifully and the marshmallow frosting was nostalgic in all the best ways. Great components for a tasty treat!!!
Divide batter into 2 (9×13) pans. You only have to flip the cake out once and there’s no measuring or cutting the cake. Baking them side by side is so much easier and quicker.
Sooooo good! If you want to make this cake, do it! You will not regret it.
The ganache was not too dark. The filling is very sweet and balances it out nicely. The cake was super moist and I love that it did not ask for coffee.
I had trouble getting the white frosting to mix with that little bit of milk so mine was runny and the swirls didn’t turn out as pretty. Next time I will be more careful to achieve those pretty swirls.
Make this cake RIGHT NOW. Do not make the mistake that I made by bookmarking it and waiting 2 years to finally make it (I was lazy & thought I would eventually make it).
You will be so delighted, and everyone will think you’re a f*!@ing GENIUS CHEF. The compliments and the amazed looks will make you feel like either a King/Queen OR it will really embarrass you. Either way, it will be memorable! Also, you can give half of it away to a friend or neighbor, and it will make their day! (We used all of the ganache on the top, but will use half or two-thirds of it next time–it made a pretty thick layer, like a little bit too rich for our taste buds.)
I was wondering how well these would freeze. Most likely I would try to freeze either 1 or 2 squares together. I’m mostly wondering about the marshmallow filling. I know everything else freezes fine. This is a lot of squares for only a couple people. Has anyone tried freezing them? Thanks
Thanks for this recipe. I made one for my birthday and it turned out great. I did simplify a couple of steps. I used 2 cake mixes from Dunkin Heinz. Then I used 2 cans of Pillsbury vanilla marshmallow frosting mixed with 7 oz of marshmallow fluff. Besides filling, I ended up crumb coating the entire cake with it. Then after refrigerating, I made the Ganash using bittersweet Ghirardelli (60% cacao).
Love this receipi! For plating, you may also put those nice square chocolate pieces to an acacia square plate. Bought from a Innovatronix store in Amazon.
I can’t wait to make this for my husband’s birthday! A little confused, though, about placing the second layer on top of the marshmallow crème layer. I seem to be missing when this layer gets flipped over. I’m assuming you flip this layer as you are placing it on top of the marshmallow creme, since afterwards you are peeling off the parchment, which is now on the top? If anyone could help, I would really appreciate it. Thank you!
Looks yummy! Definitely going to try. In the finished product, is the filling very marshmallow fluff tasting or do the other ingredients mellow it out?
I bet an ermine frosting would taste yummy in there, too!
This site focuses on fun and easy baking. You’ll find ideas for cake pops (a Bakerella creation), cakes, cupcakes, cookies, and more. You may even find yourself smiling from all the sweetness.


Thank you for sharing such an informative
Great recipe! A little bit of effort but worth it. I made this almost as written-I baked it up in one 9×13 pan @325F convection, took about 30”, instant read thermometer was 197F. After the cake cooled completely on a wire rack, I placed it in the freezer for a bit to firm it up before I torted it, then assembled in the same (cleaned) 9×13 pan. I did flip it so the bottom was now the top so I had a flatter surface; did require a little care as to not tear/break anything. Everything came together nicely, although my decorative icing was too loose and the loops filled in, so it looked like a bunch of weird squiggly lines. Cake was soft, with a tight crumb, and good chocolate flavor. The filling was a tad too sweet for me, but others liked it (I still might cut down on either the sugar or fluff next time). Looking forward to making this for potlucks; dinner parties; even work events.
That’s so cool. Looks tasty.
How long of a baking time for the 2 9 x 13 pans – really good tip thank you :)!
Will be attempting to bake this one for my upcoming birthday!
Ready recipe for the coming holidays!
These look incredible, cant wait to make some!
Nice recipe Miss Angie!
I made this cake for my mother’s birthday dinner. It was a HUGE hit! I’d just like to note: for me, taking the cakes out of the pan proved difficult! They were SO moist ( I know, terrible problem to have) that both of mine split. Totally fine, as I managed to get them together just fine, and once the filling & ganache were on you couldn’t tell. I just wondered if you had any tips to avoid this?
Thanks!
Best way to make ganache ever!! Fool proof. I just used my heavy bottomed sauce pan but it worked beautifully and the marshmallow frosting was nostalgic in all the best ways. Great components for a tasty treat!!!
Hey girl great tip!! Worked like a charm and not so fussy, thanks for sharing!!! ?
Great recipe. Perfect for summer netflix and chill.
Great recipe. Perfect for summer netflix and chill!
The entire family gobbled up this cake! It was delicious!
Delicious! Yummy cake recipe
Divide batter into 2 (9×13) pans. You only have to flip the cake out once and there’s no measuring or cutting the cake. Baking them side by side is so much easier and quicker.
Hey girl great tip!! Worked like a charm and not so fussy, thanks for sharing!!! ?
Hey girl great tip!! Worked like a charm and not so fussy, thanks for sharing!!! ?
How long did you bake the 9 x 13 pans Tina?
Chocolate and marshmallow? Say no more. Pinning this to make ASAP.
Sooooo good! If you want to make this cake, do it! You will not regret it.
The ganache was not too dark. The filling is very sweet and balances it out nicely. The cake was super moist and I love that it did not ask for coffee.
I had trouble getting the white frosting to mix with that little bit of milk so mine was runny and the swirls didn’t turn out as pretty. Next time I will be more careful to achieve those pretty swirls.
Thank you for the wonderful recipe!
Make this cake RIGHT NOW. Do not make the mistake that I made by bookmarking it and waiting 2 years to finally make it (I was lazy & thought I would eventually make it).
You will be so delighted, and everyone will think you’re a f*!@ing GENIUS CHEF. The compliments and the amazed looks will make you feel like either a King/Queen OR it will really embarrass you. Either way, it will be memorable! Also, you can give half of it away to a friend or neighbor, and it will make their day! (We used all of the ganache on the top, but will use half or two-thirds of it next time–it made a pretty thick layer, like a little bit too rich for our taste buds.)
I was wondering how well these would freeze. Most likely I would try to freeze either 1 or 2 squares together. I’m mostly wondering about the marshmallow filling. I know everything else freezes fine. This is a lot of squares for only a couple people. Has anyone tried freezing them? Thanks
So fun!
Thanks for this recipe. I made one for my birthday and it turned out great. I did simplify a couple of steps. I used 2 cake mixes from Dunkin Heinz. Then I used 2 cans of Pillsbury vanilla marshmallow frosting mixed with 7 oz of marshmallow fluff. Besides filling, I ended up crumb coating the entire cake with it. Then after refrigerating, I made the Ganash using bittersweet Ghirardelli (60% cacao).
Hi! How “dark tasting” is the ganache? I want to make this for someone that’s not fond of dark chocolate.
Can’t wait to try this. One suggestion though. Freezing the cake layers will
Make for super easy handling.
Holy cow this cake was such a hit!!! We absolutely loved it and will be making it again for sure.
Looks delicious!
Love this receipi! For plating, you may also put those nice square chocolate pieces to an acacia square plate. Bought from a Innovatronix store in Amazon.
I’m making a day before eating. Should I refrigerate?
Looks Yummy. love this snack cake.
It was awesome post. waiting for next post.
Congratulations, your site is great, just heaven for those who love sweets like me.
Yummy Mostess Snack Cake
You are great Angie in what you do. When I look at the pictures with your kitchen works, I can not get over this fabulous :) I am your fan!
I can’t wait to make this for my husband’s birthday! A little confused, though, about placing the second layer on top of the marshmallow crème layer. I seem to be missing when this layer gets flipped over. I’m assuming you flip this layer as you are placing it on top of the marshmallow creme, since afterwards you are peeling off the parchment, which is now on the top? If anyone could help, I would really appreciate it. Thank you!
Wow, it’s look like kinder delice :)
This looks delicious! Could this be made into a round cake?
OMG, looking at that cake is making my eyes well up. It looks so moist and chocolate-y. It looks AMAZING!
Looks yummy! Definitely going to try. In the finished product, is the filling very marshmallow fluff tasting or do the other ingredients mellow it out?
I bet an ermine frosting would taste yummy in there, too!
Can I use dark cocoa cocoa powder instead?
A-M-A-Z-I-N-G!!!! So delicious!
This looks so good even first thing in the morning! LOL!
Omg so yummy?
Looks beautiful and hope I can make it. Love it!
Looks so delicious! I love snack cakes!