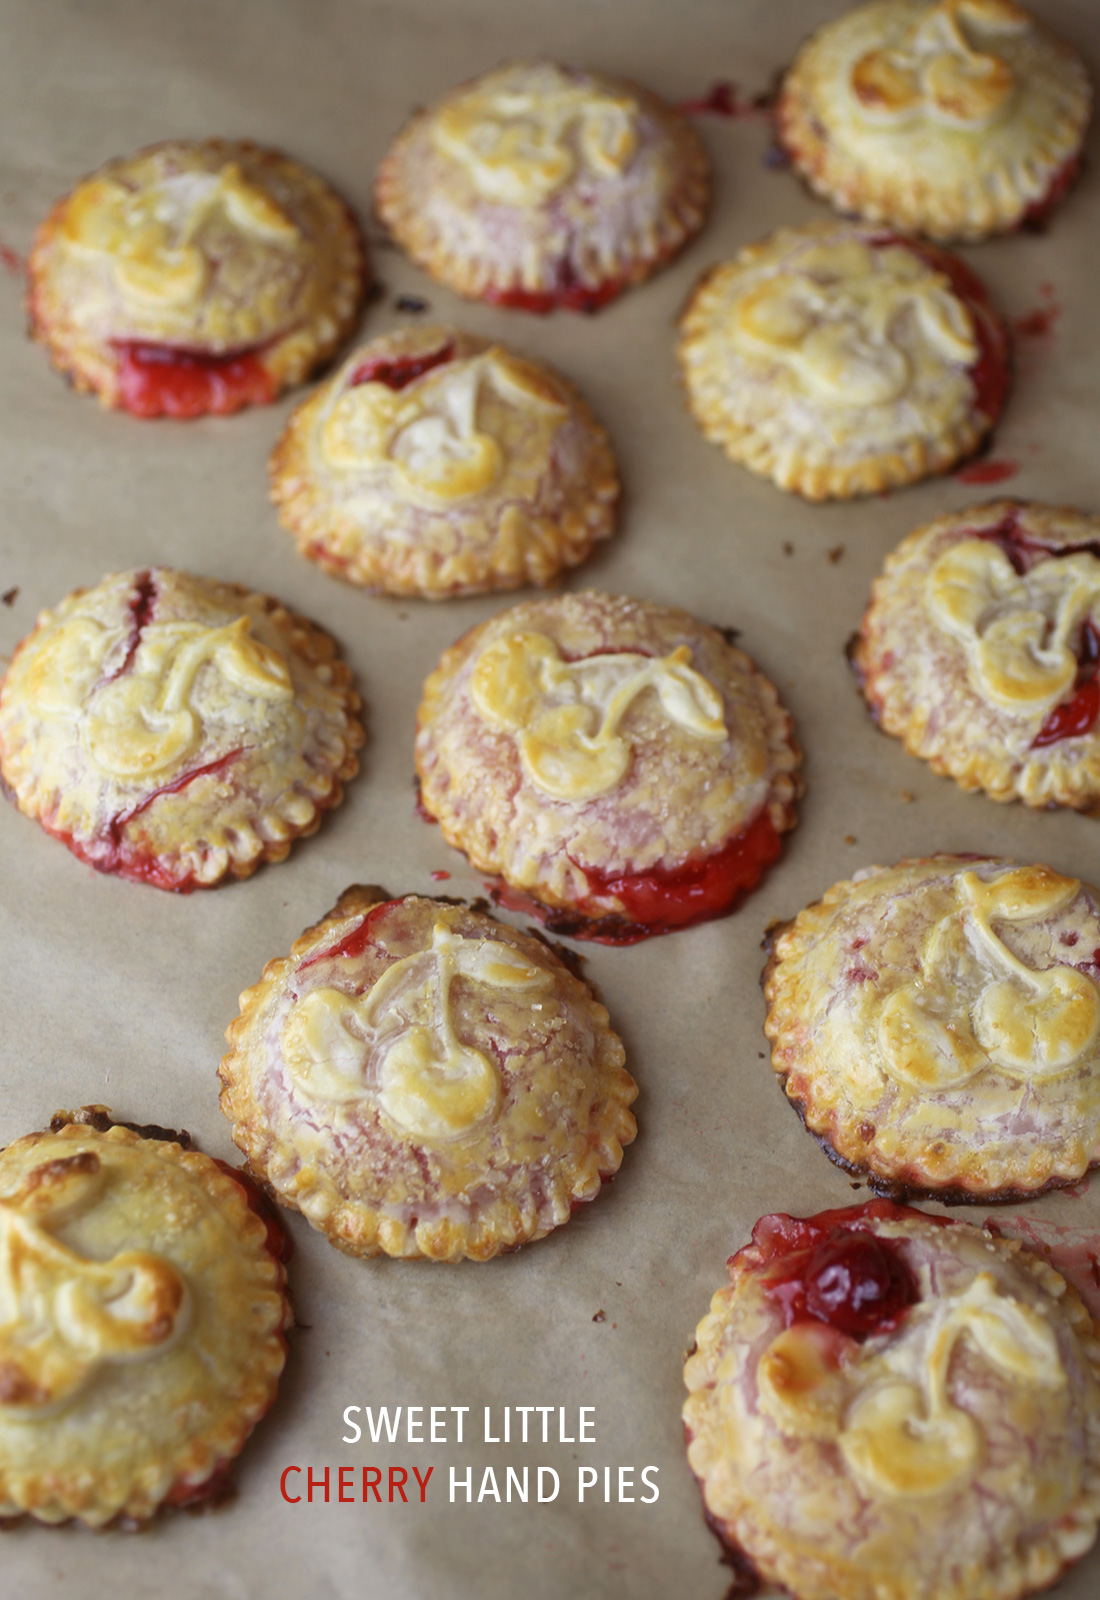
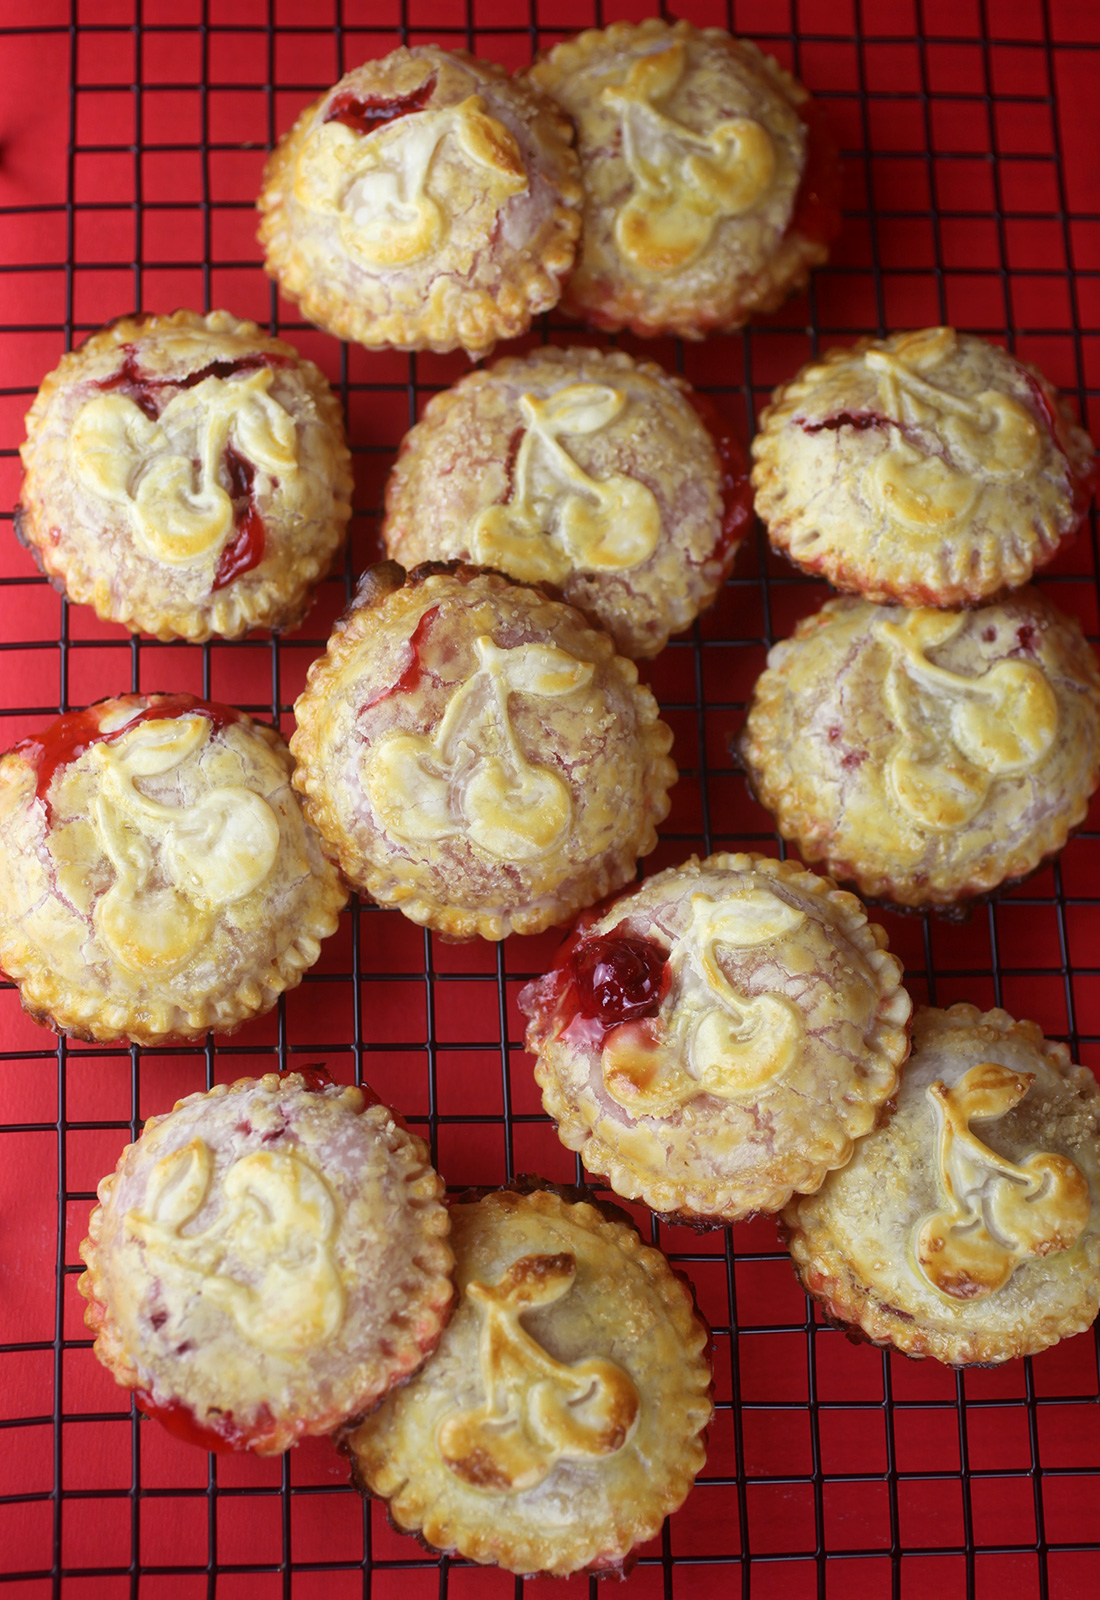
Not necessarily homemade, but definitely handmade. And handy! These sweet little cherry hand pies are so good, so easy, and so much fun to eat.
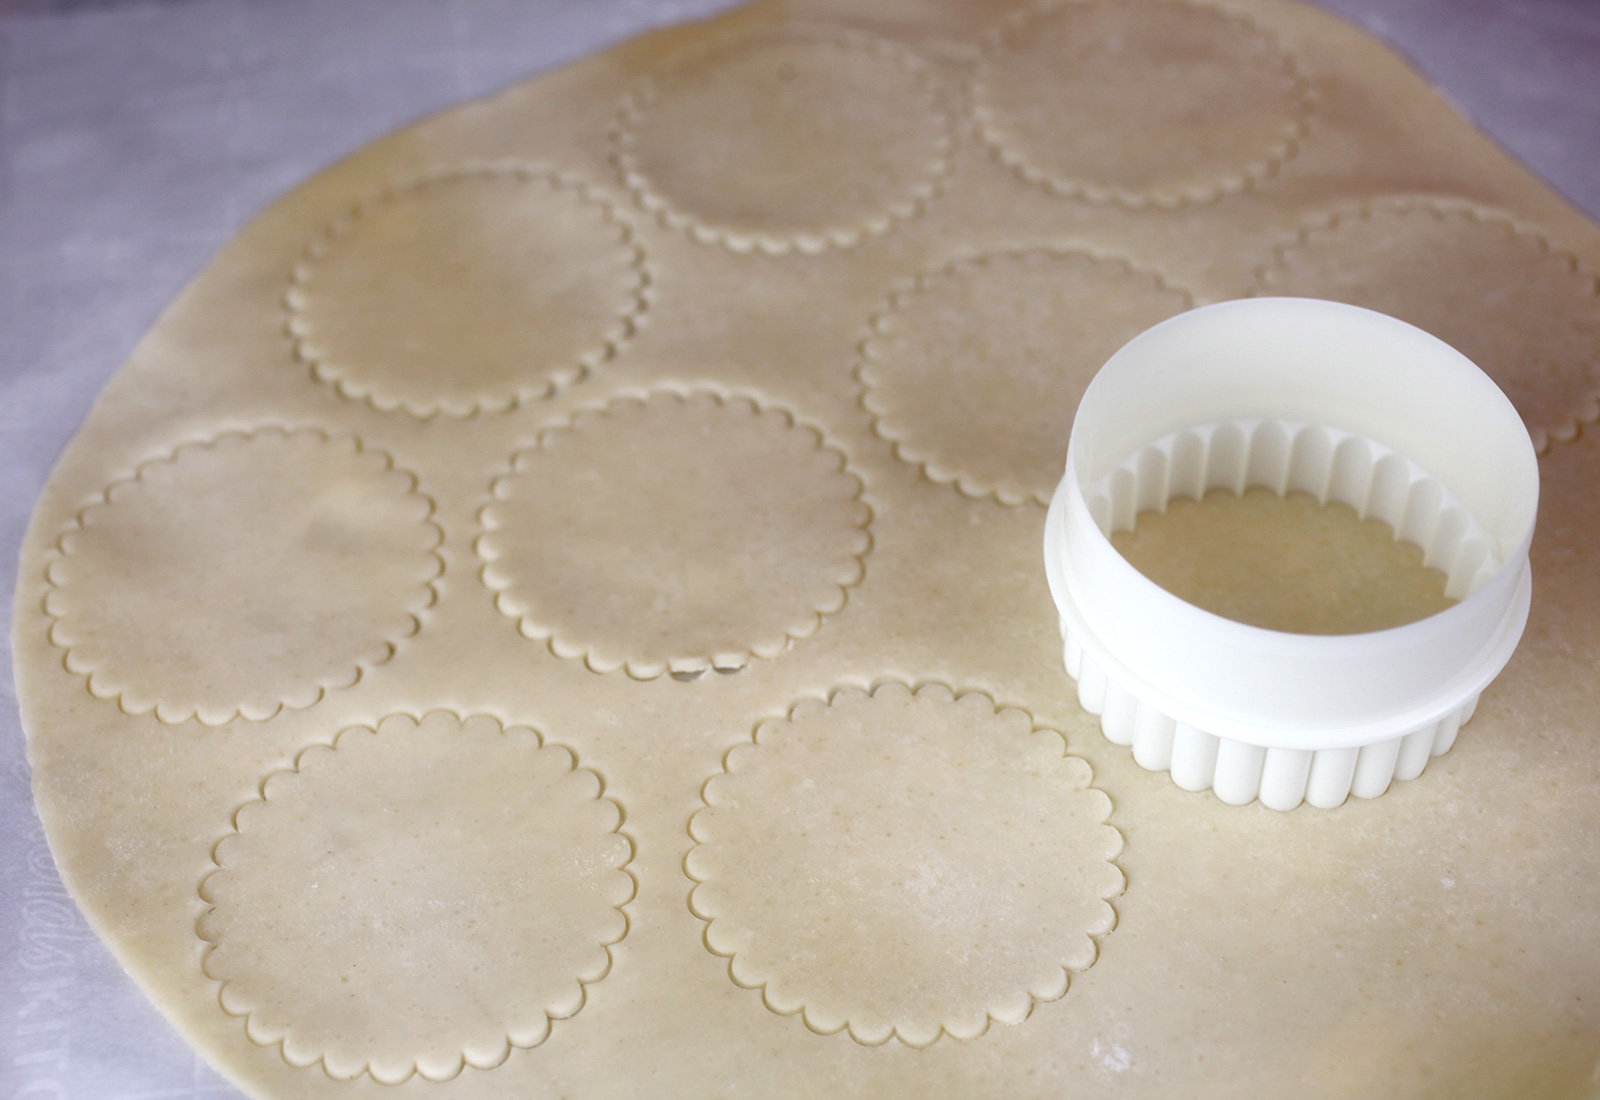
I used refrigerated pie crusts and cherry pie filling for these tasty treats. I just rolled them slightly thinner than they come out of the package.

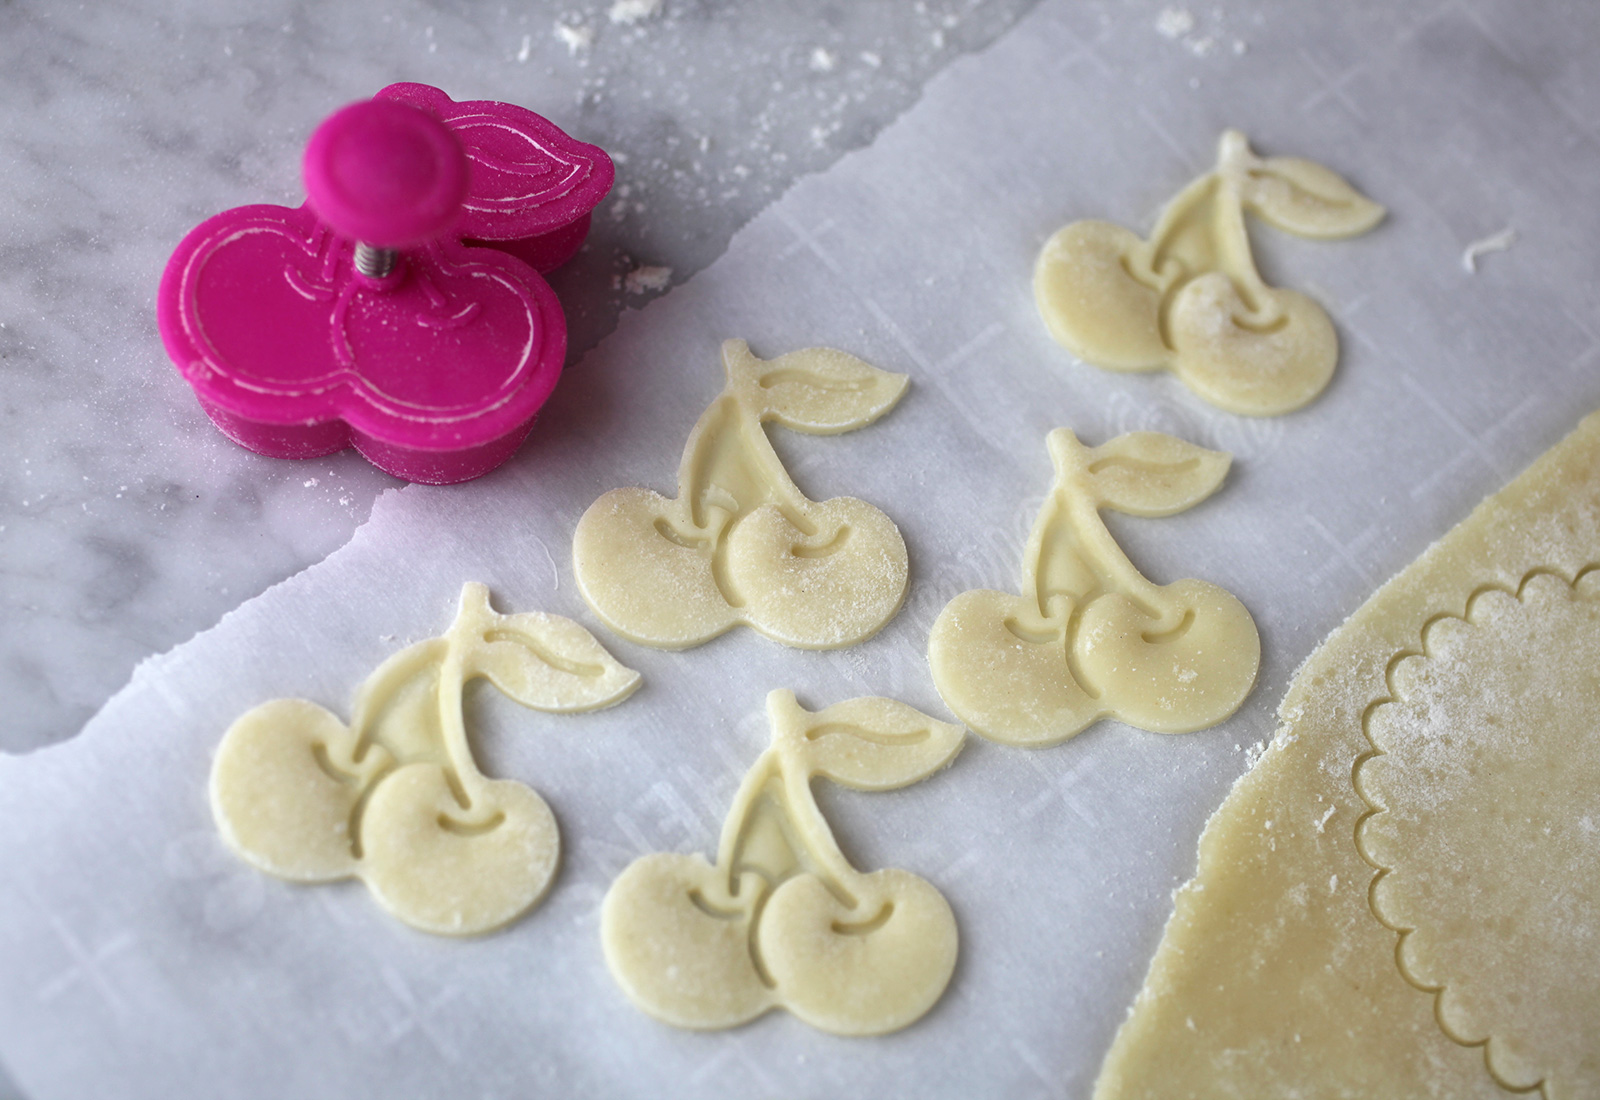
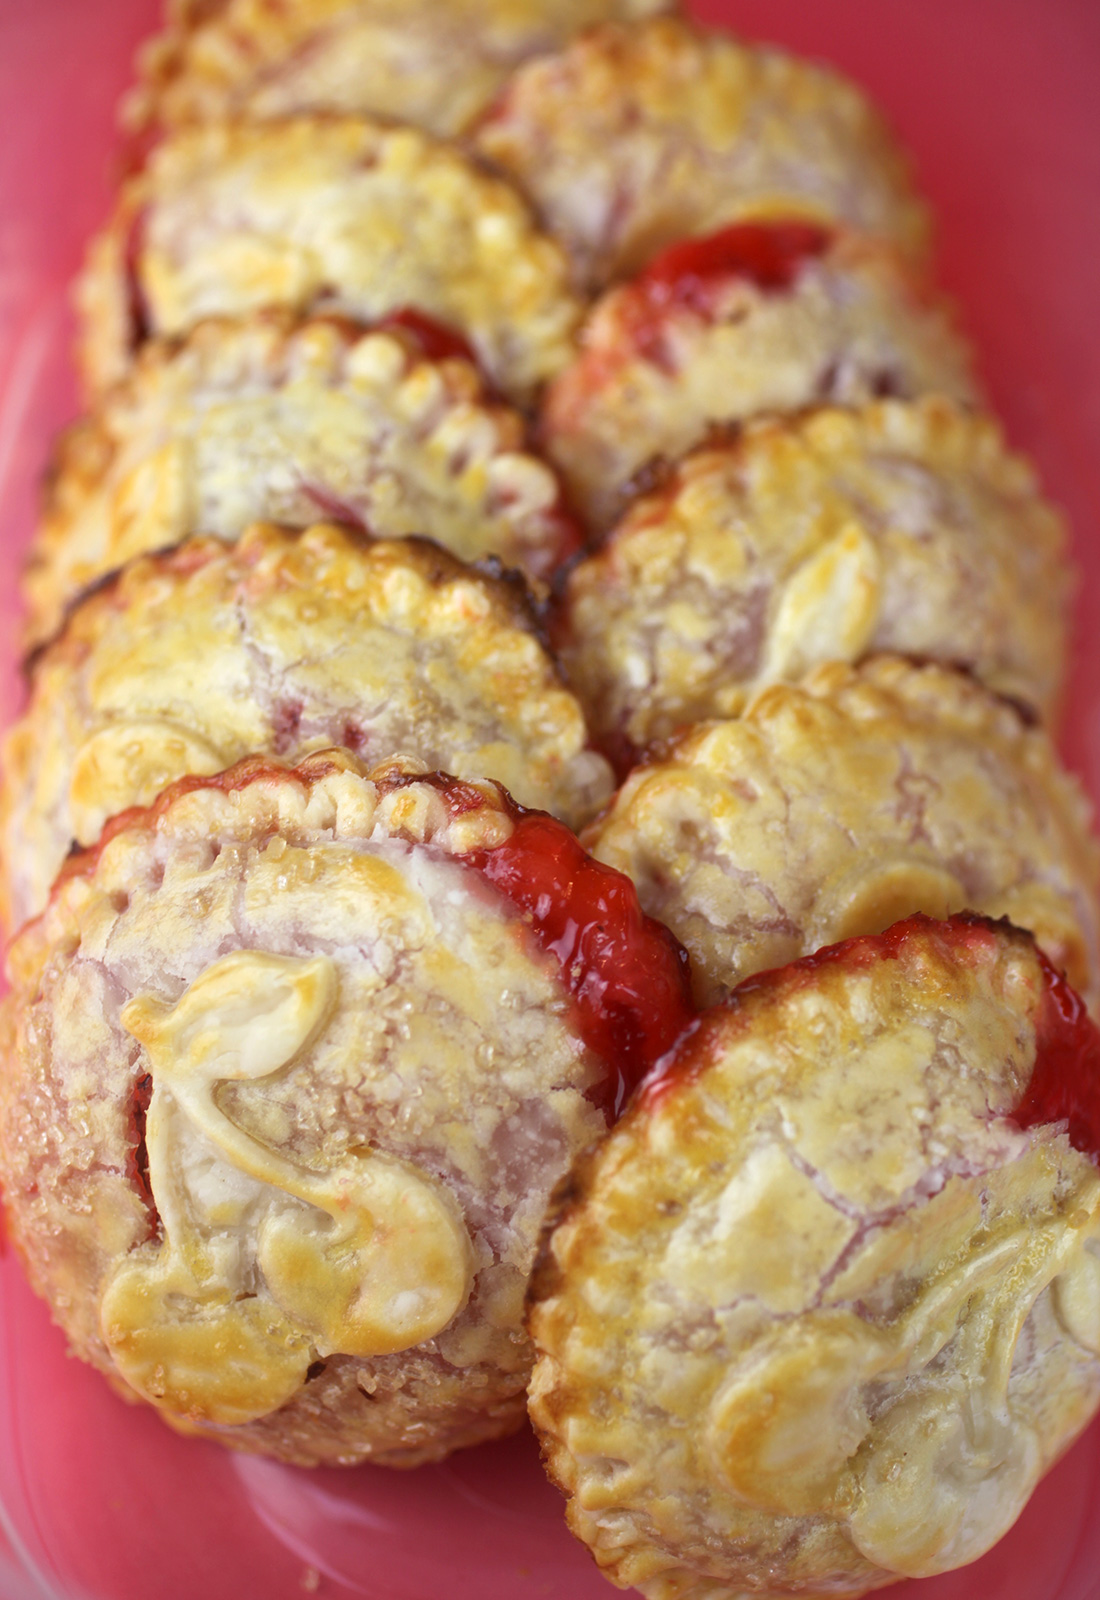
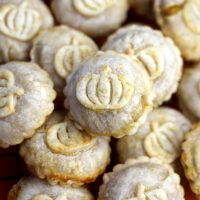
You can stuff them with your favorite filling, but I’ve been dying to use this little cherry cutter for something and well, that’s all she wrote. I mean so super cute.
Here’s the cutter I found on amazon.
The pies themselves aren’t very big so you can definitely eat them in just a couple of bites. Yum and Yay!
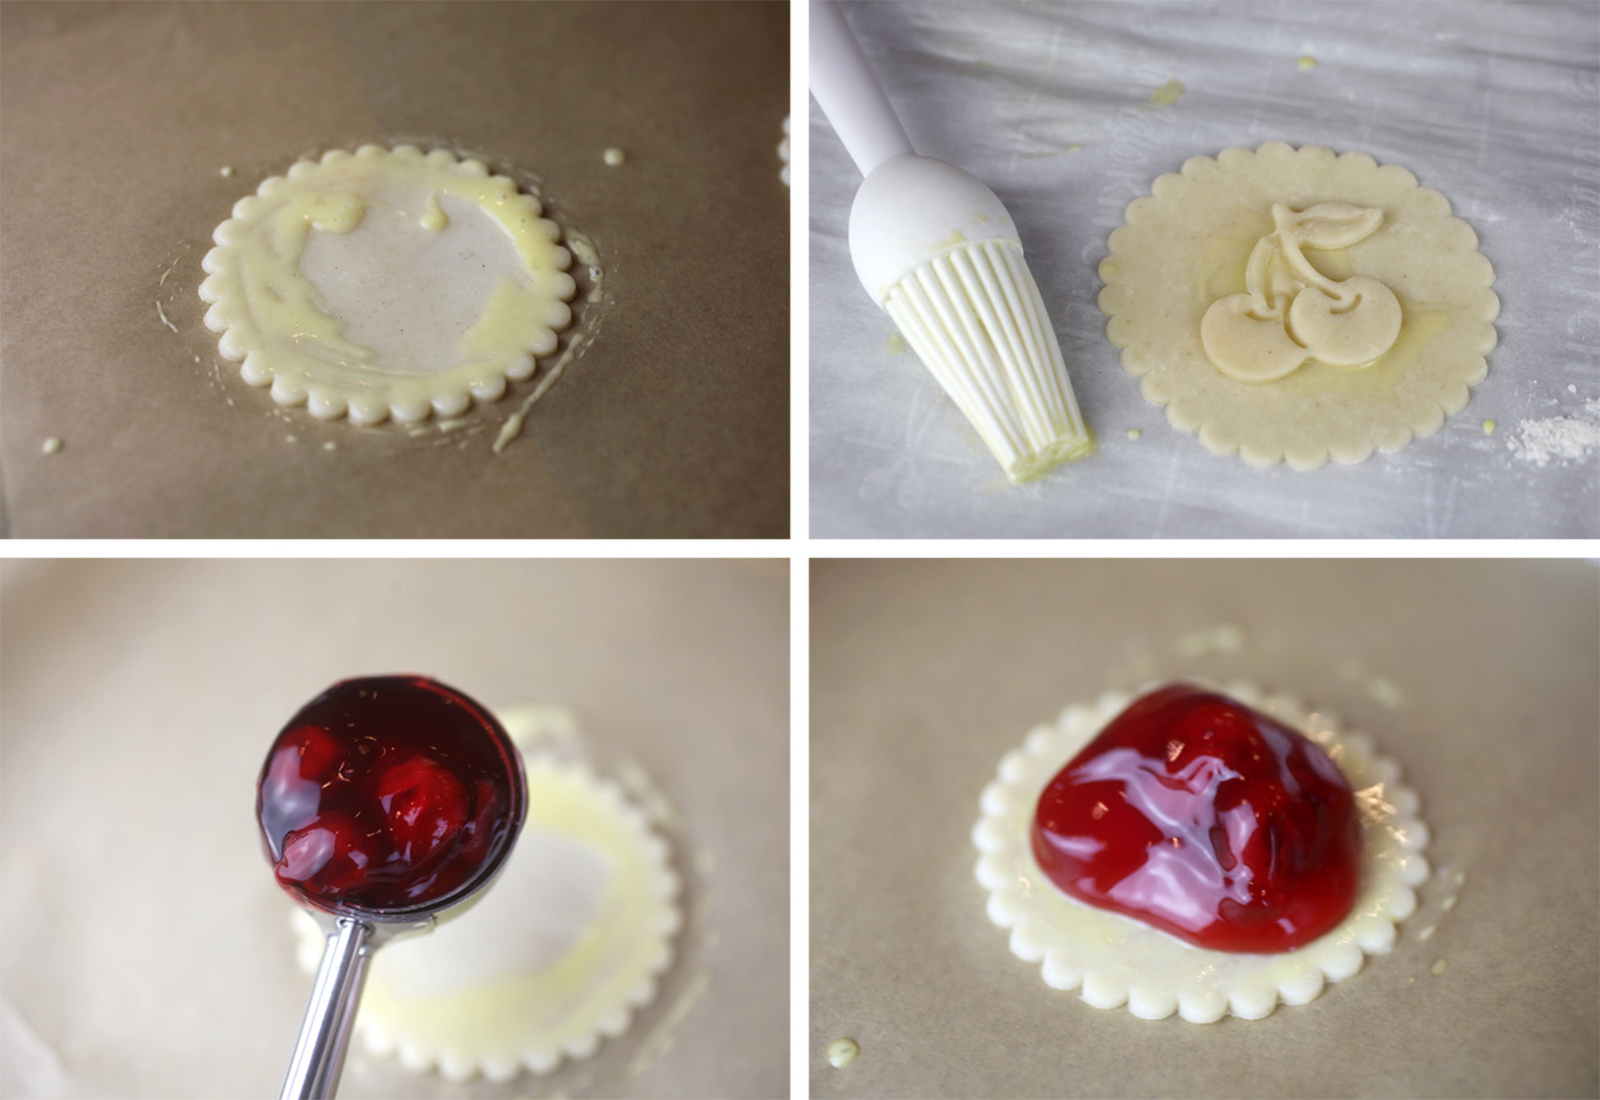
Cut out two circle shapes for each pie. With the extra pie crust, cut out fun shapes like these cherries to place on top. Place a circle shape on a parchment paper covered baking sheet and brush the edges of the bottom pie crust with an egg wash. Brush the top center of the second pie crust circle and place the cherry shape right on top so it will attach when baking. Fill the centers of the pies with a small cookie scoop full of cherry pie filling.
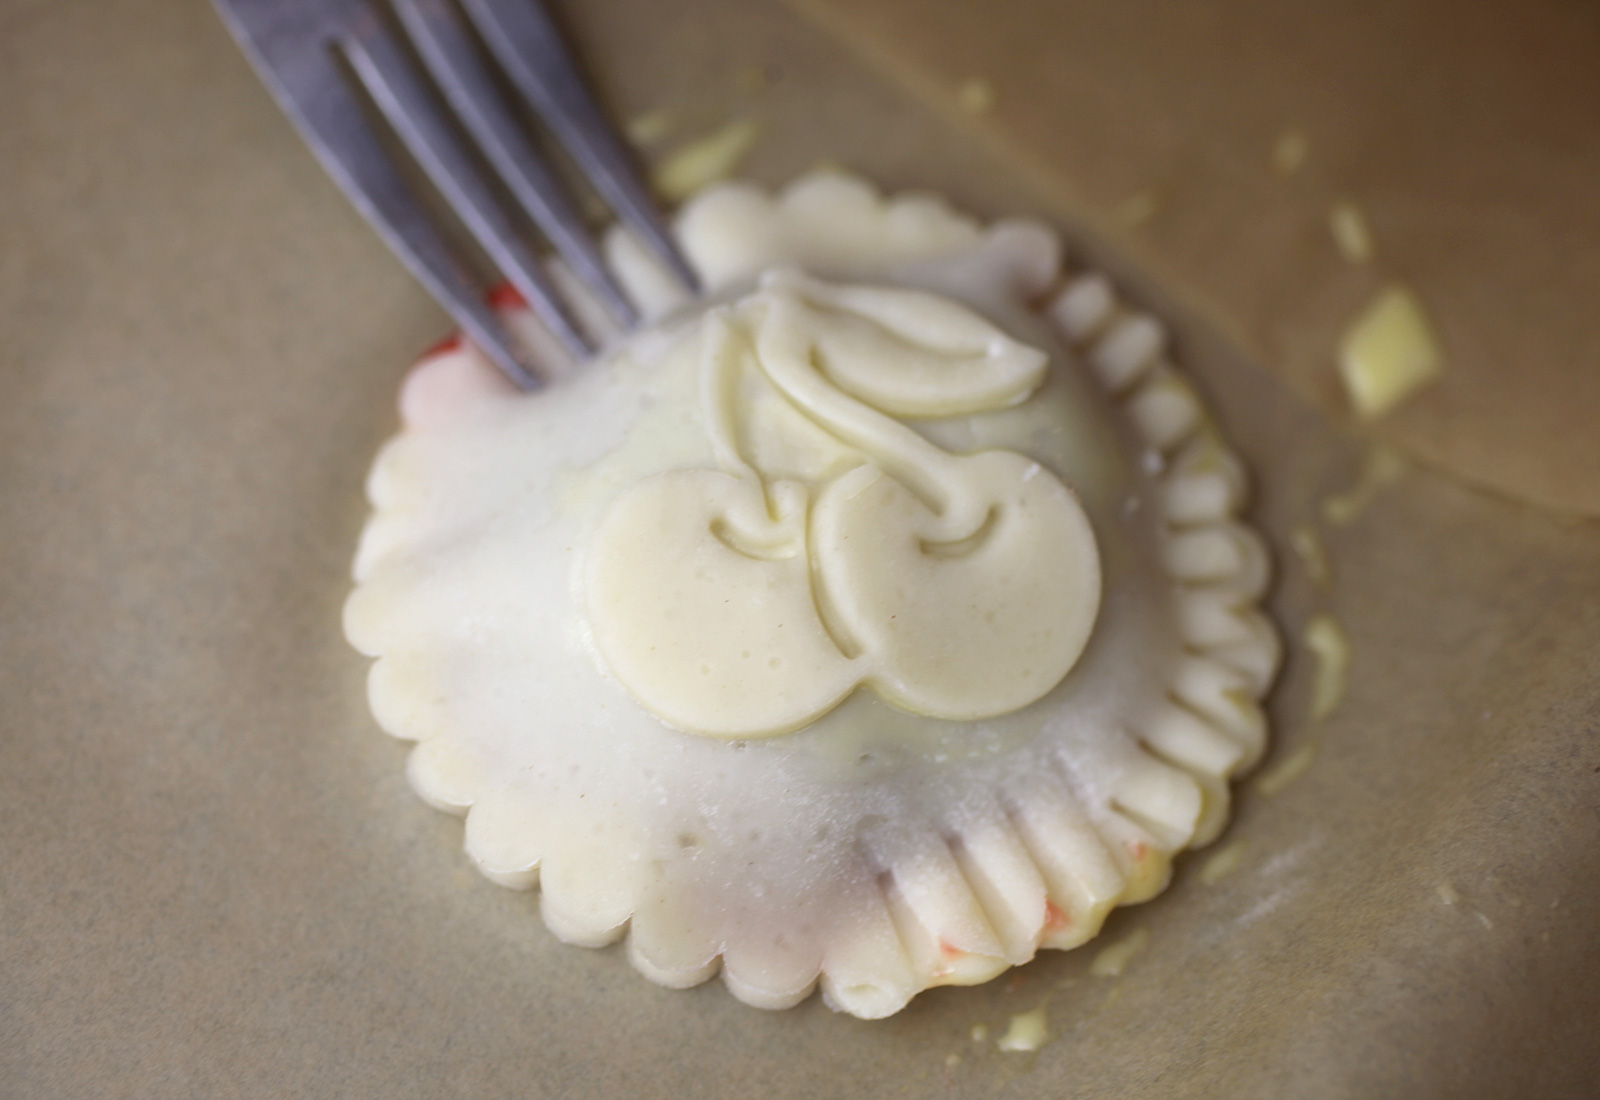
Then place the cherry-decorated pie crust circle right on top. Carefully press the tines of a fork around the edges to seal it all in.
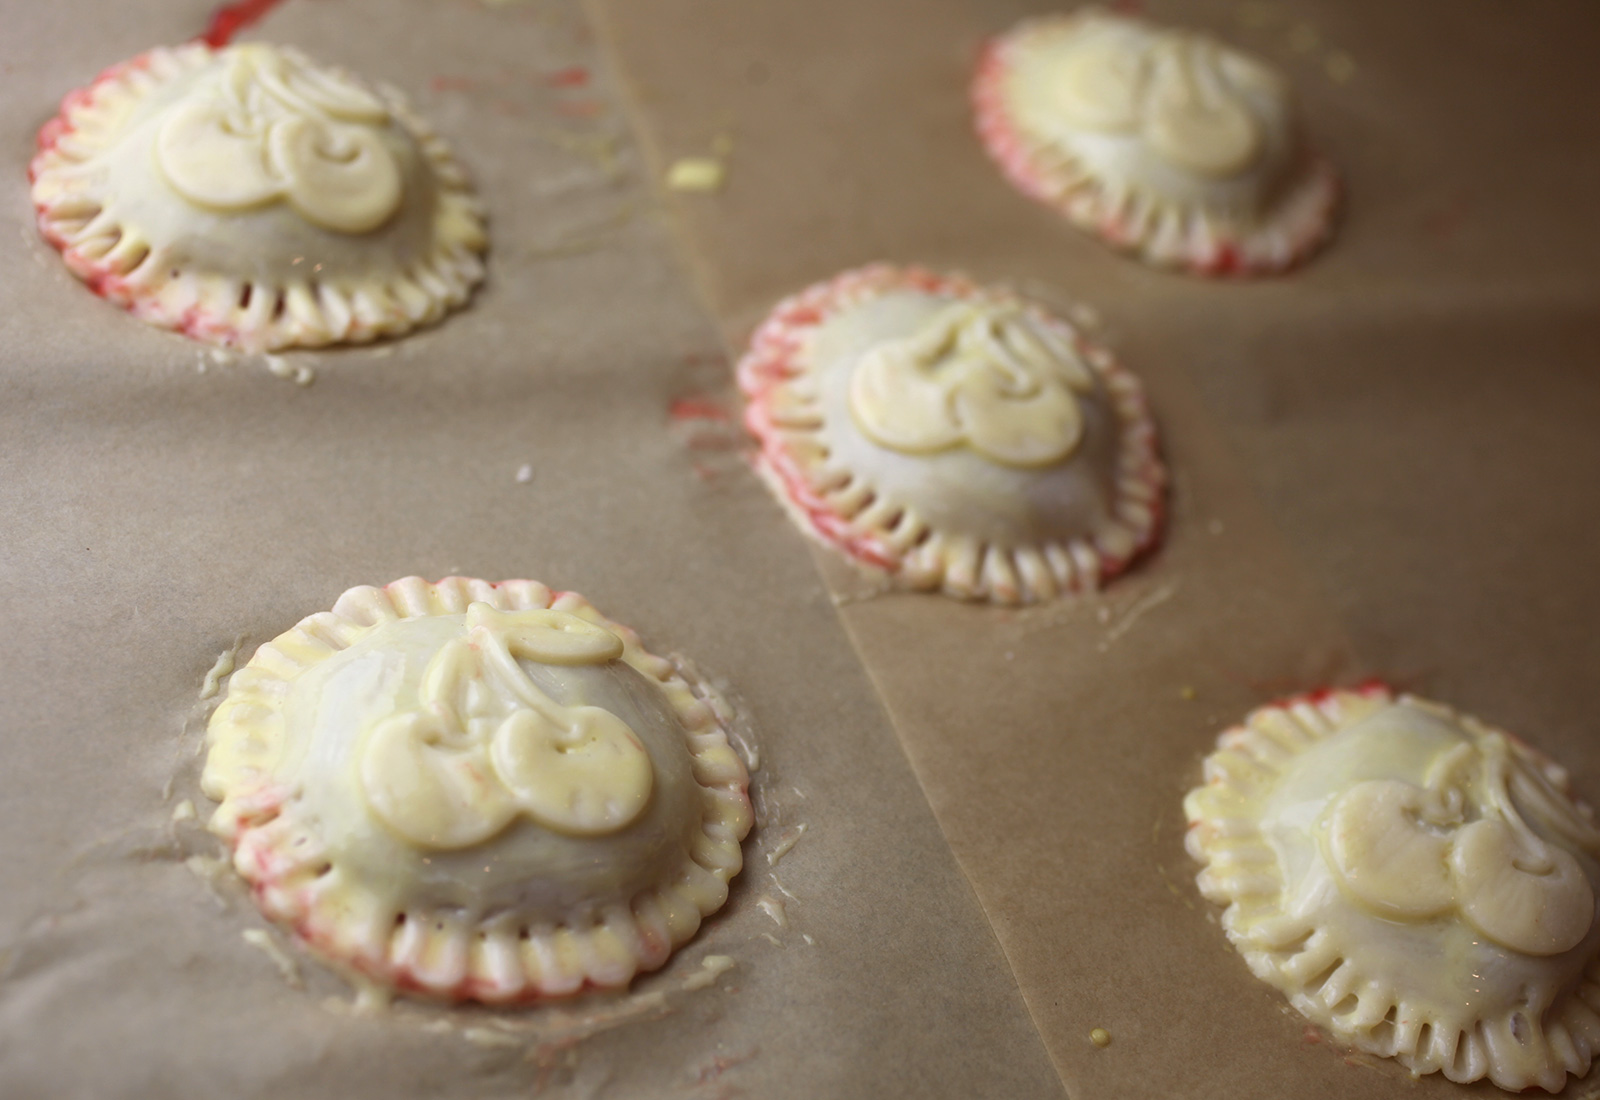
Don’t worry if some of the filling squeezes out while you are sealing them. Just wipe off any excess before baking. And don’t forget to give each prepared pie a final brush of egg wash for a nice golden brown color when baked.
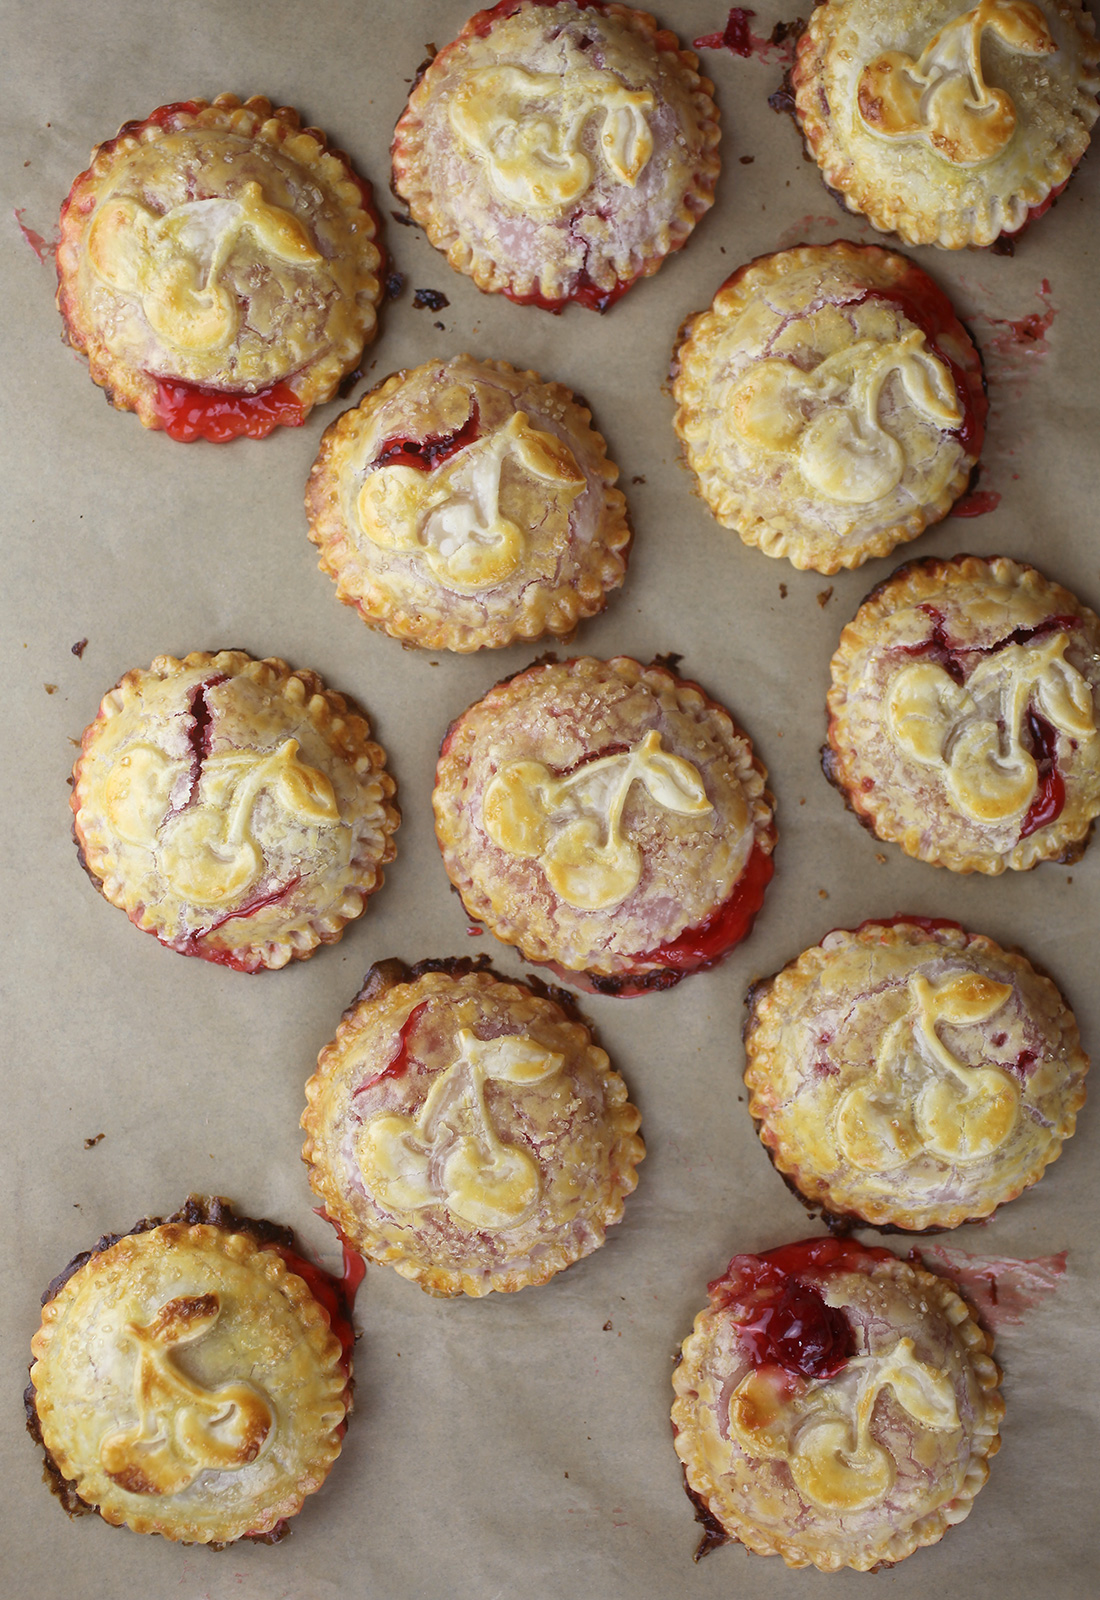
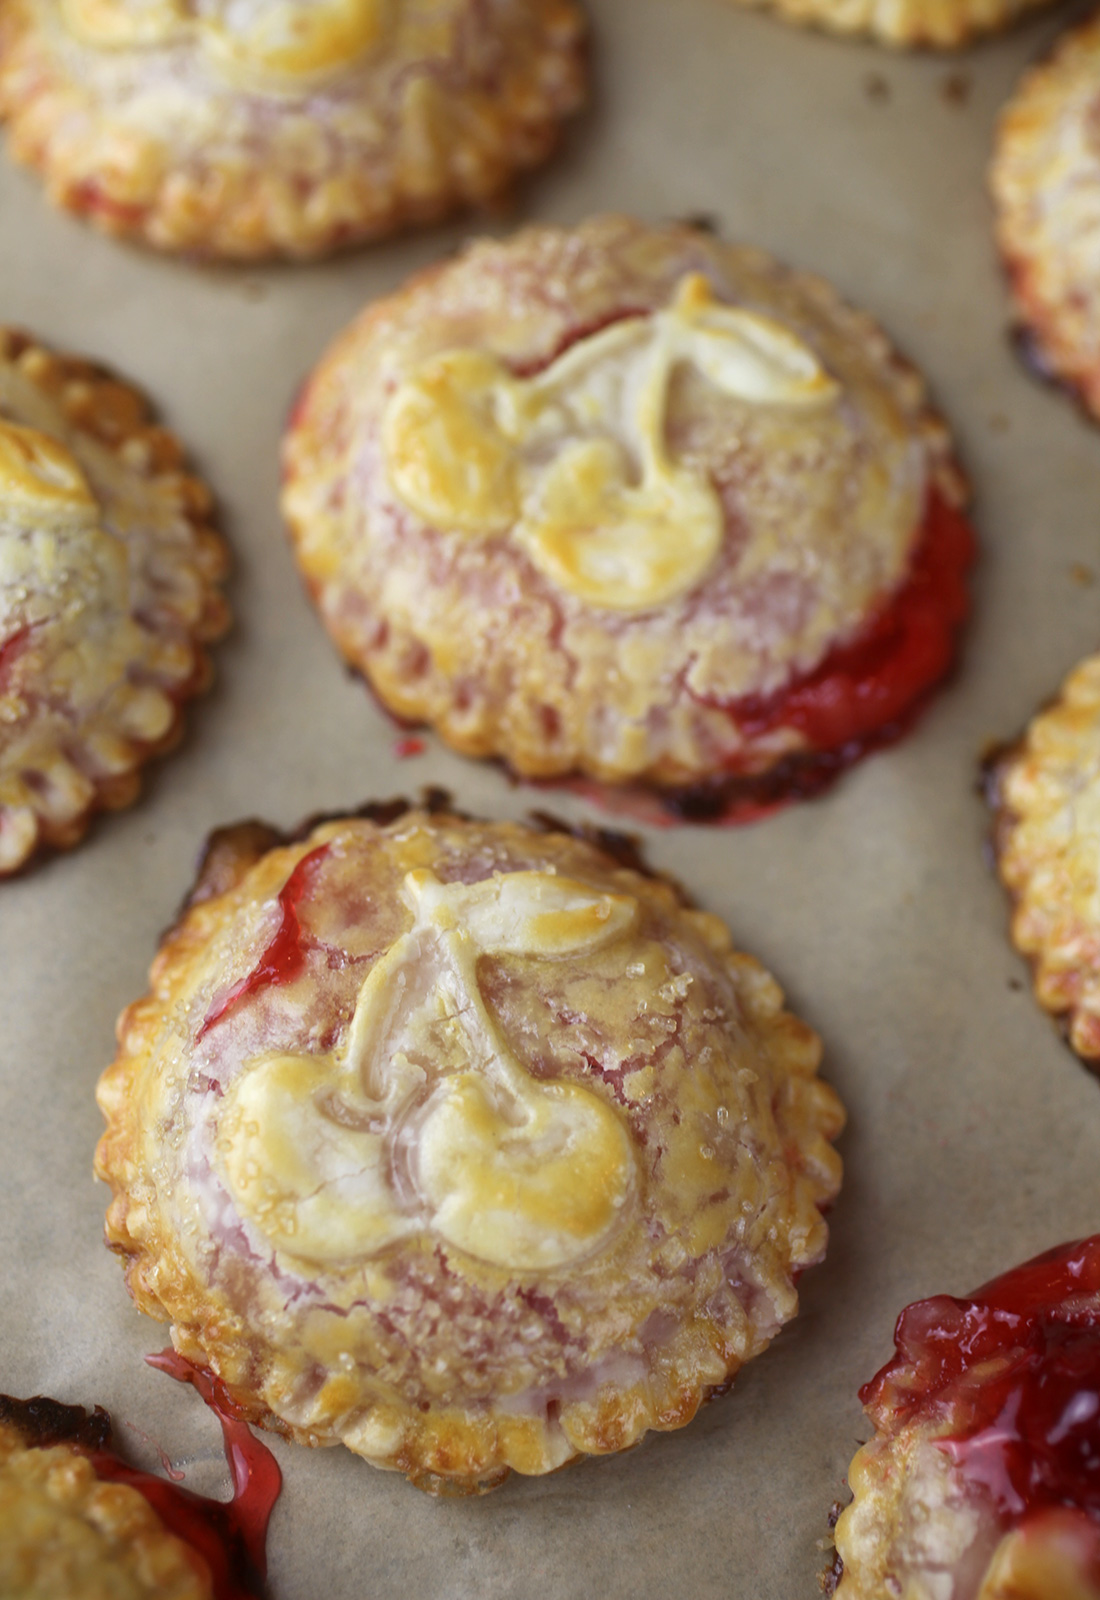
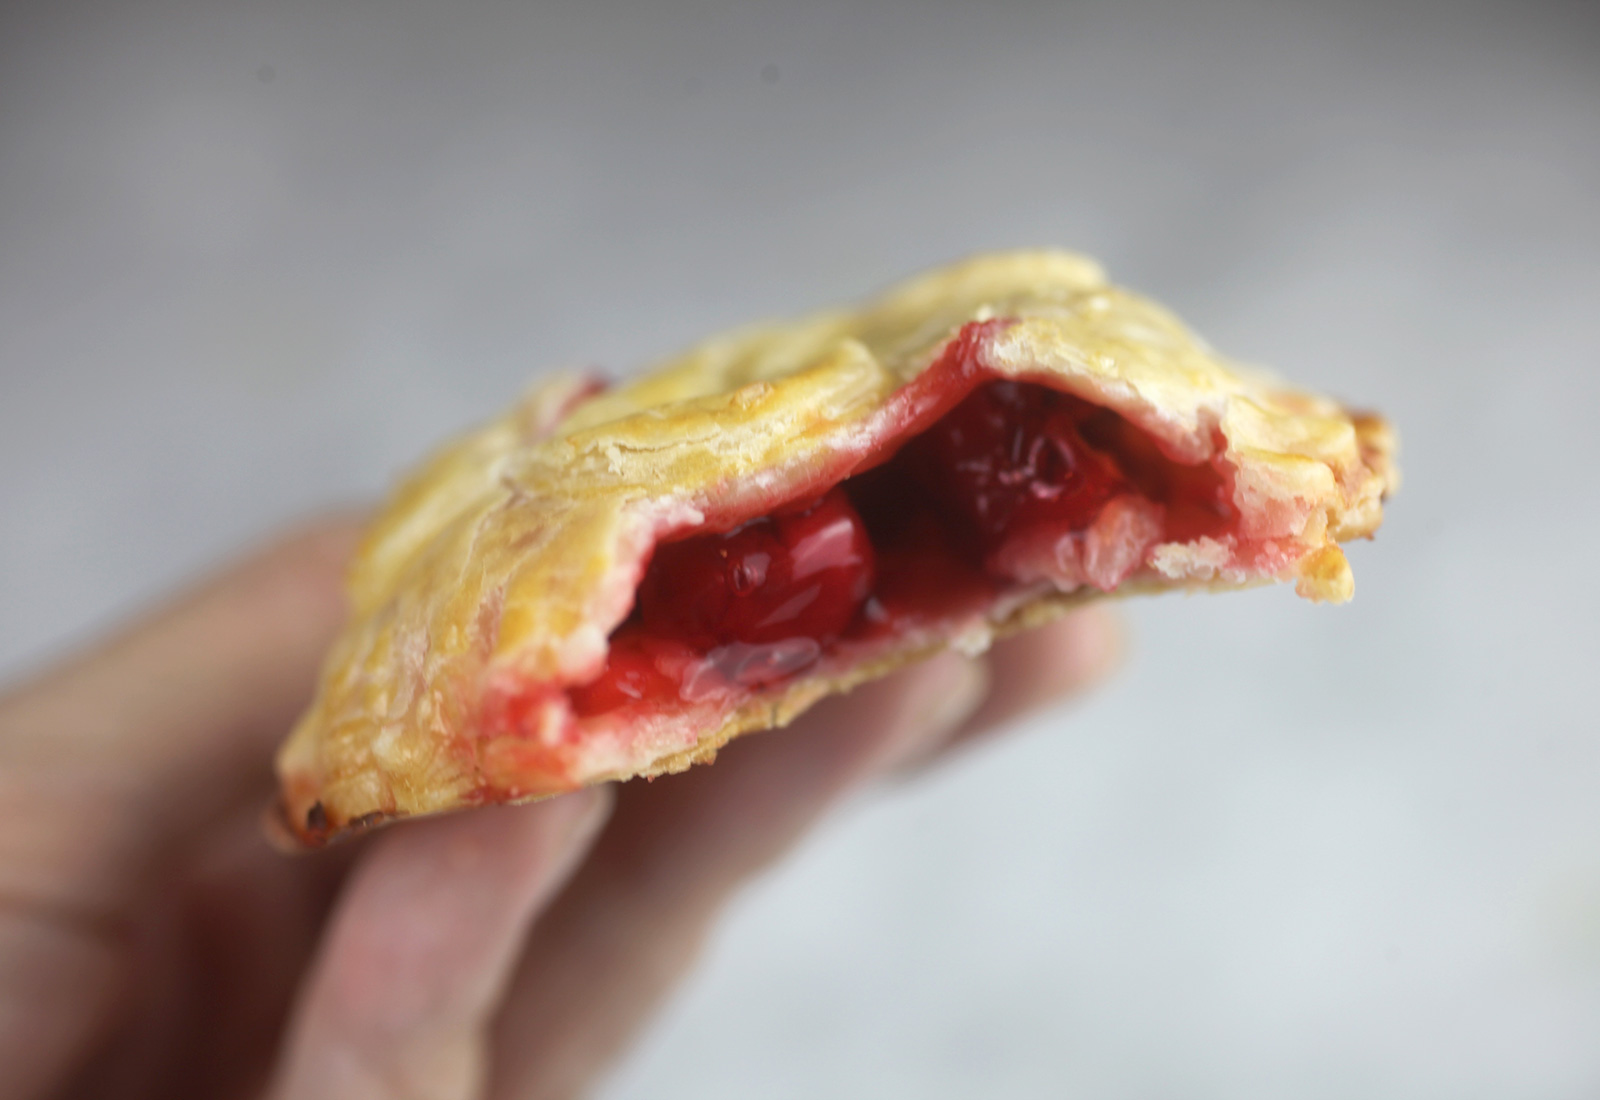
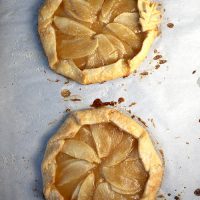
See! The pies will break open slightly to reveal the cherry flavor inside.
That’s helpful if you weren’t paying attention to these adorable cherry cutouts for the flavor cue. These would also be fun with little phrases, but cutting out tiny letters would take a lot more time.
These were so good for such a quick little treat!
I packed up a bunch of them for my mom (cherry fan all the way) and she absolutely loved them.
Makes 10 pies with cherry decorations, 12 without. And if you reroll the excess dough scraps, you can get 12 pies with decorations, 14 without.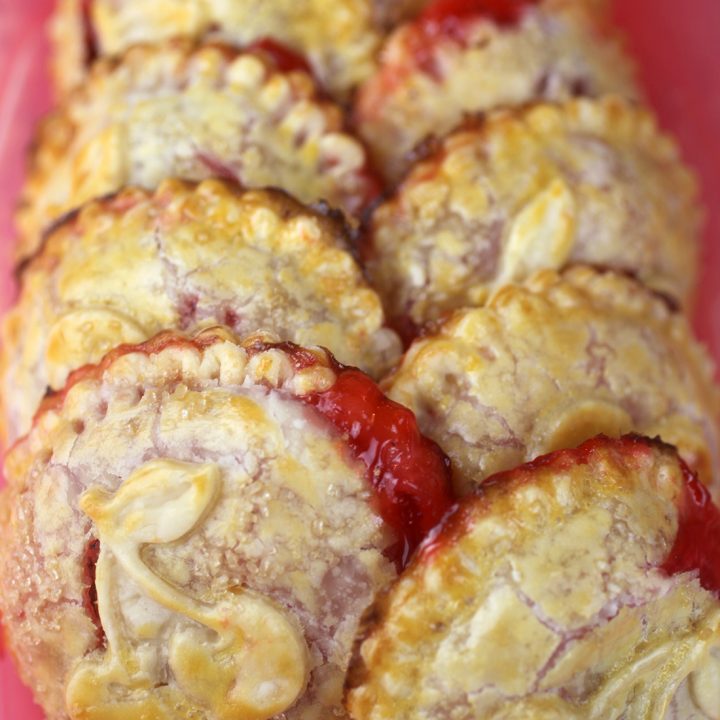
Sweet Little Cherry Hand Pies
Ingredients
Instructions
Notes
So did I. And that’s saying A LOT from a less that enthusiastic fruit or pie person. I loved these and can’t wait to make them again.
Hope you enjoy them, too!


Hello
Absolutely irresistible keeper for our next year’s cherry season ! Thank you so much and enjoy your day :-)
I’ve made lots of mini pies but never though to add a cut out on top! Yours look super cute. Thanks so much for posting!
How cute! I have to admit I have a problem. I buy cookie cutters whether I need them for something or not. Now I have an excuse to buy this one!
I sure did love these and feel free to make them anytime.