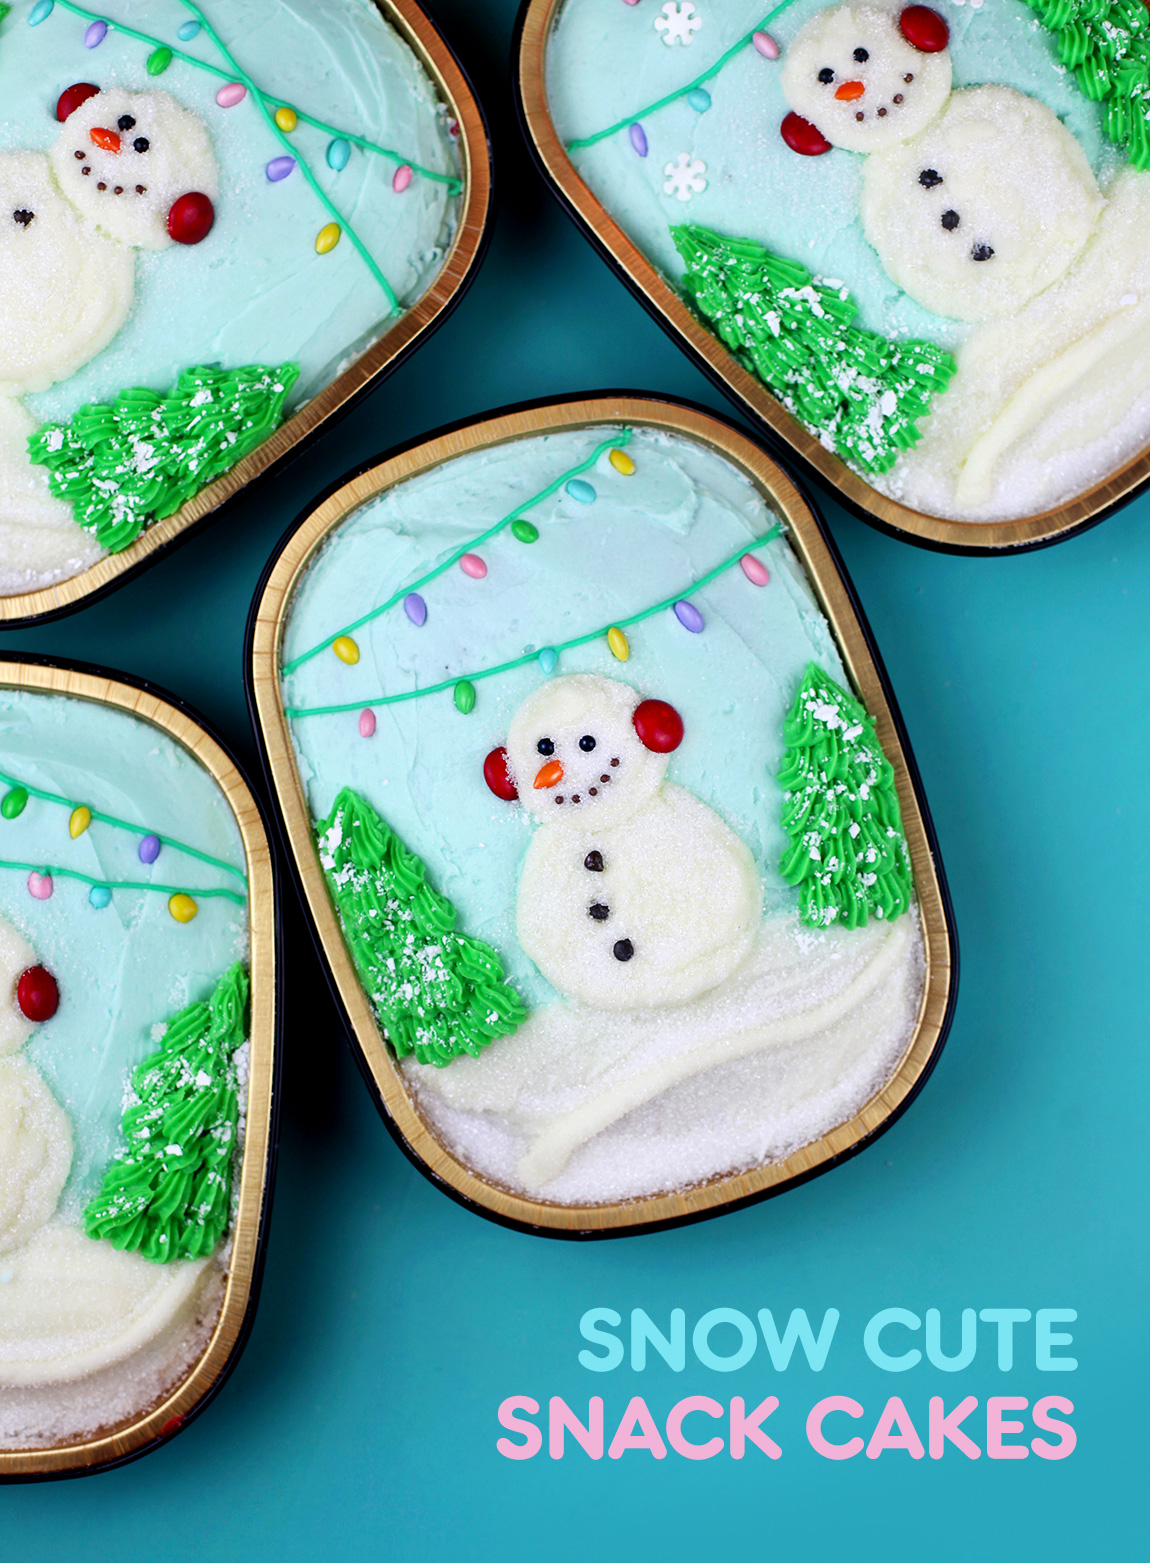
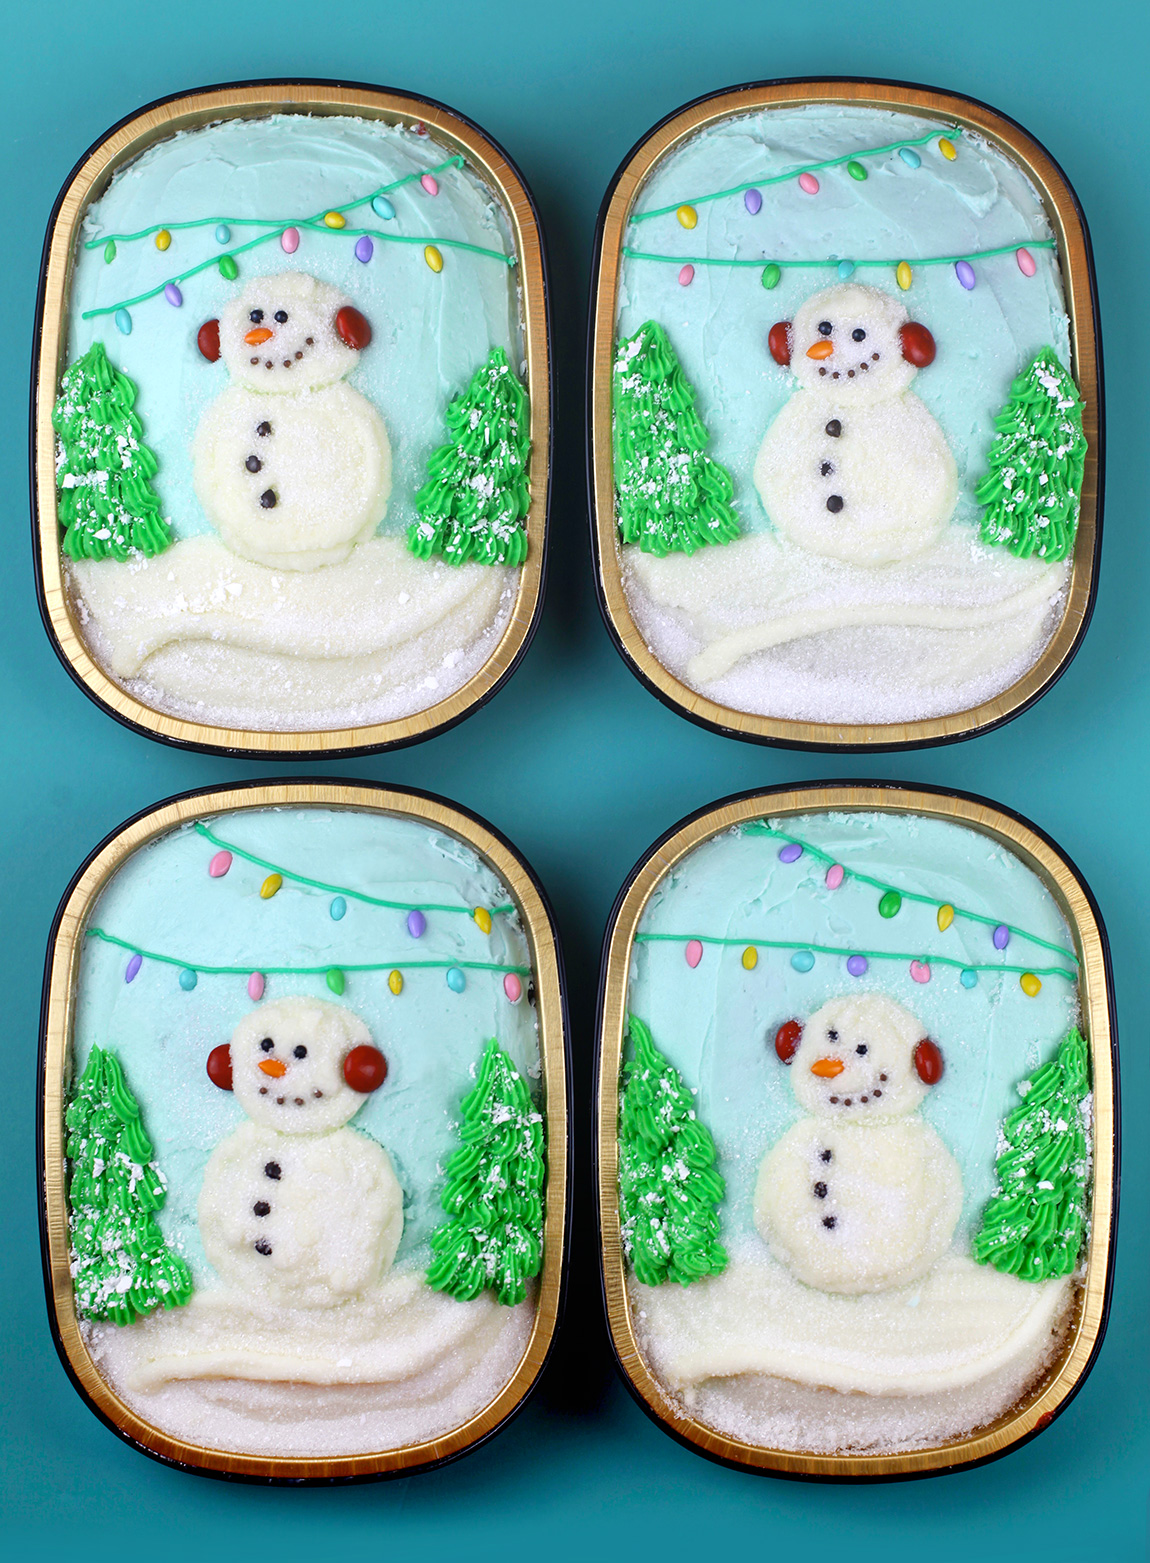
It’s a winter wonderland in a sweet snackable size. These small red velvet cakes are perfect for gifting or sharing. The recipe makes four. That’s enough for you to enjoy and to make a few others smile, too.
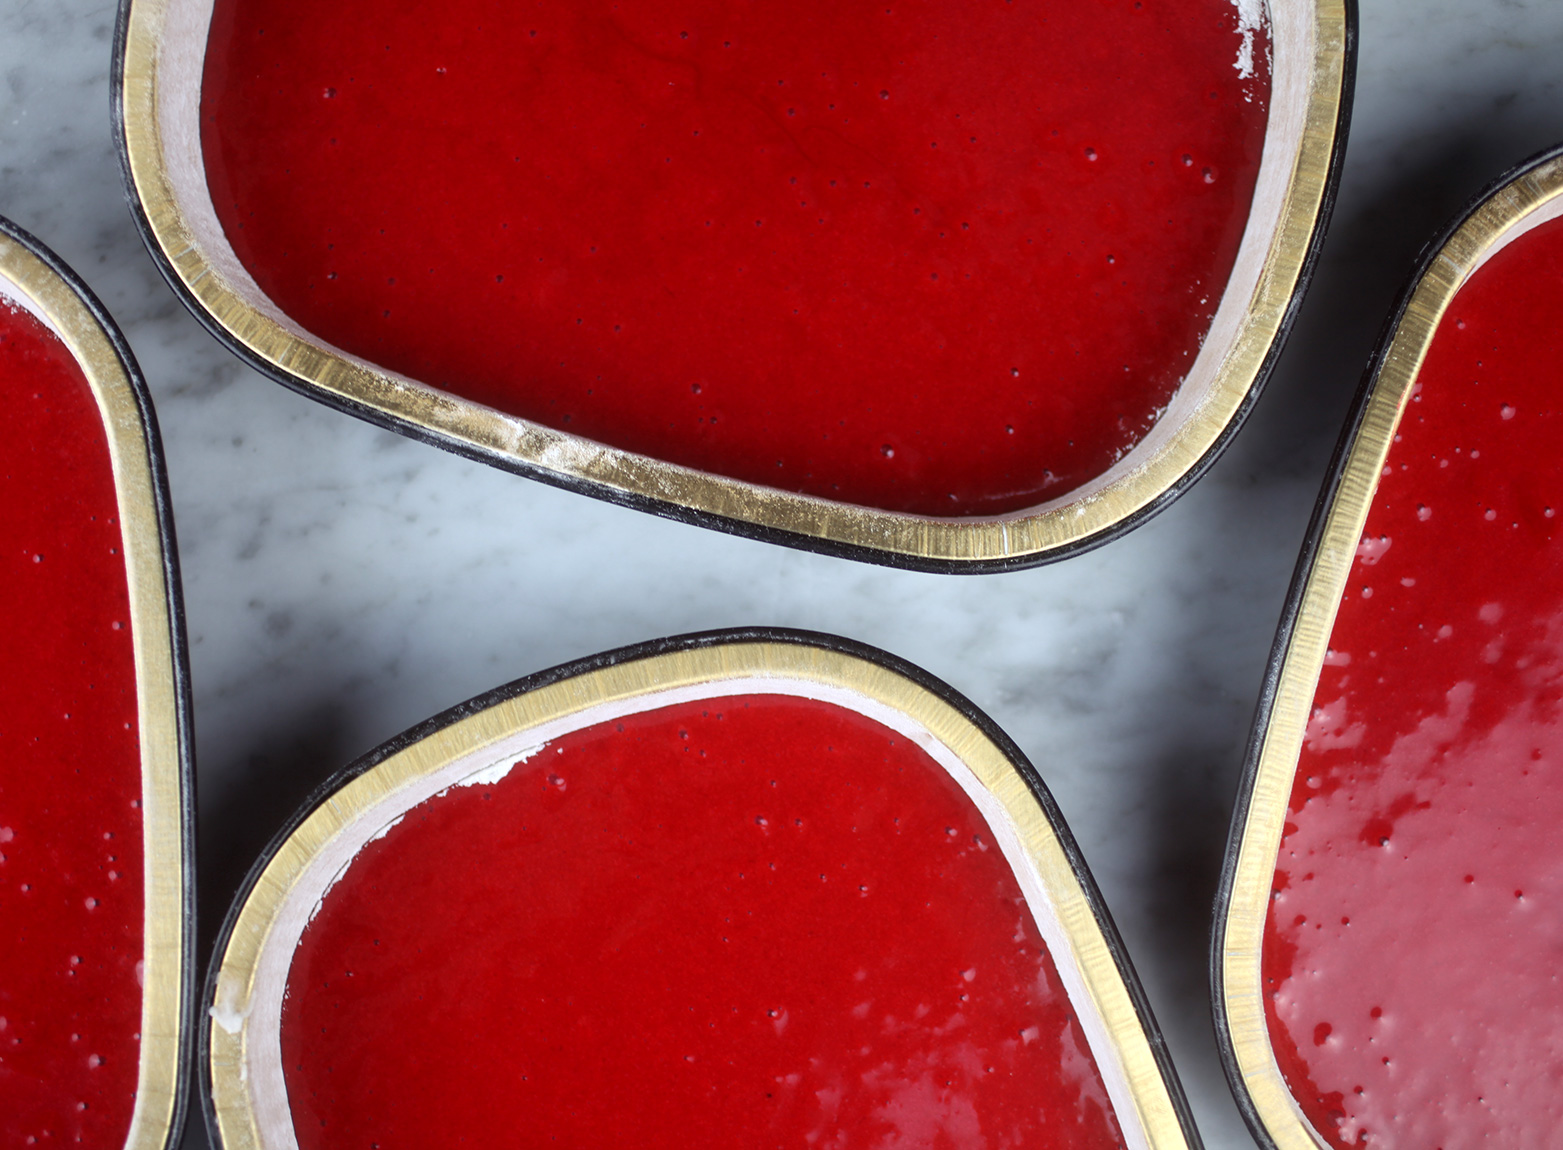
Divide the cake batter evenly among four disposable 23 oz. foil snack cake pans and bake.
Let cool completely and then you can get to decorating.
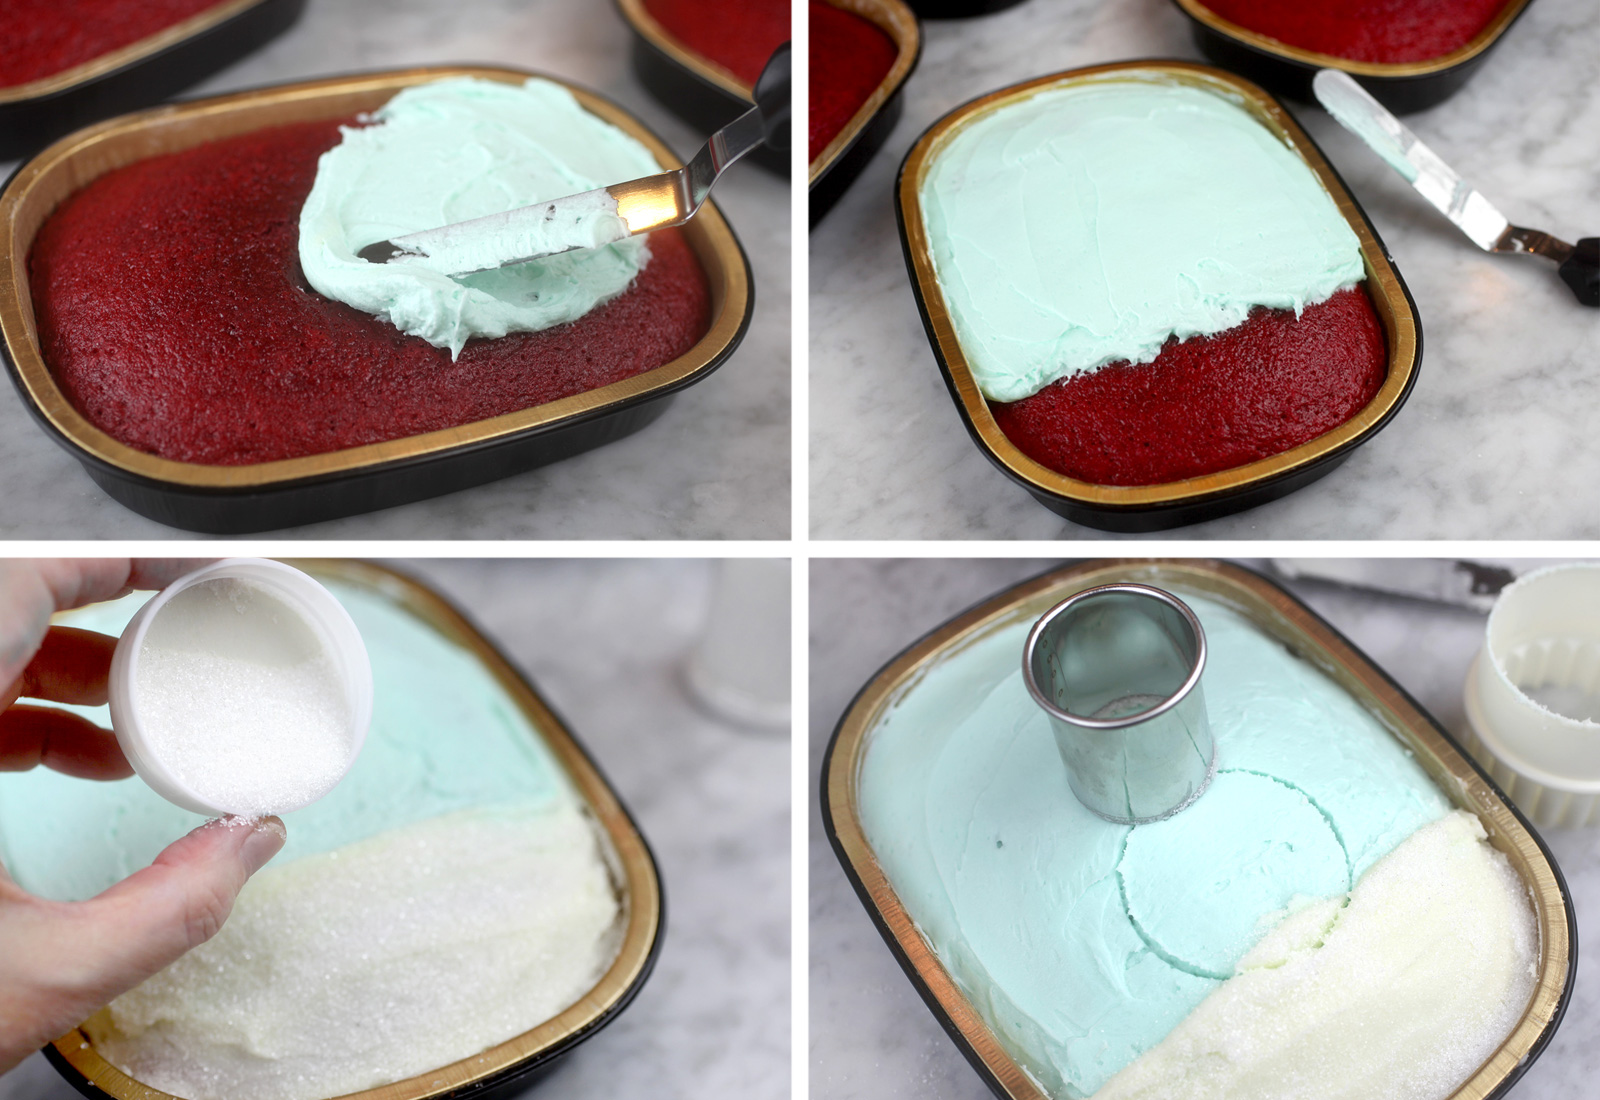
Tint half of the frosting a light blue and the remaining frosting leave white. Start out by frosting about 2/3 of each cake with light blue frosting. Fill in the remaining area with white/vanilla frosting and sprinkle white sanding sugar on top to give the ground a snowy effect.
To help guide where to place your snowman, you can use two circle cutters about 2.25 inches and 1.5 inches in diameter to make impressions in the frosting. Then just pipe inside the lines.
Start by piping the larger circle for the snowman body and sprinkle more white sanding sugar on top. I held the cutter in position over the frosting and sprinkled through the opening of the cutter to help keep it from going everywhere. Then repeat with the smaller cutter for the snowman’s head.
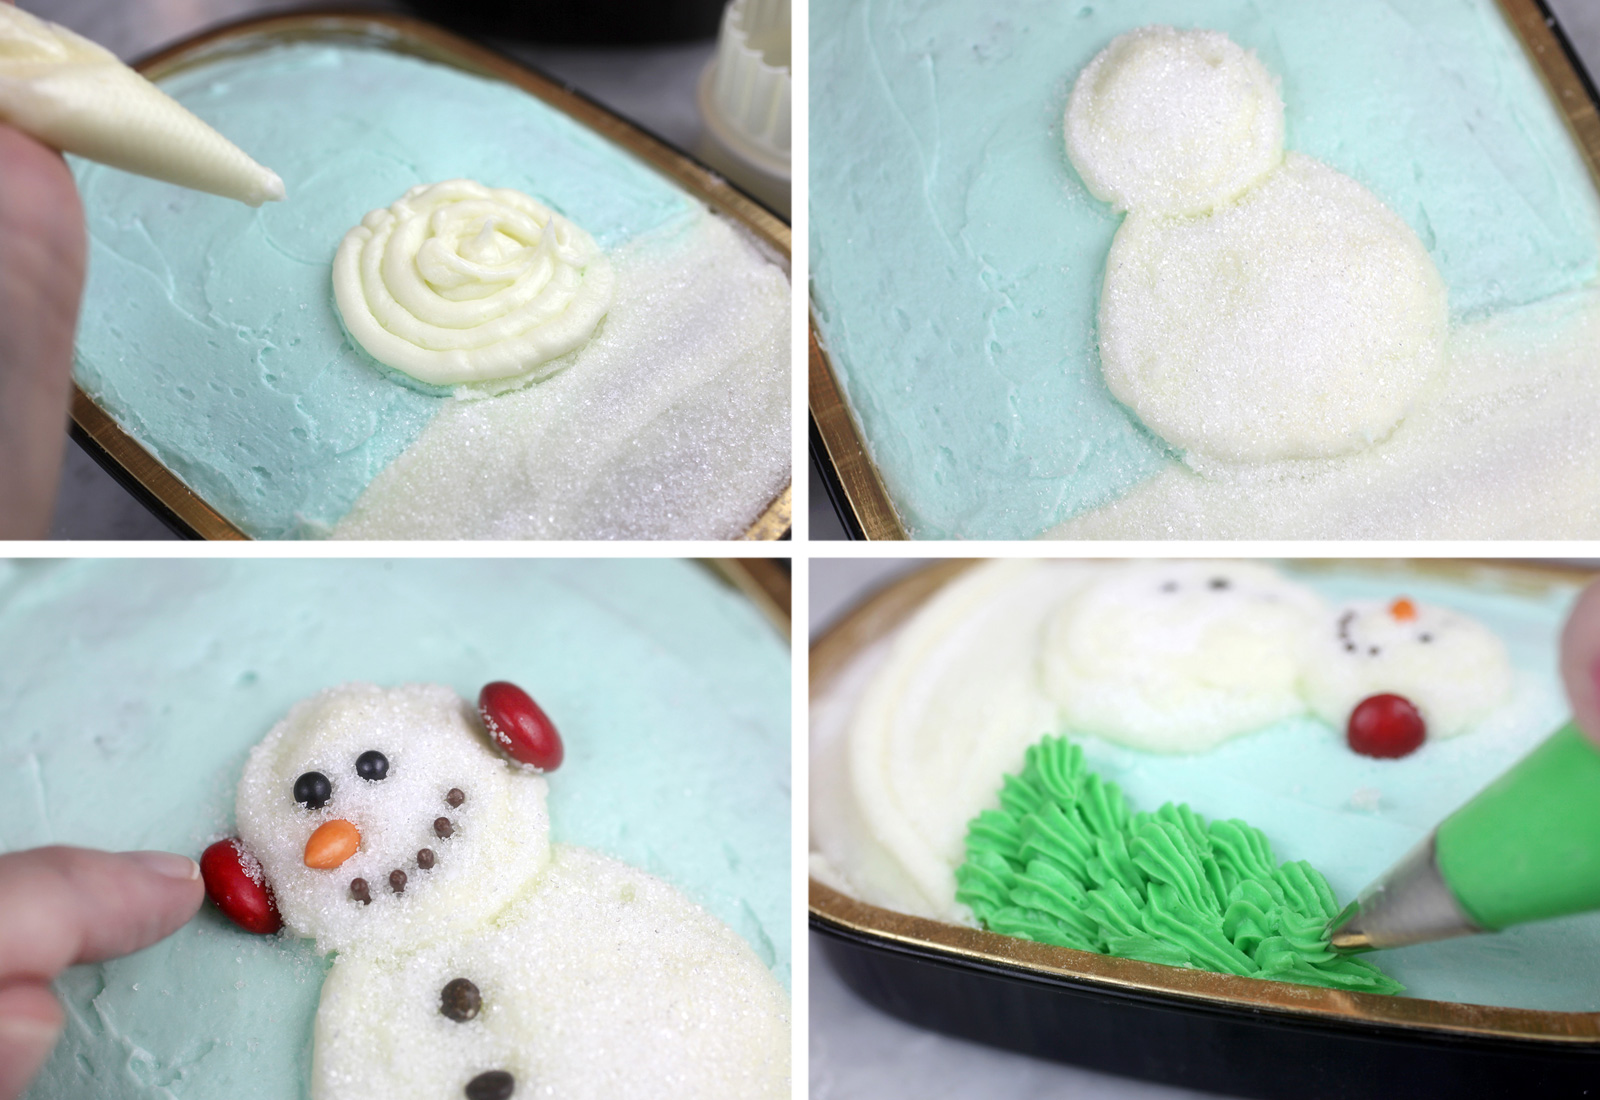
To make the faces, you can use orange coated sunflower seeds for carrot noses, brown or black jimmies for the mouths, brown rainbow chip sprinkles or black sugar pearls for eyes and buttons. Then press in some m&m’s candies for colorful earmuffs.
Use the remaining frosting to tint green and then fill in the sides of the snack cake with some sweet little trees, too. Pipe them using a a Wilton #18 decorating tip.
IMPORTANT: as you are frosting and decorating, place the lid on periodically to make sure your frosting doesn’t get too high. If it does, the lid will flatten your design. You can also slice and remove any excess dome from the cake before decorating if you are worried about it.
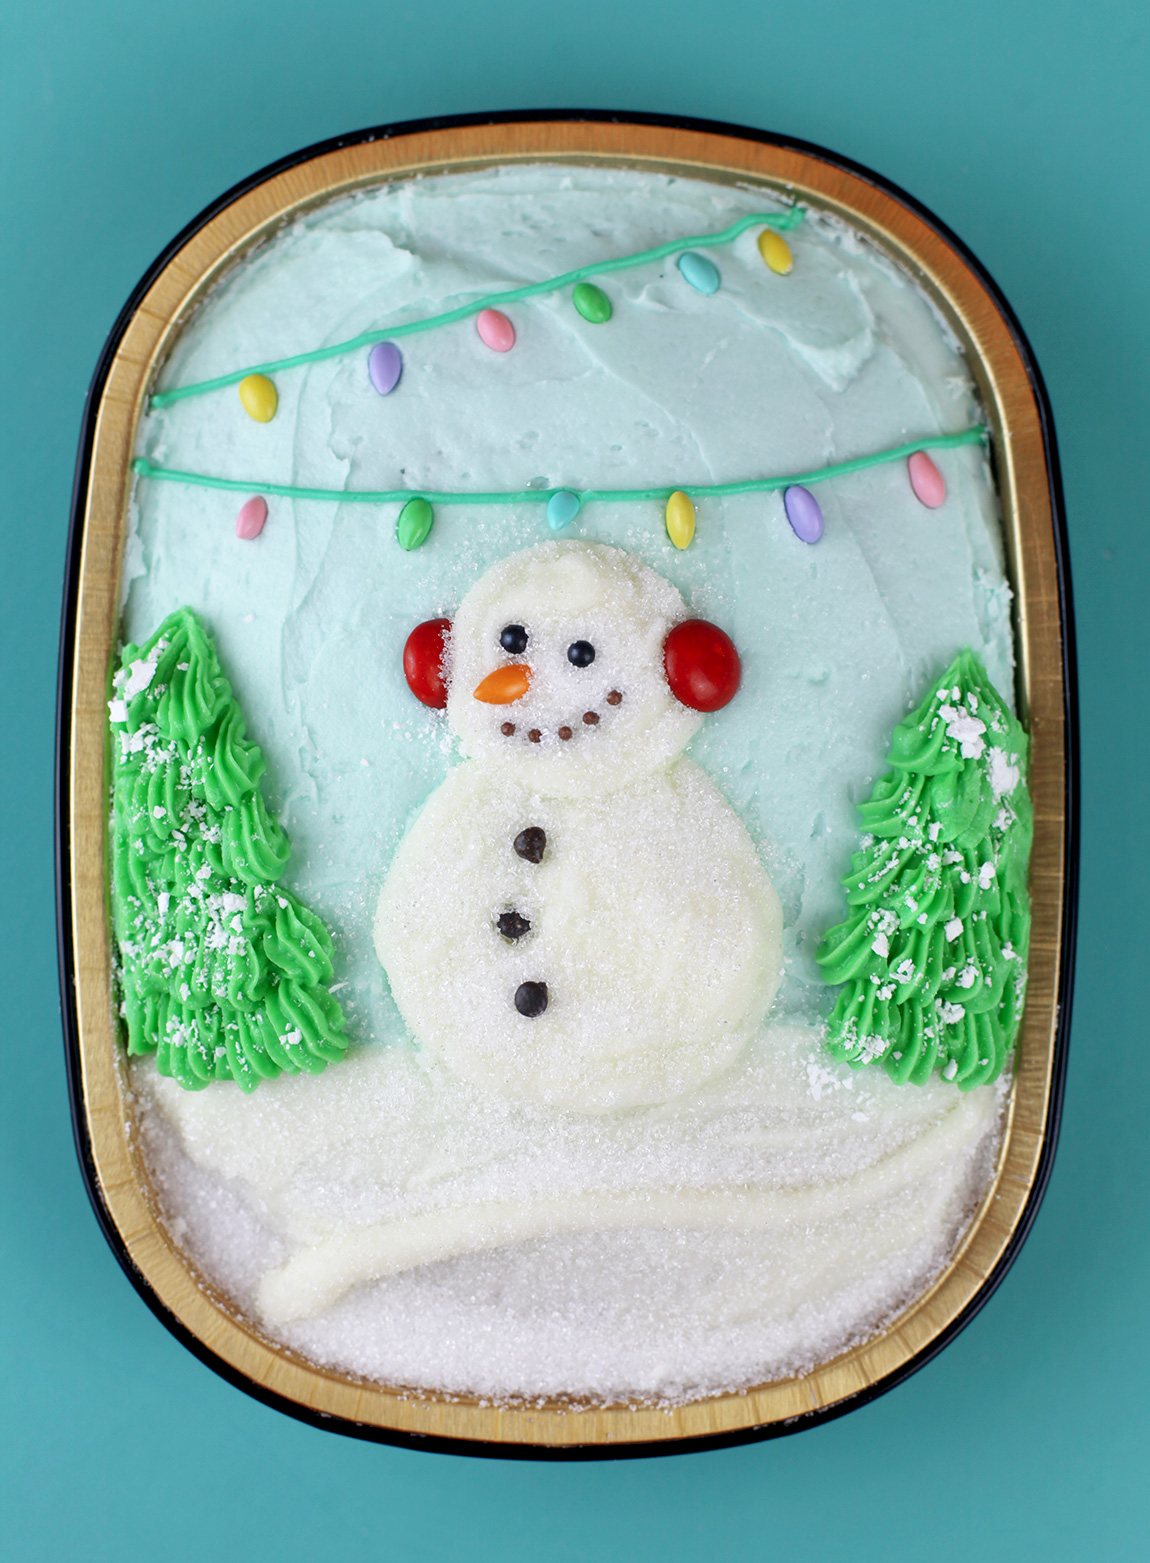
Snow cute! To fill in the rest of your frosted canvas, pipe two curved lines using the green frosting and place pastel coated sunflower seeds in position for colorful lights.
You can also sprinkle a little bit of powdered sugar on top if the trees for an extra little snowy effect. Wait just before gifting to sprinkle because the sugar will eventually absorb into the frosting and disappear.
But, you can also get your hands on some non-melting sugar that won’t disappear. Yay!
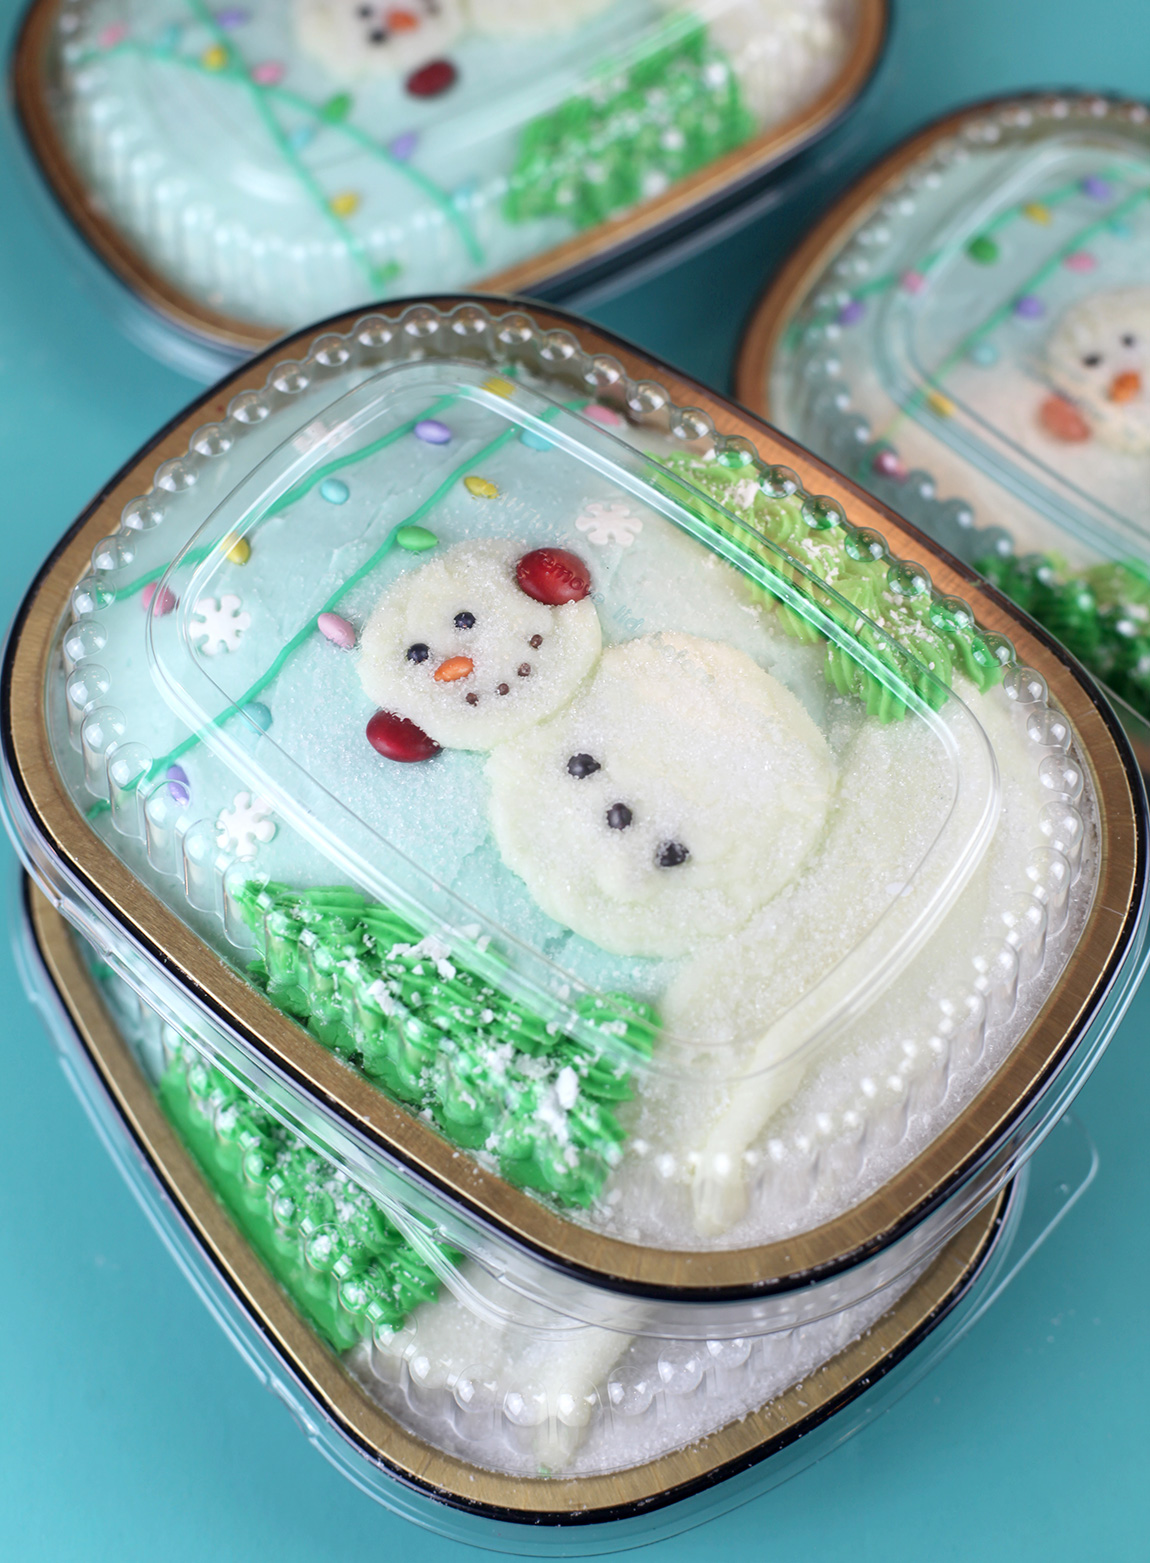
Use these individual foil containers to bake the cake in. Keep checking as you are frosting and decorating and place the lid on periodically to make sure your frosting doesn't get too high. If it does, the lid will flatten your design. You can also slice and remove any excess dome from the cake before decorating if you are worried about it.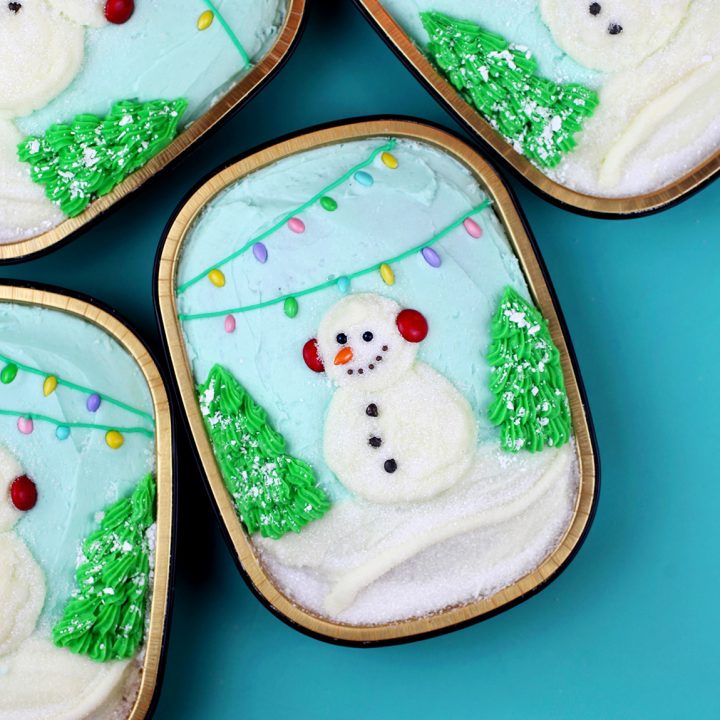
Snow Cute Snack Cakes
Ingredients
RED VELVET CAKE
CREAM CHEESE FROSTING
DECORATIONS
Instructions
Notes
Enjoy alone or with family and friends!


A really good post, very thankful and hopeful that you will write many more posts like this one.
I loved this recipe so much . It’s really awesome
These turned out adorable! Especially liked the M&M earmuffs! Thank you so much for the inspiration and the encouragement to share with our neighbors! I love making other people smile! :)
How cute and clever. I love them!
These are so adorable!!!! And making four individual cakes? Wonderful to give away to folks that might need a little cheering up. Thanks for sharing this idea! ???
What a creative and intelligent brain you have! This is classic