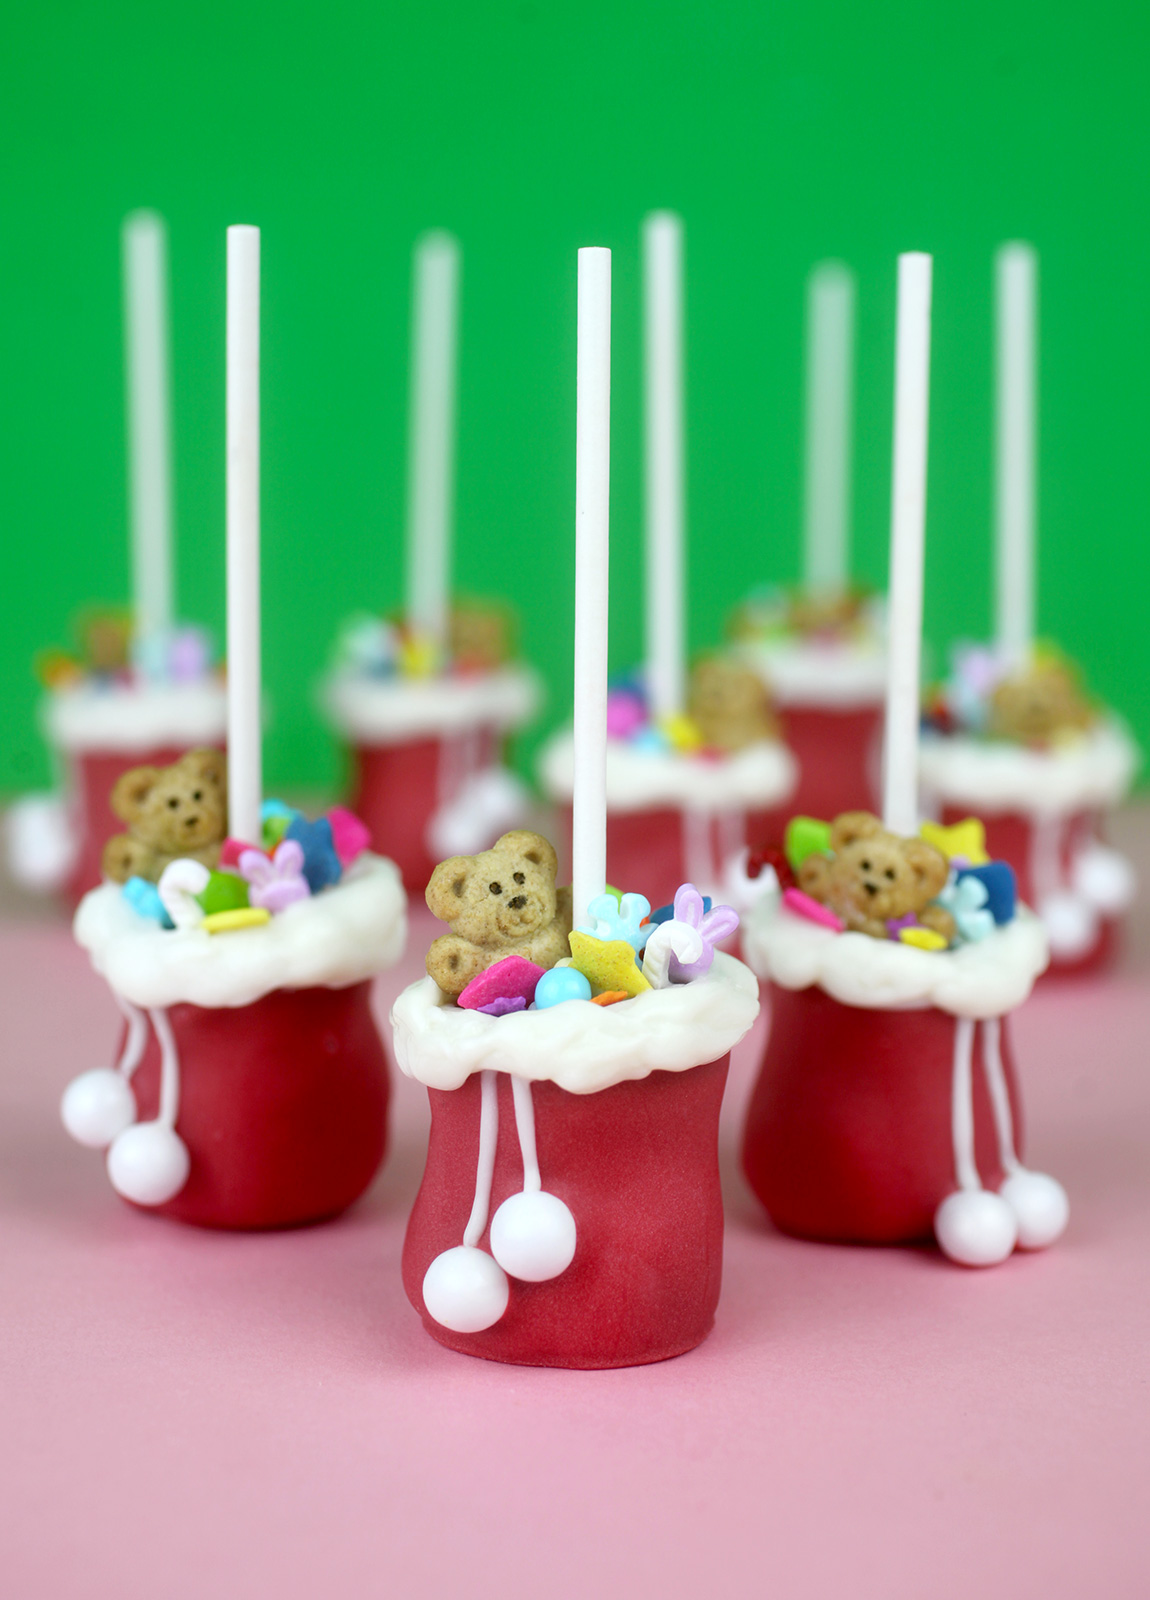
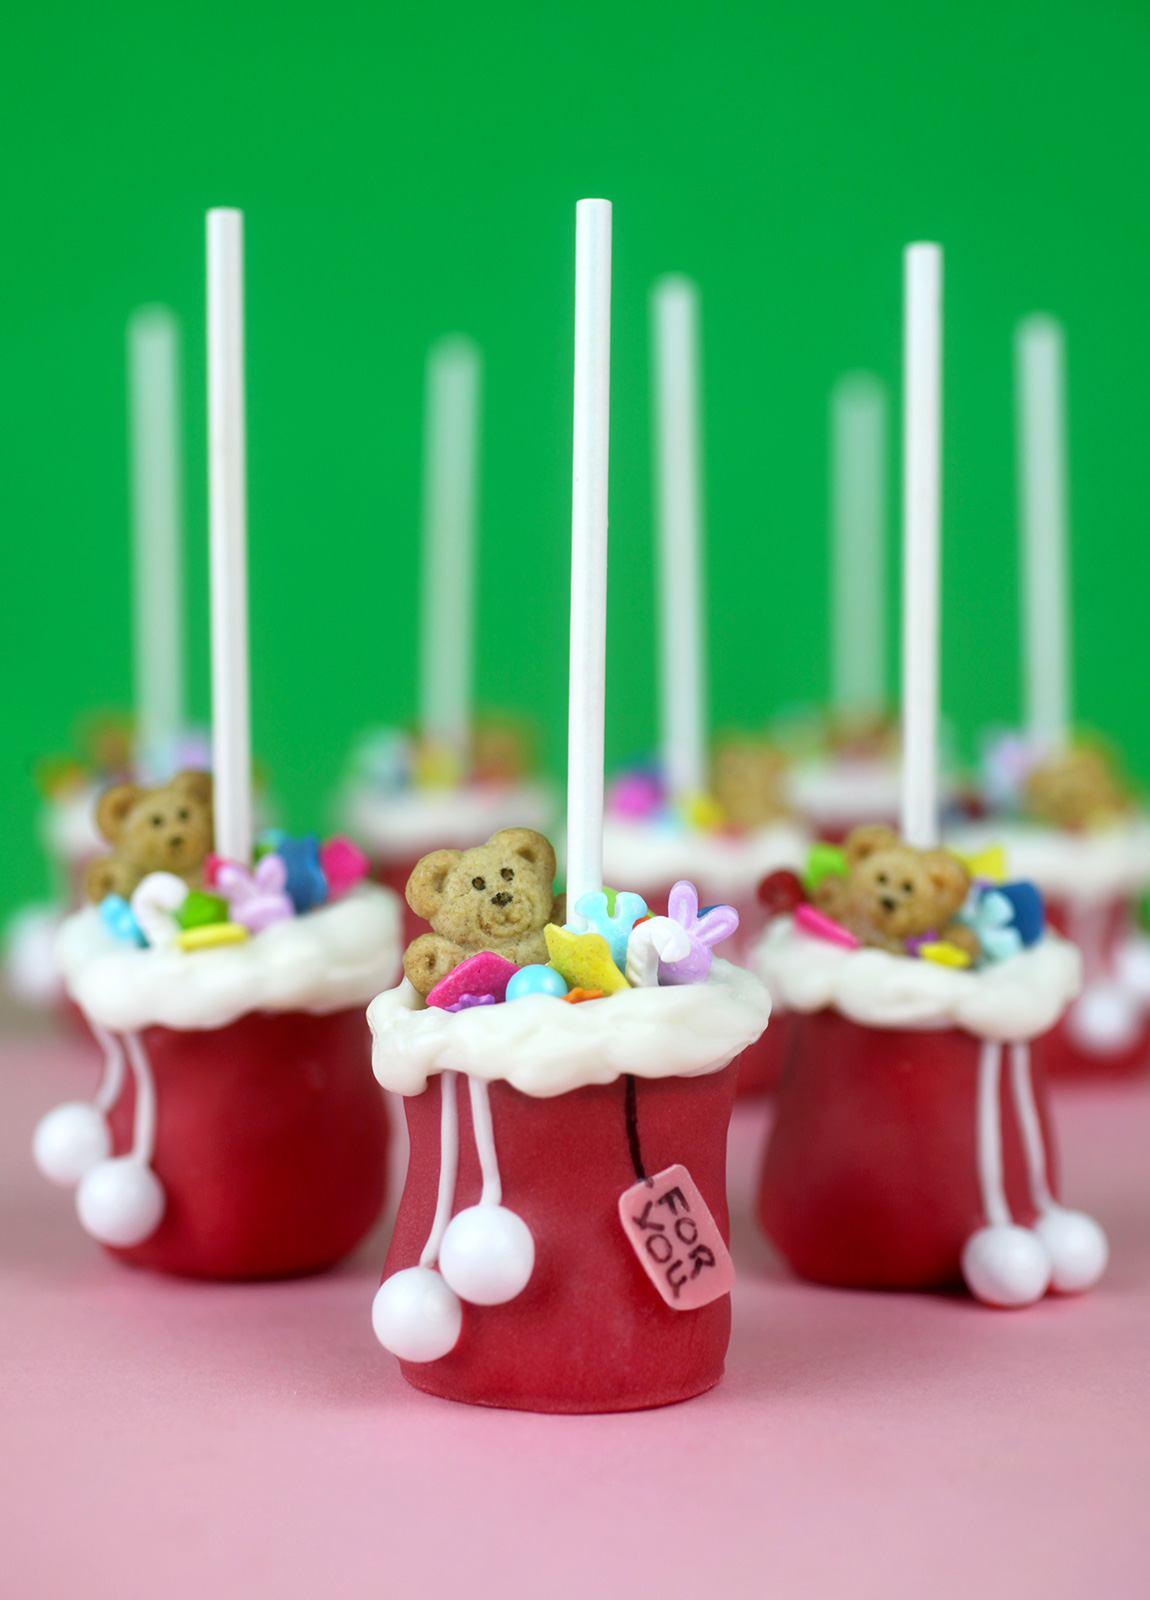
I’m so excited about these cake pops. Almost as excited as if Santa were delivering these sweet little bags himself. They are decorated with sprinkles and Teddy Grahams to look like the bags are stuffed full of toys on a teeny, tiny scale.
Are you smiling right now? Because I am. Okay, let’s see how to make them.
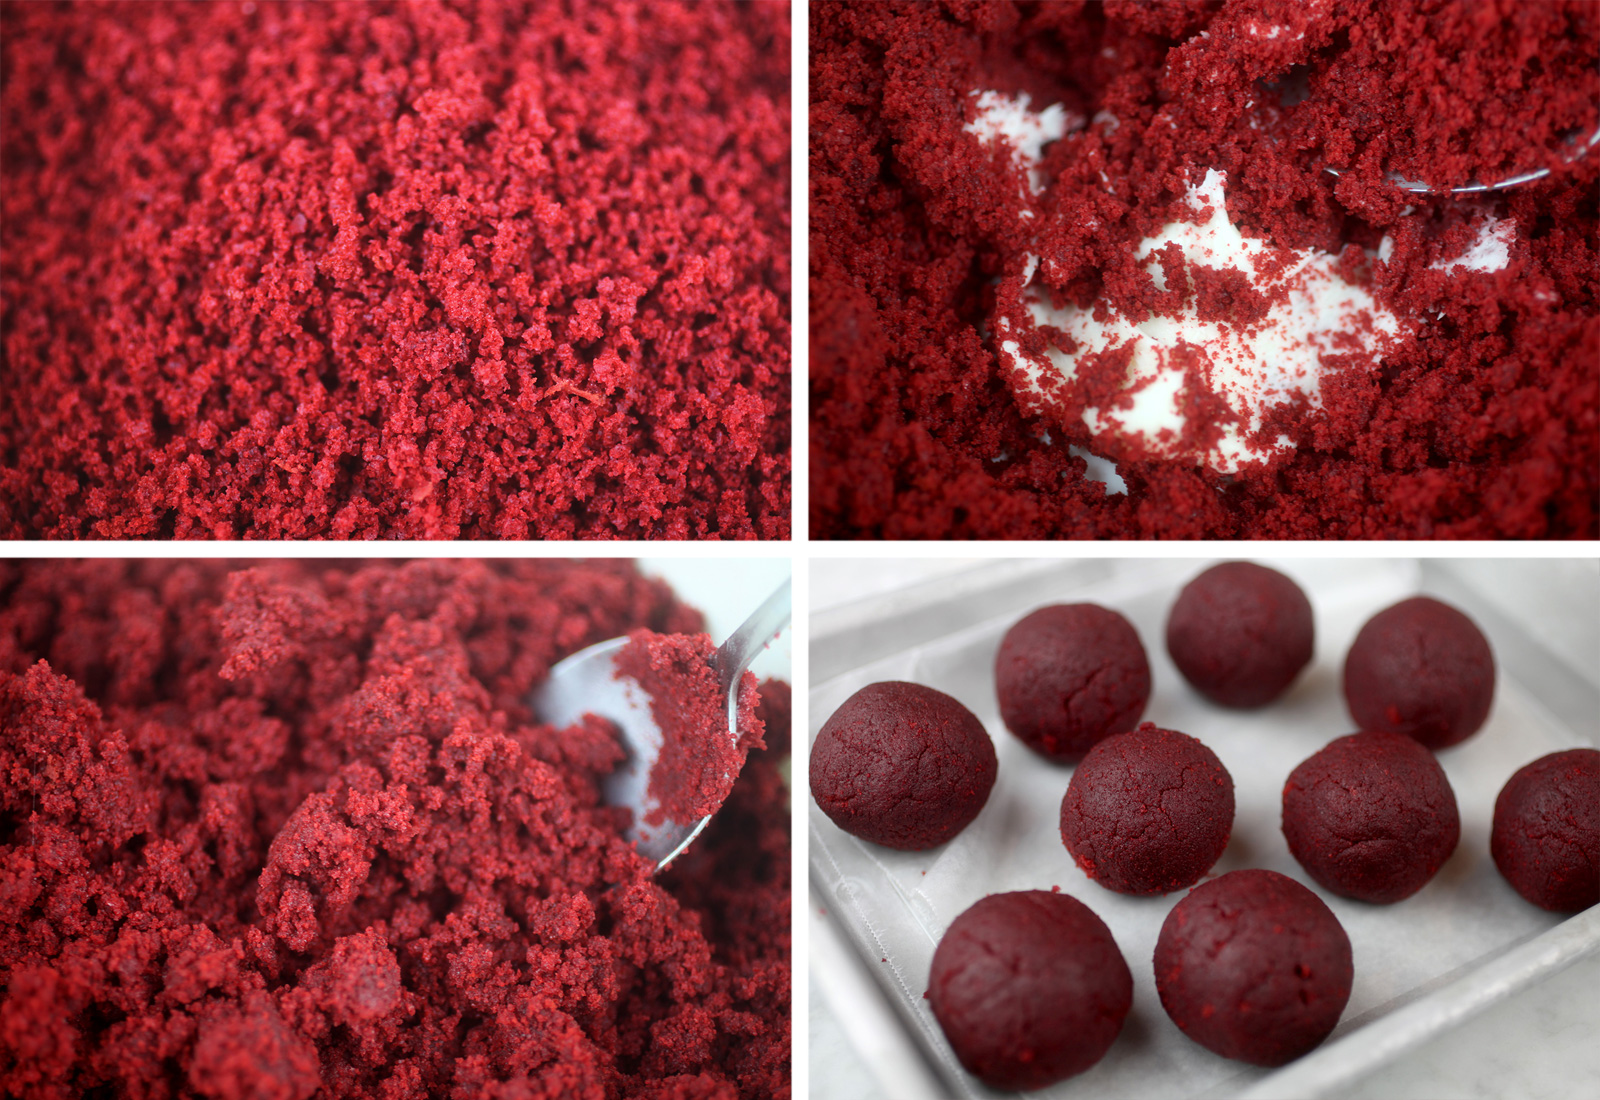
Of course Santa’s Bag Cake Pops has to be made with red velvet cake.
Crumble the cake, mix with frosting, and roll into balls. You probably know the drill by now.
And if you don’t – no worries, you can follow my basic cake pops instructions here and then roll the cake mixture into roughly 1.75 inch cake balls. This is a bit larger than usual because you’ll need enough to shape and accommodate all of the toys.
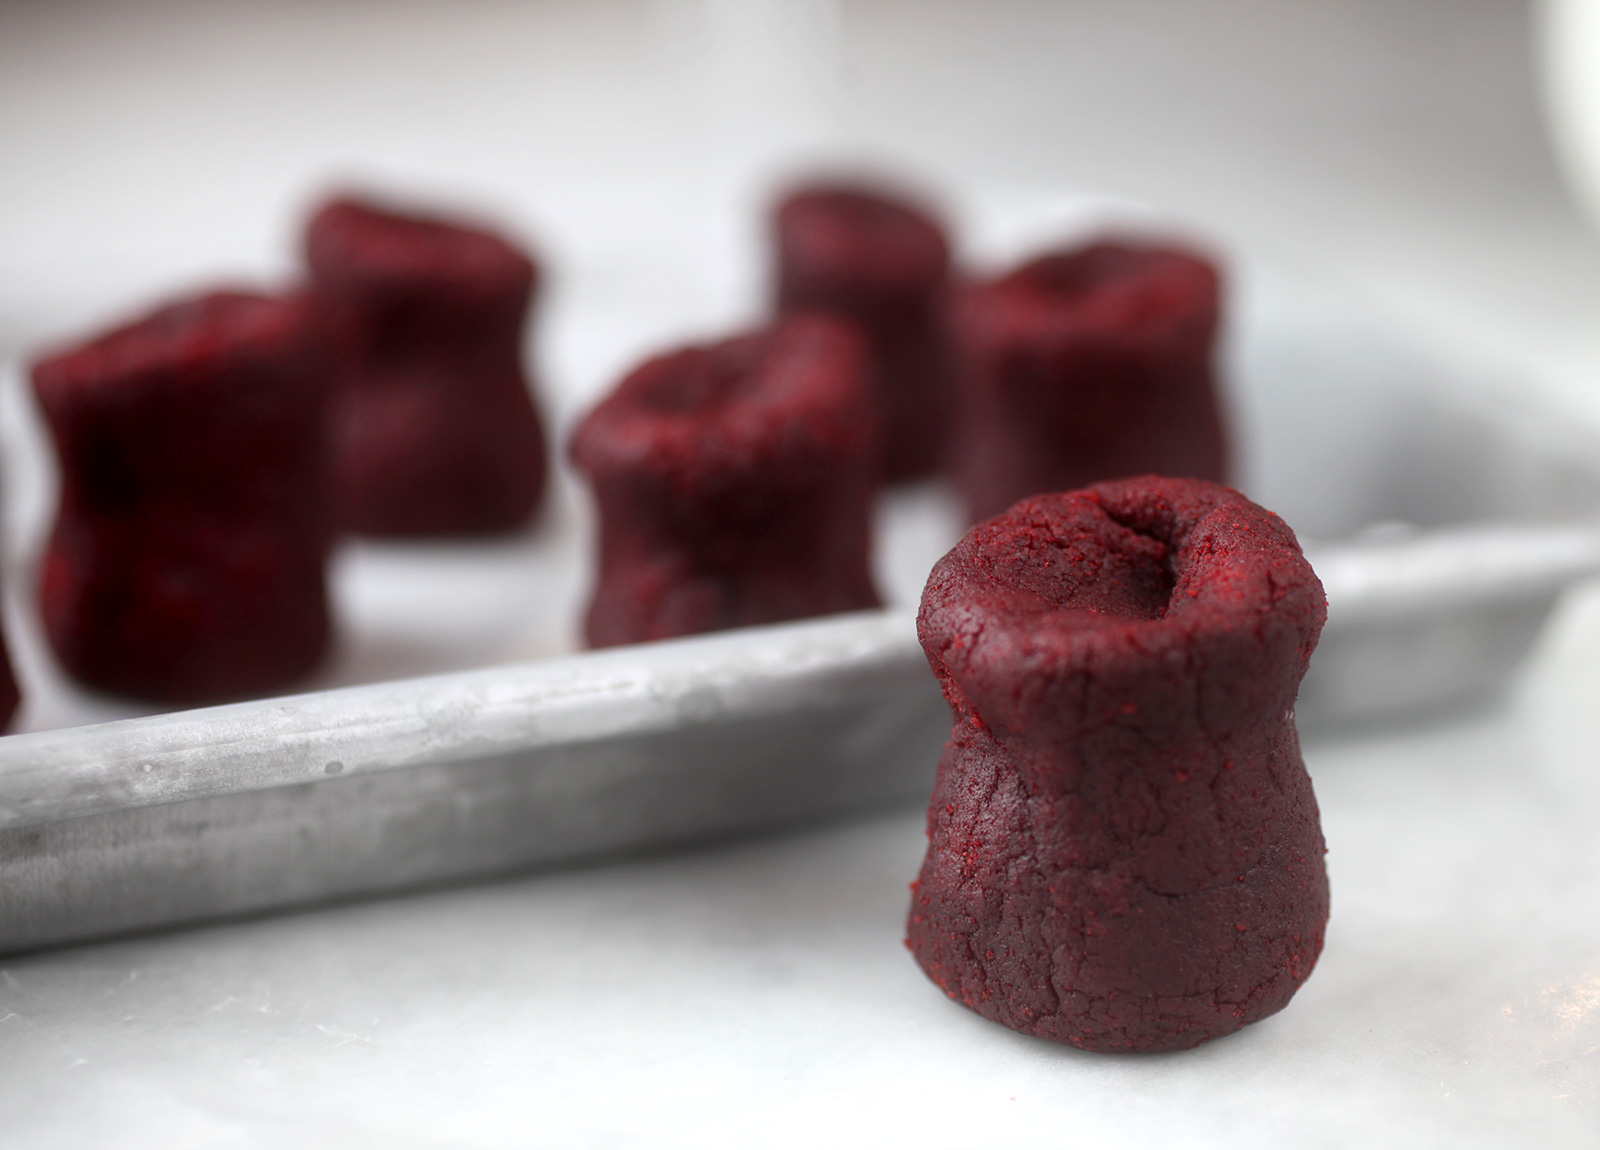
Okay… shaping. I like to roll the mixture into balls first in an attempt to have them all of the same size. I could weigh the mixture, but I just eyeball it. It’s a touch and feel thing for me. After you have the balls rolled, then begin to shape them into bags. The shape should be larger at the bottom with a narrower area towards the upper portion before it widens at the very top. Then on the very top, you can make an indentation to help allow space for the sprinkles. To make the bottom of the pops flattened, just slide the cake ball on a piece of wax paper laying on your counter. When you are done, the shape should look something like the above photo. But remember, they are lumpy bags, so they shape is flexible, too.
Place the shaped cake balls in the fridge to chill until firm. You can place them in the freezer to speed things up, but just leave them in there for about 15 minutes and then transfer them to the refrigerator. You want them to be firm, but not frozen.
Okay, on to dipping.
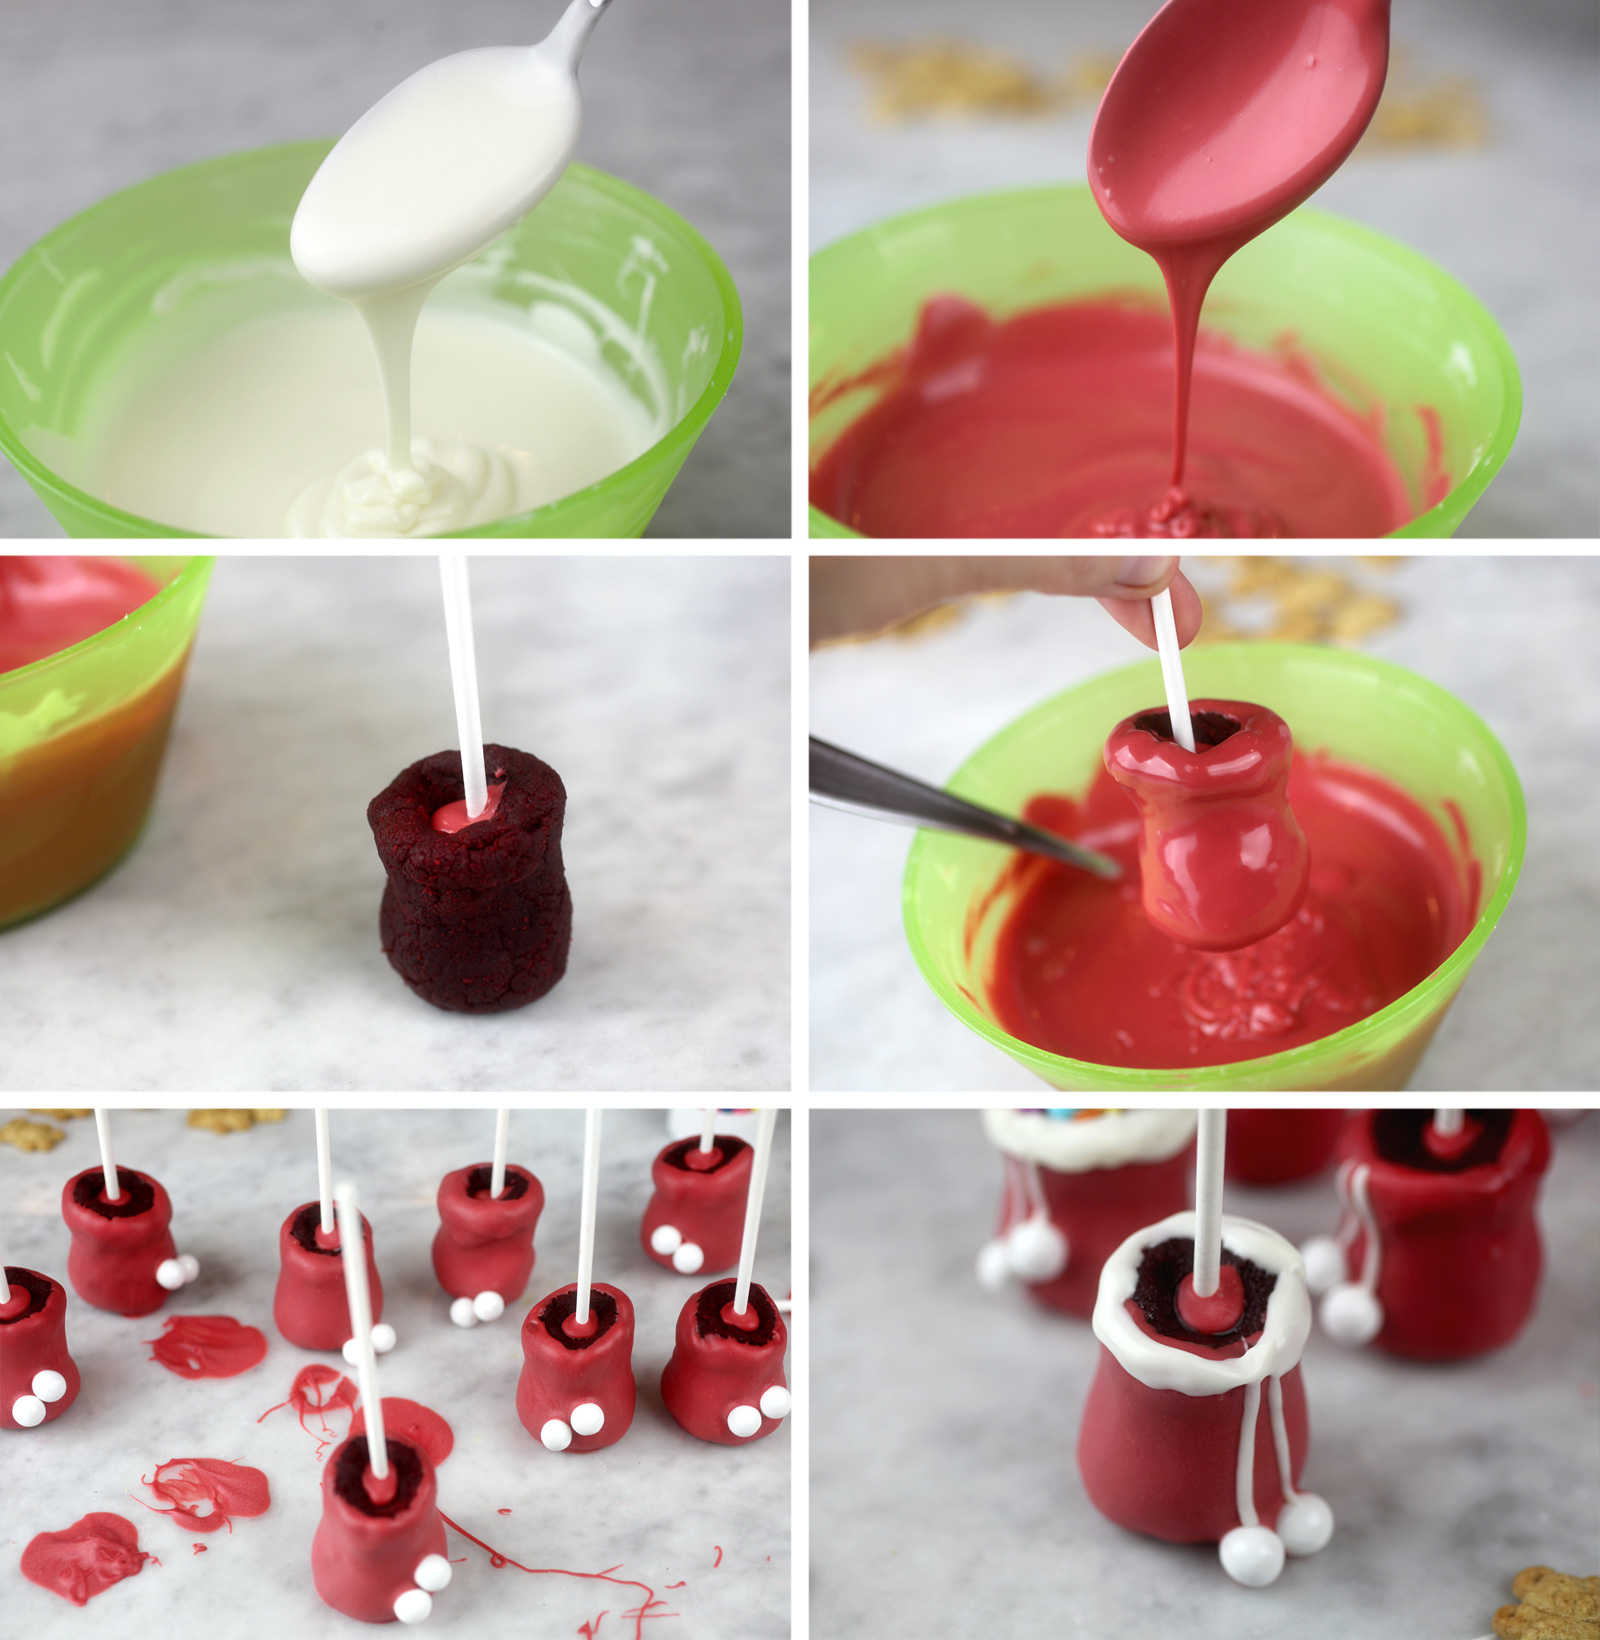
You will need red and white candy coating. Melt in the microwave in 15-30 second intervals, stirring in between each interval until melted and smooth. You want to heat it on low and slow to achieve nice a fluid melted candy coating. The consistency in the first two photos from the grid above are ideal for dipping. If the coating does not pour off your spoon easily, it will result in lumpy, thicker coated pops.
As a side note, packaged red candy wafers can sometimes be more difficult to work with than vanilla. Tinting your candy coating with red candy color can be a great alternative. That’s what I did here. Make sure you specifically use coloring that is oil based. Water based food coloring will cause the coating to seize up.
To dip, place the end of a lollipop stick in melted coating and then into the top of the shaped cake ball, no more than halfway. Then dip into the melted candy coating, remove and allow any excess coating to fall off in the bowl.
Place two white sixlet candies in position for pom pom balls and place on wax paper to dry. If the coating starts to pool at the bottom too much, immediately lift it up gently and then place in a different spot on the wax paper to dry. Lifting once or twice, ususally removes any excess pooling.
Note: For these you don’t need to have the coating completely cover the top of the shaped cake ball because if you did that area would be harder to fill with sprinkle toys.
Once dry, you can use a toothpick dipped in white candy coating to draw on the strings. You can also pipe these using a small squeeze bottle.
Let dry and then use a toothpick dipped in coating to apply a small amount around the top of the bag and let dry. You will continue to apply and let dry to layer on coating and build up the bulkiness to represent the furry opening of the bag. But do this in conjuction with adding sprinkles so you can overlap the vanilla coating and make the sprinkles and such look tucked inside.
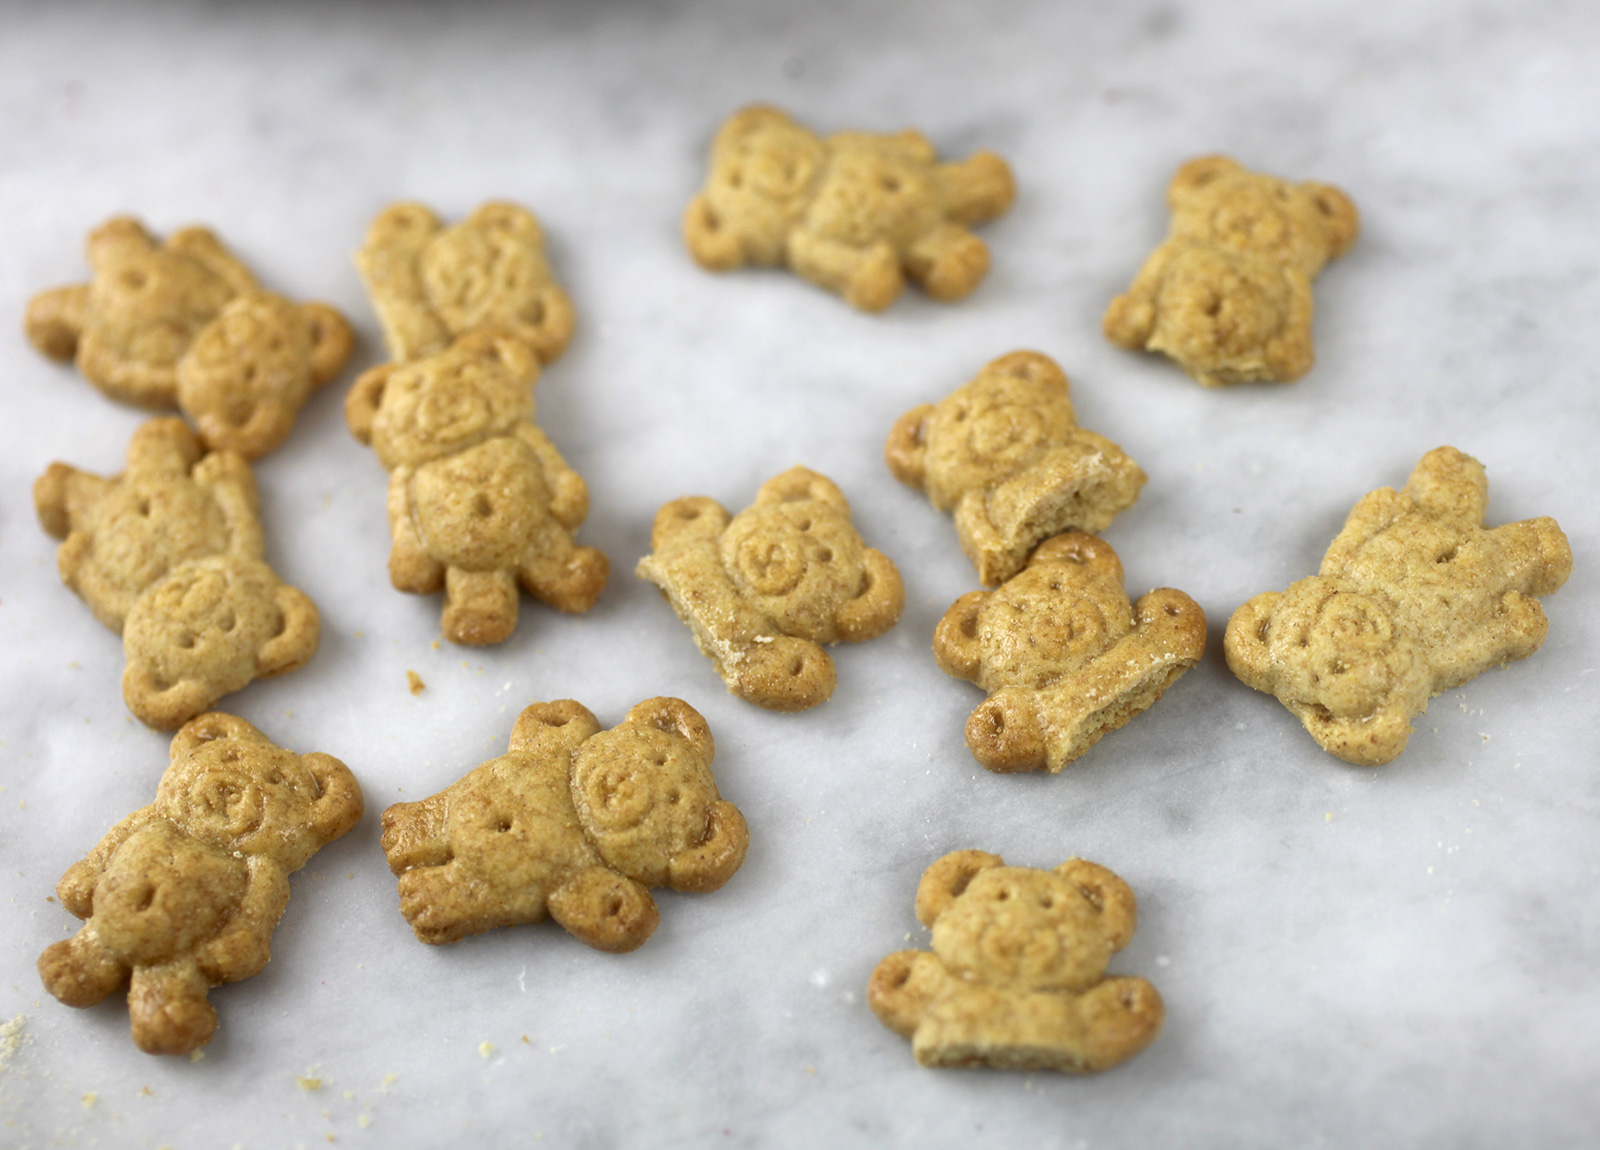
Teddy Grahams! These obviously make great teddy bears for our toy sacks. Just cut them in half right at the belly and they will be perfect for attaching.

Dip the cut portion of the bears in melted candy coating and place in position on top of the bag. You can apply melted coating to the top as well and then start inserting and attaching sprinkles. Any sprinkles. Just look for some with bright colors and various sizes to fill the bag.
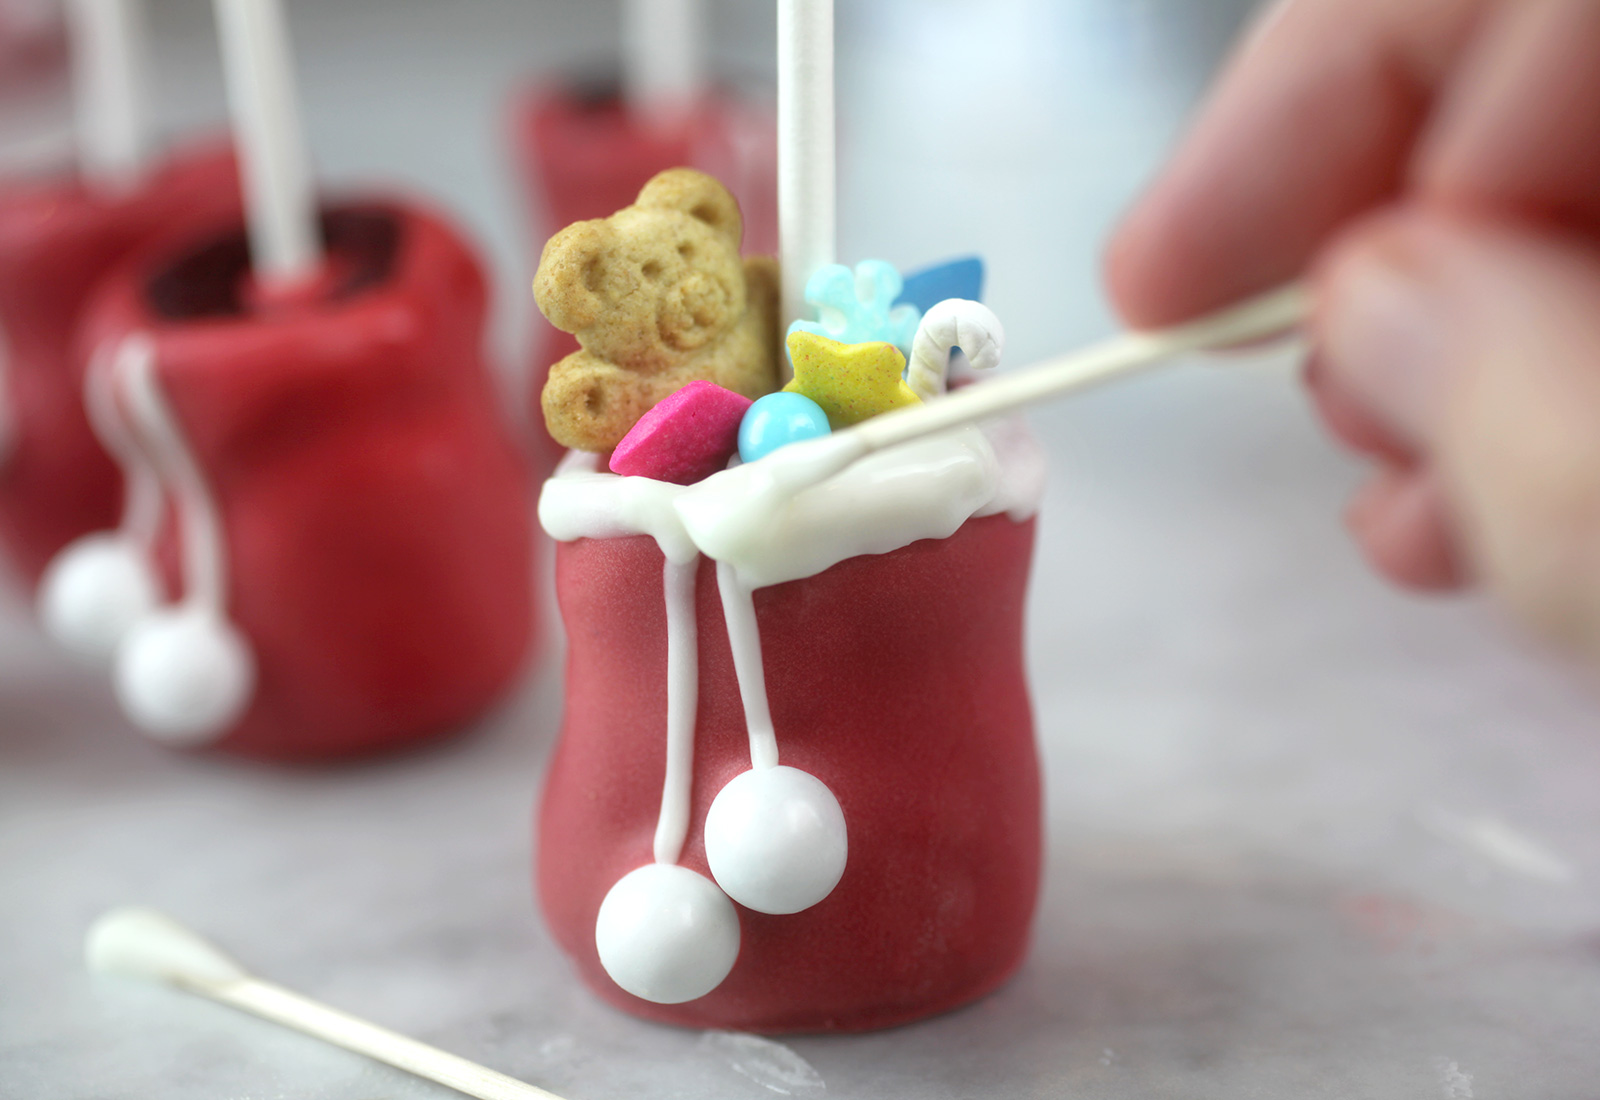
Continue to build up the bulk of the bag opening, overlapping the sprinkles and overlapping the piped strings. Do a little bit at a time on each one and rotate to another while the others dry.
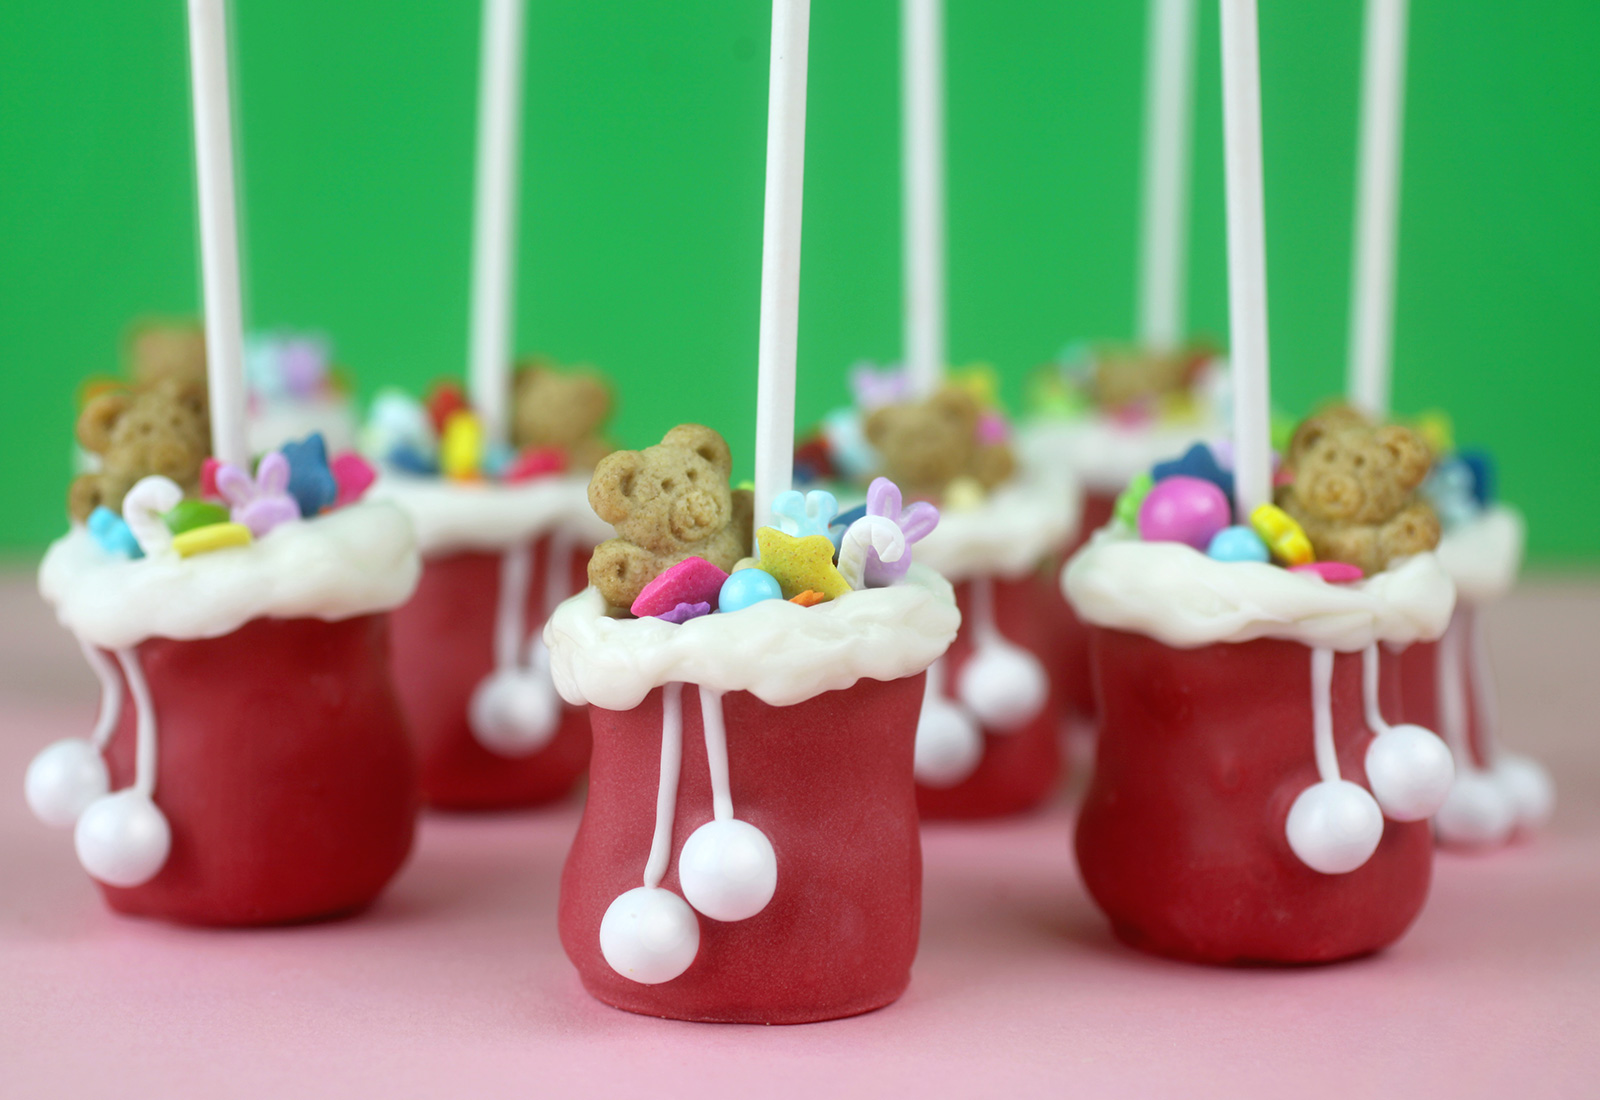
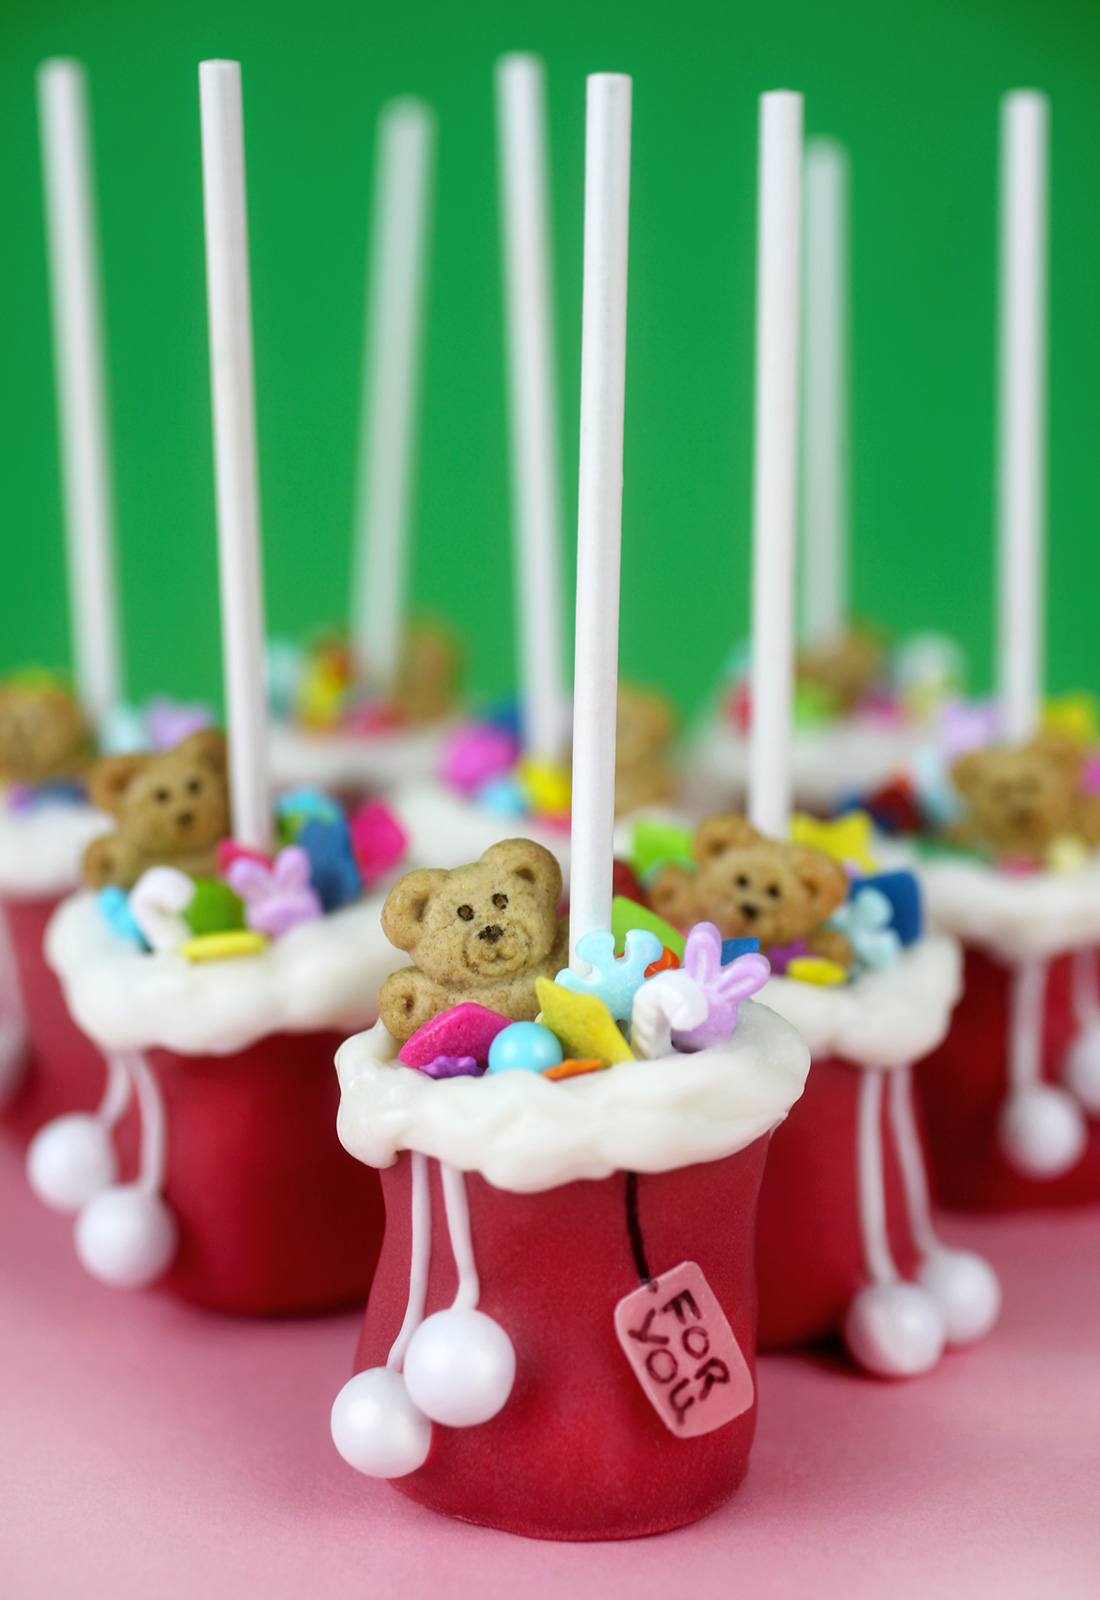
Done. And I couldn’t be happier. Sometimes in the first stages of bringing an idea to life, I’m not sure how they will turn out. But when they finally come together at then end and look so cute, I am so glad I pushed through.
I just want to add a couple more details that are completely unnecesary, but I can’t help myself.
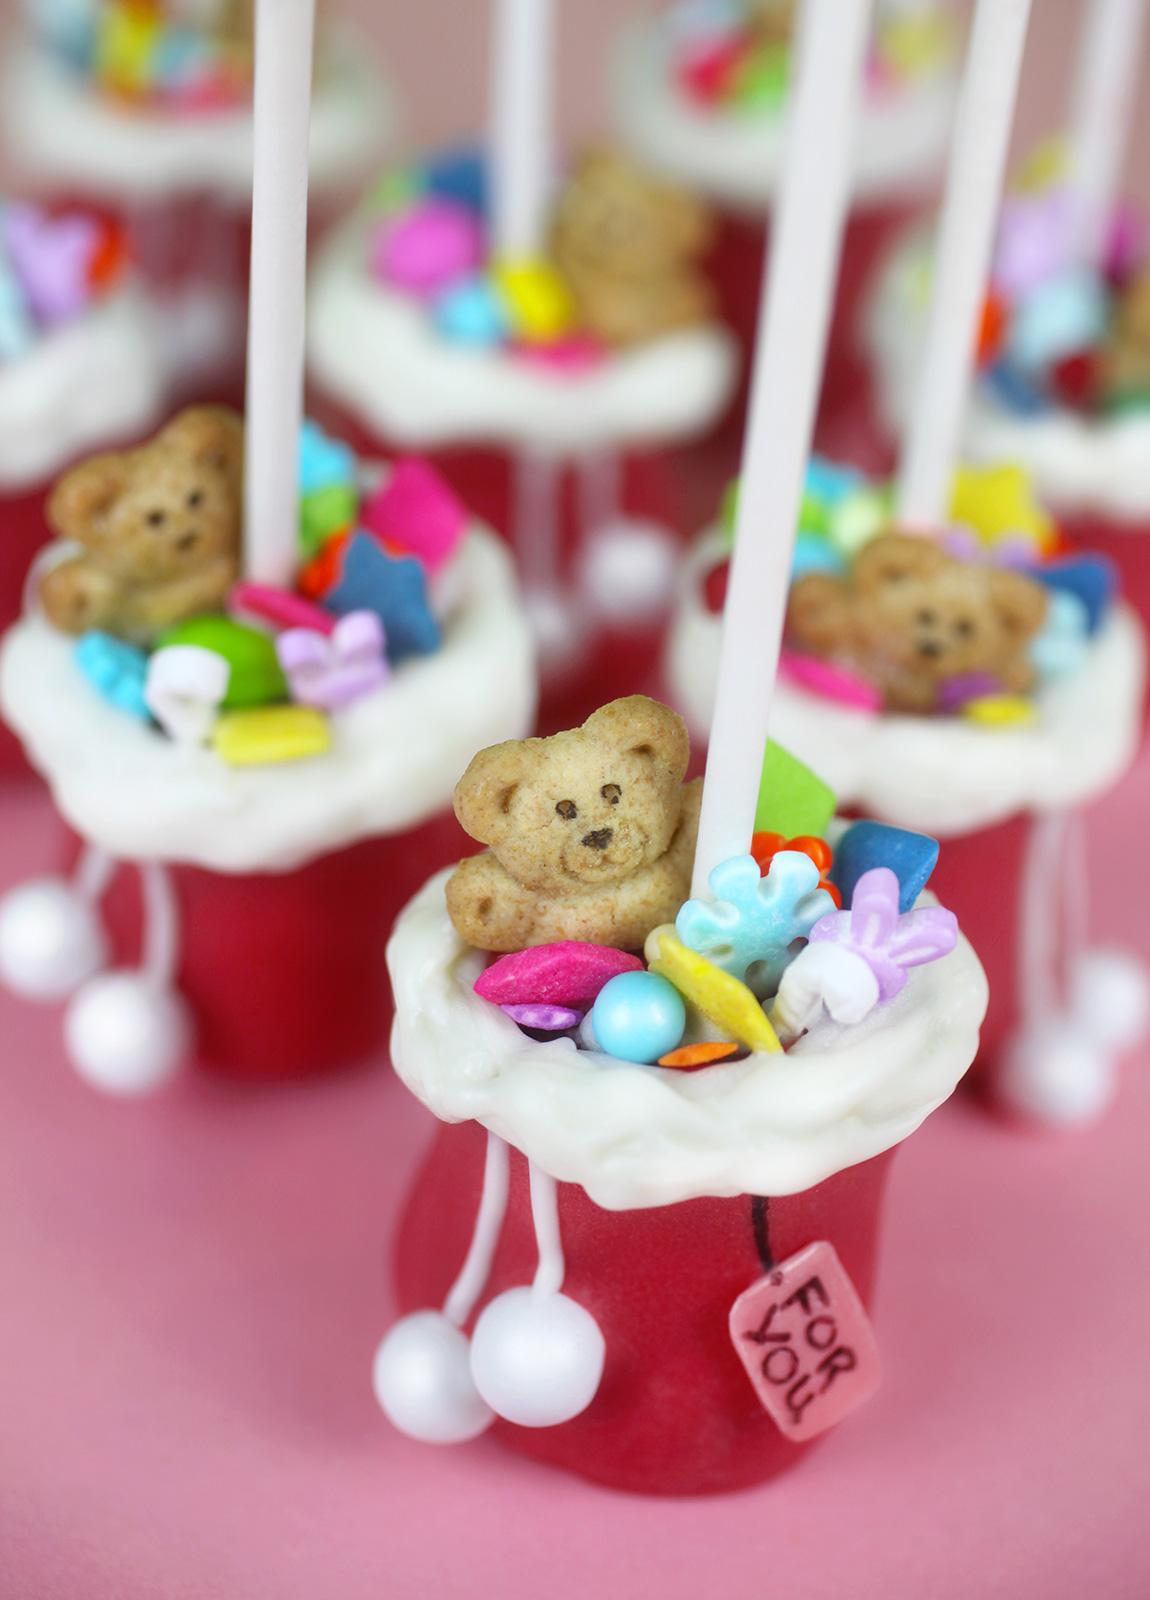
Dotted eyes and a little nose to emphasize the teddy bear faces using a black edible ink-writing pen.
I also made a tiny tag. More work than it was worth, so I only did one. But if you want to make them, use a toothpick to apply coating in a rectangular shape on was paper. Let dry and then turn over and write on the flat side using the black edible ink writing pen. Work quickly because the body heat from your fingers will melt the tags. Yikes. Again I only ended up doing one for photos.
But I love how it looks.
Hope you love them too.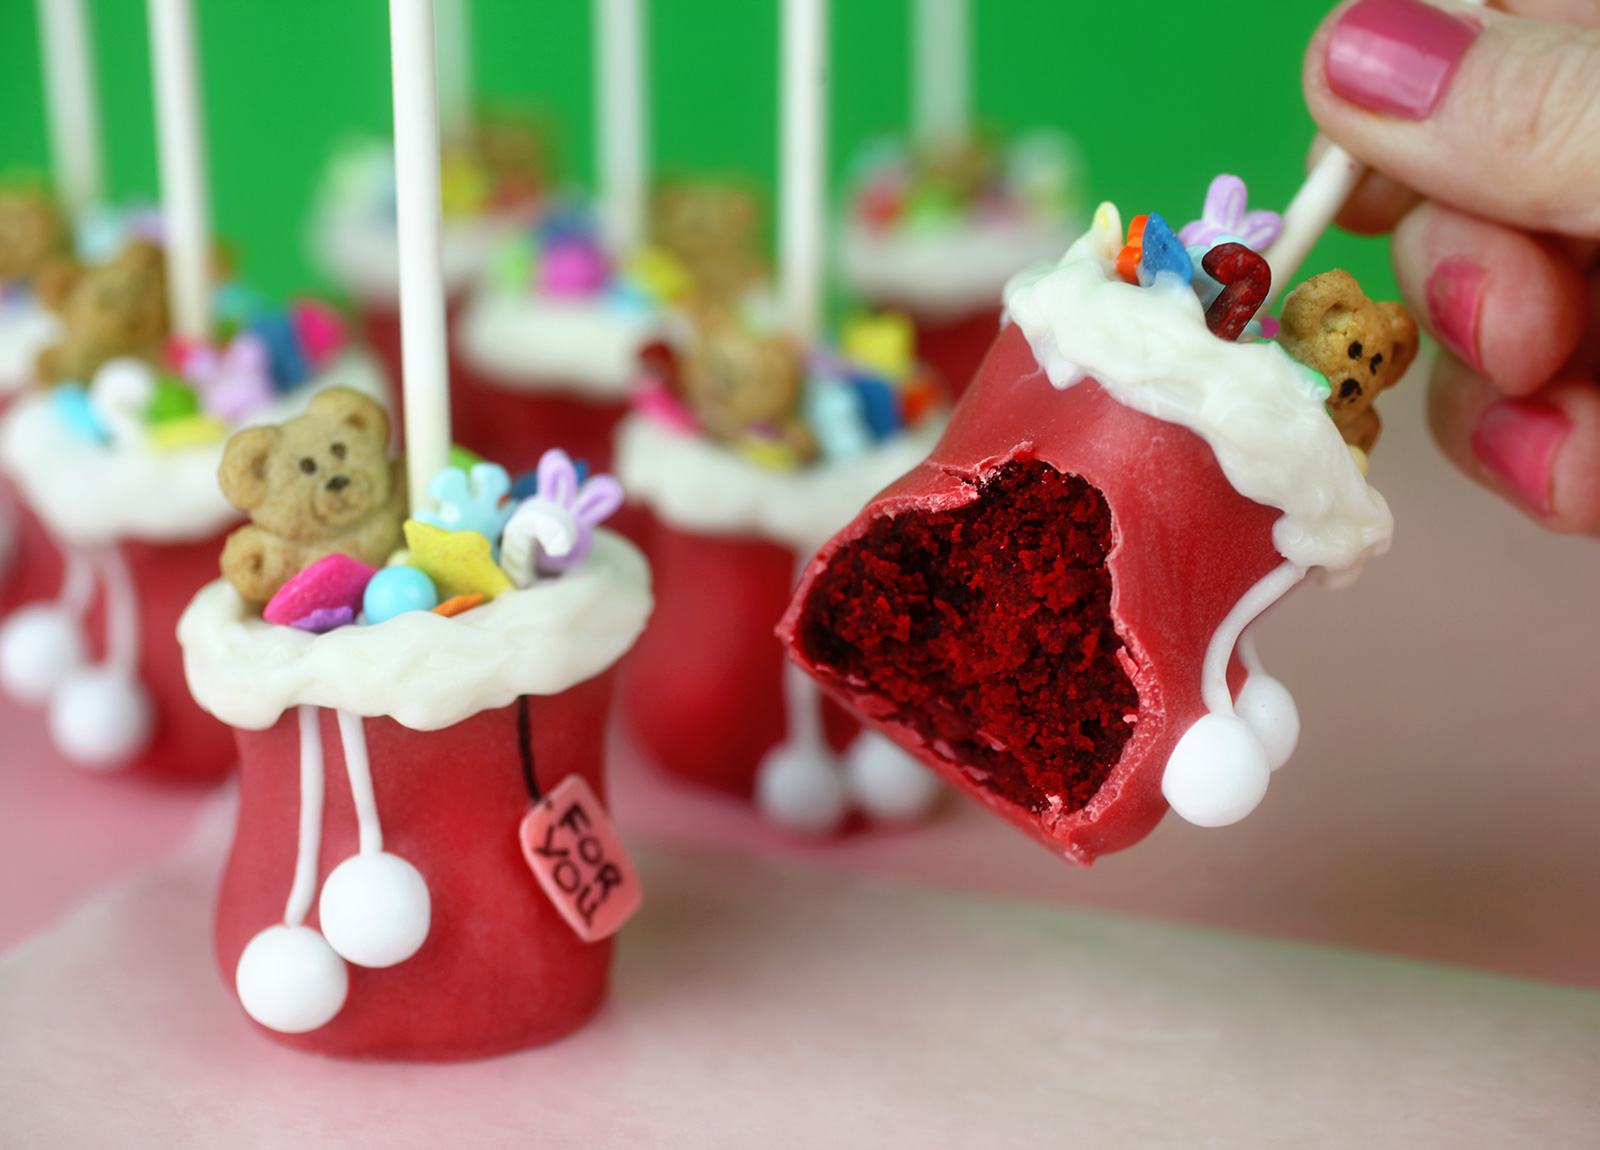
Enjoy and hope these made you smile today.


These Santa’s Bag cake pops are absolutely adorable! Bakerella always does an amazing job of breaking down complex-looking treats into step-by-step instructions that feel achievable. The attention to detail on the tiny toys peeking out of the bag is incredible, and they make for the perfect festive holiday treat.
The design is playful but still really polished, which is what makes Bakerella’s Christmas treats so fun to look at every year.
Santa’s Bag Cake Pops are totally precious and utterly adorable.
These Santa’s Bag Cake Pops are incredibly cute and delightful.
How lovely and charming these Santa’s Bag Cake Pops look!
These Santa’s Bag Cake Pops are simply irresistibly cute!
This was very informative. Rising burial costs are becoming a real concern for many families today. Final expense coverage seems like a smart way to prepare ahead and protect loved ones from unexpected expenses.
These Santa’s Bag Cake Pops are so creative and festive! I especially love the use of Teddy Grahams as little bears in the toy sacks.
These Santa’s Bag Cake Pops are absolutely adorable! I love the idea of using Teddy Grahams and sprinkles to create tiny toy sacks. I always film my holiday baking on my phone, and if you need to pull audio from those .mov clips, MOV to MP3 converter free handles it right in your browser with no upload needed.
These Santa Bag Cake Pops are absolutely adorable! I love the idea of using Teddy Grahams and sprinkles to create the tiny toy bags. If you want your cake pop photos to look extra crisp and professional, try photo hd converter free online to enhance them to HD quality.
These Santa Bag Cake Pops are absolutely adorable! I love the idea of using Teddy Grahams and sprinkles to create the tiny toy bags. If you want your cake pop photos to look extra crisp and professional, try photo hd converter free online to enhance them to HD quality.
These Santa’s Bag Cake Pops are absolutely adorable! I love the idea of using Teddy Grahams to make little teddy bear decorations for the toy bags. If you’re looking to bring your cake pop photos to life, check out Photo to Video AI – it’s amazing for creating dynamic videos from your pictures!
I love the comparison to Nimipäivä, it’s so true, each cake pop does get its own moment to shine! I think kids would be most excited about the ones decorated like Santa or reindeer, maybe with chocolate or strawberry flavors. Bright sprinkles and little edible stars always grab their attention too. It’s amazing how a small treat can bring so much festive joy and smiles to everyone.
Your post on Santa’s Bag Cake Pops looks absolutely delightful—they’re such a fun and festive treat! It made me think of Nimipäivä tänään, where every name gets celebrated, much like how each little cake pop gets its own moment to shine and bring joy. Which flavor or decoration do you think kids would get most excited about this season?
Such a fun and creative idea!
These Santa’s Bag Cake Pops are absolutely adorable!
it’s adorable! i like the idea of using Teddy Grahams and sprinkles to make Santa’s toy bags.
Love that cake so much
This cake is really special, and I’m grateful that you’re willing to provide me the recipe so I can try to make it.
These Santa’s Bag Cake Pops are absolutely adorable! Love the playful details with the sprinkles and Teddy Grahams, so fun and festive. Can’t wait to try making them!
Awesome Santa’s bag cake pops that combines the magic of Christmas with scrumptious flavors! A delightful and festive treat for your holiday parties!
These are absolutely adorable. Can I ask where you bought the tiny candies? Edible of course? What are the white balls made of at the end of the strings? Thanks for sharing.
You do wonderful work! I am so happy I found your site! Merry Christmas to you and yours!
These Santa Bags are too cute…I must make these with the grandkids…thanks for sharing Merry Christmas and Happy New Year to you and your family.
OMG!!!! Sooooo cute! Thanks Bakerella for more amazing ideas ??
So much creativity and attention to detail. Classic Bakerella!
Move over Reindeer… was planning on making your Reindeer cakepops for Christmas. Looks like I need to go shopping for sprinkles today. Thankyou!!
Merry Christmas from Canada.
These are seriously adorable!