
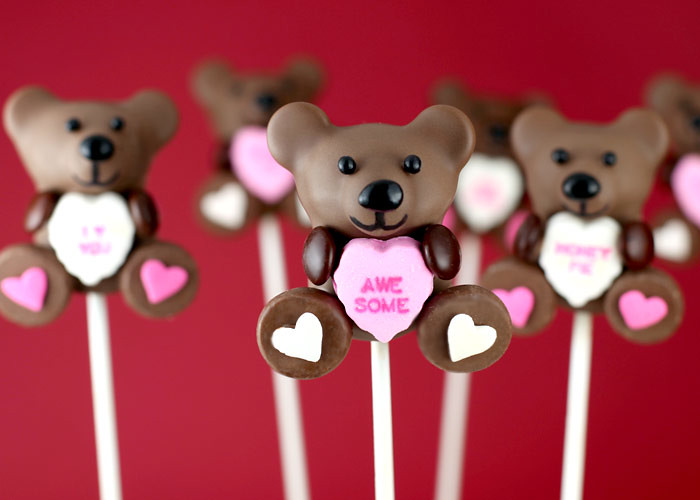
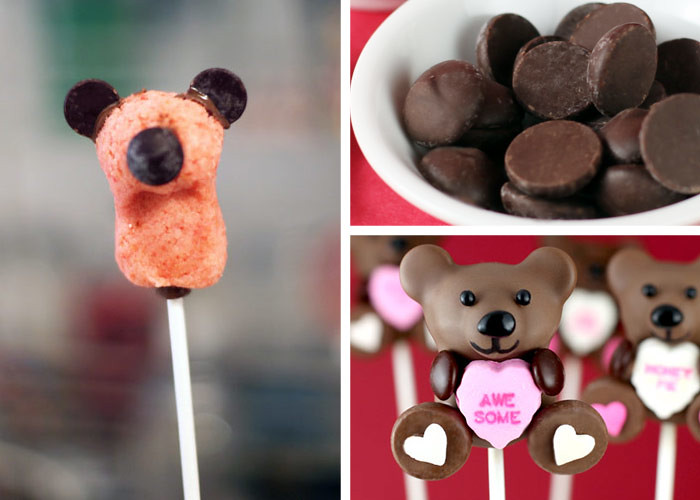
I’ve already made some cake pops that look like conversation hearts, using pastel candy coatings and a heart-shaped cutter. They’re in my Cake Pops book. But, this weekend I wanted to try using real conversation heart candies to make some cute teddy bears look awesome.

Awe. Some.
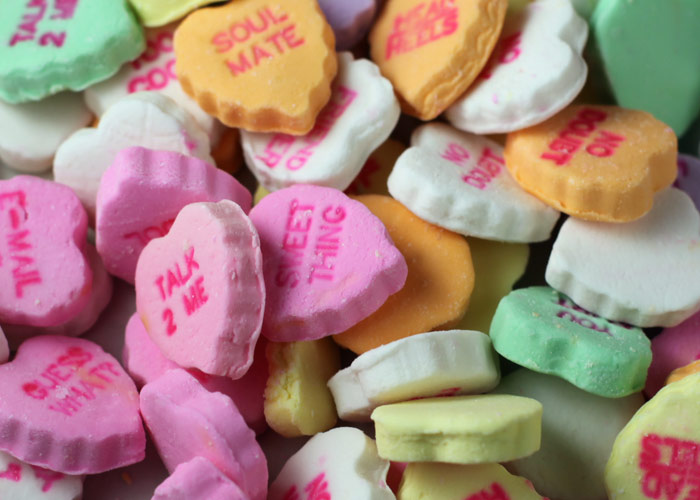
These are large conversation heart candies. Not the little ones you usually see. They are about 1 inch tall and just the right size to place in front of teddy bear’s belly. (Found at Hobby Lobby craft store by the way.)
I’ve also already made teddy bear cake pops. They are in the book, too. But they aren’t the entire body… just the head.
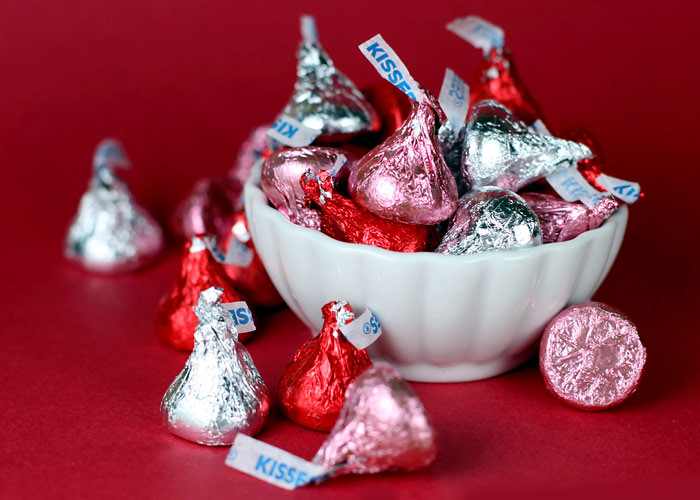
So for these I thought Hershey’s Kisses would make perfect legs. Perfect enough to resemble a plush doll anyway.
For his arms, his front paws… I used brown M&M’s candies. I could have used a slightly larger candy, but these were pretty close to the color of the Kisses and the chocolate candy coating that I used for the bodies, so I rolled with it. Besides, it’s all I had on hand that was close enough to work and also look like he was holding the heart.
For the rest of the details I used the following…
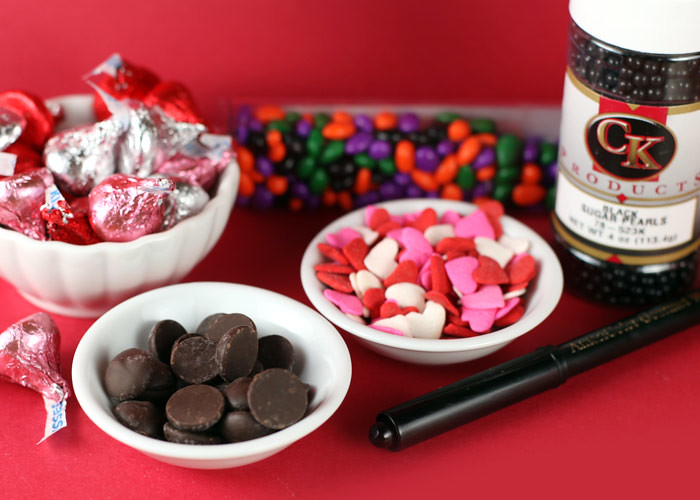
Large jumbo heart sprinkles on the legs.
Black coated sunflower seeds for noses.
Black sugar pearls for eyes
A black edible ink pen for smiles.
Oh and chocolate chips to help shape the bear’s structure. (FYI – These are Ghiradelli chips. They are larger chocolate morsels and worked great since I was going for bigger ears. They are also a bit flatter, so they weren’t too pointy when placed in position for the nose.)
After rolling out your cake balls (see basic cake pop instructions here), chill in the freezer to get them firm and easier to shape. Take your ball and shape it kind of like a peanut. Use one of your heart candies to press on the front and flatten out the bear’s belly on the lower half.
Melt some chocolate candy coating. Dip the edge of two chocolate chips in the melted coating and insert into the bear cake pop shape for ears. Attach a third chip to the front of the bear’s face to help his nose protrude a bit. Insert your lollipop stick into the coating and then insert about halfway into the shaped cake ball. Return pops to the freezer to firm up again for just a couple of minutes.
After chilling, dip the entire body into the bowl of melted candy coating. Make sure the bowl is deep enough to dip and remove in one motion. The coating should also be thin enough to completely coat the pop without having to stir it in the bowl.
Gently tap off any excess coating. Attach nose, conversation heart and legs while the coating is still wet.
Place in a styrofoam block to dry.
When dry, you can dip your toothpick into some of the leftover melted coating and dot some in position for the eyes. Then just attach the sugar pearls. Dot some on the legs and attach the jumbo heart sprinkles. Apply a little bit of coating to one side of the M&M’s candies and attach them to the body so they appear to be holding the hearts.
Then just draw on some sweet smiles.
Voila. Huggable lovable bears.

Have fun!


These are sooooooo cute
ooooh, so cute ;D I would have something like this bears for a gift ;)
wow,those look amazing!so cute
Cute…..my mom baked for my birthday….
I made these and just cut blocks of chocolate for the legs instead of hersheys kisses
Gorgeous and exemplary, as always. And a highlight on my site, as always: Love Bear Cake Pops
I live in southern California and we don’t have hobby lobby stores where can I go instead?
soooo cool my kids luv it a lot!
they are zo gute
Do you think of it your self because WWWWOOOOOWWWWW you have great and awesome ideas
I love it very much it so cute I going to make
I love the cake pops there cute as a teddy bear! Oh wait they are Teddy bears.whoops!
I tried making them my friends just loved them!
heyy i love cake pops the make me get hunqryy
You inspire us!!! We adore your work. Look at our first achievements at http:cupcakelove.pl:)
OMG these are adorable!! I’m not sure I could pull these off as good as you but I’m sure going to give it a try! Thanks for the great tutorial :)
I just tried to make these, Oh My God! They are not possible for a normal person to make. I have all the things i need, i start by shaping the cake ball into a peanut, and then attaching the nose and ears. At this point i think to myself, these could actually be pretty easy. so i put them in the fridge for a few minutes to cool. I melt my wilton candy melts, and get ready to dunk and attach legs and belly fast, I know this stuff hardens quickly. So I dunk them, one fluid motion, in and out, they come out chunky, not smooth at all. i decide since this is a trial run that I will attach legs anyways, ummm how the heck to you get these giant kisses to attach to the rounded bottom of the bear?? On the next one i try making indents for the kisses before i dunk them, it works out a little better but honestly it still doesn’t look good. If ANYONE has made these succesfully i would like tips on how to do it. I was sooo excited to give these to my son’s class as his valentines, but sadly i think now i will have to settle for making hearts, after wasting at least $20 on supplies for these bears.
ps.. i have made tons of cake pops before, and they usually turn out great and are a big hit!
:(
Can’t wait to make these. They’re sooooooooooooooooo adorable!!!!!
I just bought you book at Christmas time and just love it. I have yet to make any of these adorable creations, but that is about to change. My old oven went out and we just got a new double oven. Double the trouble now!! These Valentine bears are absolutely adorable!! Can’t wait to make some!! Thanks for sharing!!
love it!!
My b-day is a velentines days so.I’m might make these.!!!!!!!!!!!!:):):):):):)
Super cute!!!!!!!!!!!!!!
I totally want to make these for my daughters’ valentines party. Yes they look beautiful and love the simple explanation…BUT on a scale of difficulty when actually making these…where do you sugggest this project ranks? Totally a novice baker…so just because it “looks” easy, I know doesn’t mean it is! :) I know thats where talented people just make things look so darn easy…LOL!! Well I want to try but this would be my first batch…any suggestions are greatly appreciated! …..<3 Bakerella
i have a question… about how long do you think these will take to make? I am a complete beginner with baking, do you think these would be too hard? Do you have any extra tips for me? I looove these, and I think it would be very cute to make!
SOOOOO cute!
i love it!!! I will try to make like this soon!!!
i love the bear.
I admire your creativity, these are just beautiful
I like how you came up with this idea of making valentine teddy bears and it’s very good to give it to the person you love or someone special.
so incredibly talented!
What is that pink thing (the body of the bear) and where do we buy those sticks? (the one u use 2 hold the pops)
I’m making cake balls for a wedding shower at the end of April and would like to freeze them. Should I freeze before or after I dip them in the chocolate?
I’ve recently learned about your blog about a week ago and I must say that I love it…It has changed my thought on things I say that because I just think about what I want to make next just to make everyone happy and to see the joy on there faces. I made the cake pops on St. Patrick’s Day and they were the talk of the office. Thanks and may God continue to bless you.
Ms. North Carolina
I really got to try these..they are very cute i wish i can see one sideways…cant really see how the legs look. Thank you for sharing ur wonderful thoughts.
I just discovered your website today.. can I just say you are one amazingly creative and talented woman?! Where do you come up with these things!!?!! I LOVE cooking and baking and I want to get into it more. I’m still in college and have been using all my spare time to bake! Thank you!! I love ALL of your ideas! I’ve gone through every page of your blog. (pathetic? possibly a little.. i have been looking at it for about five hours..). I’m so excited to get baking!!!!!
Took me longer than I care to admit to make these. Night 1: bake, cool, crumble, shape round cake balls. Night 2: Shape into peanut shape, add ears/nose, dunk in choco. Night 3: Add appendages, heart candy and draw faces. Let dry. Night 4: Put into treat bags and tie with pretty ribbon.
Sad to think that classroom of first-graders destroyed them in a matter of seconds.
These are cute but not a one night project. Think I’ll do cupcakes and let it be the body then make just the head.
These are just so cute! Too bad they’re impossible to make. Definately thought I could make these the night before the big day and they have proved impossible. Thanks so much for posting something that is just “so easy.” Not to mention half the things you have to get are not very cheap.
I’ve followed this blog for so long now and never been let down this bad.
These are way too cute and brilliant in the design! Awesome. LOVE
Also, thinking maybe, if I ever make these again, what would happen if I attached the legs (Kisses) BEFORE the dunk into the chocolate coating. The Kisses, at least the bag that I got, were kind of dry looking and had lots of nicks and imperfections that might benefit from a dunking beforehand. Thoughts, anyone?
Love this project! A bit ambitious for never having made cake pops before, and mine are a bit lumpy and mis-shapen compared to the photos above, but my kids and their classmates (and the teachers!) were so impressed. I couldn’t find black sunflower seeds and Michaels seemed to have every color sugar pearl EXCEPT black, so I used royal icing instead.
Here’s a photo: http://flic.kr/p/9hvcYP
This project was lots of fun, though labor intensive. Next up, regular ol’ cake pops will seem like a breeze.
I am in the process of making these now for my son’s valentines! let me tell you, I started off totally stoaked about them but now im just getting a little frustrated with the legs :( they are a pain to put on and then when they dry they keep cracking! I don’t know what i’m doing wrong…hope somone can give me some helpful advise! I really want them to turn out! i’m glad i started today so I have enough time to perfect them by monday! I love the idea, I guess i got a little ambitous for my first attempt at cake pops! LOL
I made these for a treat for my son’s class. I thought they were too cute. Let me tell you now that I LOATHE them. Hate is not a strong enough word. Despise, detest, wish them an evil, melty death,,,,yeah they were THAT bad to make. First, the bits for the eyes and nose do not exist anywhere near me. I looked for two weeks. I ended up buying tiny candy eyes and using black dots out of a sprinkle mix for the nose. I also could not find the brown M&M’s but substituted black ones. So off I go to make these little creatures of doom. I used both Nestle’s and Hershey’s chips for the ears and nose (no Ghiradellis to be found). Both produced a godawful nasal protrusion that made them look more like weasels than bears. Next, the bodies cracked. Almost every freaking one. Did not matter if I cooled them or not. Did not matter the chocolate I used as I switched brands after the first kind kept cracking. It was not a matter of not following the recipe as I followed it exactly. This was not my first foray into cakeballs either. I have made them numerous times with good results…althought the kitchen usually looks like a warzone after some of the more complex ones. But these bears…ugh. NEVER again. Some other parent saw them and said ohhh those are so cute. All I could think was how lousy they looked and what a miserable ordeal they were to make. These things were a joke. If ANYONE was able to reproduce the above pictured results without ending up babbling in the fetal position I would be amazed. I would post a pic of the ones I did, but unlike all of my other creative efforts I took no pics of these, they were too hideous. I even threw out the remaining pops instead of giving them to other teachers and friends because I was embarassed to hand them out. I will never make them again. However, if anyone ever remarks that they need to make a chocolatey weasel I will be sure to give them this link! =-(
You.Are.Amazing. :)
Had to post how much fun I’ve had with these bears! I made the cutest polar bears with white chocolate and cookies/cream kisses. The bears had speckly legs. Thanks for such a fun idea. Everyone I send to your site comes back to me to try out something new.
When I got the Godiva morsels, I thought they’d be perfect. But they melted when I dipped the pops! No ears. They didn’t fall, just melted. I cooled the coating a bit, but then it got lumpy. These are awfully cute…wish mine was (I didn’t go past the one; reshaped into balls).
I love your blog as well as your book! I am attempting these teddy bear pops tonight. I would feel more confident about making them if you had taken a profile shot of them. I’m having trouble wrapping my mind around fitting the large conversation heart and the two kisses all onto the body of the bear. It feels like there isn’ t enough cake to hold the legs on securely. Also, I’m assuming that I need to make the cake balls much larger to fit everything on there.
I’m having a difficult time dipping my cake pops and having them come out looking good. You mention to make sure the chocolate is thin enough – how do I thin it up and still get the chocolate to set up?
Thanks!
I am so impressed! I have five children and I am always looking for new ideas. Thank you for your inspiration. You are amazing.
These are darling!! Thanks for the post, Bakerella. I’m makin’ these little bears today for the kids’ team….they’re holding soccer balls and lil’ truffle cupcakes, tho’.
Hey Bakerella – love this post and am completely inspired! Would you recommend doing this with the cheesecake recipe or would that be too heavy / dense to shape and coat?