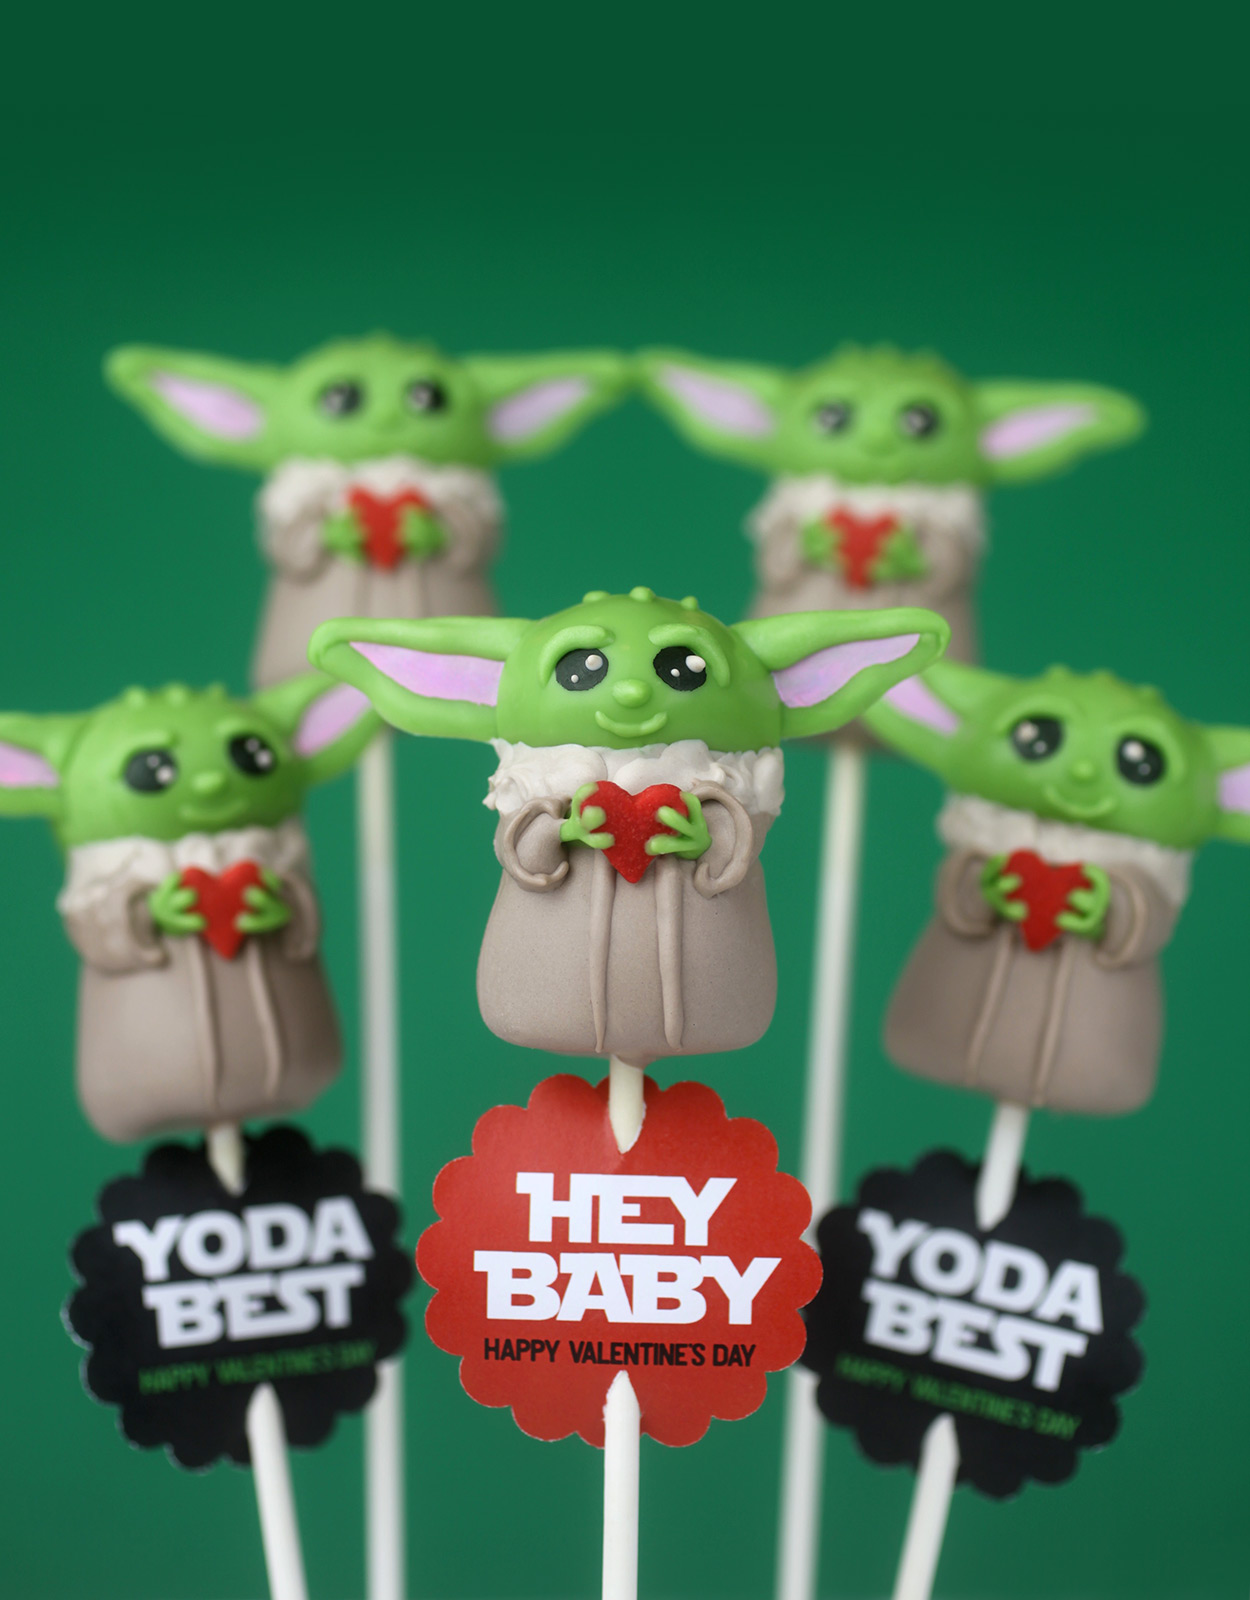
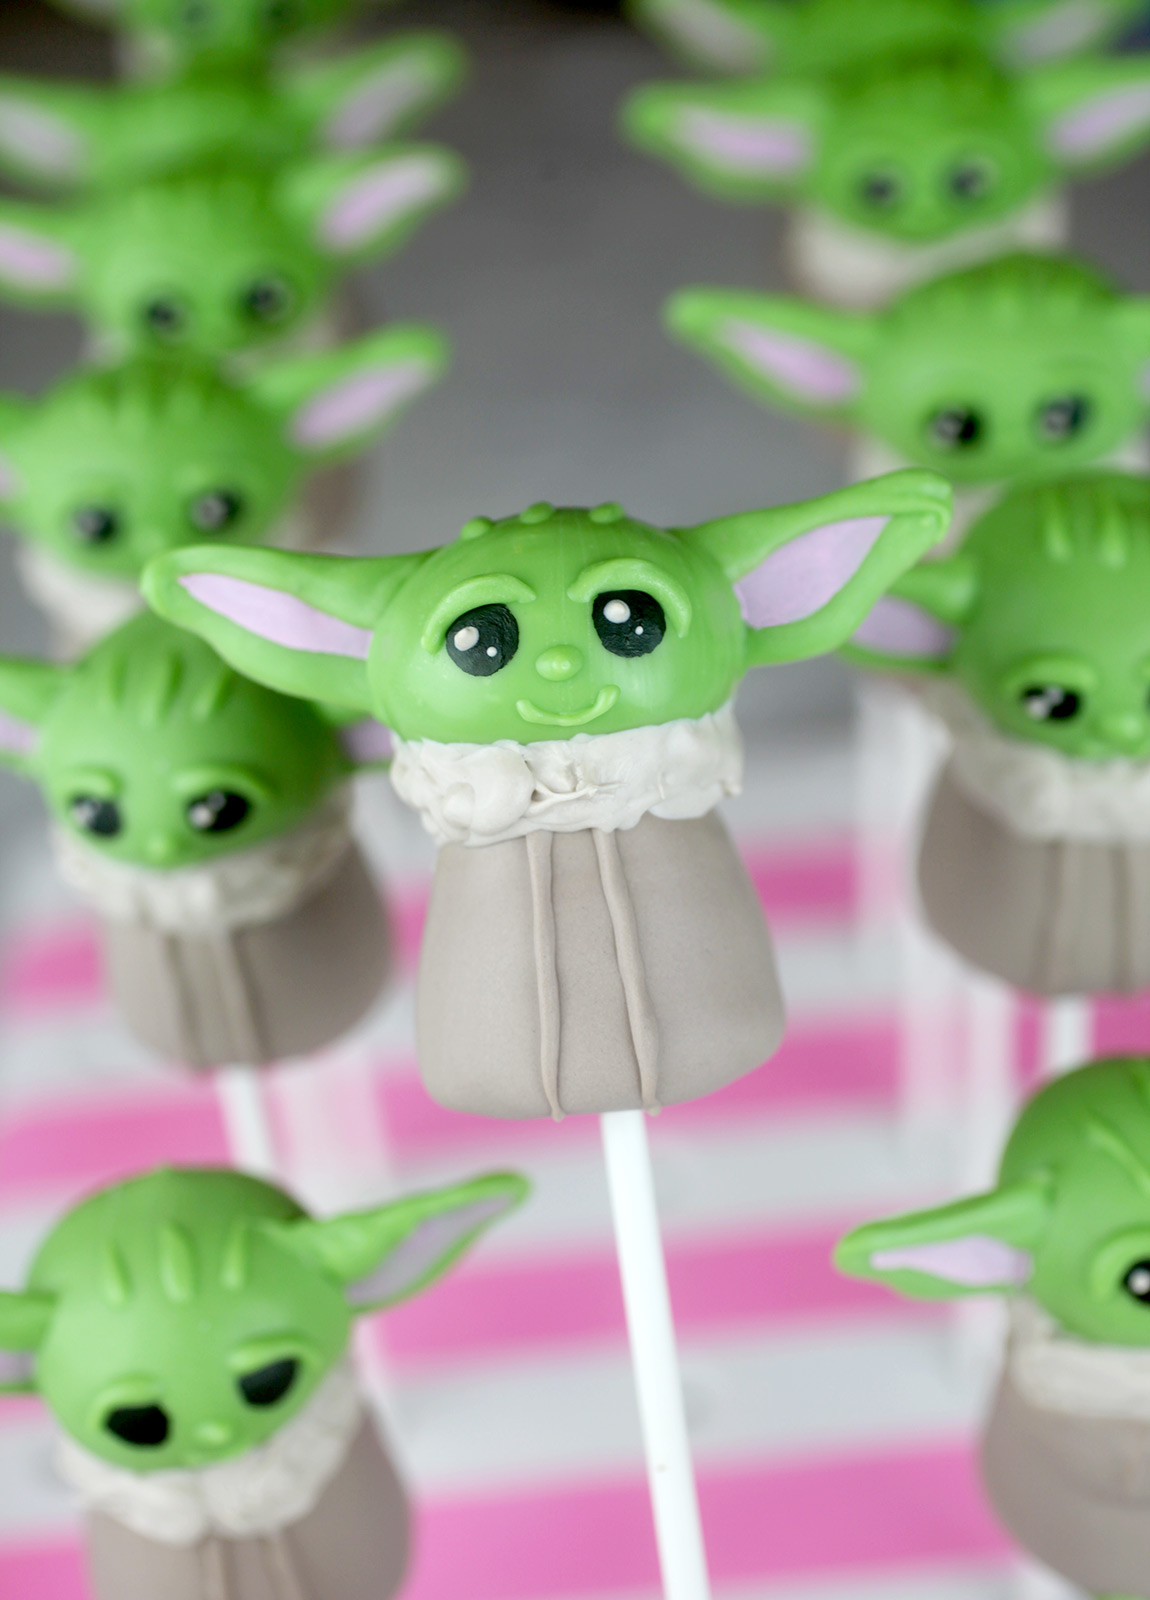
It’s Baby Yoda and my latest crazy cake pop attempt. You guys should know that I wouldn’t be able to resist trying to turn this sweet little baby child into an adorable, edible cake pop. And a Valentine’s Day treat seemed to be the perfect time.
I love recreating characters because they are usually the most challenging. And he might look intimidating, but don’t worry, I will break down all the steps for you into hopefully, easy-to-follow directions. And as always, keep in mind, you don’t have to do every detail I show to make a cute cake pop. I’ll give you some tips along the way to reduce some of the steps if you like.
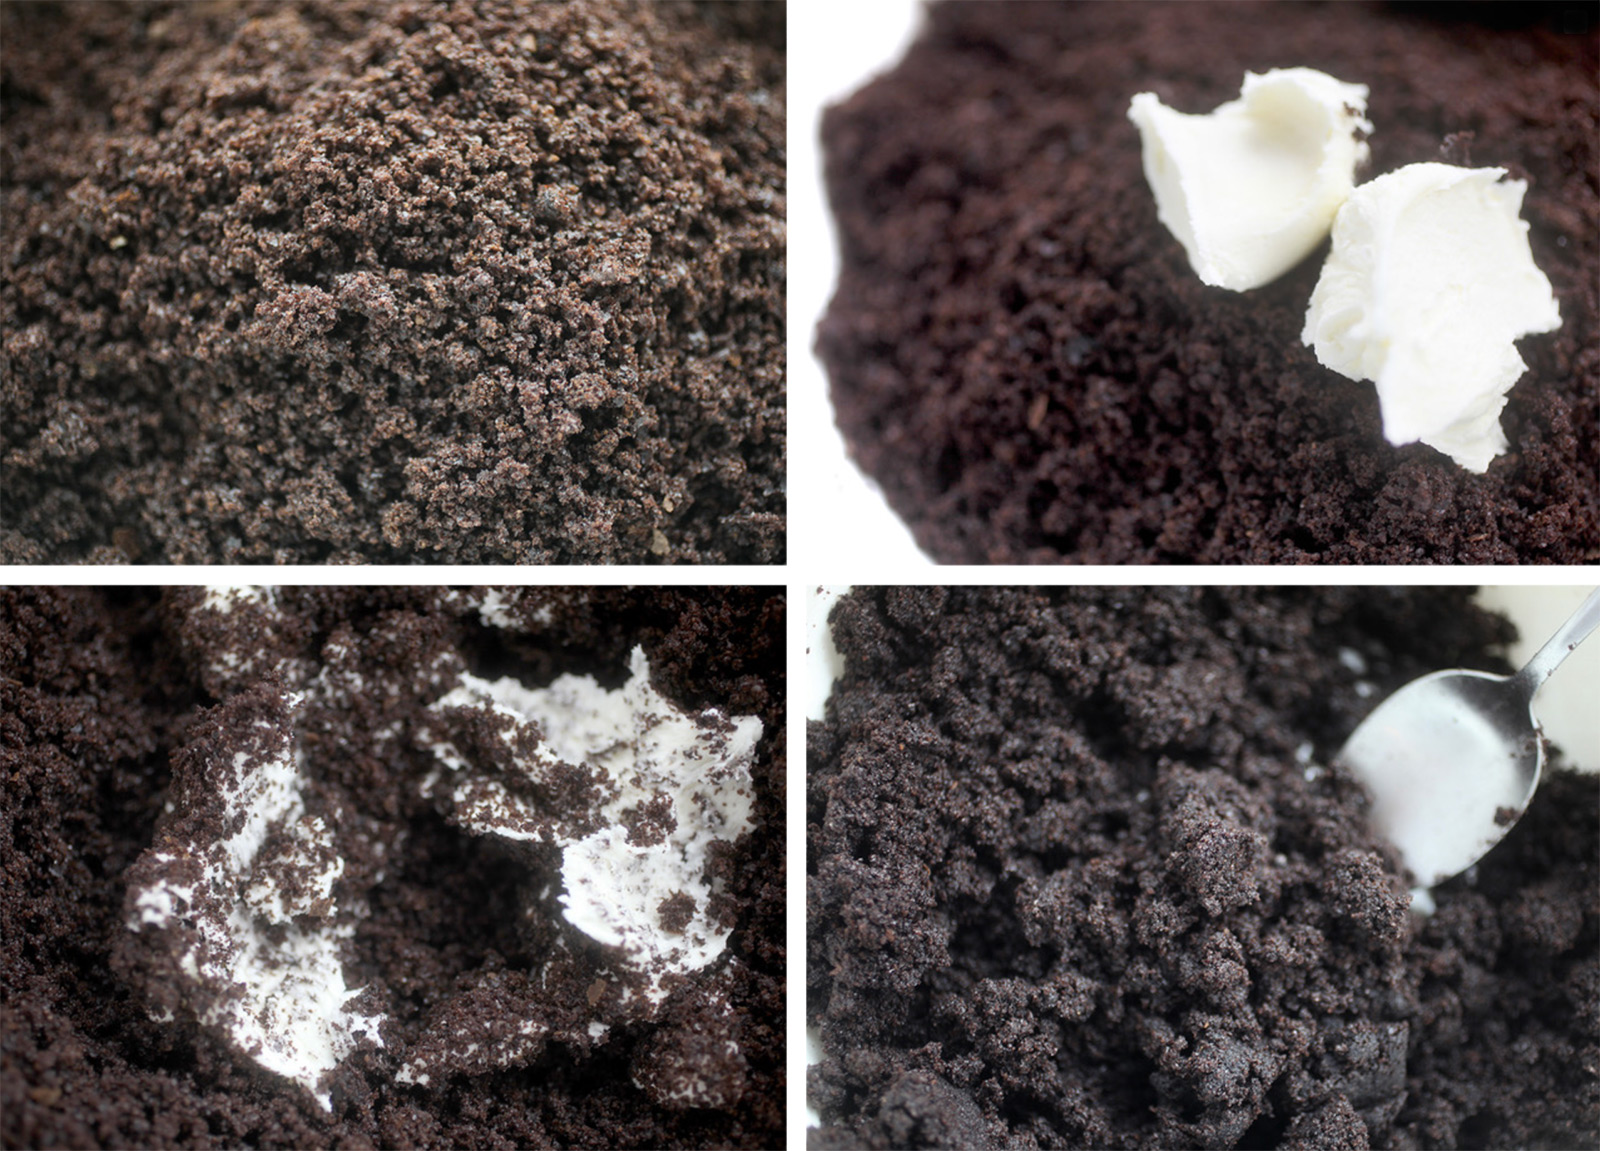
Cake pops start with crumbled cake and frosting. Yes and yum! Use my basic cake pop instructions here to get started. Then follow the directions below to shape, dip and decorate.
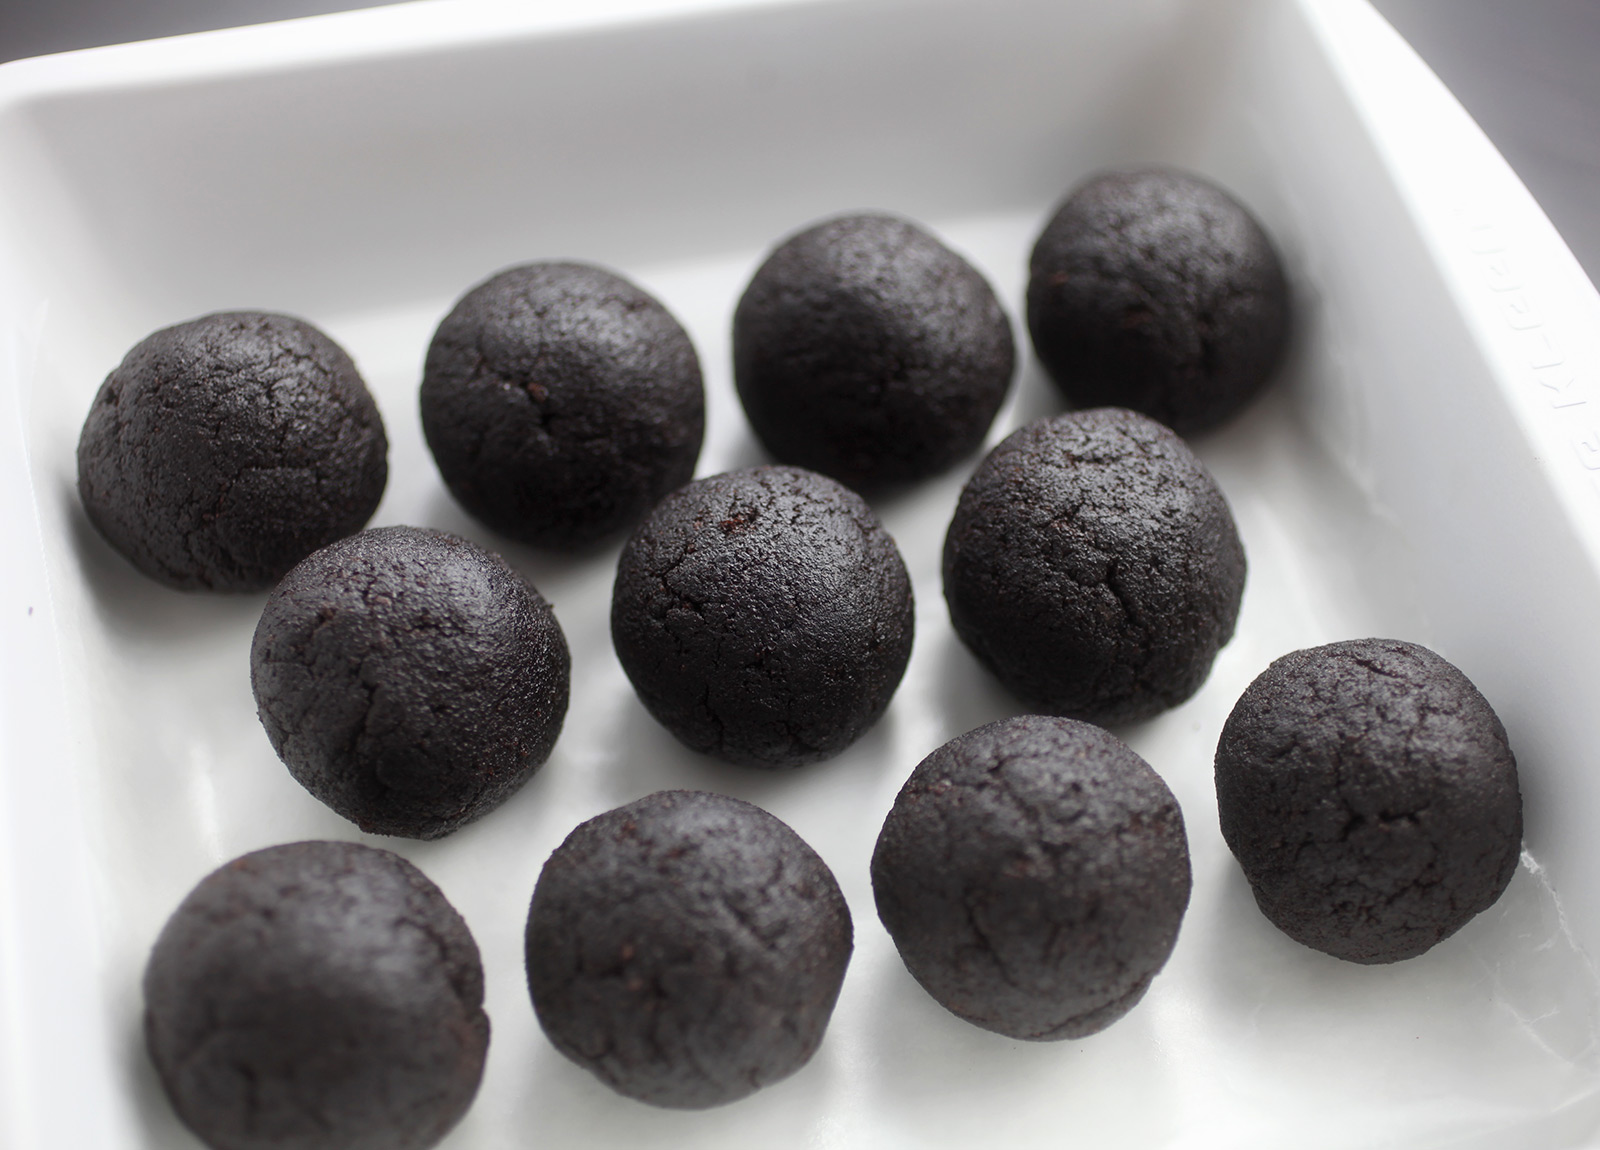
I always roll the cake pop mixture into balls first before shaping to make sure they are pretty evenly sized and also so I know how many I’m going to make. I rolled these into bigger balls to account for the combined body and head. I forgot to measure but they were probably 1.5 -2 inches in diameter.
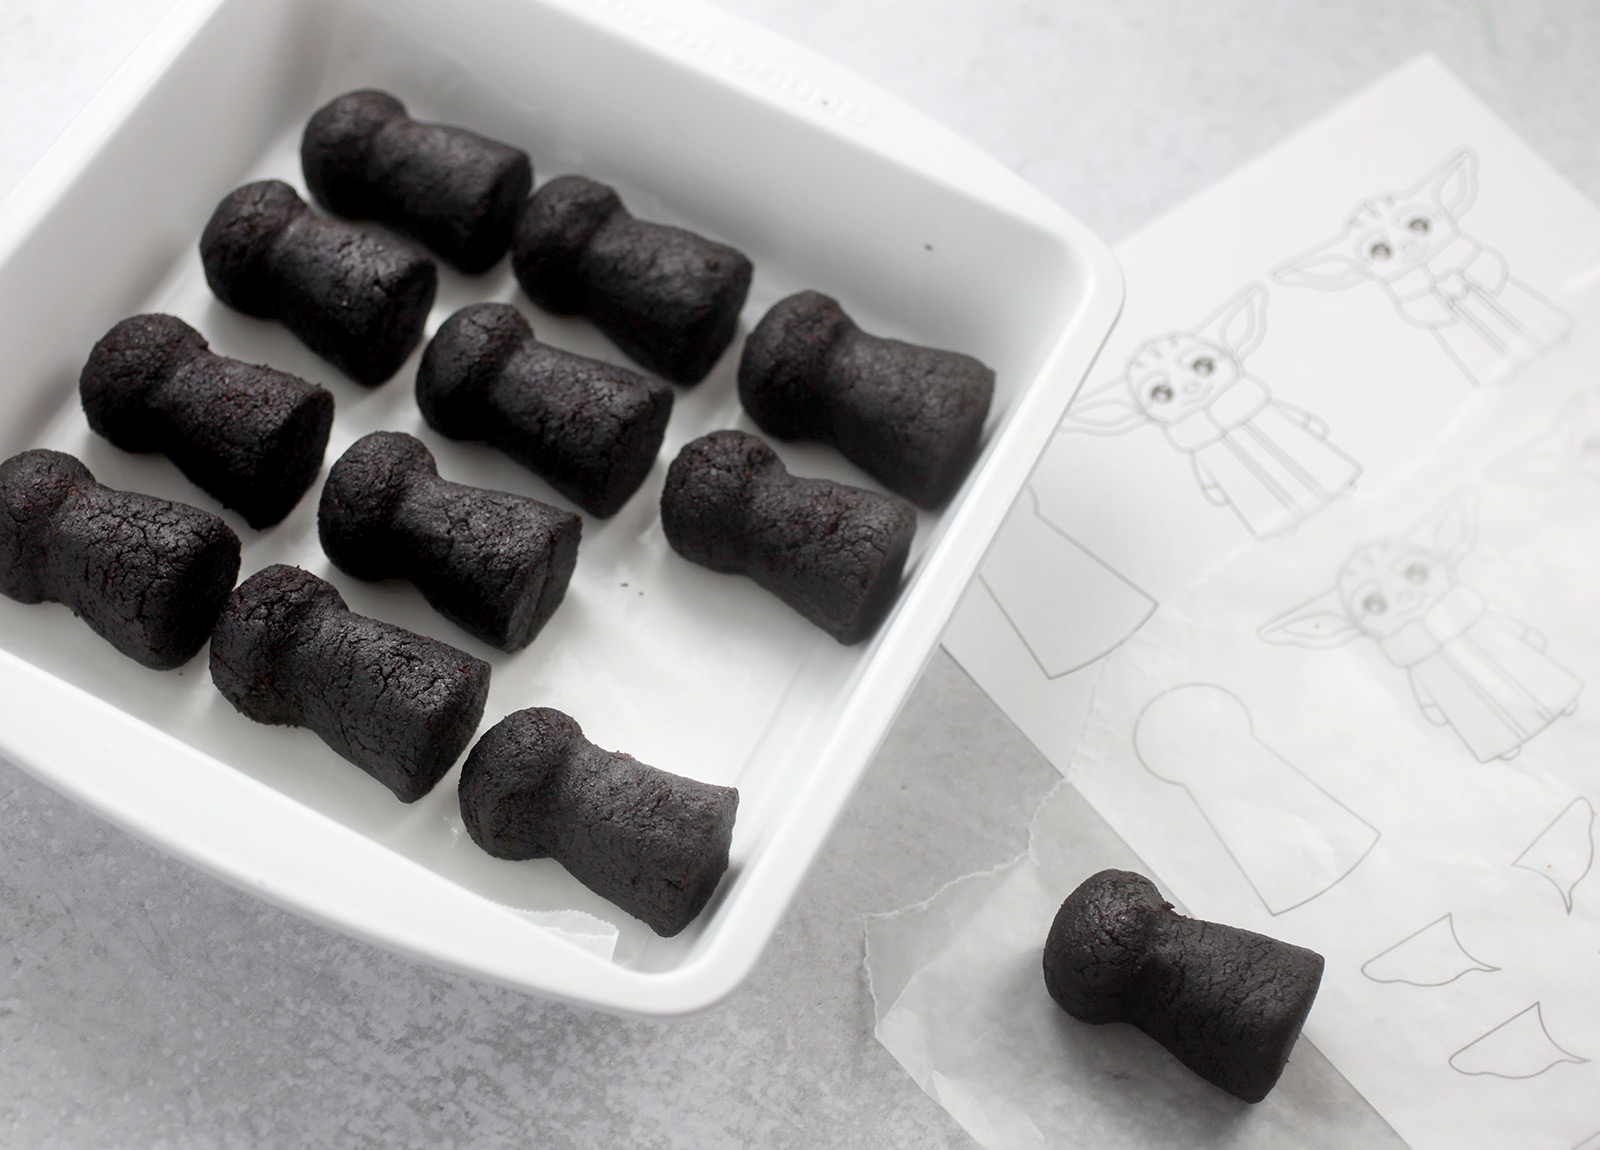
Now, reshape them to resemble a salt shaker.
When making detailed characters, it’s helpful to have reference. So, I made an illustration inspired from the character version on The Mandalorian and created a template you can download and use as a helpful guide.
Use the template under a piece of wax paper and shape the rolled cake ball to match the shape and size on the template. Use your fingers to mold the small head and angled body. Slide the bottom of the body on the wax paper and it will help create a smooth, flat surface. Use the side of a lollipop stick to press against the cake shape to define the neck if needed.
Once shaped, leave on the counter for 30-45 minutes. This can help with the occasional problem of cracking after dipping by allowing the compacted cake pop mixture to rest and expand.
Then, place in the freezer for about 15 minutes to firm up for dipping. Transfer them to the fridge to remain chilled, but not frozen.
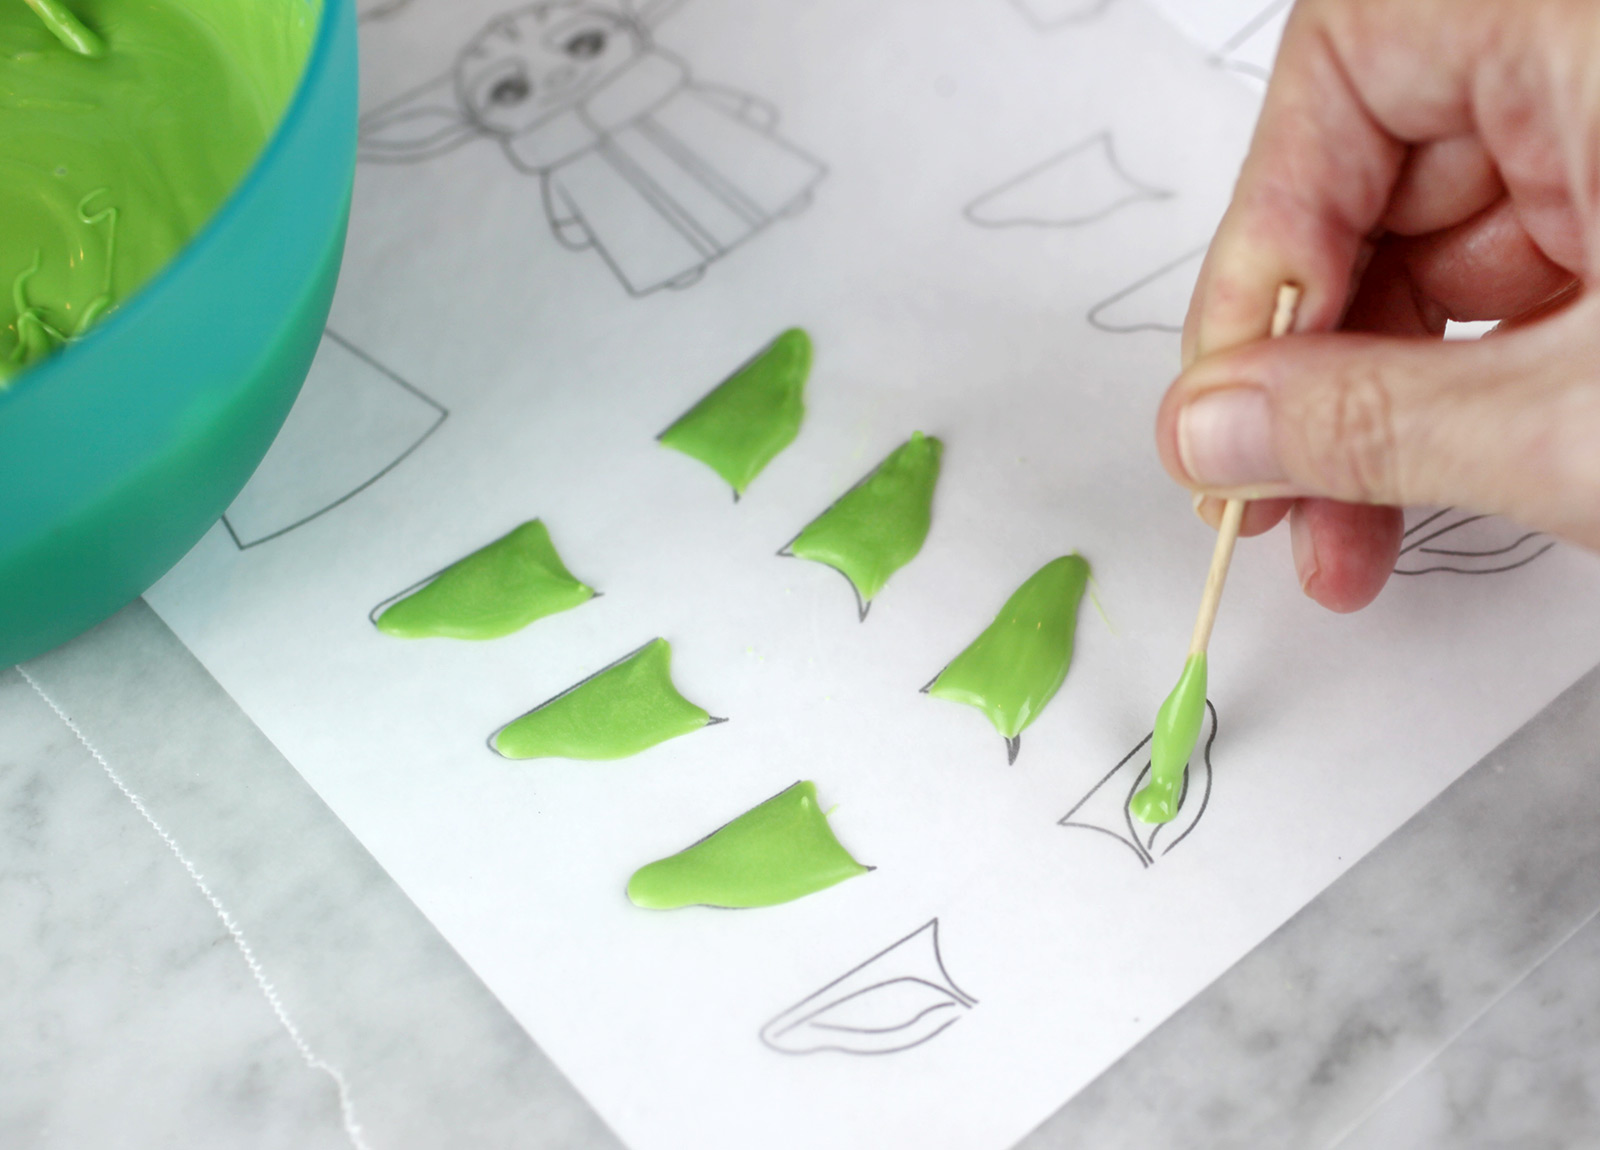
Use the template to make the ears, too. Just dip a toothpick into melted green candy coating and use it to fill in the shape. Make the ears on the thicker side without the coating falling outside the lines. Then just let them dry completely.
For light green coating, mix dark and white vanilla candy wafers together when melting. You can also use vanilla candy wafers mixed with green oil-based candy coloring.
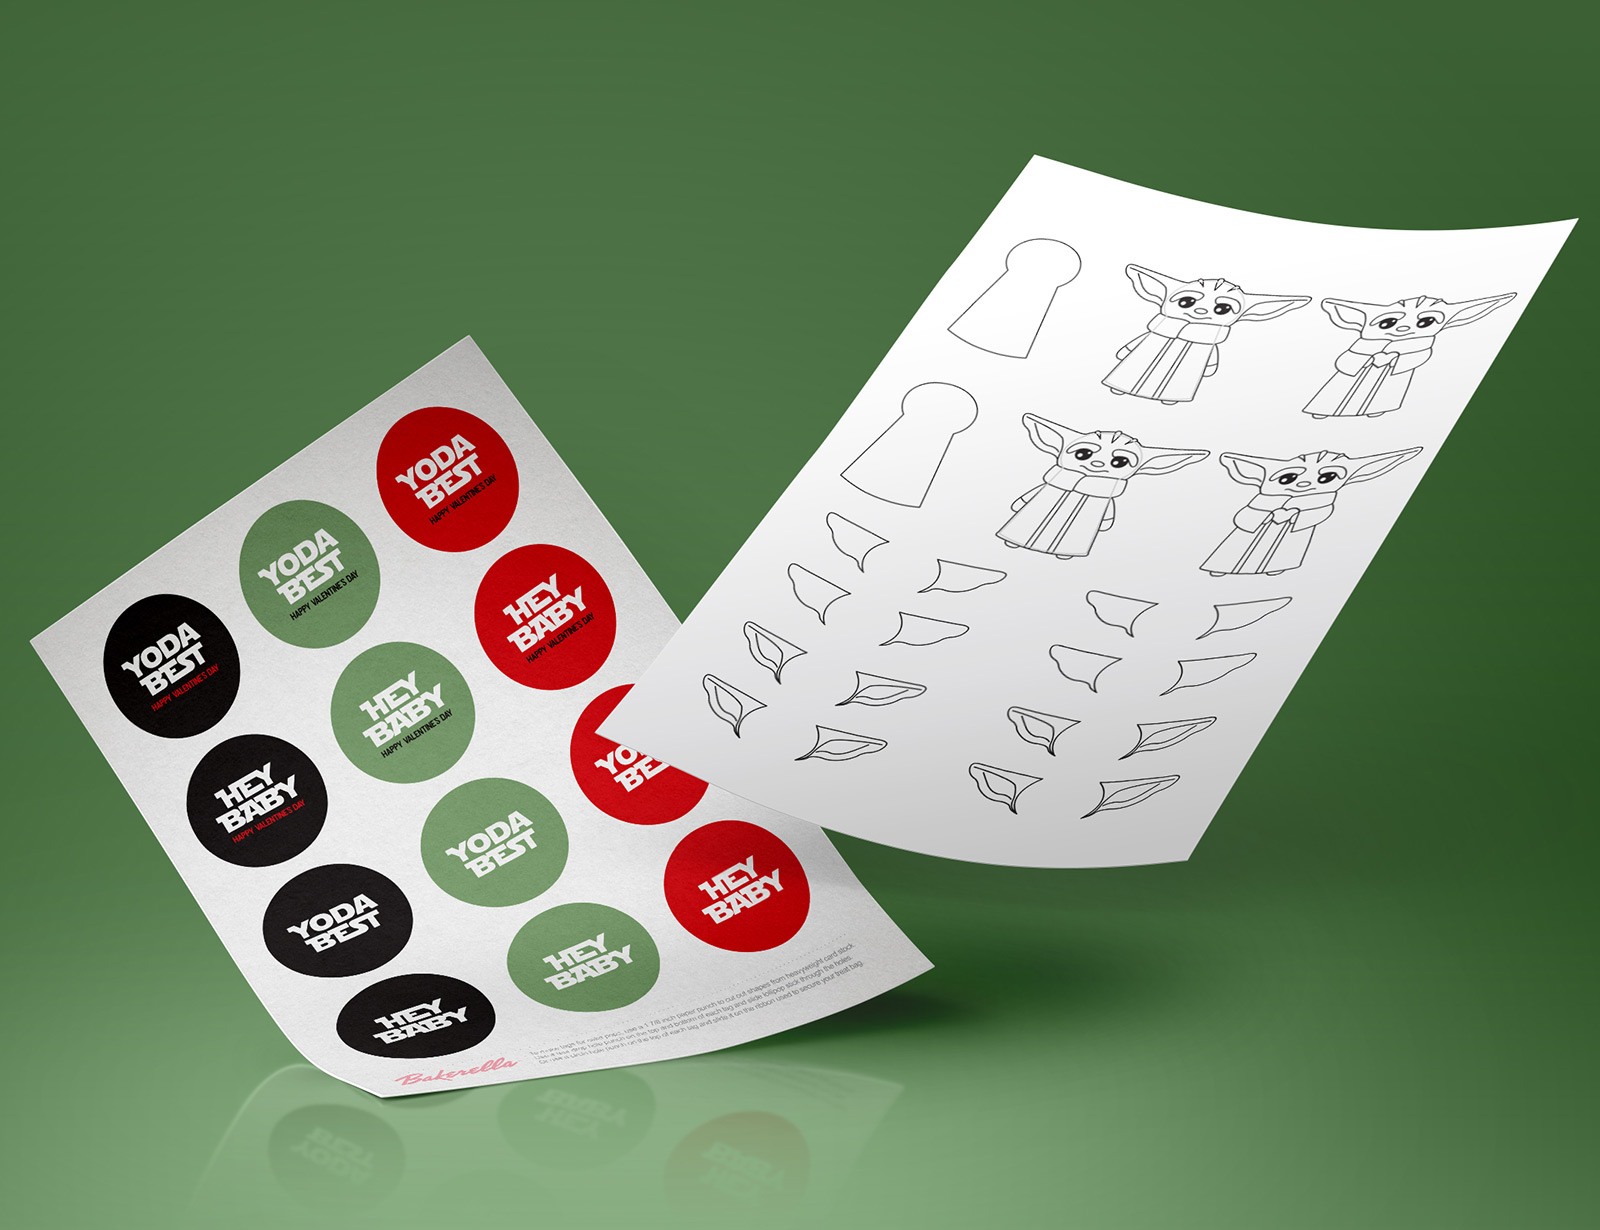
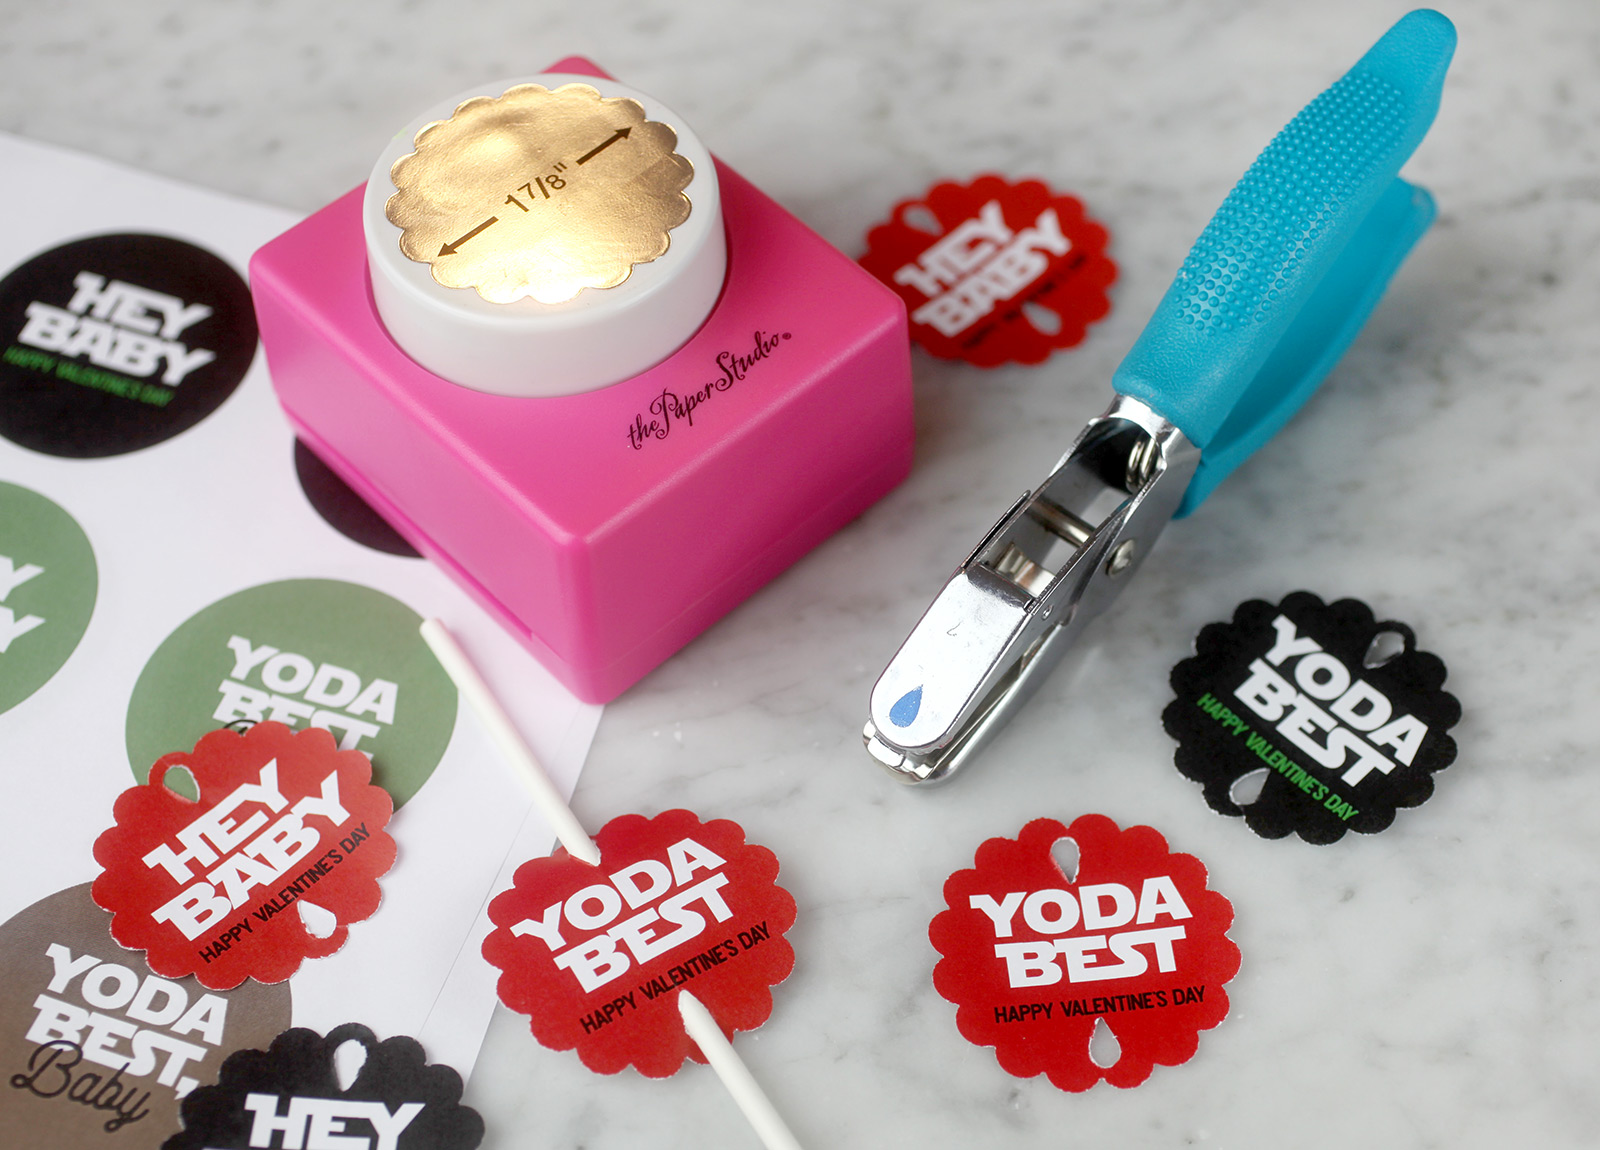
Here are pdfs of the template and coordinating tags that you can download and use. I used a 1-7/8 inch paper punch for the tags, but a 2-inch can also work. Just print out the pdf slightly higher than 100% to accommodate if needed. Also, the tags include a version without Happy Valentine’s Day if you need it.
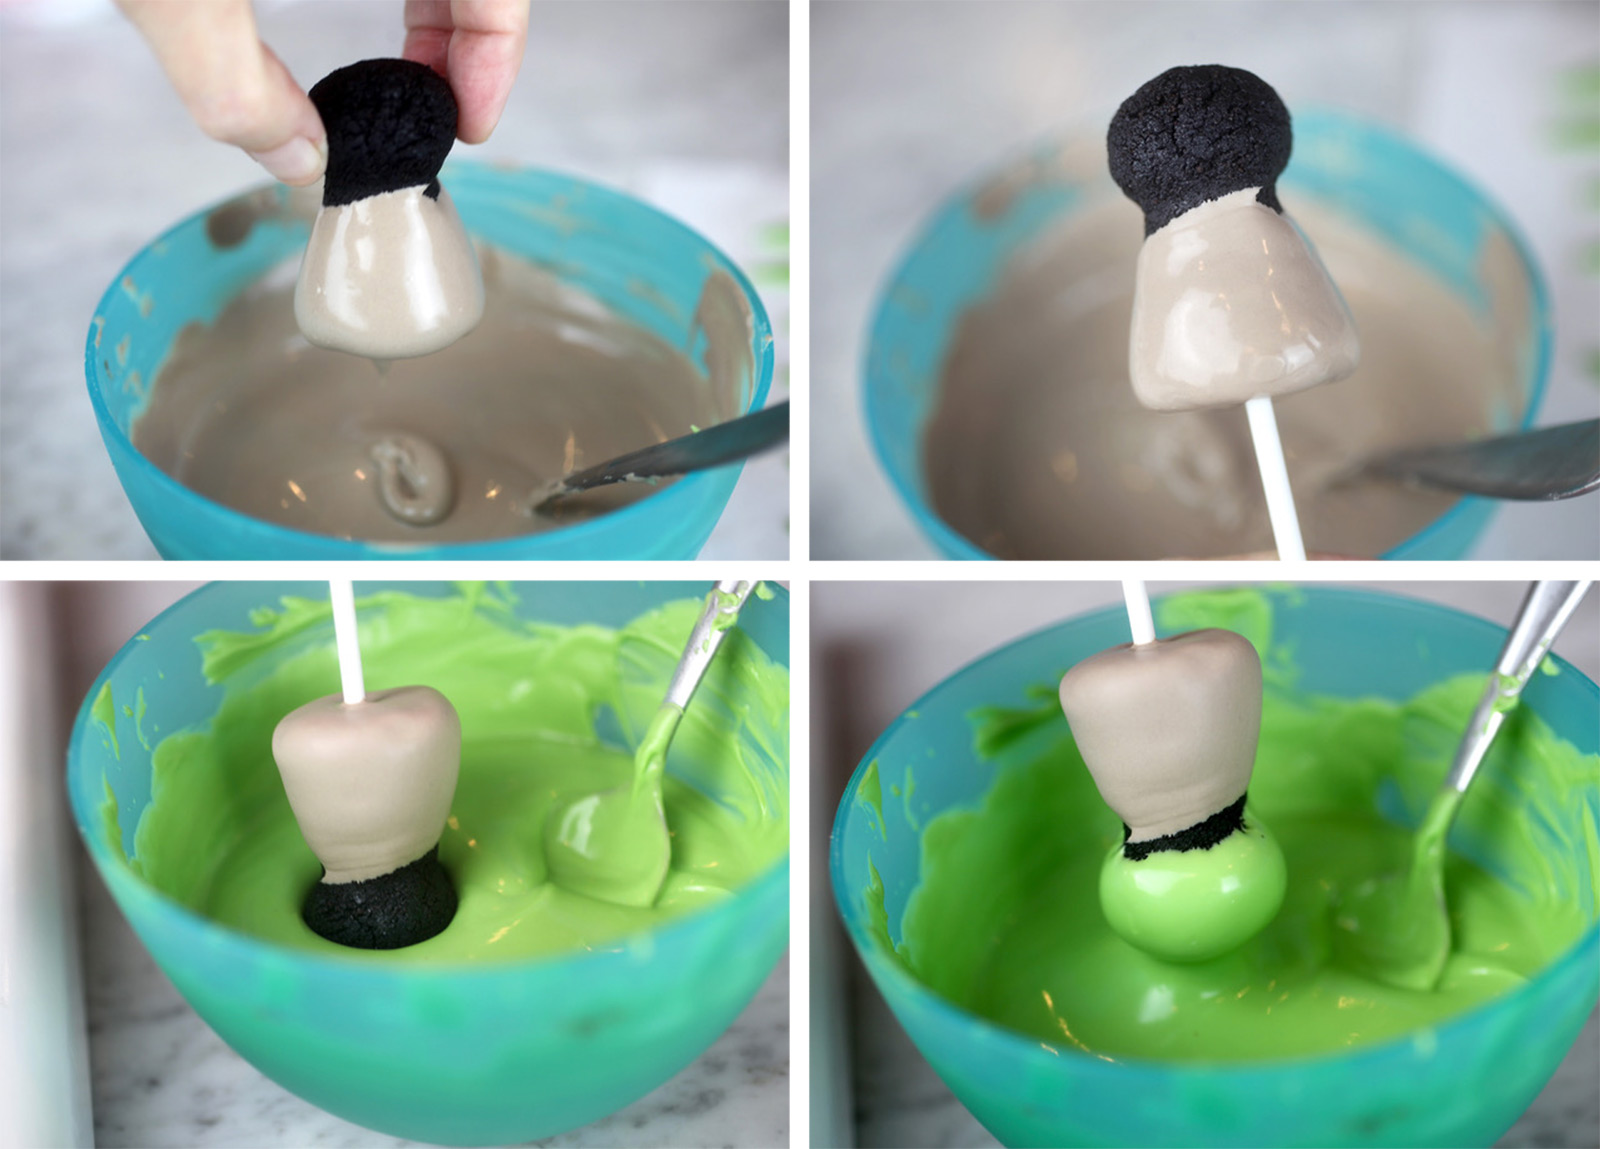
- Okay now let’s decorate. Remove a chilled shaped cake ball from the fridge one at a time and holding by the head, dip into light brown melted candy coating.
- Gently swirl to let excess coating fall off and immediately insert a lollipop stick into the bottom center of the cake ball. Insert halfway for support – about the same height as the body and let dry.
- Once dry, dip the head into the green candy coating and remove allowing any excess coating to fall off. Don’t worry if the cake is exposed around the neck. You’ll be covering it up soon with more coating for the collar.
- Once you dip the head, immediately place two ears in position on either side and hold in place until they are set.
- Repeat with remaining cake pops to get to this step.
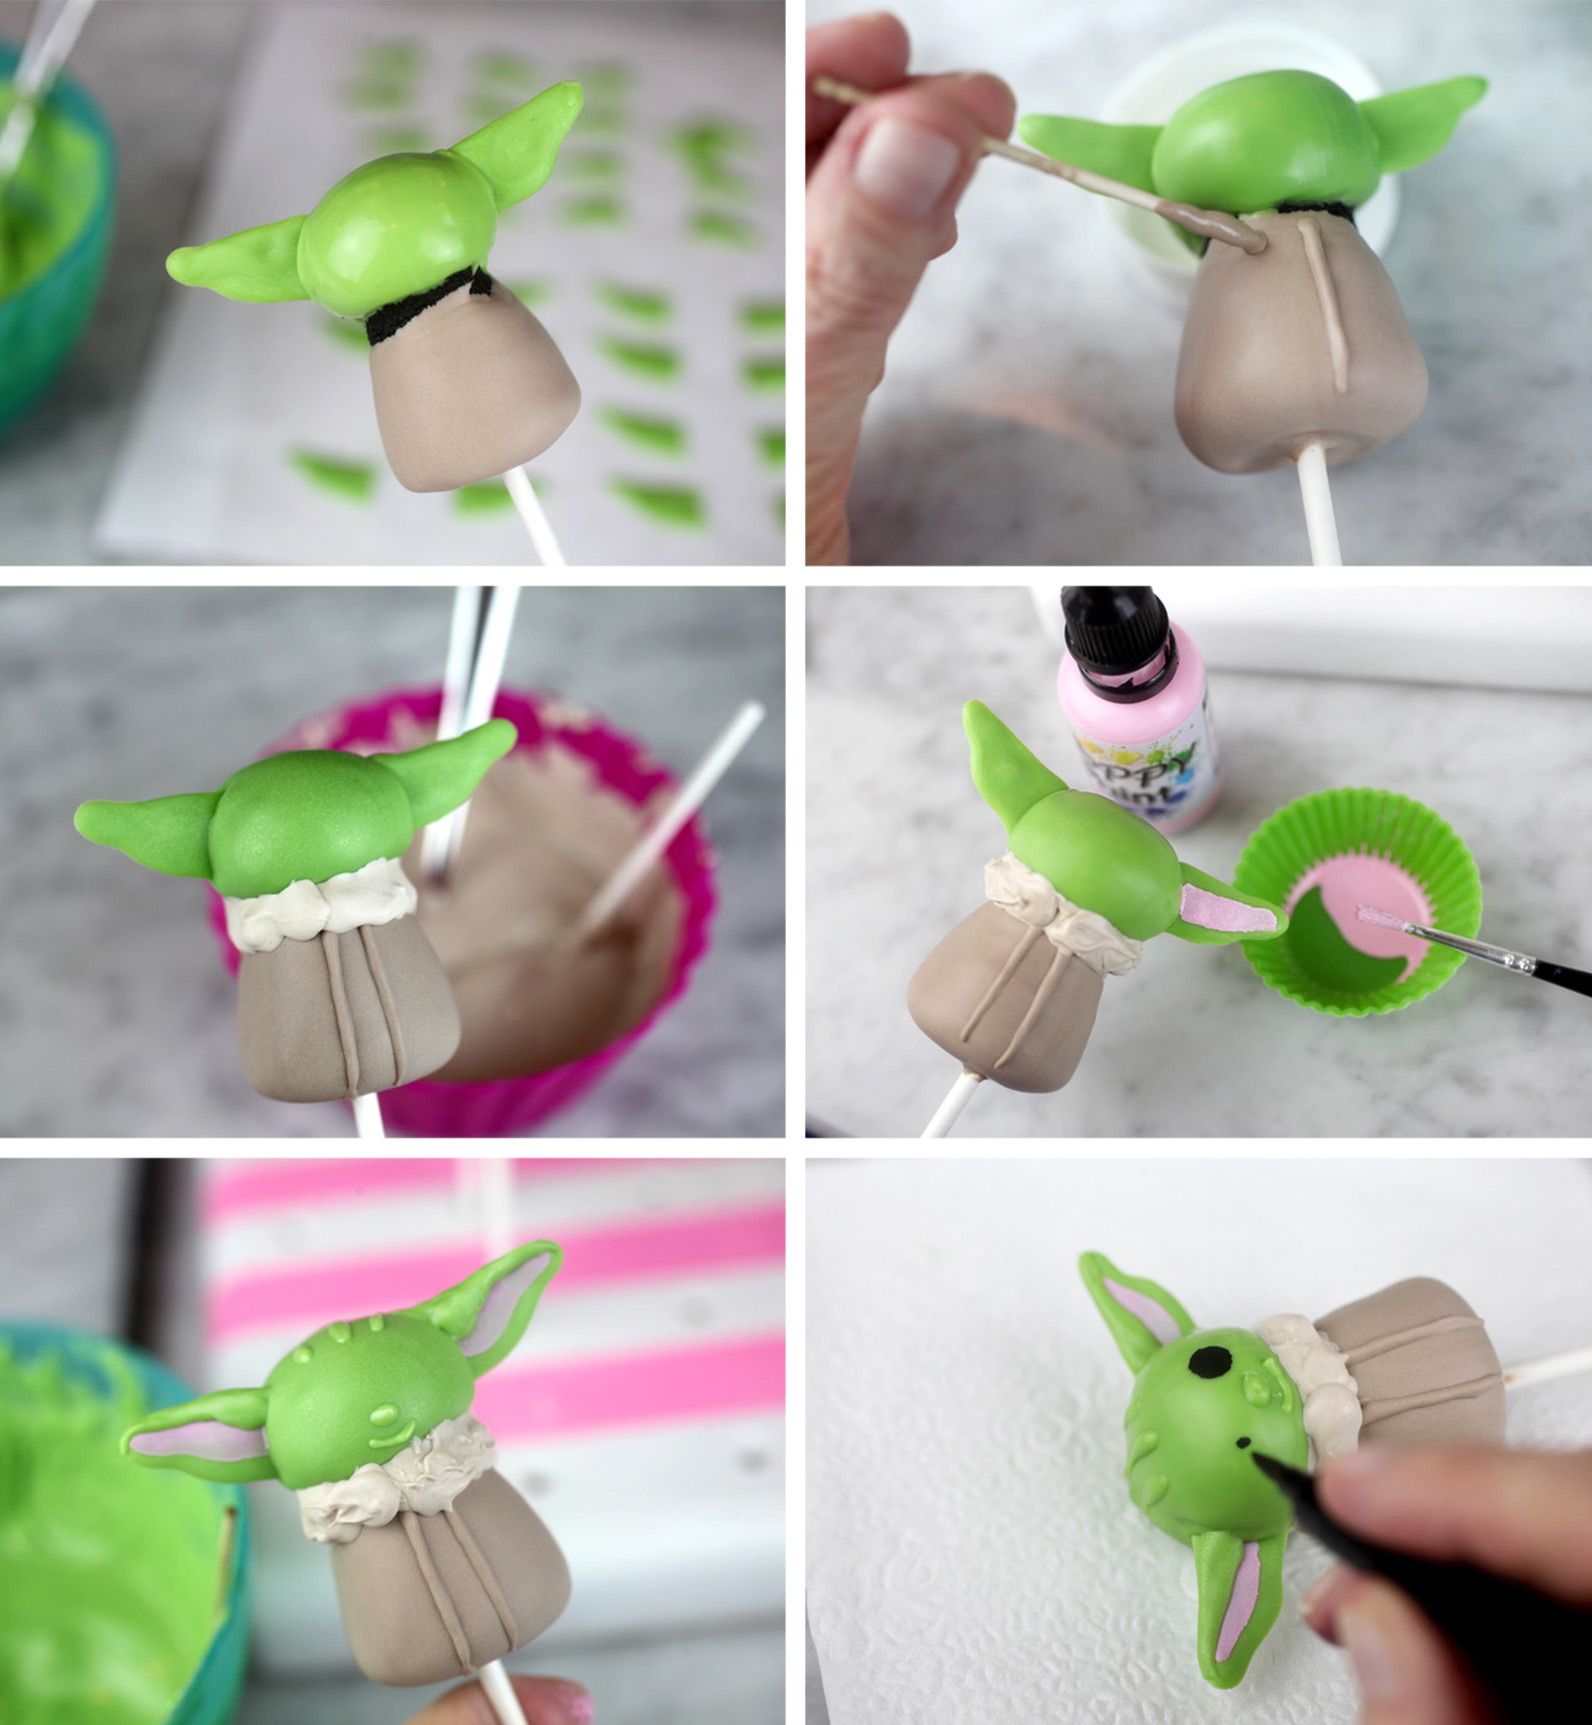
- Now add details. Use a toothpick dipped in coating to draw two lines down the front of the coat.
- Mix some of the light brown coating with more white vanilla coating to achieve a lighter color for the collar. Use a lollipop stick this time to apply a thicker amount. Apply in sections and let dry in between to create a fluffy look. Otherwise, the coating will spread more smoothly together.
- Paint pink on the ears with edible poppy paint or melted pink candy coating.
- Use a toothpick dipped in green to draw lines on the forehead, tops of the ears, noses and sweet smiles. Let dry.
- Use a black edible-ink writing pen to draw on big black eyes.
For the finishing facial touches, add more green coating slightly over the eyes to create big brows. Then use white or even the light brown coating to dot and add sparkle to the eyes.
Sidenote: Here’s a good visual where you could stop and still be super cute… Imagine the cake pop without painting on pink or overlapping green coating on the ears. You could also eliminate a step by making his coat all the same color brown. You could skip dotting the eyes, but it really does add something. So, if you’re looking to simplify, consider some of these tips and stop right here.
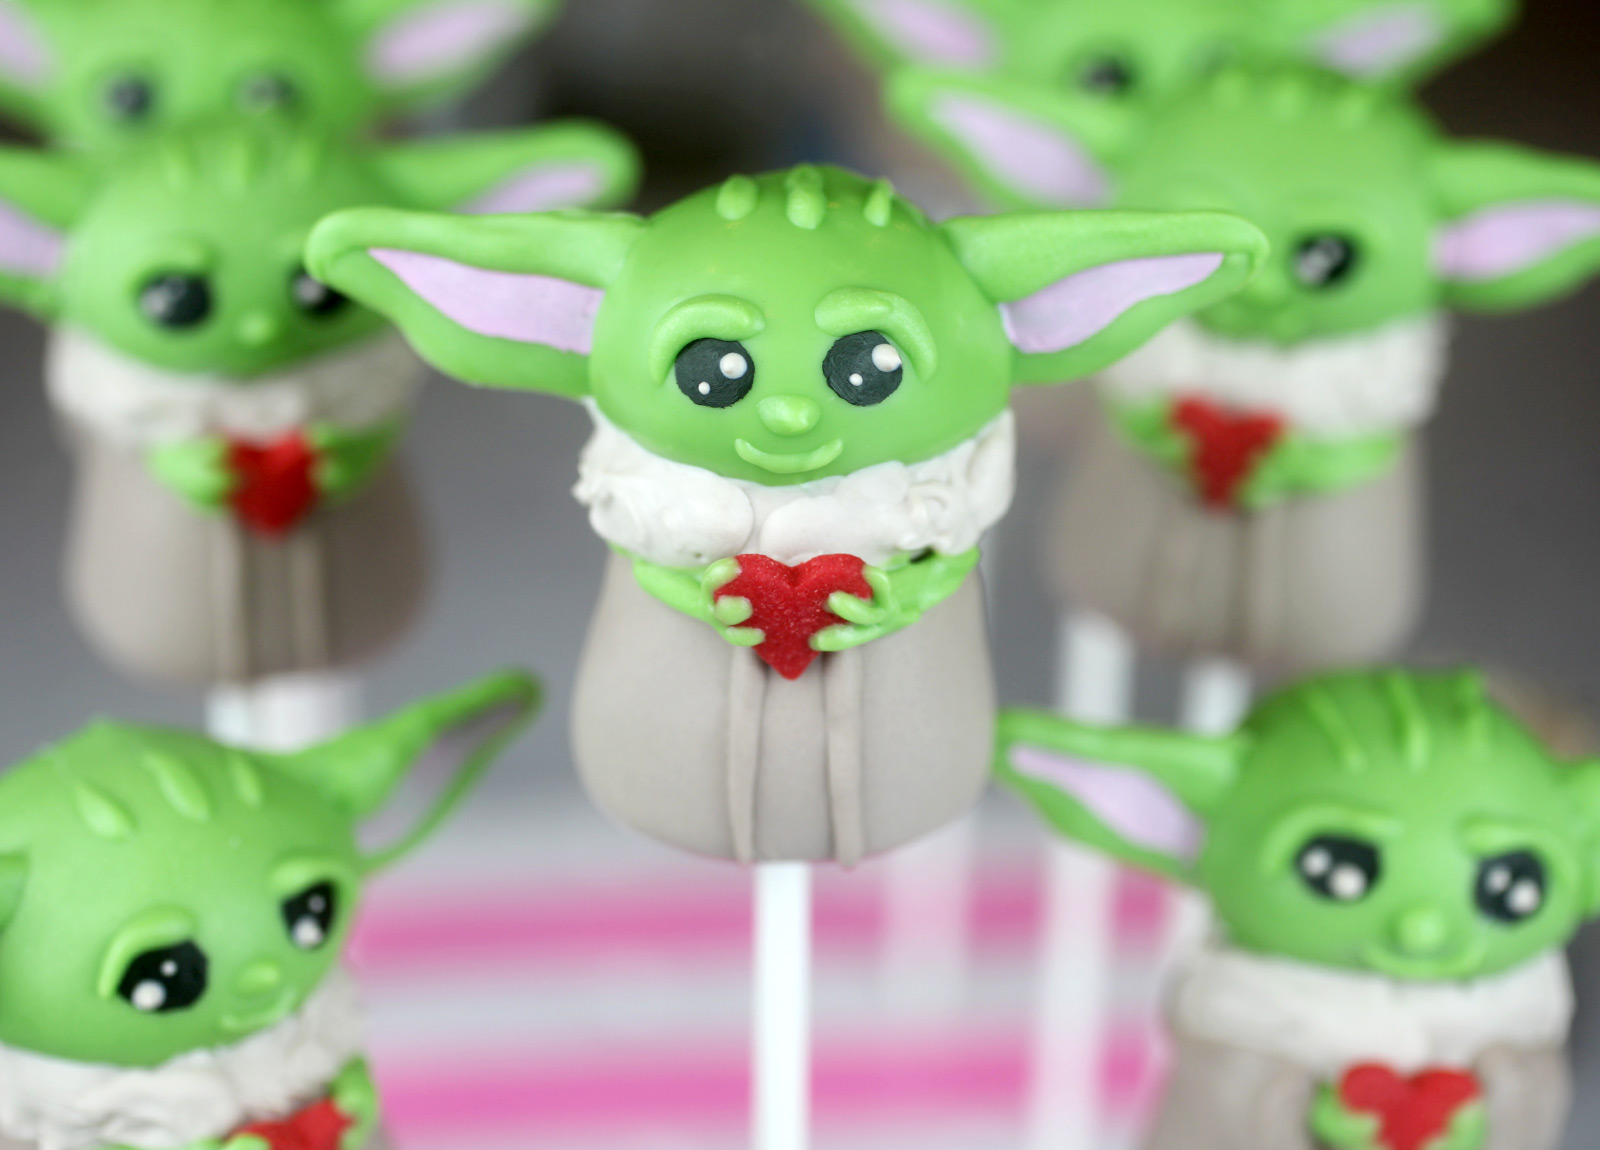
But let’s keep going for some Valentine’s Day fun!
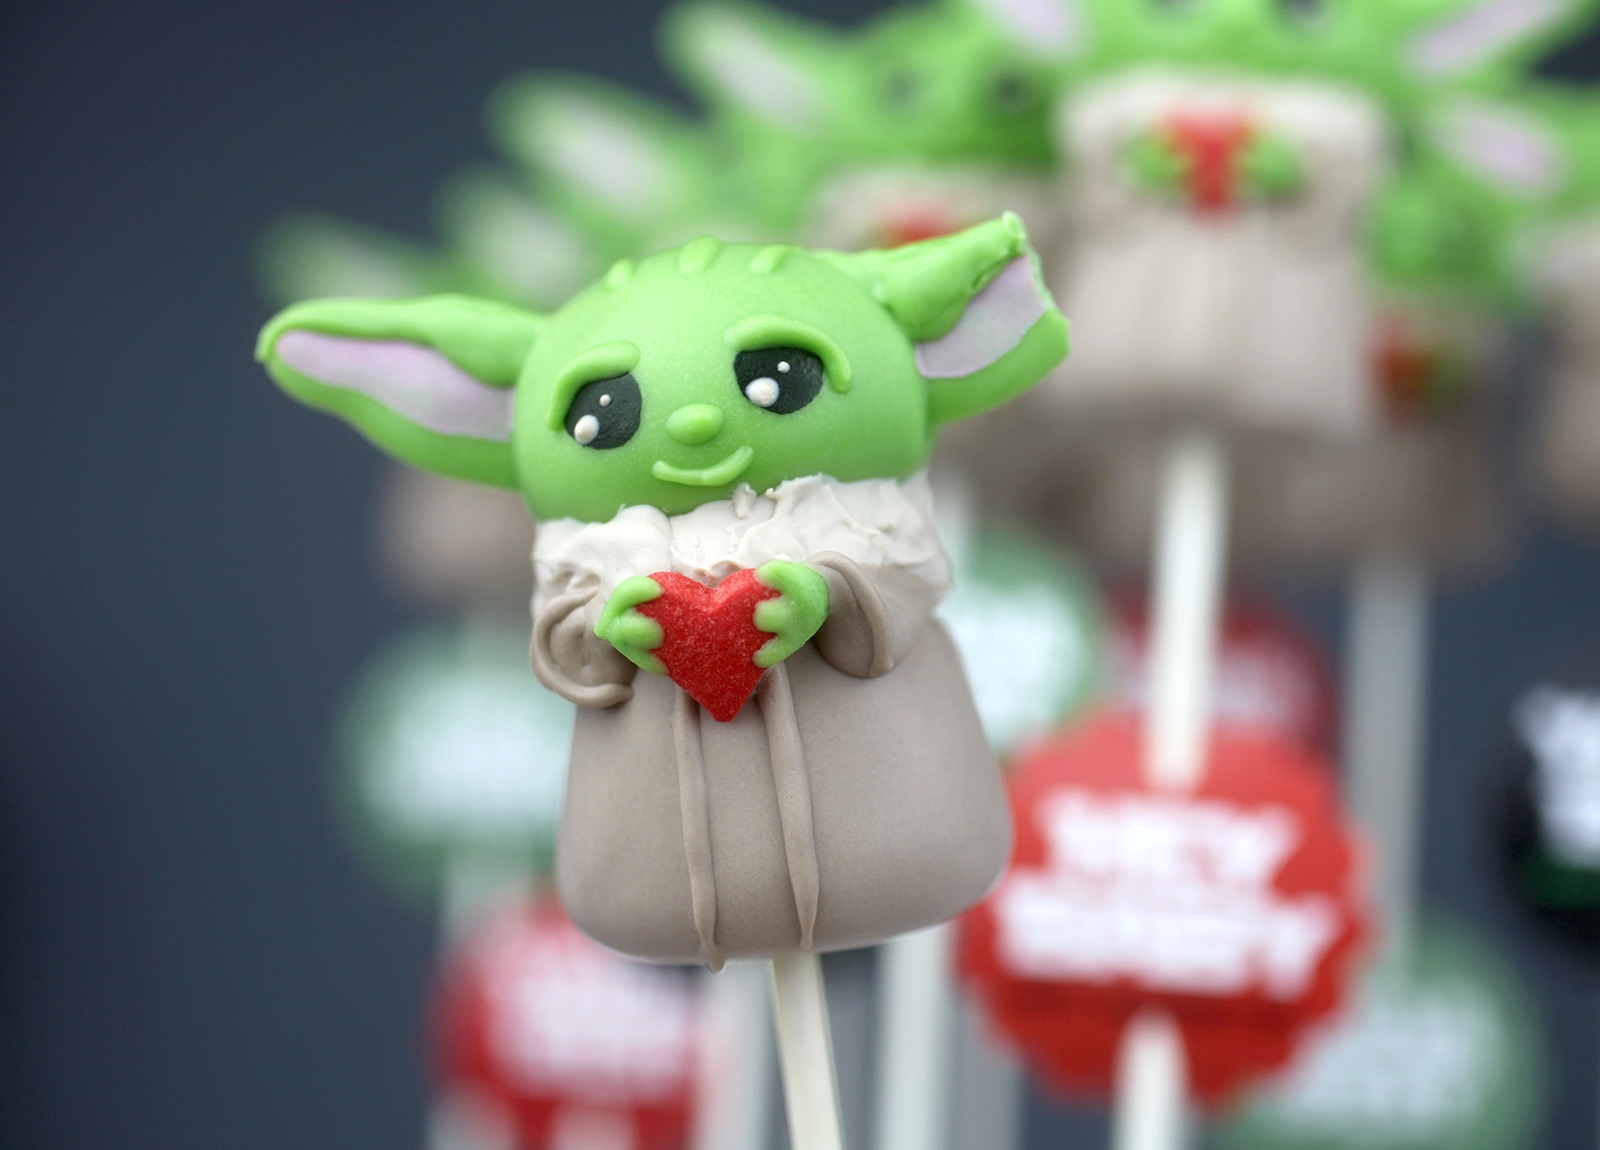
Attach a jumbo red heart sprinkle on Baby Yoda’s coat with a dot of melted coating to act as glue. Once dry, use a toothpick dipped in green to draw little fingers overlapping the heart. Extend the coating around the sides and right under the collar for arms and let dry.
The last step really pulls it all together. Use some of the light brown melted candy coating and apply on the pop overlapping the arms and tapering at an angle towards the collar on the sides. let dry completely and then draw a definition line defining the cuff with more melted candy coating and let dry.
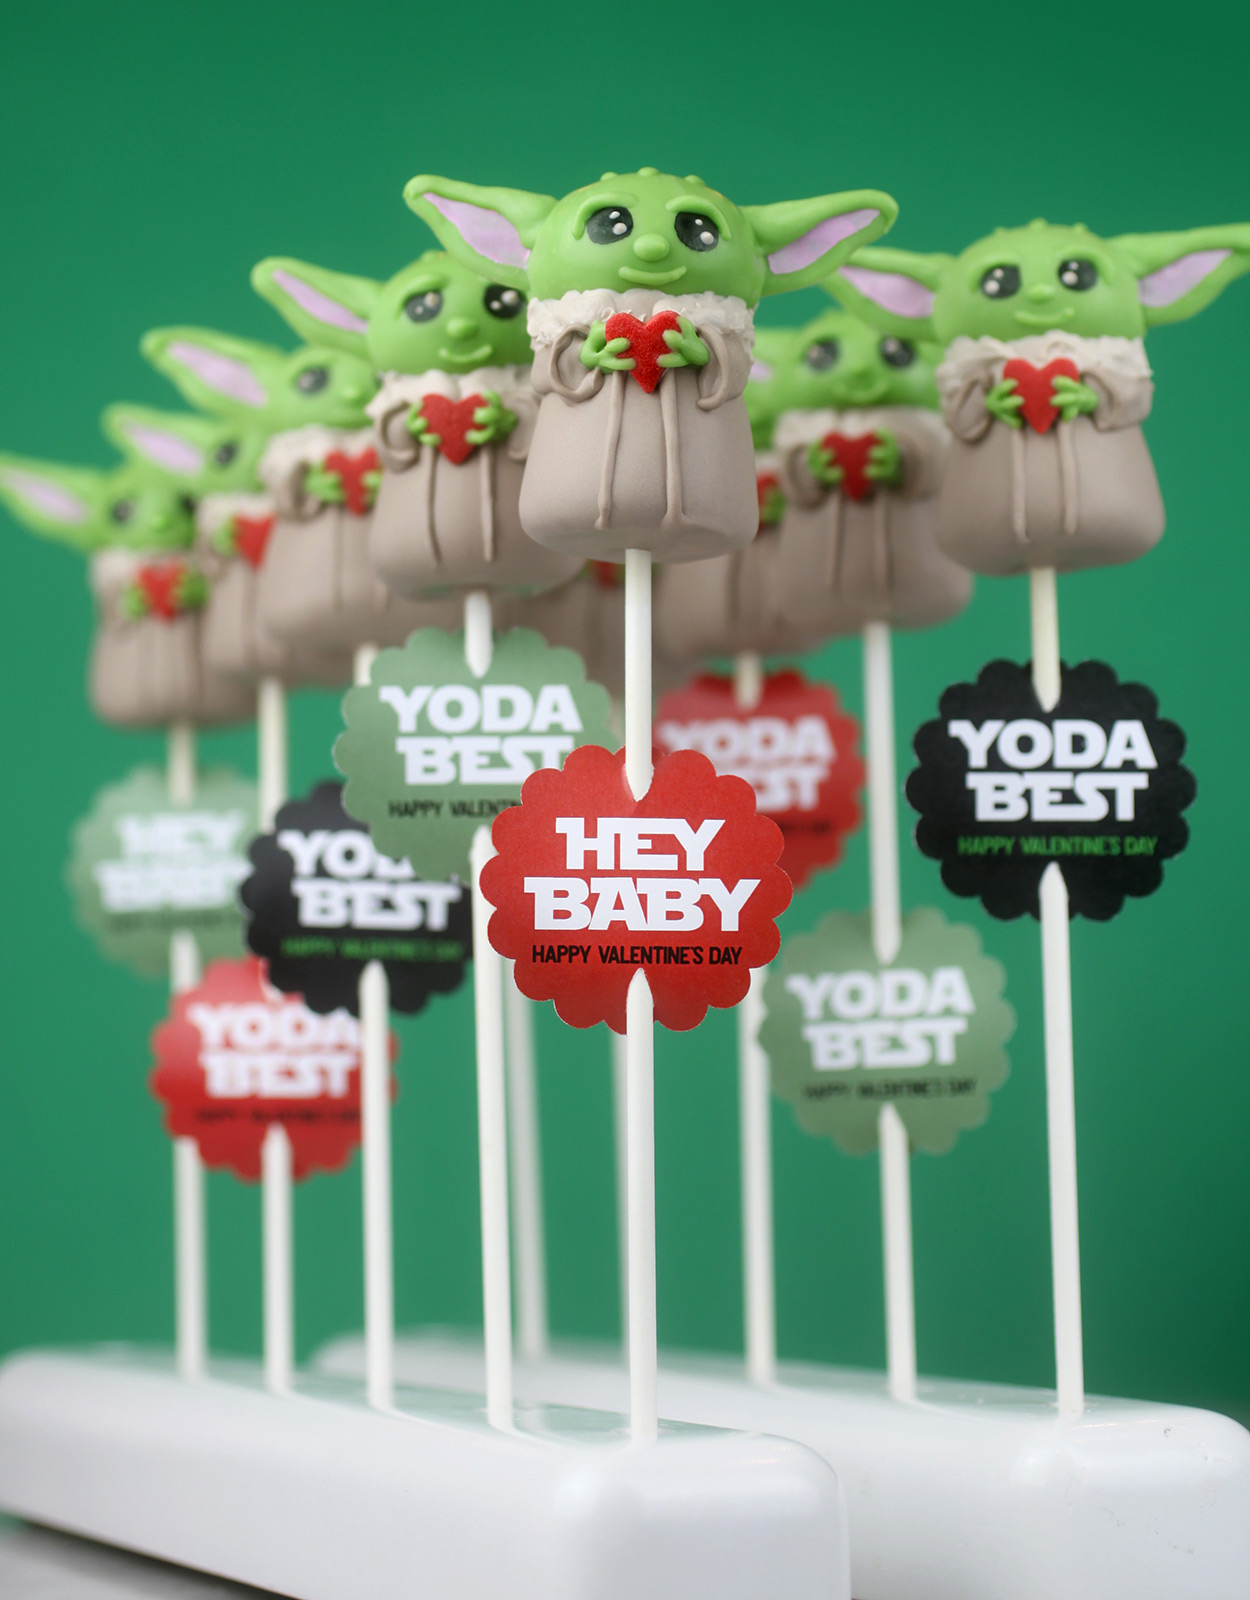
Punch out the paper tags and you’re all set to make someone’s Valentine’s Day.
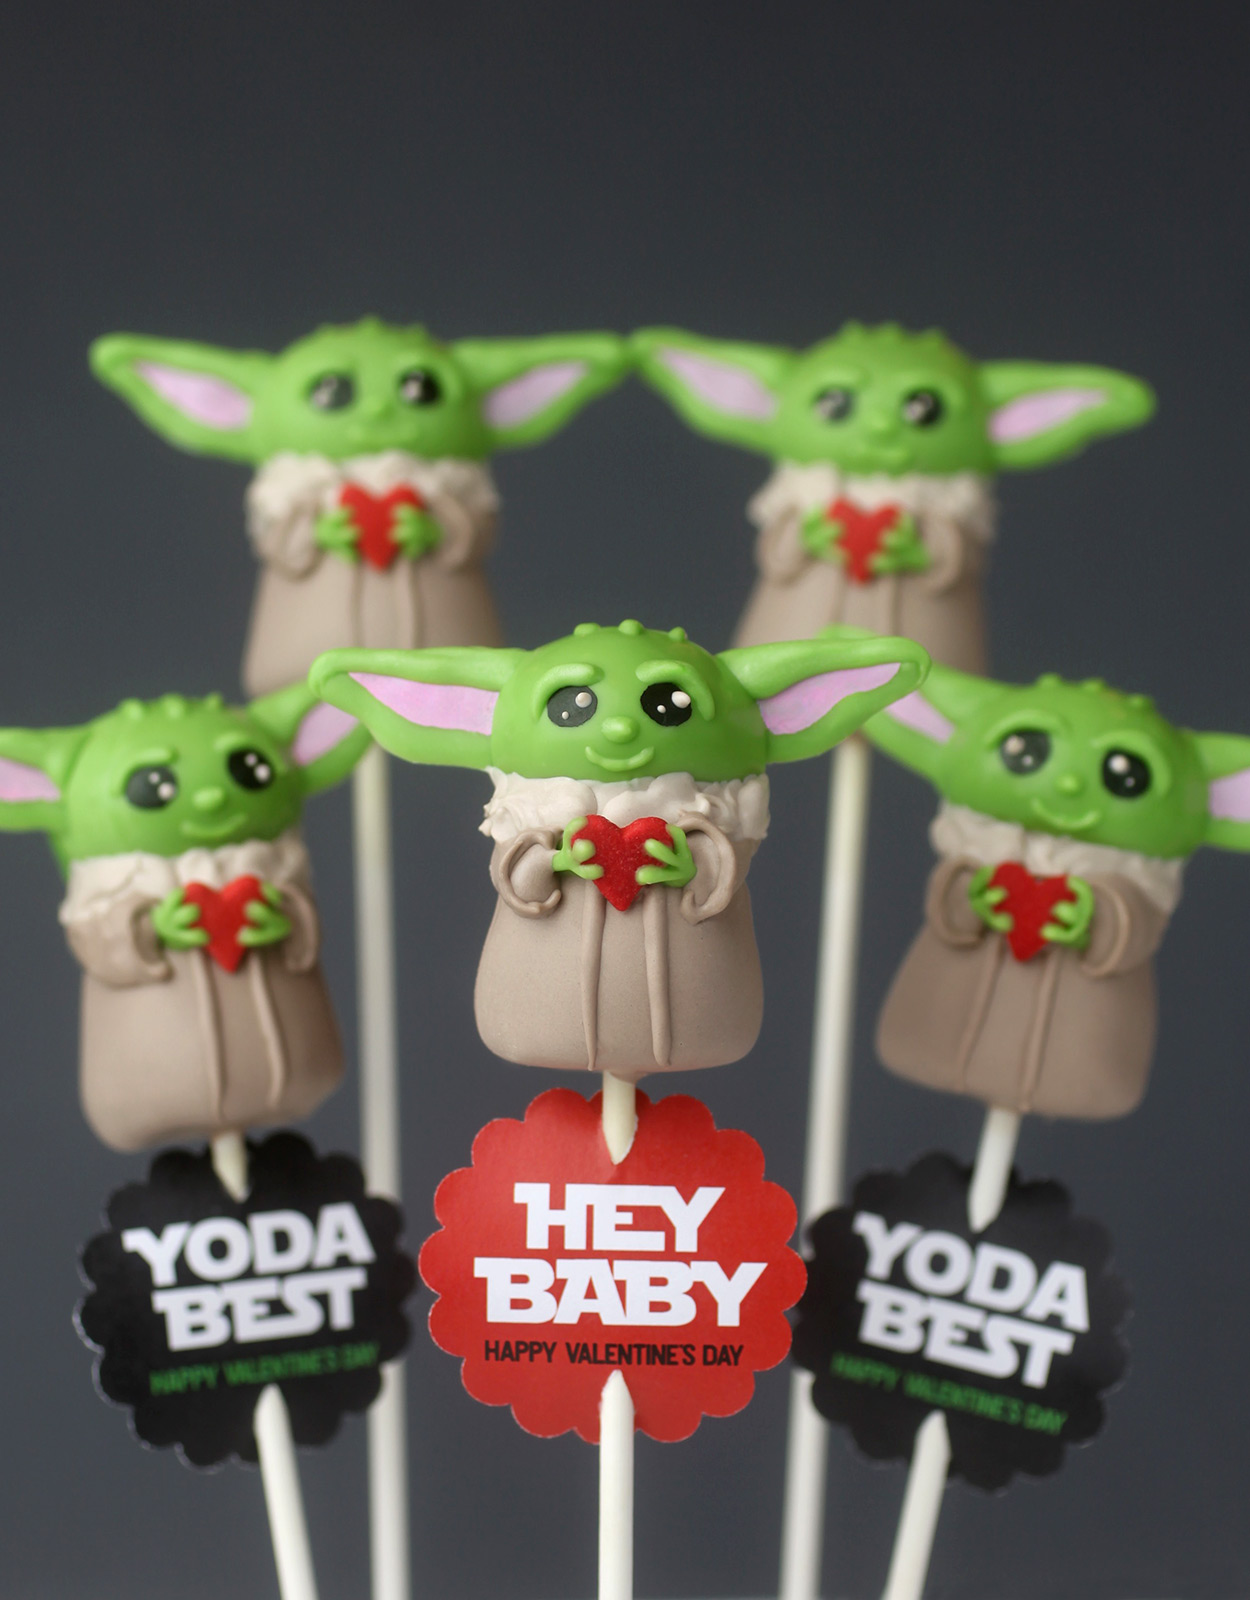
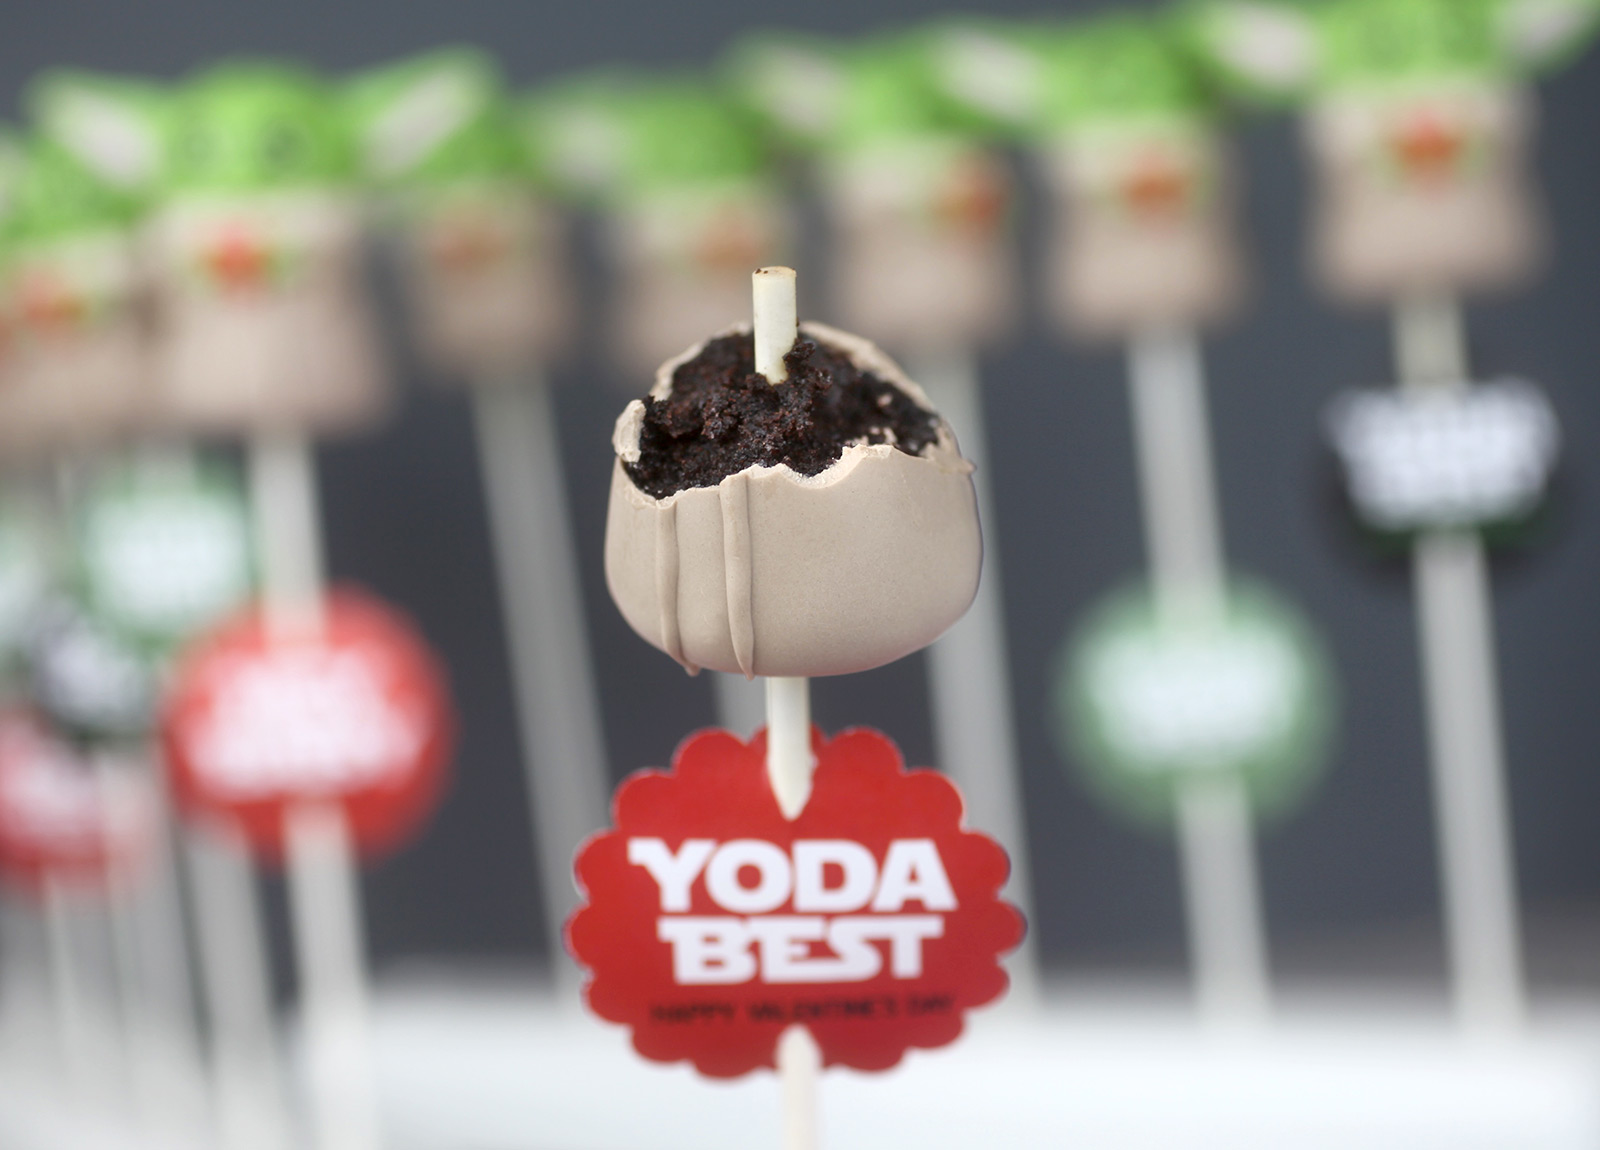
Hey Baby! Yoda Best!
I had to nibble the little guy’s ear.
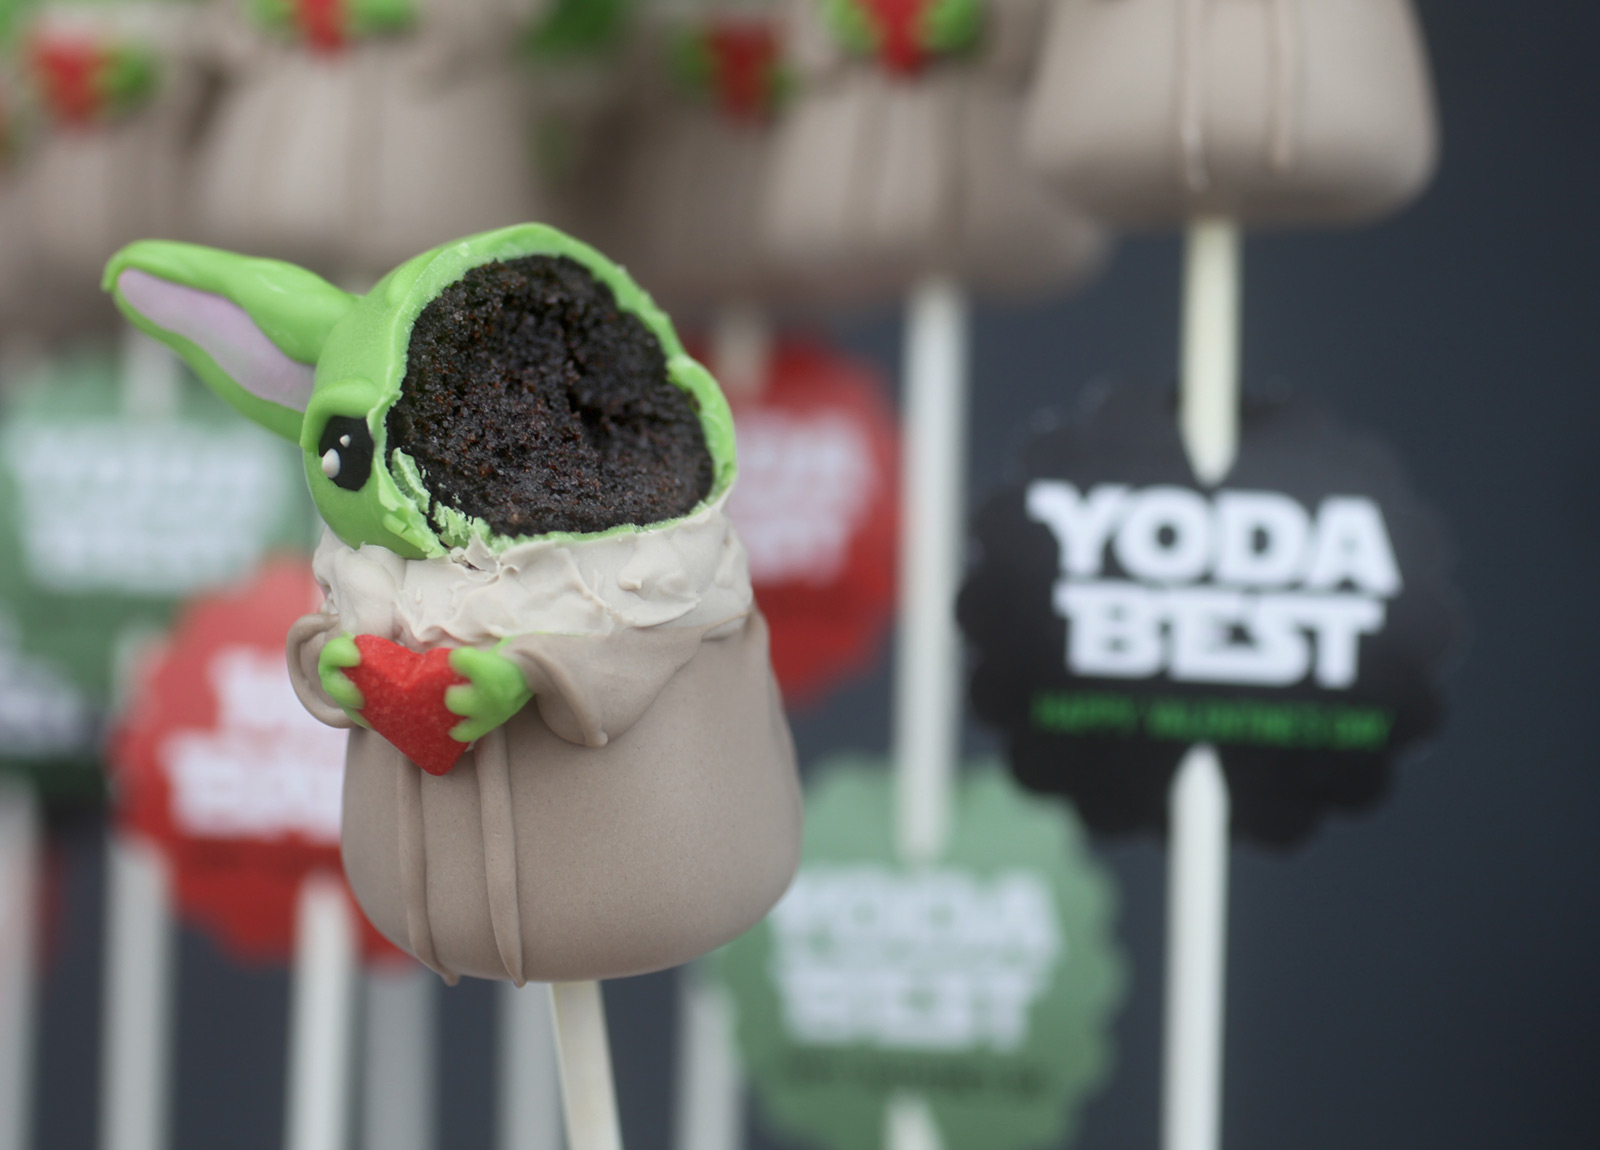
And his sweet cheeks, too!
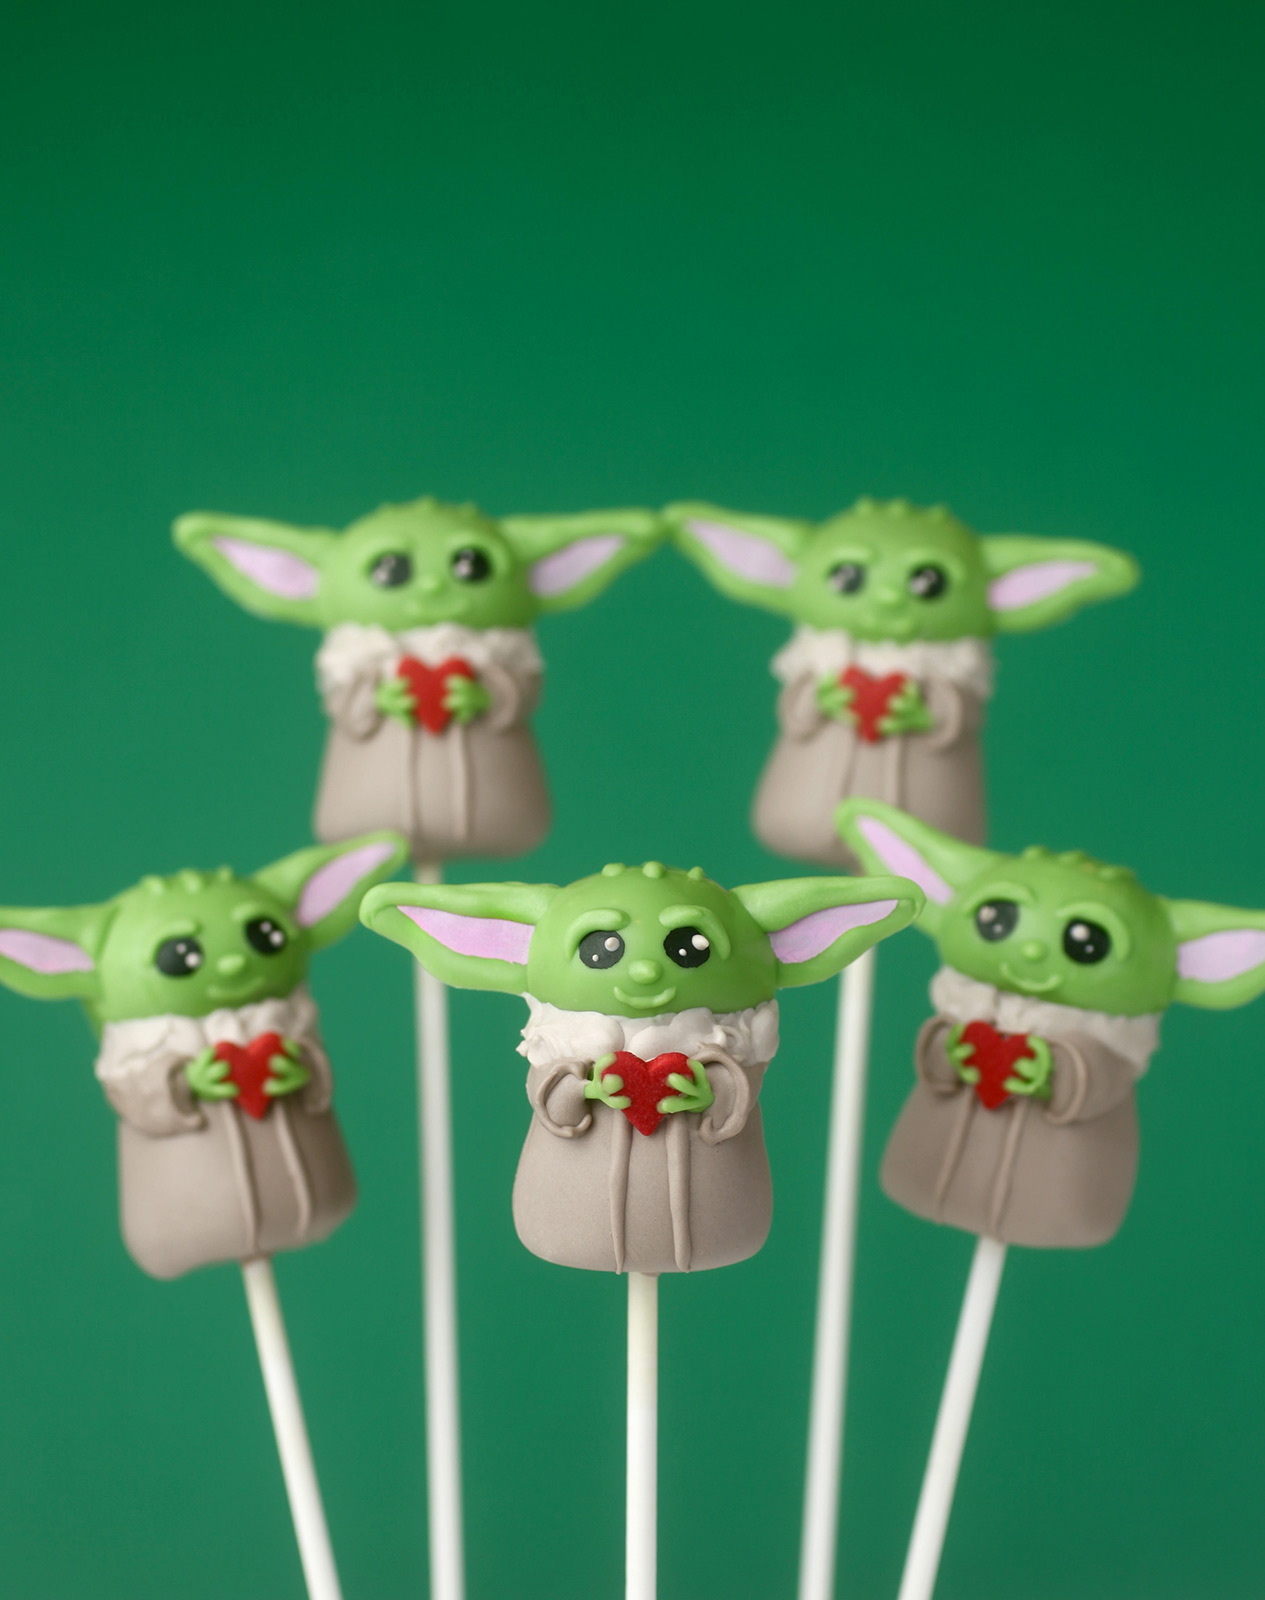
Oops! Hope you enjoy these yummy Baby Yodas as much as I did making (and eating) them.
Hugs and Happy Valentine’s Day!


How did you make the sleeves?
How did you make the sleeves?
Thank you so much for sharing this beautiful baby Yoda cake pops! I made them for a birthday!
Thanks For Sharing , It’s really cute
the blog is quite simple and amazing thanks
you always bake something cute
Just incredible as always!
These are adorable!! I love them!
They are so cute, just like everything you post here. Thank you!
You are so clever! These are super cute!!
Wow! You have outdone yourself!!!! Those are adorable and out of this world!
Wow~ Incredible! As always, love your work!!!
These are amazing. I love him!
These are so darn cute I can’t stand it!
Every time I think you can’t make anything cuter, you do! I love seeing (and vicariously eating) your beautiful treats!
You are unbelievable!!! Your attention to detail is spot on and you never cease to amaze me!!!
Brilliant, meticulous, creative, spot on, WOWSER!!!! You are the best!
Omg those are way too cute! :D
I cannot believe my eyes! You are like a magician.