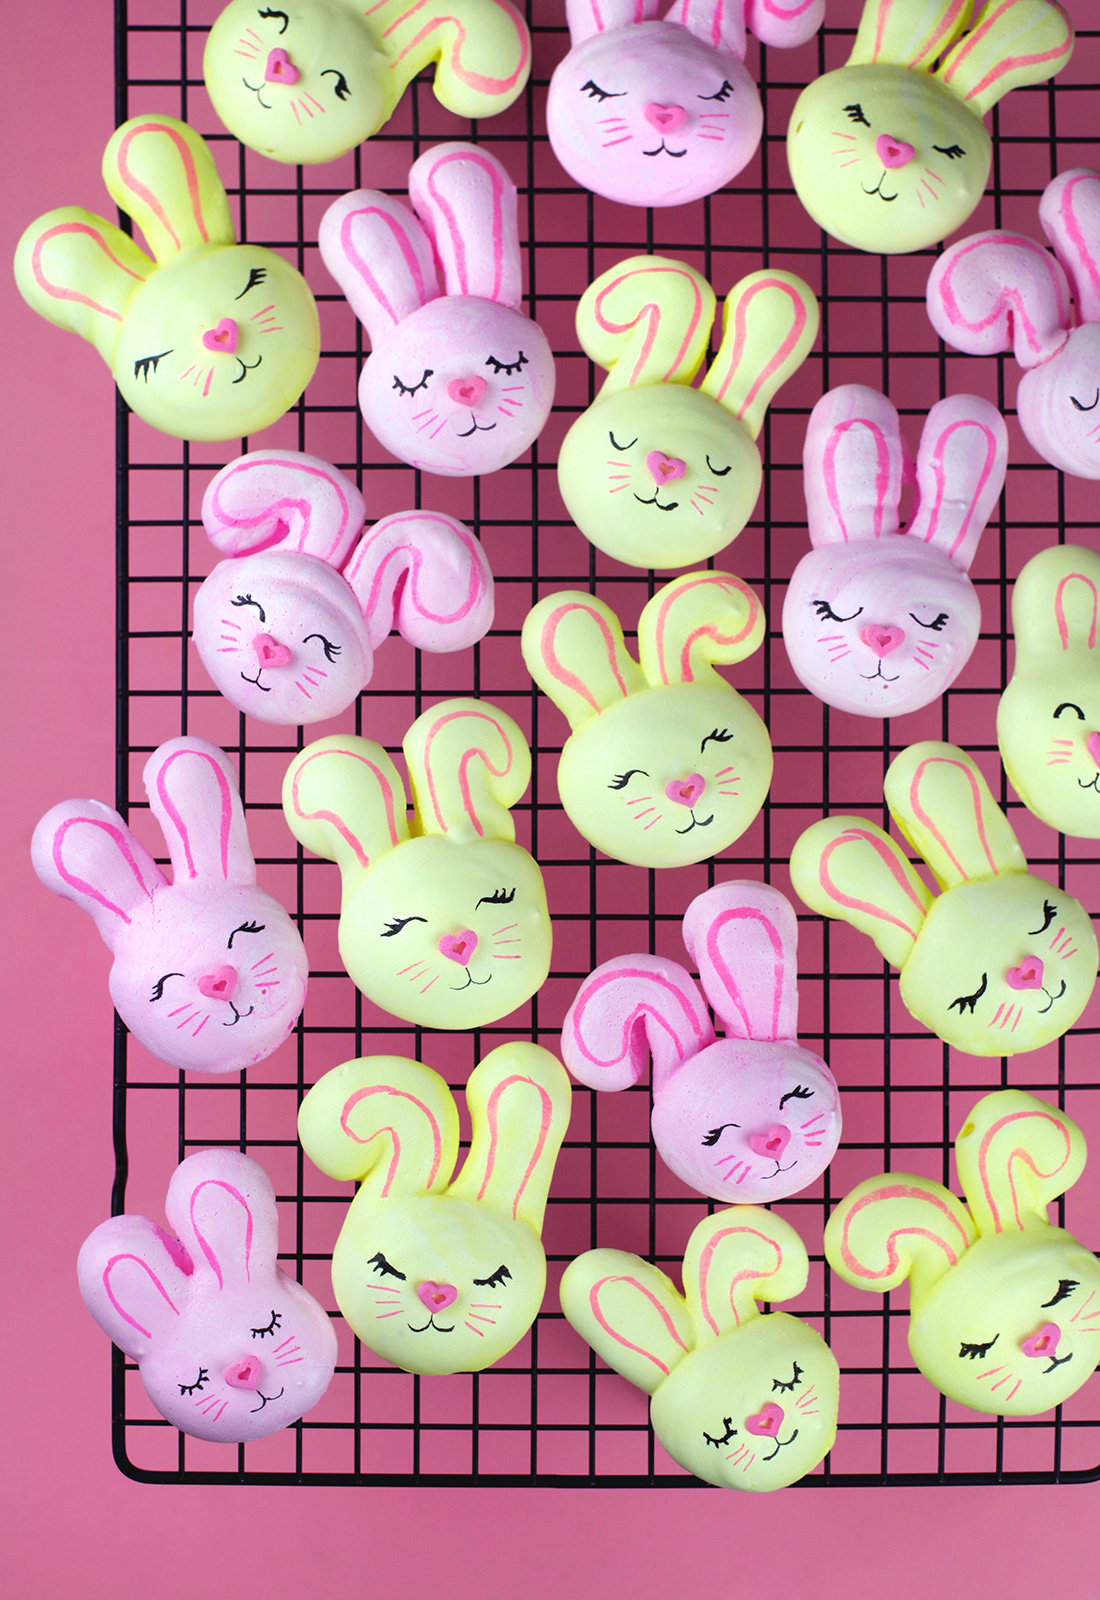
Have you ever tried making meringues at home? They are made by adding sugar to whipped egg whites and often piped in traditional kiss shapes and baked. Pretty easy, but you guys know I can’t resist a twist on sweet treats. So … Here come some bunnies in perfectly pastel colors for spring.
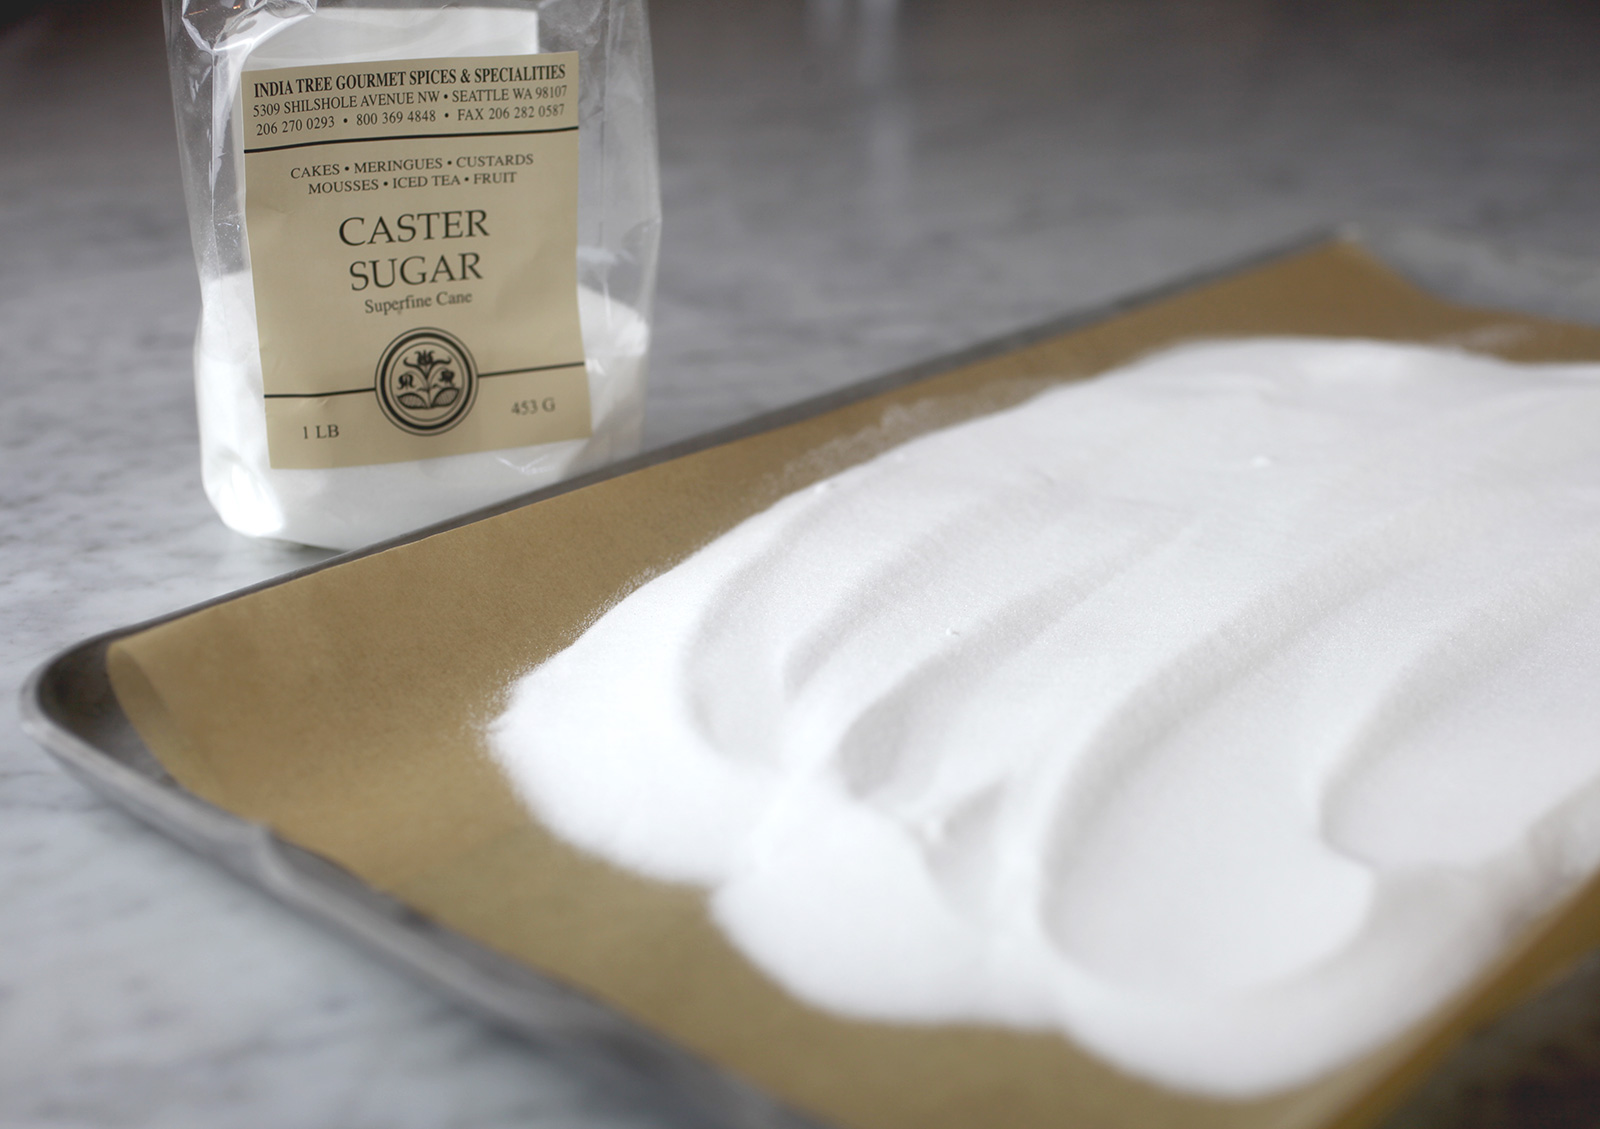
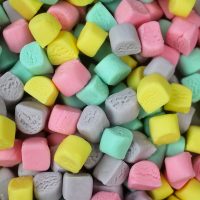
The recipe I use calls for superfine sugar or caster sugar and heating it in the oven for a few minutes to make it easier to dissolve when incorporating into the egg whites. This brand is from India Tree and I have found it at Fresh Market in the past.
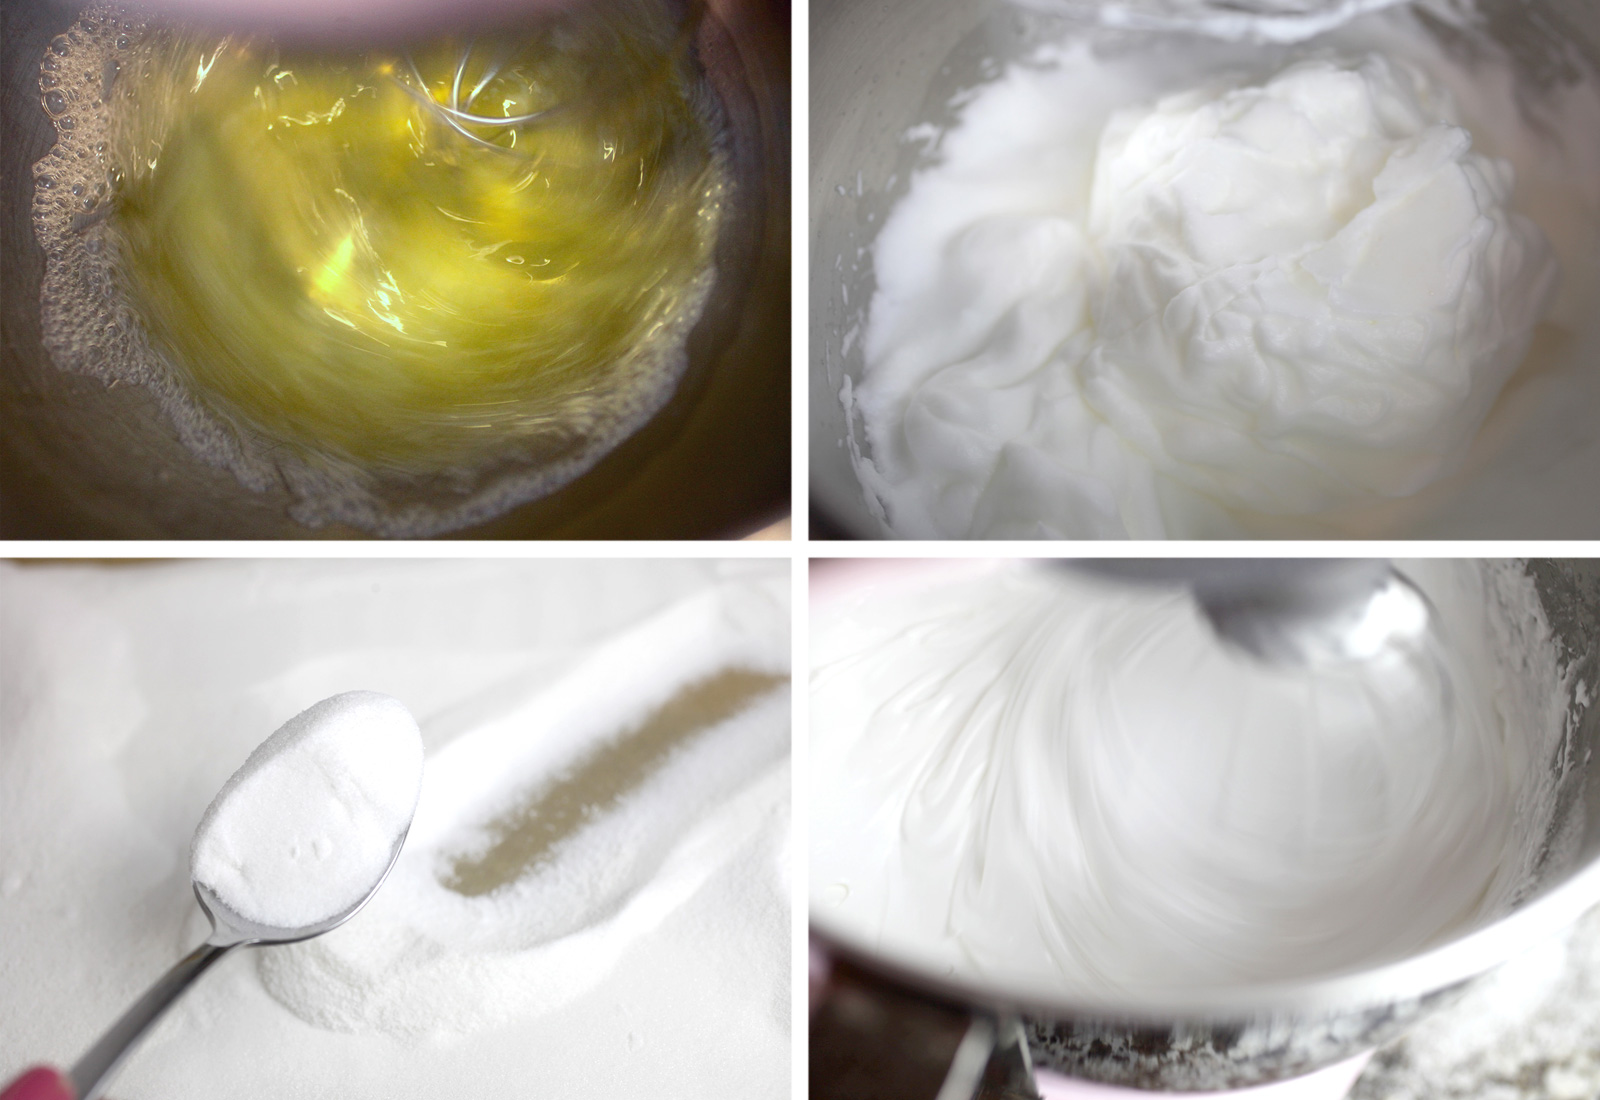
Making meringues is relatively easy and a great recipe to know for last minute, two-ingredient treats. Basically you whip egg whites, add sugar and whip until stiff peaks form, pipe them and bake (more specifics in the recipe below) but that’s the super quick overview.

Stiff meringue. This is what you are looking for and if you turn your whisk upside down, it should stay put without falling off.
Now for meringue bunnies. Let’s hop to it.
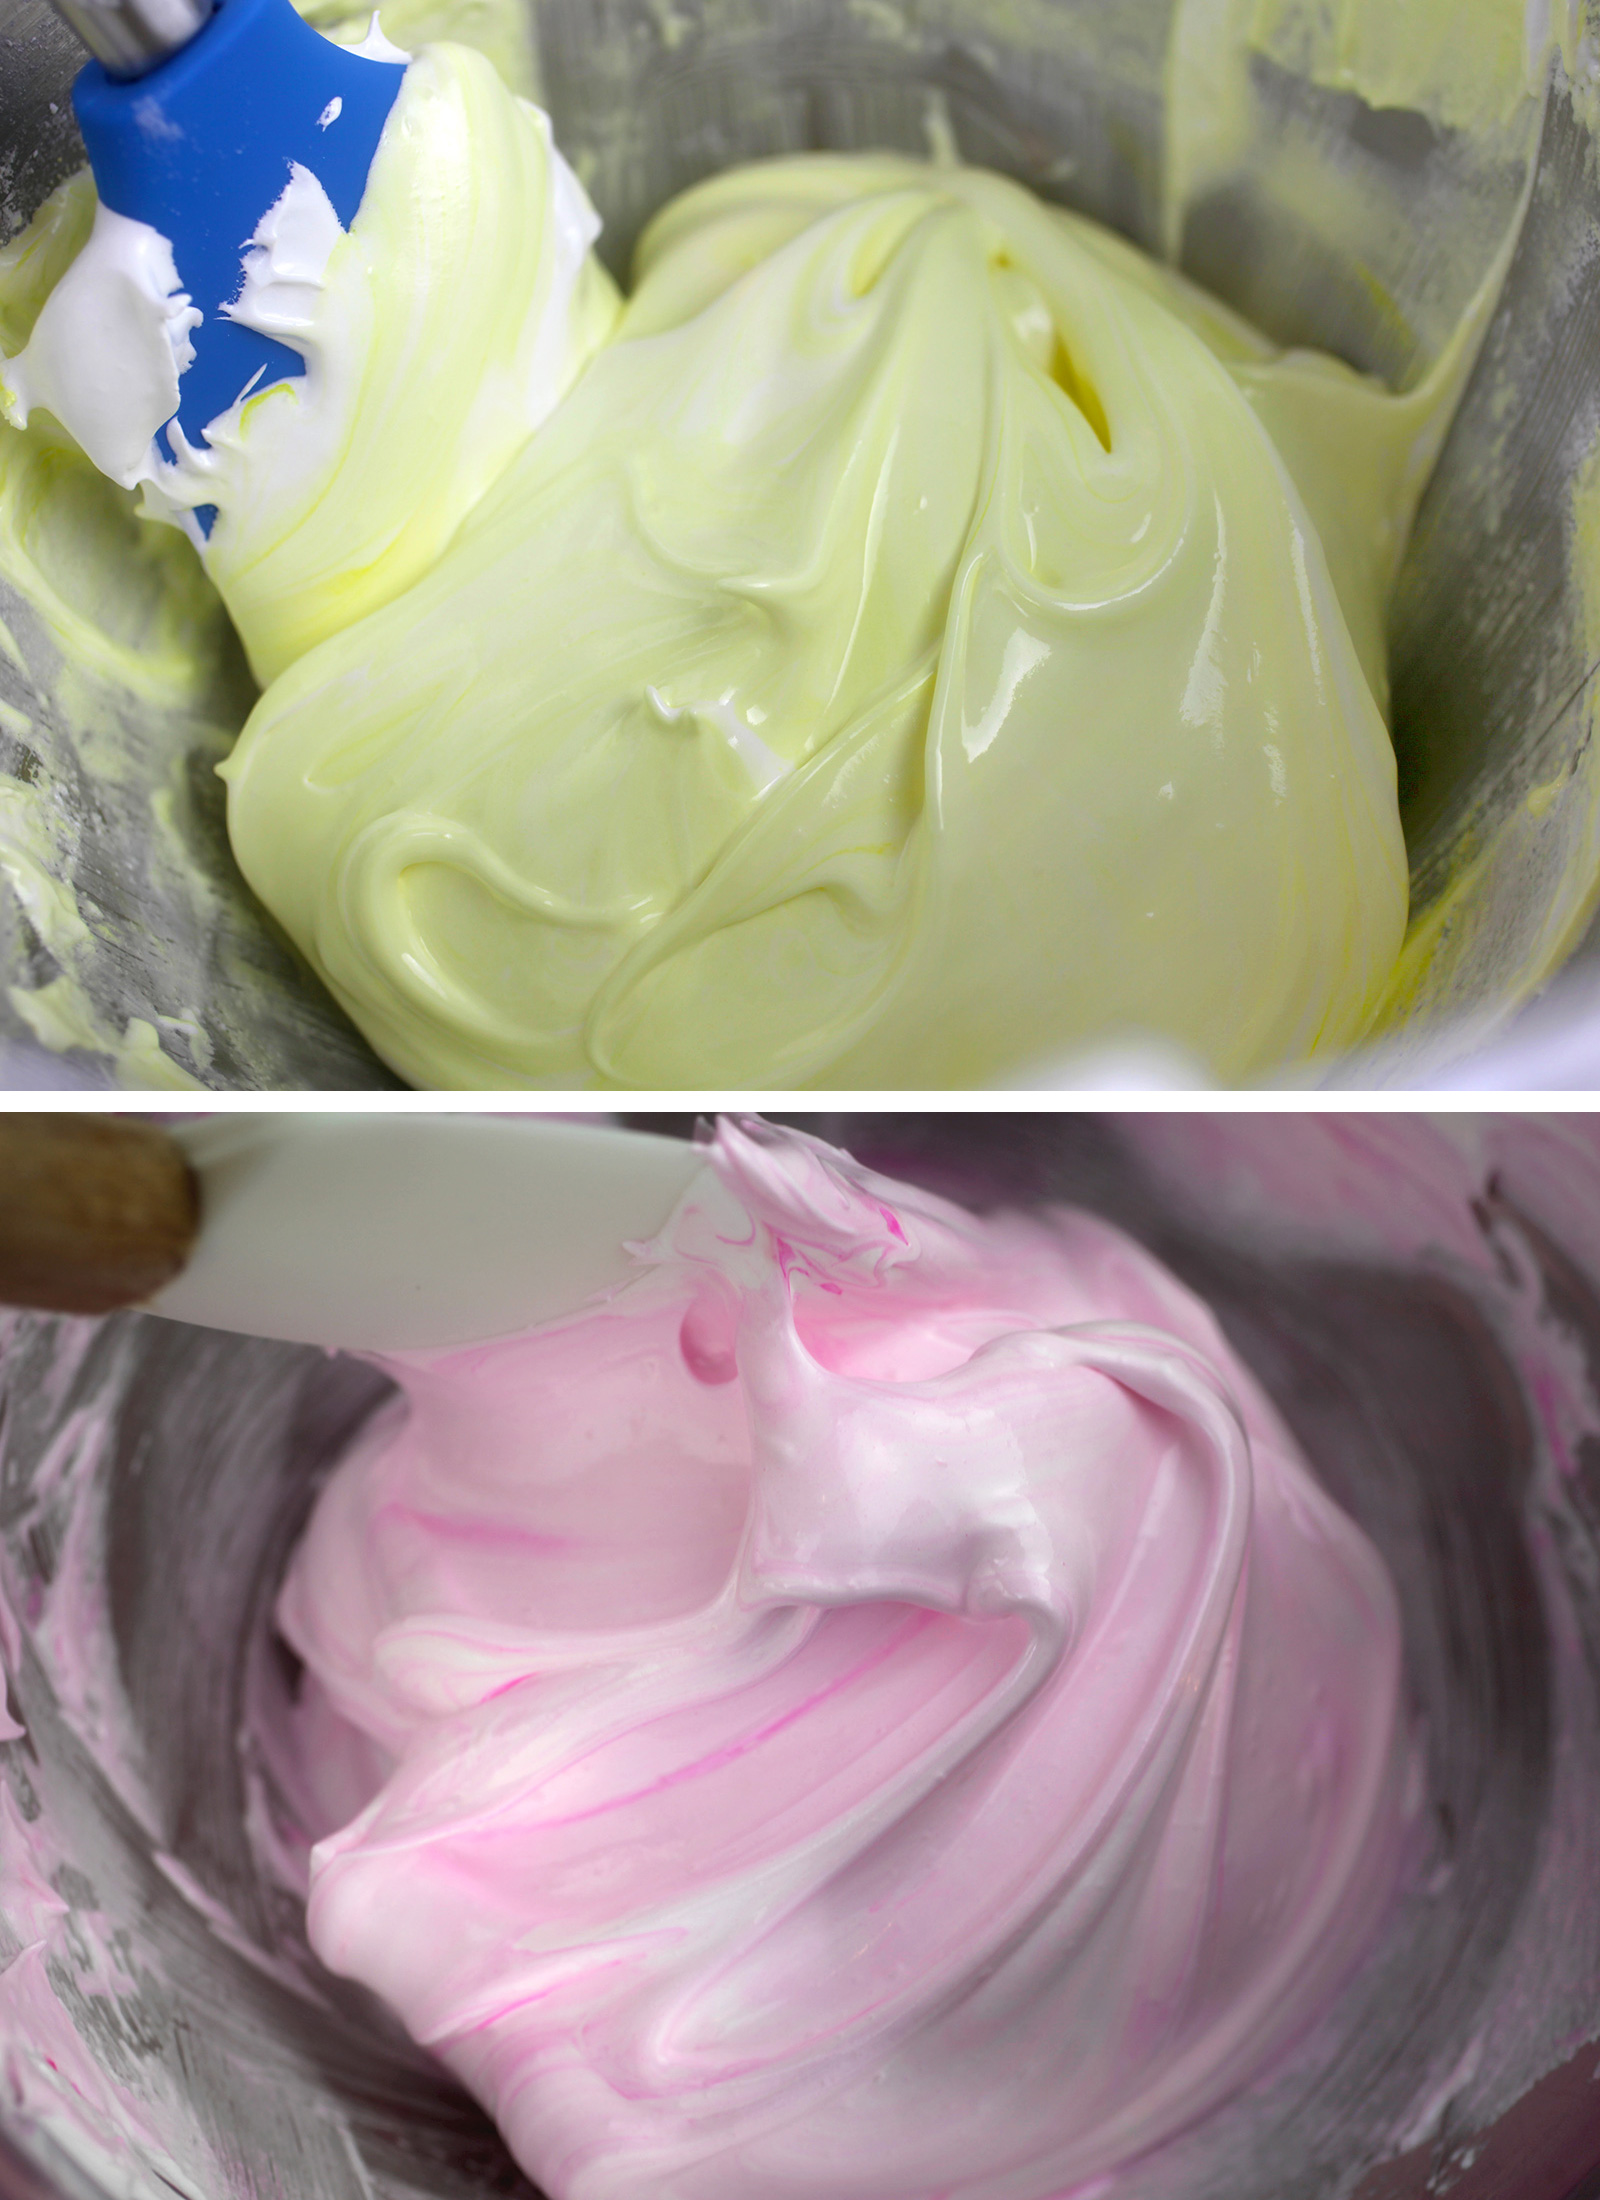
I tinted the meringue batter with a drop or two of food coloring to tint it pink and yellow.
Always start small and add additional drops if needed to achieve a darker shade.
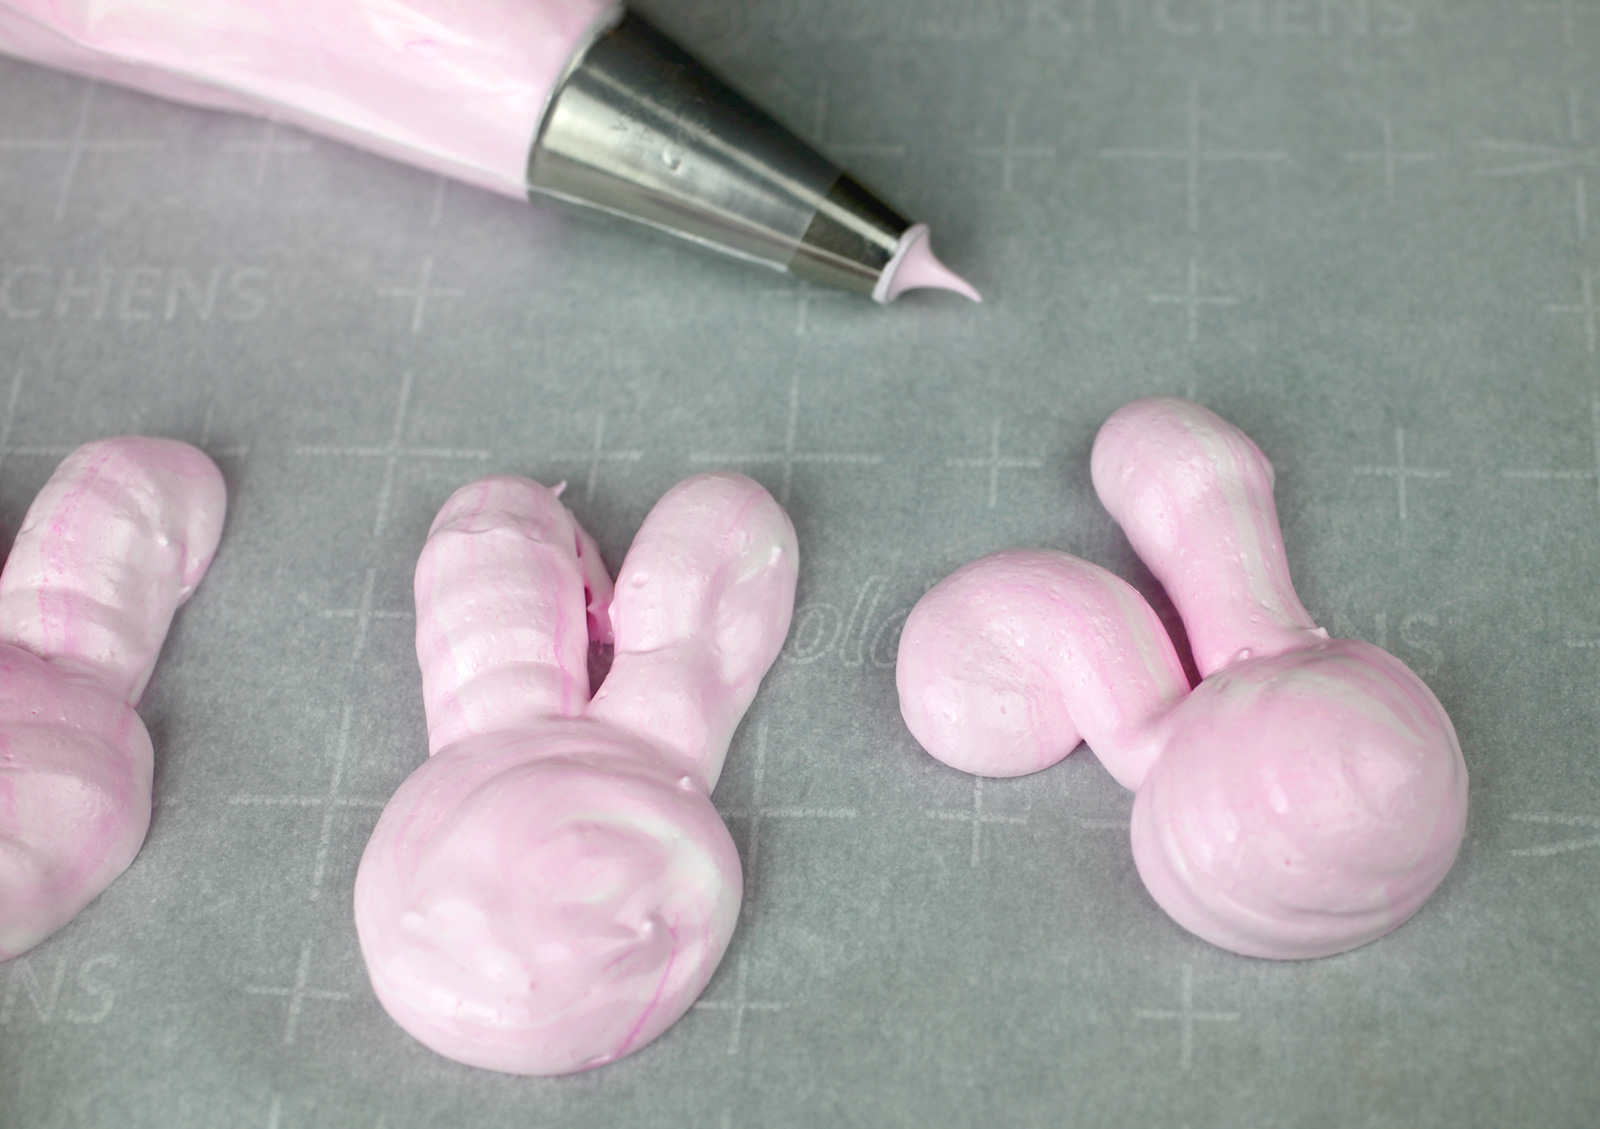
To pipe traditional kisses, hold your piping bag straight up and down, starting with more pressure and then less pressure as you pull away and release.
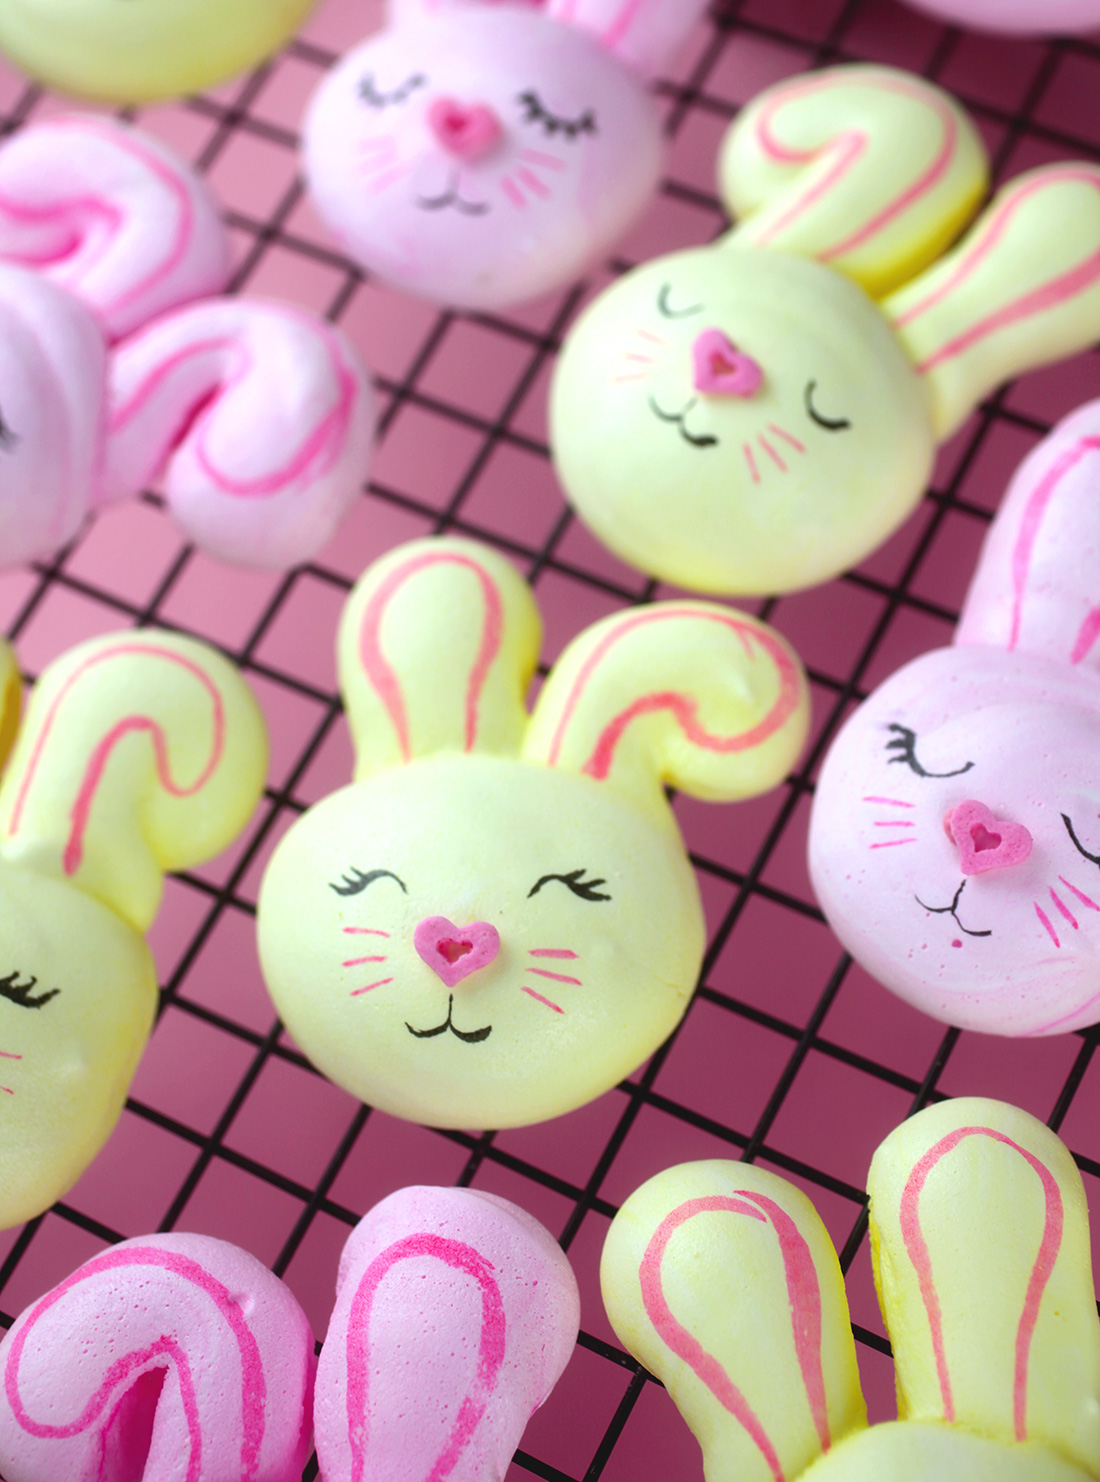
For these bunnies, the approach is a little different. Start with the ears and pipe at an angle close to the baking sheet. Use more pressure when you start and slightly less pressure as you pull down and away against the baking sheet. This will give the ears a slightly tapered look.
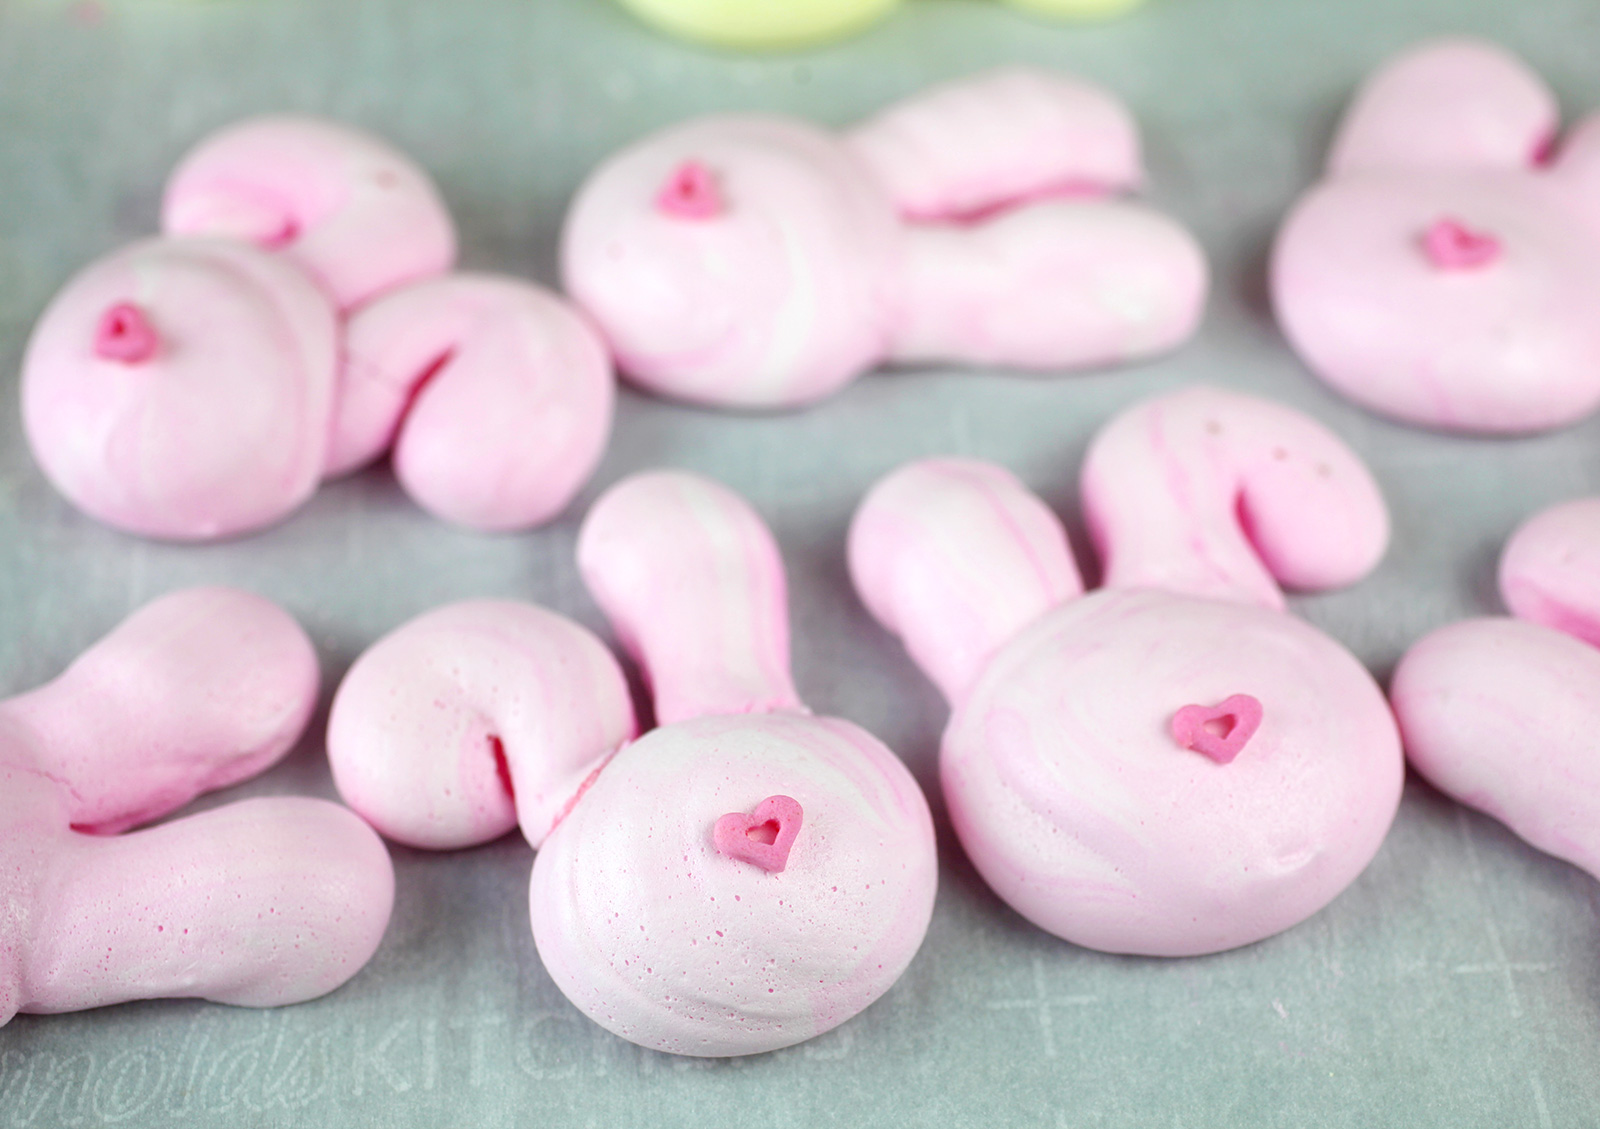
Look at the bunnies on the left… the ripples in the meringue are because I did not do a great job of maintaining even pressure as I piped and released. The bunny on the right is much smoother. It just takes practice and getting comfortable with piping.
Once the ears are piped, overlap the ears with more meringue holding it straight up and down or slightly angled. Pipe until you have a nice round ball of meringue that covers a good portion of the bottom part of the ears. Too little of an overlap and the ears will break apart due to not enough support.
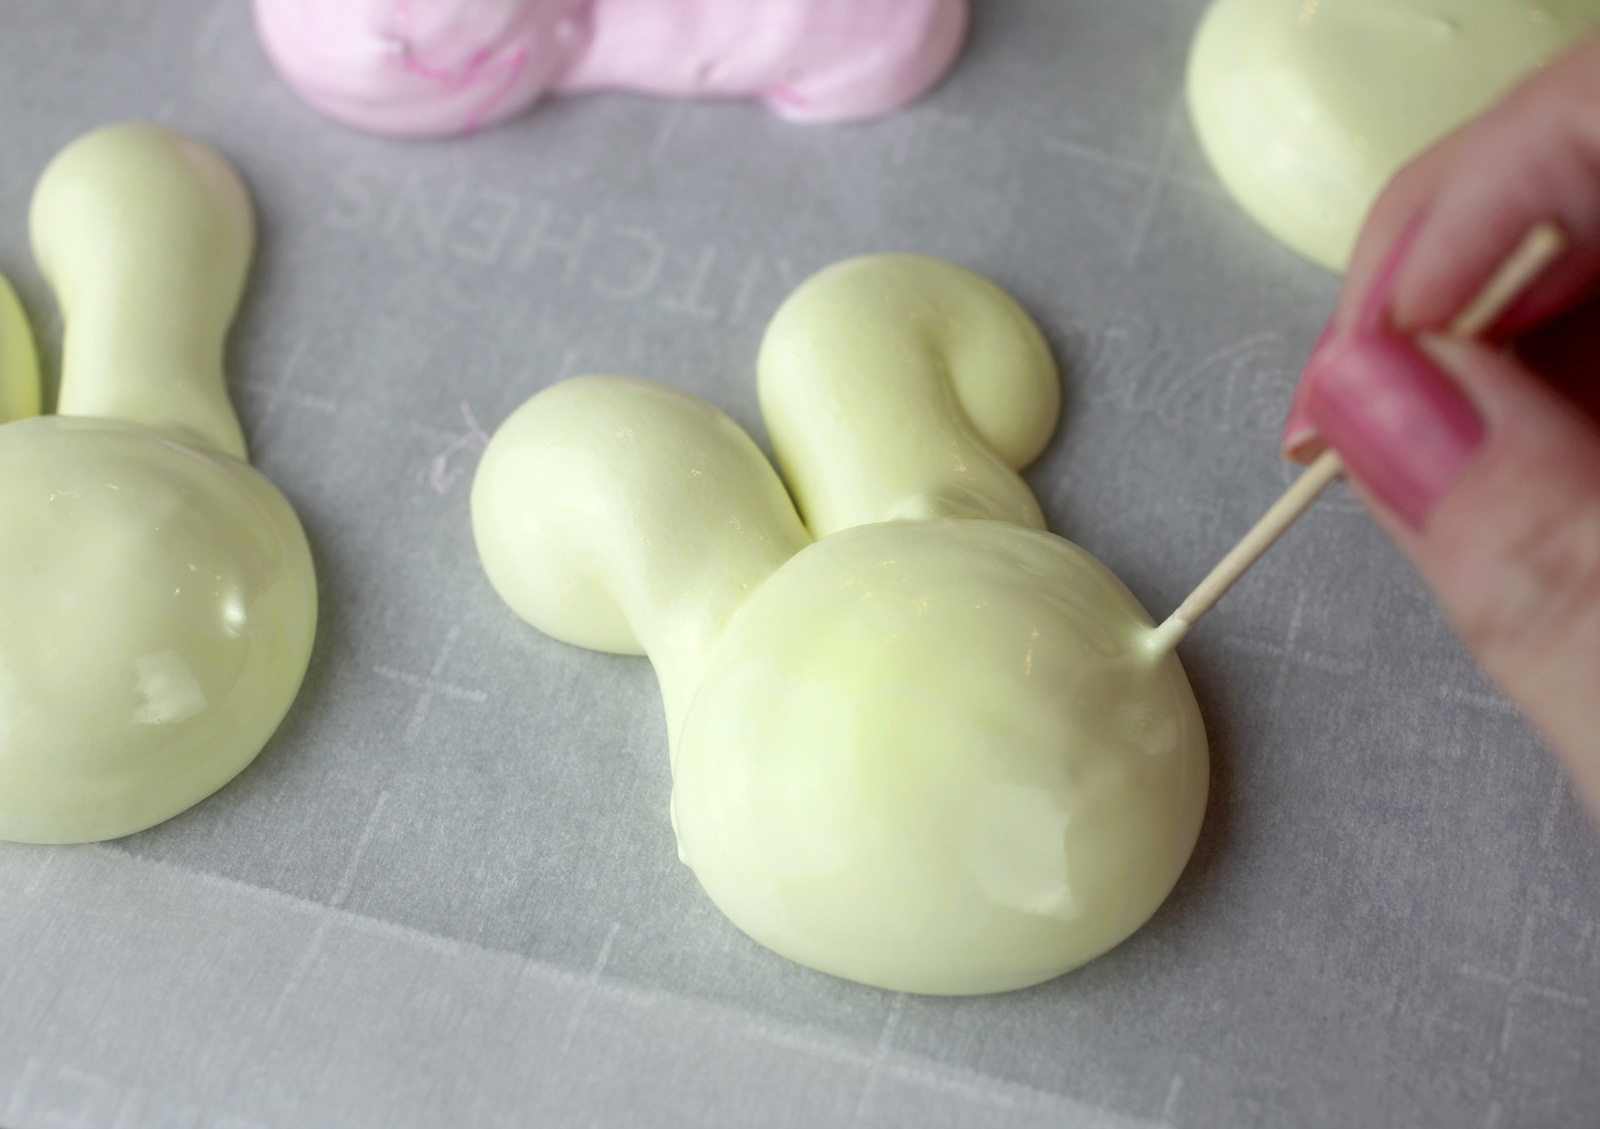
The consistence of the meringue makes it difficult to pull the piping bag away without forming a pointed tip every time. To remove for smoother bunnies, take a toothpick and very gently on just the surface of the meringue, swirl any points until they disappear.
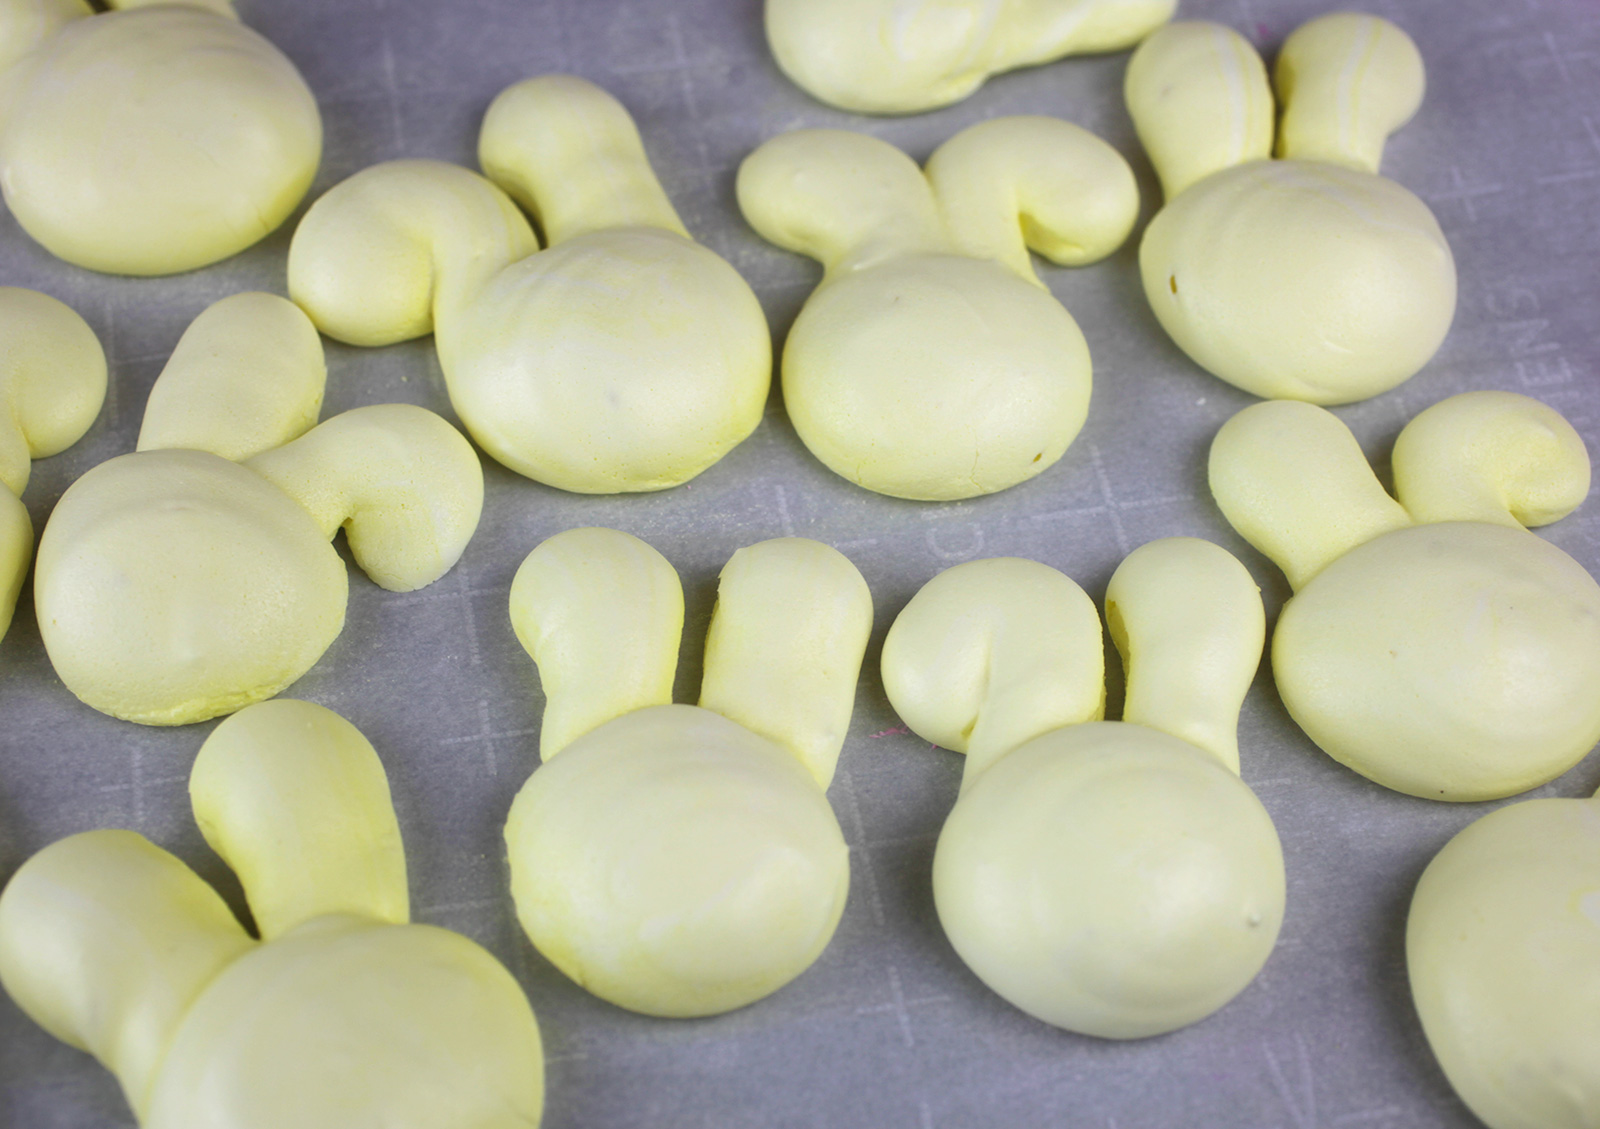
They’ll bake up almost exactly as they are piped.
You can leave them like this or decorate them. Here’s how I did it.
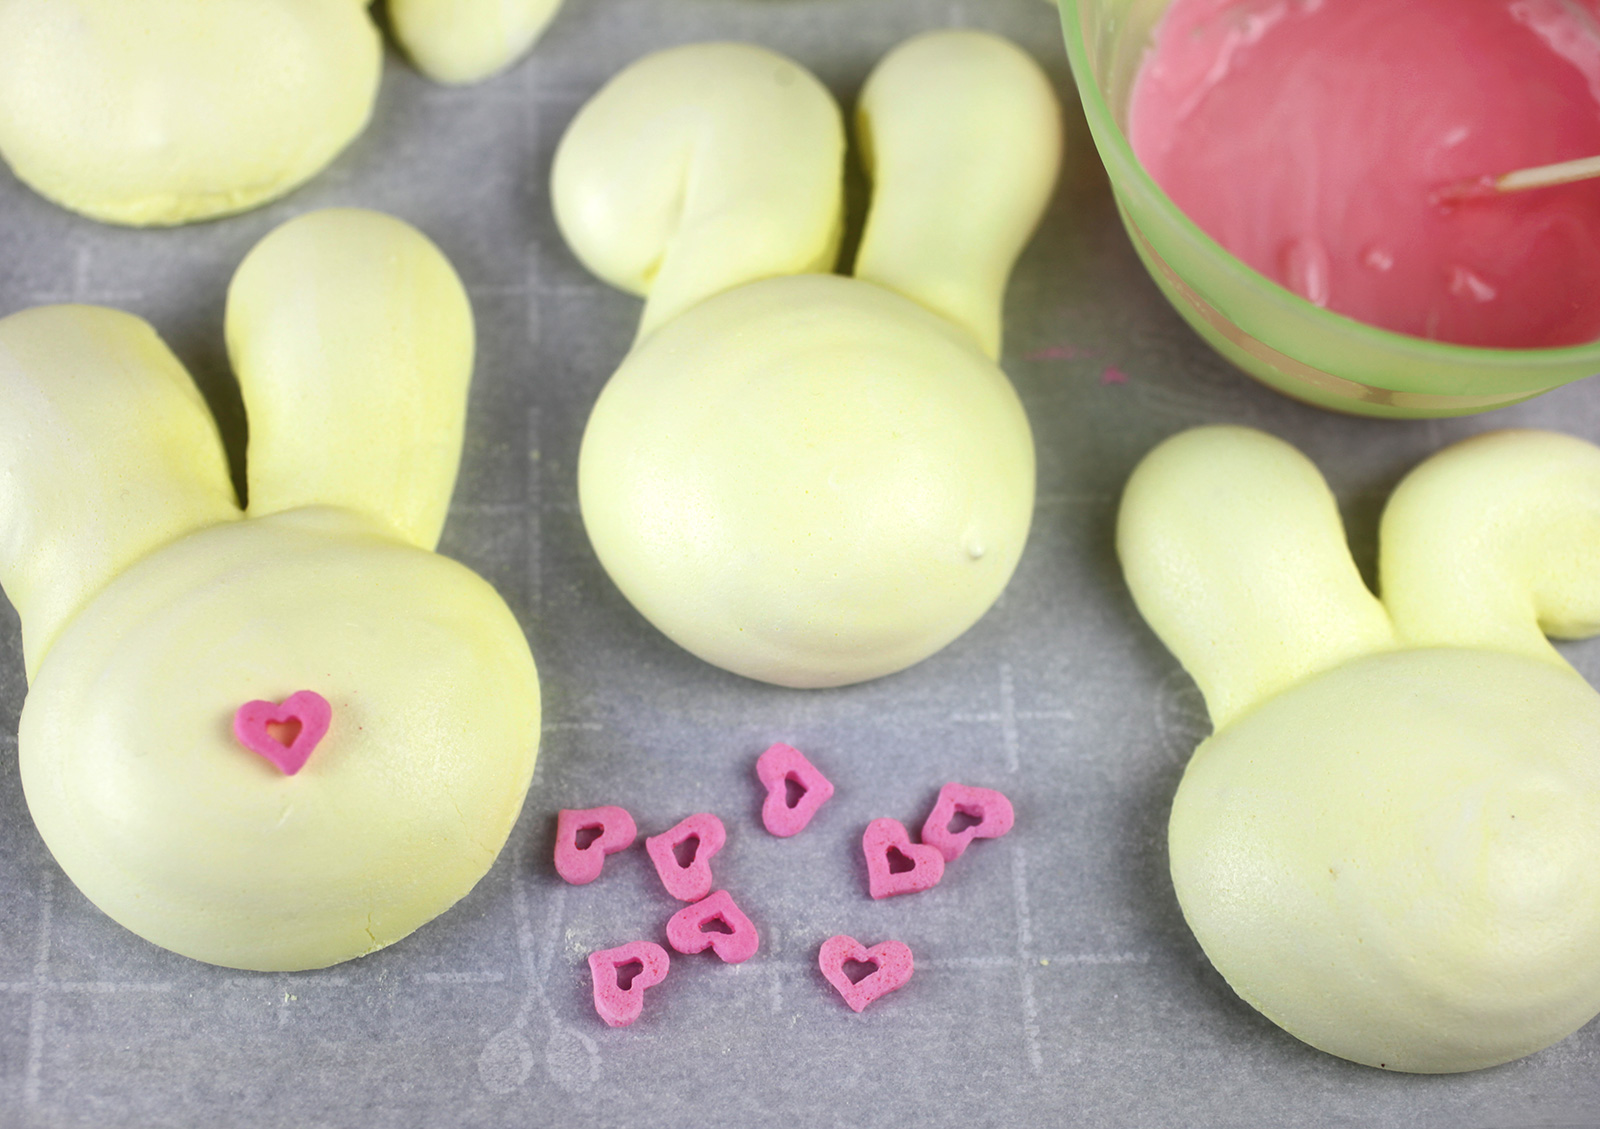
Pink heart sprinkles made perfect little noses. I attached them with a dot of melted candy coating.
Cuties!
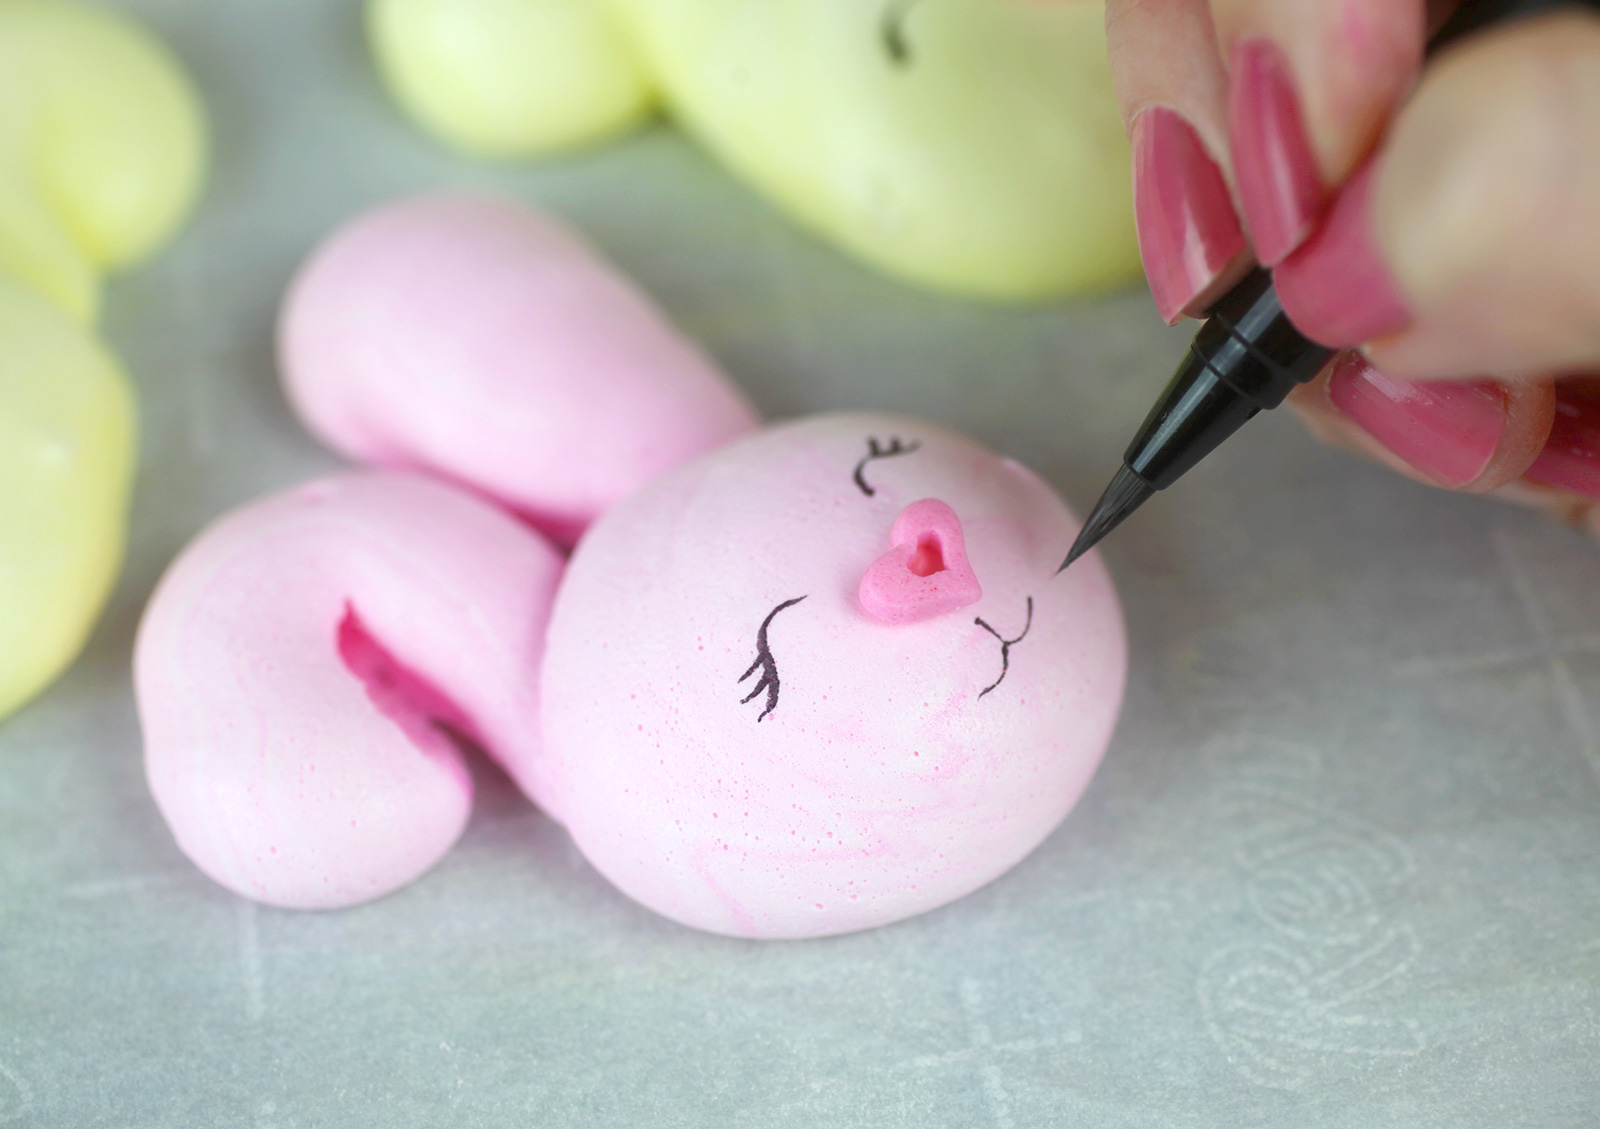
Then I used a black edible ink writing pen to make eyes and mouths.
This is the first time I’ve used this Nomeca brand of pens and I love the tapered tip and how nicely it functioned almost like a paintbrush with thicks and thins on the porous surface of the meringue.
You can stop here or add a few more details.

Let’s use the pink pen.
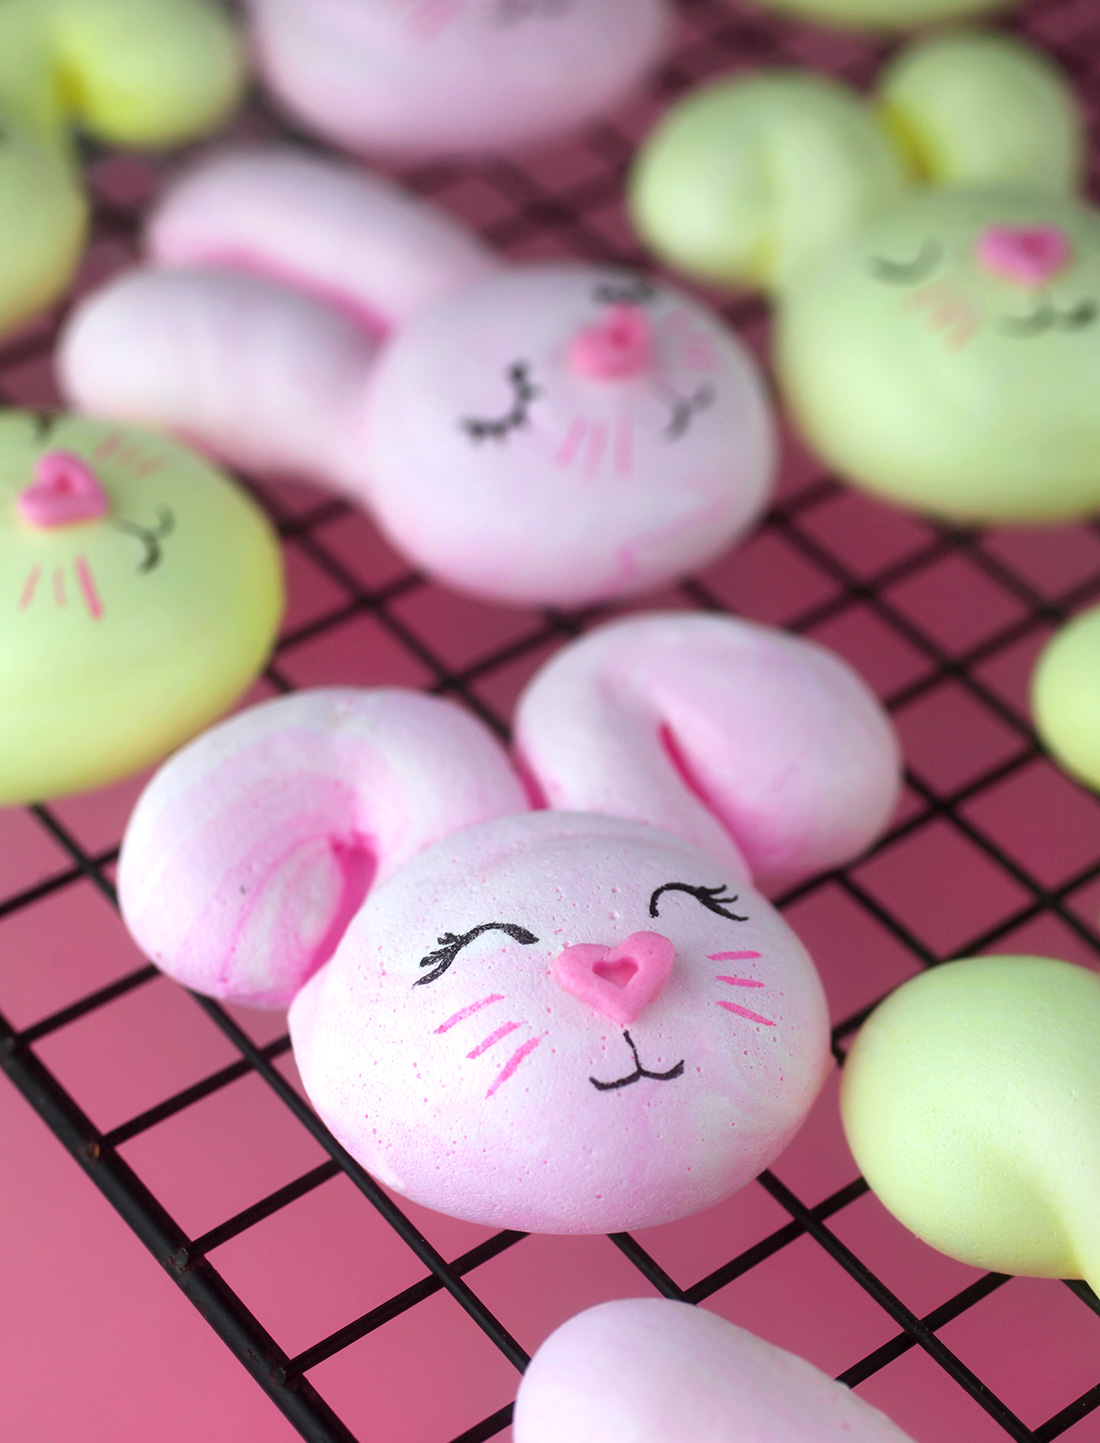
Draw on a few whiskers if you like.
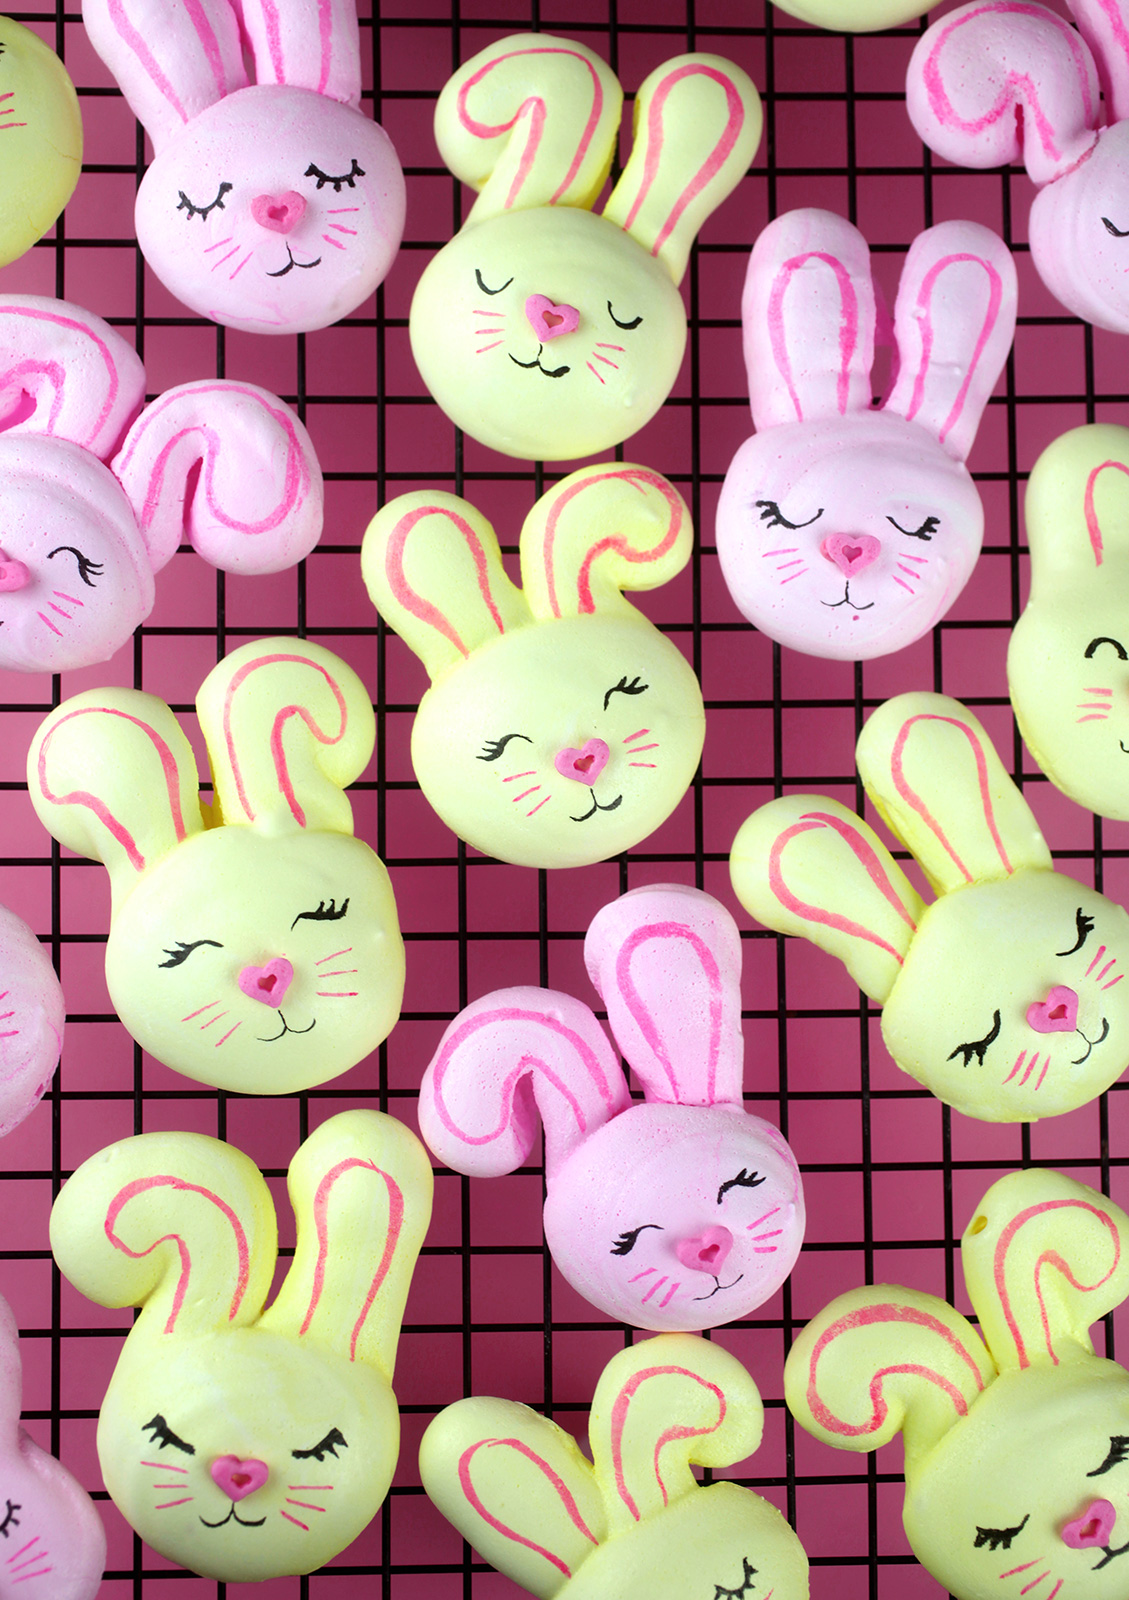
And then outline the ears for even more character. Too cute!
Source: Adapted from The Meringue Girls Cookbook, 2014 published by Chronicle Books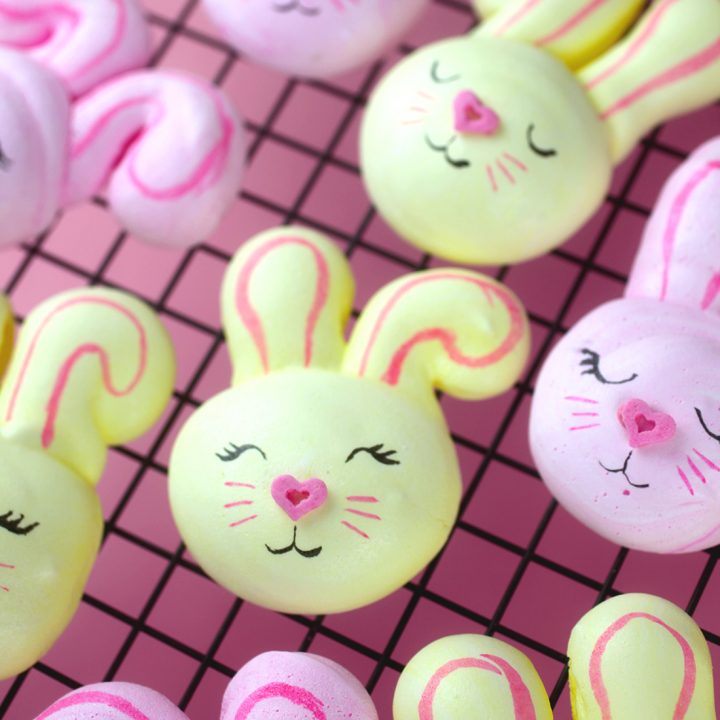
Meringue Bunnies
Ingredients
Meringue
Optional items for decorating
Instructions
Notes
Hope you enjoy and wishing you a Happy Hoppy Easter!


crayfish-farming-profit-per-acre/
most-profitable-crayfish-species-for-farming/
how-to-increase-crayfish-growth-rate-naturally/
how-long-does-it-take-for-clams-to-grow-to-market-size/
benefits-of-raising-clams/
how-to-raise-clams/
clam-seed-cost-and-where-to-buy-clam-seed-for-farming/
best-water-quality-parameters-for-fastest-clam-growth/
is-it-profitable-to-raise-clams/
where-do-we-find-clams/
hard-clam-vs-soft-shell-clam-which-is-more-profitable/
licenses-and-permits-needed-to-start-a-clam-farm/
most-profitable-clam-size-to-sell-wholesale-vs-direct/
common-diseases-in-clam-aquaculture-and-how-to-treat-them/
how-much-does-it-cost-to-start-a-small-scale-clam-farm/
substrate-type-for-optimal-clam-growth-and-survival-rate/
how-to-speed-up-broiler-chicken-growth-naturally/
how-to-raise-chicken-in-a-farm-as-a-beginners/
how-to-raise-chickens-as-a-beginner-for-profits/
most-profitable-chicken-breeds-for-meat-production/
how-to-prevent-stunted-growth-in-chickens/
what-vitamins-help-chickens-grow-faster/
how-long-does-it-take-for-chickens-to-grow-to-full-size/
best-feed-for-faster-chicken-weight-gain/
how-often-should-i-feed-my-chickens-for-optimal-growth/
homemade-chicken-feed-recipes-for-weight-gain/
break-even-analysis-for-a-small-scale-chicken-farm/
best-practices-for-profitable-backyard-chicken-farming/
how-to-reduce-feed-costs-for-chicken-farming/
best-practices-for-raising-broiler-chickens-for-profit/
how-to-start-a-profitable-free-range-chicken-business/
is-organic-chicken-farming-more-profitable/
best-growth-booster-supplements-for-chickens/
how-nutrition-impacts-cattle-growth-rate/
how-to-raise-cattle-for-meat/
how-to-raise-cattle-in-a-farm-for-profits/
how-to-raise-cattle-farming-as-a-beginner-2/
impact-of-weather-on-cattle-growth-performance/
how-genetics-affect-cattle-growth-and-weight-gain/
effect-of-mineral-supplementation-on-cattle-growth/
cattle-growth-and-the-role-of-protein-rich-diets/
best-feeding-practices-for-healthy-cattle-growth/
cattle-growth-improvement-with-growth-promoting-hormones/
effect-of-stress-on-cattle-weight-gain-and-growth/
how-probiotics-improve-cattle-growth-and-digestion/
the-influence-of-pasture-quality-on-cattle-growth-rate/
the-role-of-water-intake-in-cattle-growth/
how-age-impacts-cattle-growth-and-feed-efficiency/
the-effect-of-breed-selection-on-cattle-growth-performance/
how-to-optimize-cattle-growth-with-rotational-grazing/
best-feed-additives-to-enhance-cattle-growth/
cattle-growth-improvement-with-growth-promoting-hormones-2/
improving-cattle-growth-with-optimal-livestock-management-techniques/
how-to-prevent-diseases-that-stunt-cattle-growth/
the-role-of-calcium-and-phosphorus-in-cattle-growth/
the-impact-of-feed-conversion-efficiency-on-cattle-growth/
how-vaccination-schedules-affect-cattle-growth/
best-time-of-day-to-catch-channel-catfish/
how-to-rig-a-slip-sinker-for-catfish-fishing/
best-bait-for-catching-catfish-in-freshwater-lakes/
catfish-farming-_-guide-for-commercial-purposes/
farming-catfish-for-a-beginner-2/
differences-between-blue-catfish-and-channel-catfish/
how-to-cook-catfish-in-an-air-fryer/
best-seasoning-for-grilled-catfish-fillets/
how-to-clean-and-fillet-a-catfish-properly/
southern-fried-catfish-recipe-with-cornmeal/
how-often-to-feed-a-pet-catfish-in-a-tank/
best-bottom-feeder-catfish-for-freshwater-aquariums/
how-to-identify-a-walking-catfish/
are-bullhead-catfish-good-to-eat/
camel-farming-for-business-2/
how-to-train-a-camel-for-riding/
beginners-guide-about-camels/
how-to-care-for-a-pet-camel/
camel-farming-tips-for-beginners/
best-camel-breeds-for-desert-work/
camel-trekking-tours-in-morocco/
benefits-of-camel-milk-for-health/
camel-growth-to-profitability-planning-guides/
factors-influencing-camerl-growth-to-profitability/
camerl-growth-to-profitability-success-stories/
camerl-growth-to-profitability-analysis-techniques/
strategies-for-carmel-growth-to-profitability/
is-it-profitable-to-raise-blackbuck/
how-to-raise-blackbuck-for-profits/
which-climate-is-suitable-for-blackbuck-growth/
cost-of-blackbuck-meat-processing-after-the-hunt/
where-do-we-find-blackbuck/
best-feed-for-blackbuck-antelope-growth/
best-time-of-year-to-hunt-blackbuck-for-trophy/
how-much-does-it-cost-to-hunt-blackbuck-in-south-africa/
affordable-blackbuck-cull-hunt-packages/
bison-farming-for-a-beginner/
bison-herd-management-for-profit-optimization/
grass-fed-bison-meat-roi-analysis/
targets-eco-conscious-investors-and-ranchers/
sustainable-bison-farming-profitability-strategies/
bison-farming-for-business/
bison-meat-market-demand-analysis-2025/
organic-bison-farming-certification-and-profitability/
bison-wallowing-impact-on-pasture-productivity/
climate-resilient-bison-ranching-business-models/
sustainable-bison-ranching-profit-margins-2025/
best-bluegill-stocking-density-for-maximum-growth-rate/
whow-to-raise-bluegill/
organic-bluegill-feed-options-for-premium-market-pricing/
most-profitable-bluegill-size-for-live-bait-market/
how-fast-do-bluegill-grow-in-a-commercial-aquaculture-setup/
cost-to-raise-bluegill-to-market-size-per-pound/
optimal-bluegill-feed-conversion-ratio-for-profitability/
treat-slow-growth-sturgeon-water-quality-2/
markets-to-sell-live-sturgeon-for-profit-2/
how-profitable-is-silkworm-farming/
cost-to-start-a-small-scale-silkworm-farm/
how-to-build-a-low-cost-silkworm-rearing-rack/
best-temperature-and-humidity-for-silkworm-growth/
where-to-buy-healthy-silkworm-eggs-for-rearing/
suitable-sustanable-silkworms-growth/
benefits-of-raising-silkworm-for-profits/
bison-meat-holiday-cooking-ideas-christmas-and-thanksgiving/
where-can-i-buy-high-quality-bison-meat/
bison-photography-tours-in-national-parks/
best-bison-meat-recipes-for-grilling/
scaling-bison-operations-for-long-term-profitability/
best-beekeeping-equipment-for-small-farms/
how-to-start-a-beehive-for-beginners/
beekeeping-for-beginners/
/beekeeping-for-business/
beekeeping-guide-for-beginners/
organic-beekeeping-methods-for-natural-honey/
benefits-of-beekeeping-for-backyard-gardeners/
best-feed-for-honey-growth-in-winter/
best-beekeeping-practices-for-sustainable-honey-production/
organic-beekeeping-practices-without-chemicals/
6-key-factors-affecting-beekeepers-globally/
seasonal-beekeeping-tasks-for-every-beekeeper/
top-beekeeping-equipment-for-hobbyists/
how-to-maintain-a-healthy-bee-colony-year-round/
how-to-harvest-honey-without-harming-bees/
barramundi-feed-conversion-ratio-fcr/
commercial-barramundi-farming-investment/
barramundi-ras-system-startup-costs/
barramundi-fish-farm-profit-per-acre/
how-to-raise-barramundi-for-profits/
barramundi-harvest-and-processing-equipment/
barramundi-vertical-farming-profitability/
barramundi-processing-plant-cost/
barramundi-market-demand-in-south-africa/
barramundi-breeding-stock-for-sale/
niche-markets-for-alpaca-fiber-products-2023/
cost-effective-alpaca-feed-solutions-for-small-farms/
best-practices-for-alpaca-breeding-profitability/
how-to-increase-alpaca-farm-profit-margins-sustainably/
marketing-strategies-for-alpaca-fiber-and-breeding-stock/
challenges-in-scaling-alpaca-farms-to-profitability/
sustainable-alpaca-farming-methods-for-profitability/
roi-timeline-for-starting-an-alpaca-farm/
alpaca-fleece-processing-techniques-for-higher-value/
diversifying-income-streams-on-alpaca-farms/
organic-alpaca-farming-certification-and-profitability/
alpaca-fiber-value-added-product-ideas/
government-grants-for-sustainable-alpaca-farming/
alpaca-herd-health-management-for-cost-reduction/
benefits-of-raising-abalone-farming-for-profits/
abalone-feed-cost-per-kilogram/
how-much-do-abalone-farmers-make-per-year/
sustainable-farming-for-abalone/
commercial-abalone-farming-guide/
abalone-aquaculture-handbook-guide/
most-profitable-abalone-species-to-farm/
wholesale-buyers-for-farmed-abalone/
sustainable-abalone-farming-profitability/
premium-live-abalone-market-price/
financing-options-for-aquaculture-abalone-farm/
how-to-scale-abalone-farm-to-commercial-production/
value-added-abalone-products-processing-equipment/
where-do-we-find-abalone-in-the-world/
roi-on-abalone-farming-operation/
abalone-export-market-requirements/
best-abalone-species-for-profitable-farming/
buy-abalone-seed-stock-for-farming/
how-to-buy-hybrid-abalone-seeds-for-fast-growth/
scaling-a-partridge-farm-from-small-to-profitable-business/
I do trust all the ideas youve presented in your post They are really convincing and will definitely work Nonetheless the posts are too short for newbies May just you please lengthen them a bit from next time Thank you for the post
SpeedX Tracking stands out for its accuracy and ease of use, offering real-time updates that make tracking simple, reliable, and highly efficient.
These are the cutest bunnies ever! My kids would love helping make these for Easter.
Thanks for sharing this post about Meringue Bunnies – Bakerella. I enjoyed the ideas here.
I found the Jalwa game login system very efficient. It takes only a few seconds to log in, and I can start playing immediately without waiting or facing any glitches.
This game truly lives up to its name—Jalwa! The design, speed, and gameplay are impressive. It keeps getting better with updates, making it one of my favorite games to play regularly.
These meringue bunnies are absolutely adorable! I love the cute twist on traditional meringue kisses. Perfect for Easter!
What a cute and imaginative style! It makes me think of Nanabanana?https://nanaimg.io?, which I’ve been using recently to create creative images in no time.
Such an adorable and creative design! It reminds me of the Nanabanana?https://imgful.io? image editor I’ve been using lately—it quickly generates creative visuals just like this.
Its like you read my mind You appear to know a lot about this like you wrote the book in it
Meringue Bunnies sound absolutely adorable! I really appreciate you explaining that meringues are just sugar added to whipped egg whites and then piped. It sounds pretty easy, but your hint that you can’t quite manage makes me so curious about what’s coming next! Can’t wait to read more.
Love your ideas. Your directions are so through.
I look forward to seeing new ideas.
Hi Angie – these are really cute. :)
Do you think using superfine sugar made in the food processor would work?
Thanks,
Sheila
Sooooooooooo TALENTED!
Too cute !
These are adorable!! (Everything you make is precious) I have made many meringues but have never warmed the sugar in the oven. (Who knew!!) I cannot wait to try this method. Thank you!!