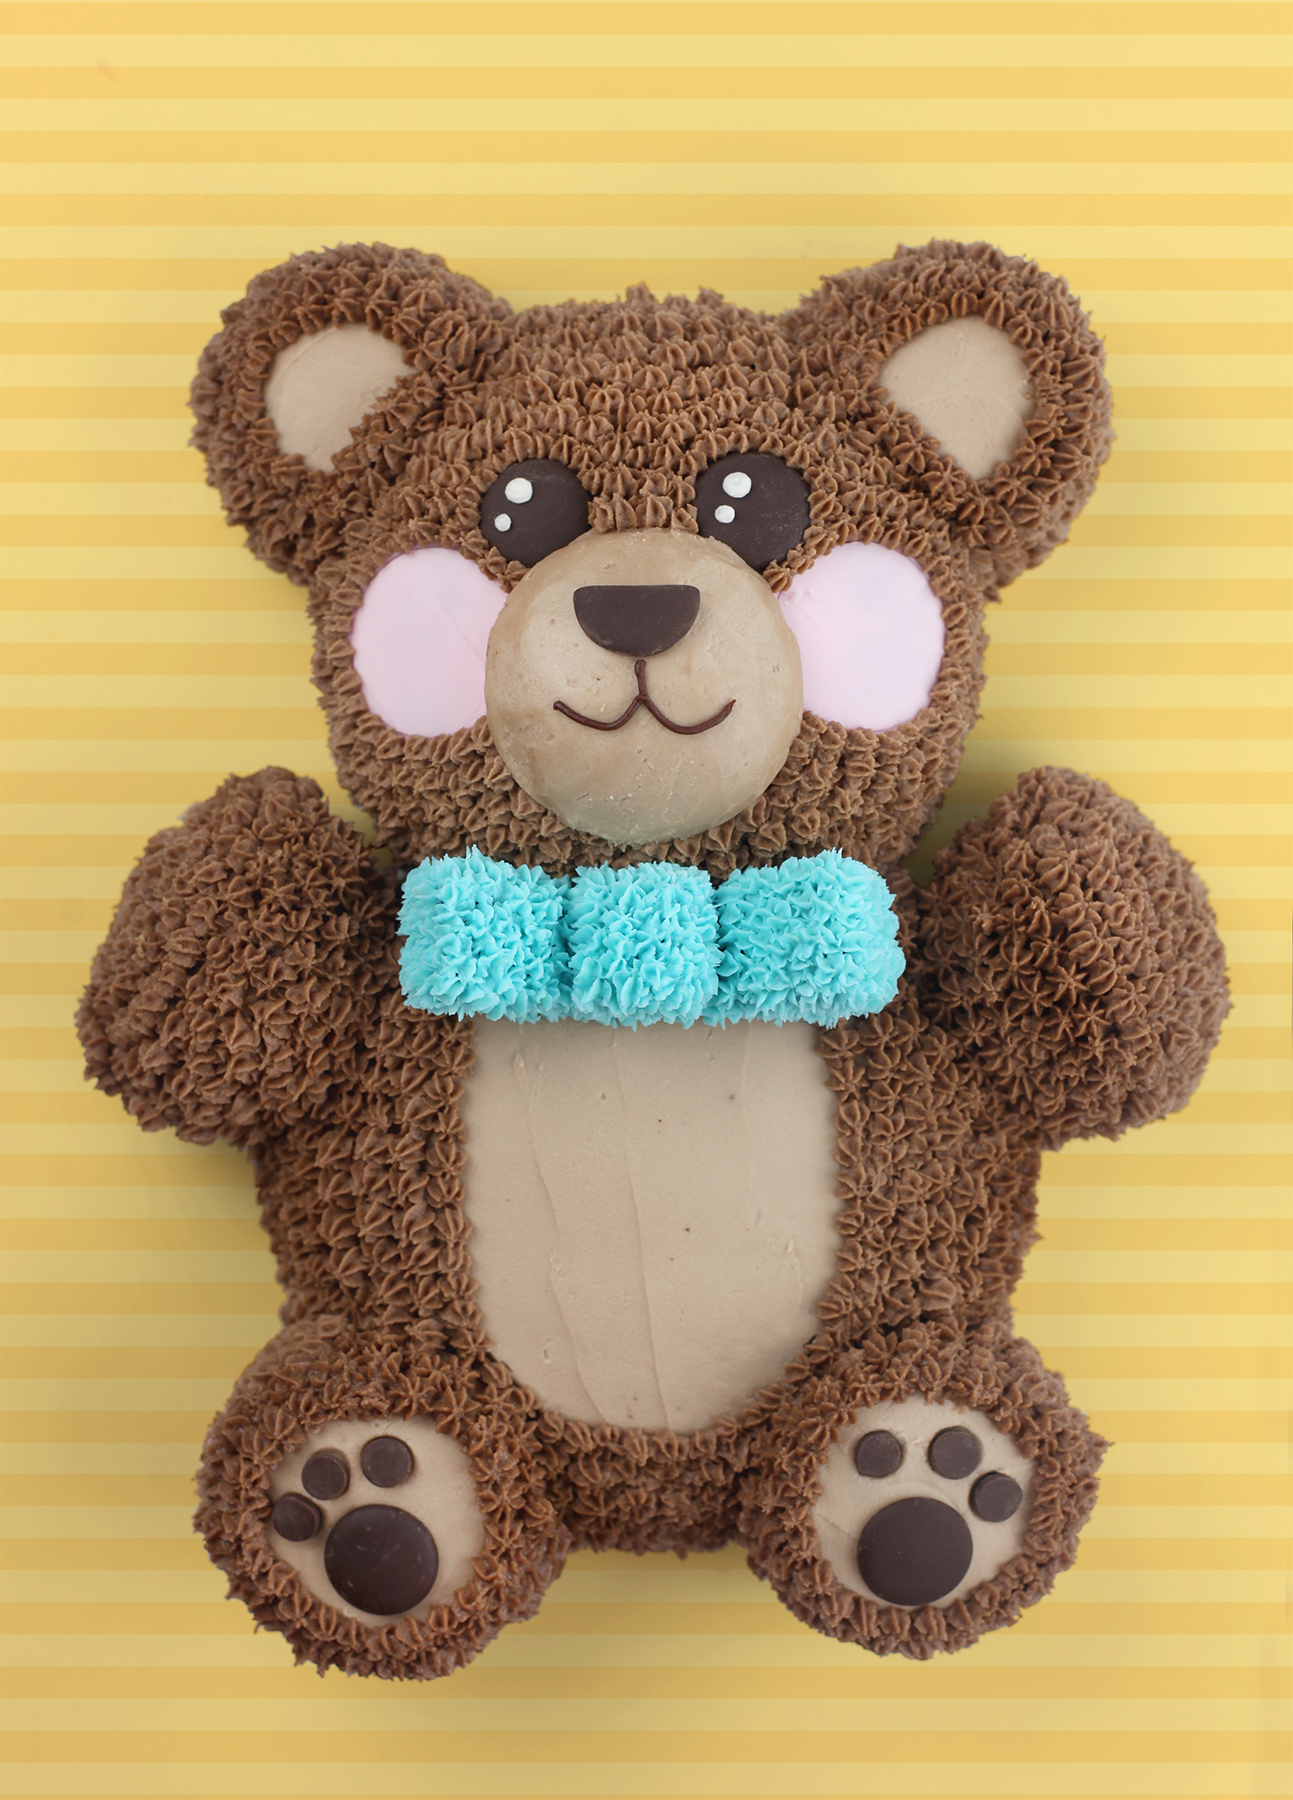
I’m pretty thrilled with how this little teddy bear turned out. It’s the first time I’ve tried to make and decorate a three dimensional decorated cake like this, but I think he looks beary cute!
The inspiration for the shape came when I was actually making another cake. I had baked a two-layer, six-inch cake and made some cupcakes with the extra batter from the recipe.
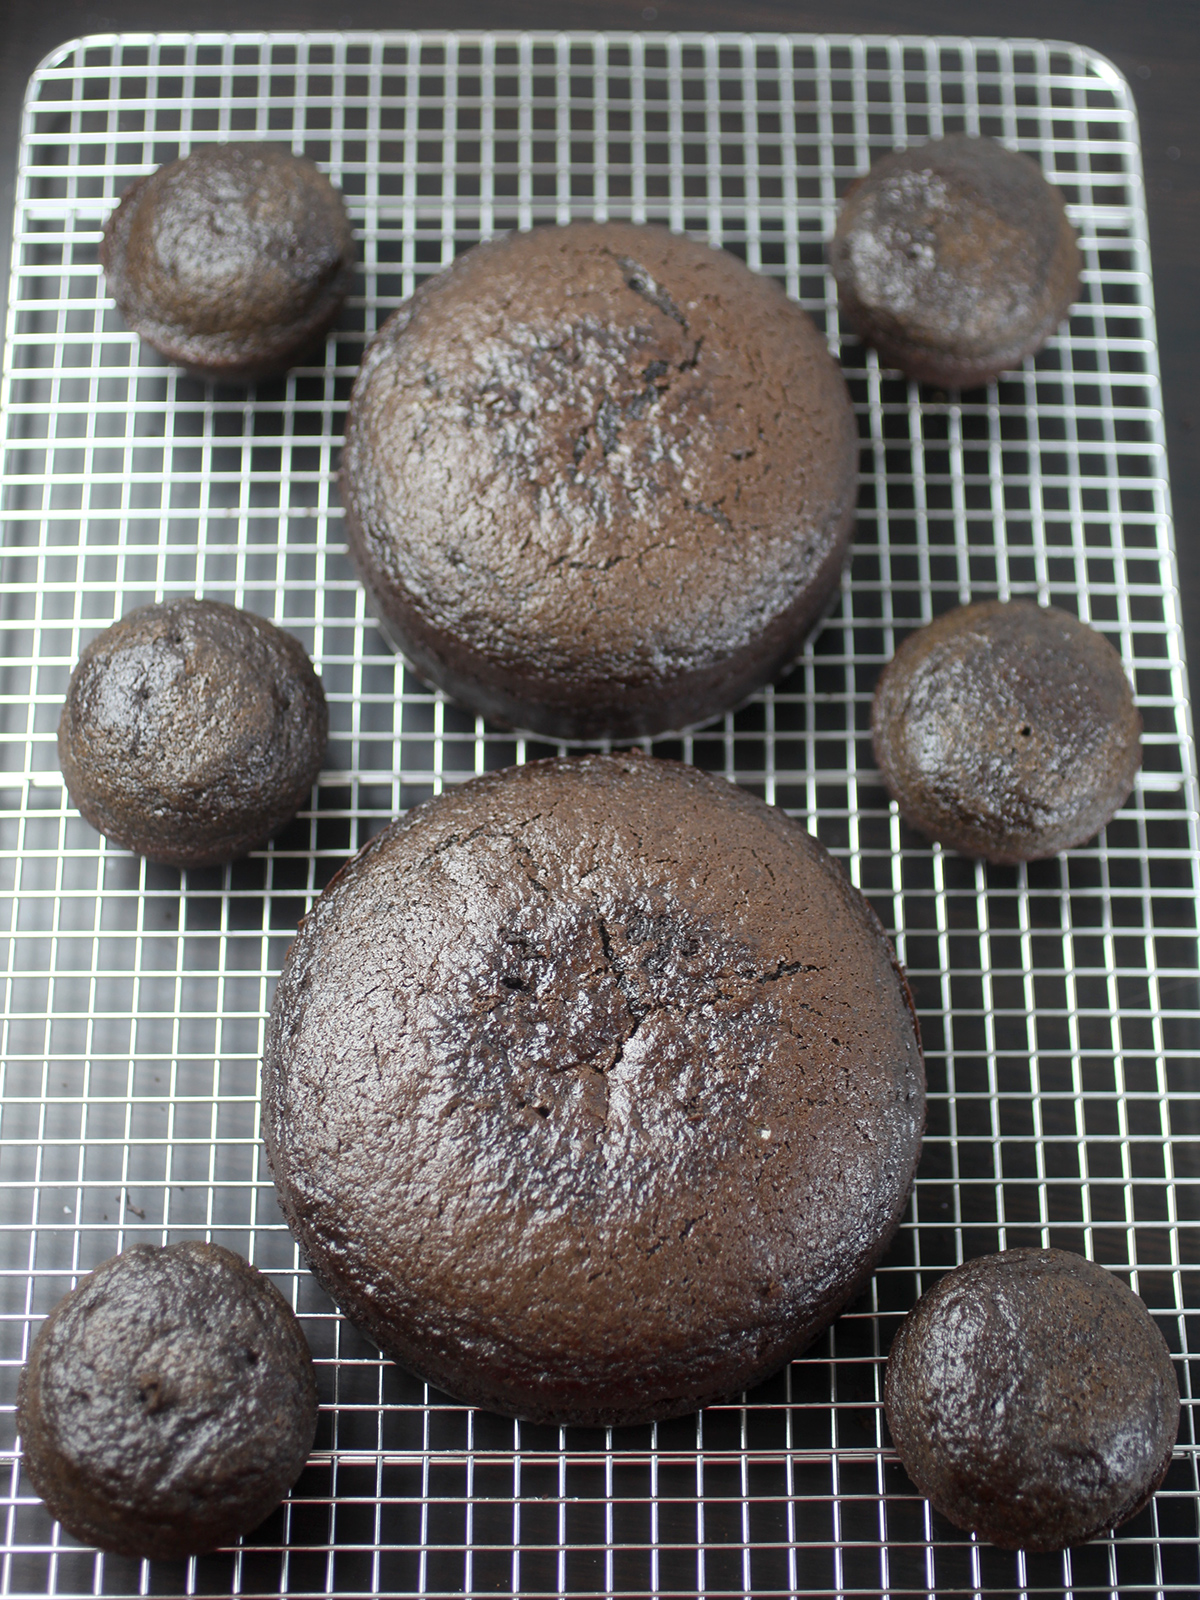
When I set them out to cool, they all looked something like this. I immediately saw a “bear” with little cupcake legs and ears.
I used this delicious cake recipe and it makes the perfect amount for a complete teddy bear.
One 6-inch cake layer
One 5-inch cake layer
6 cupcakes
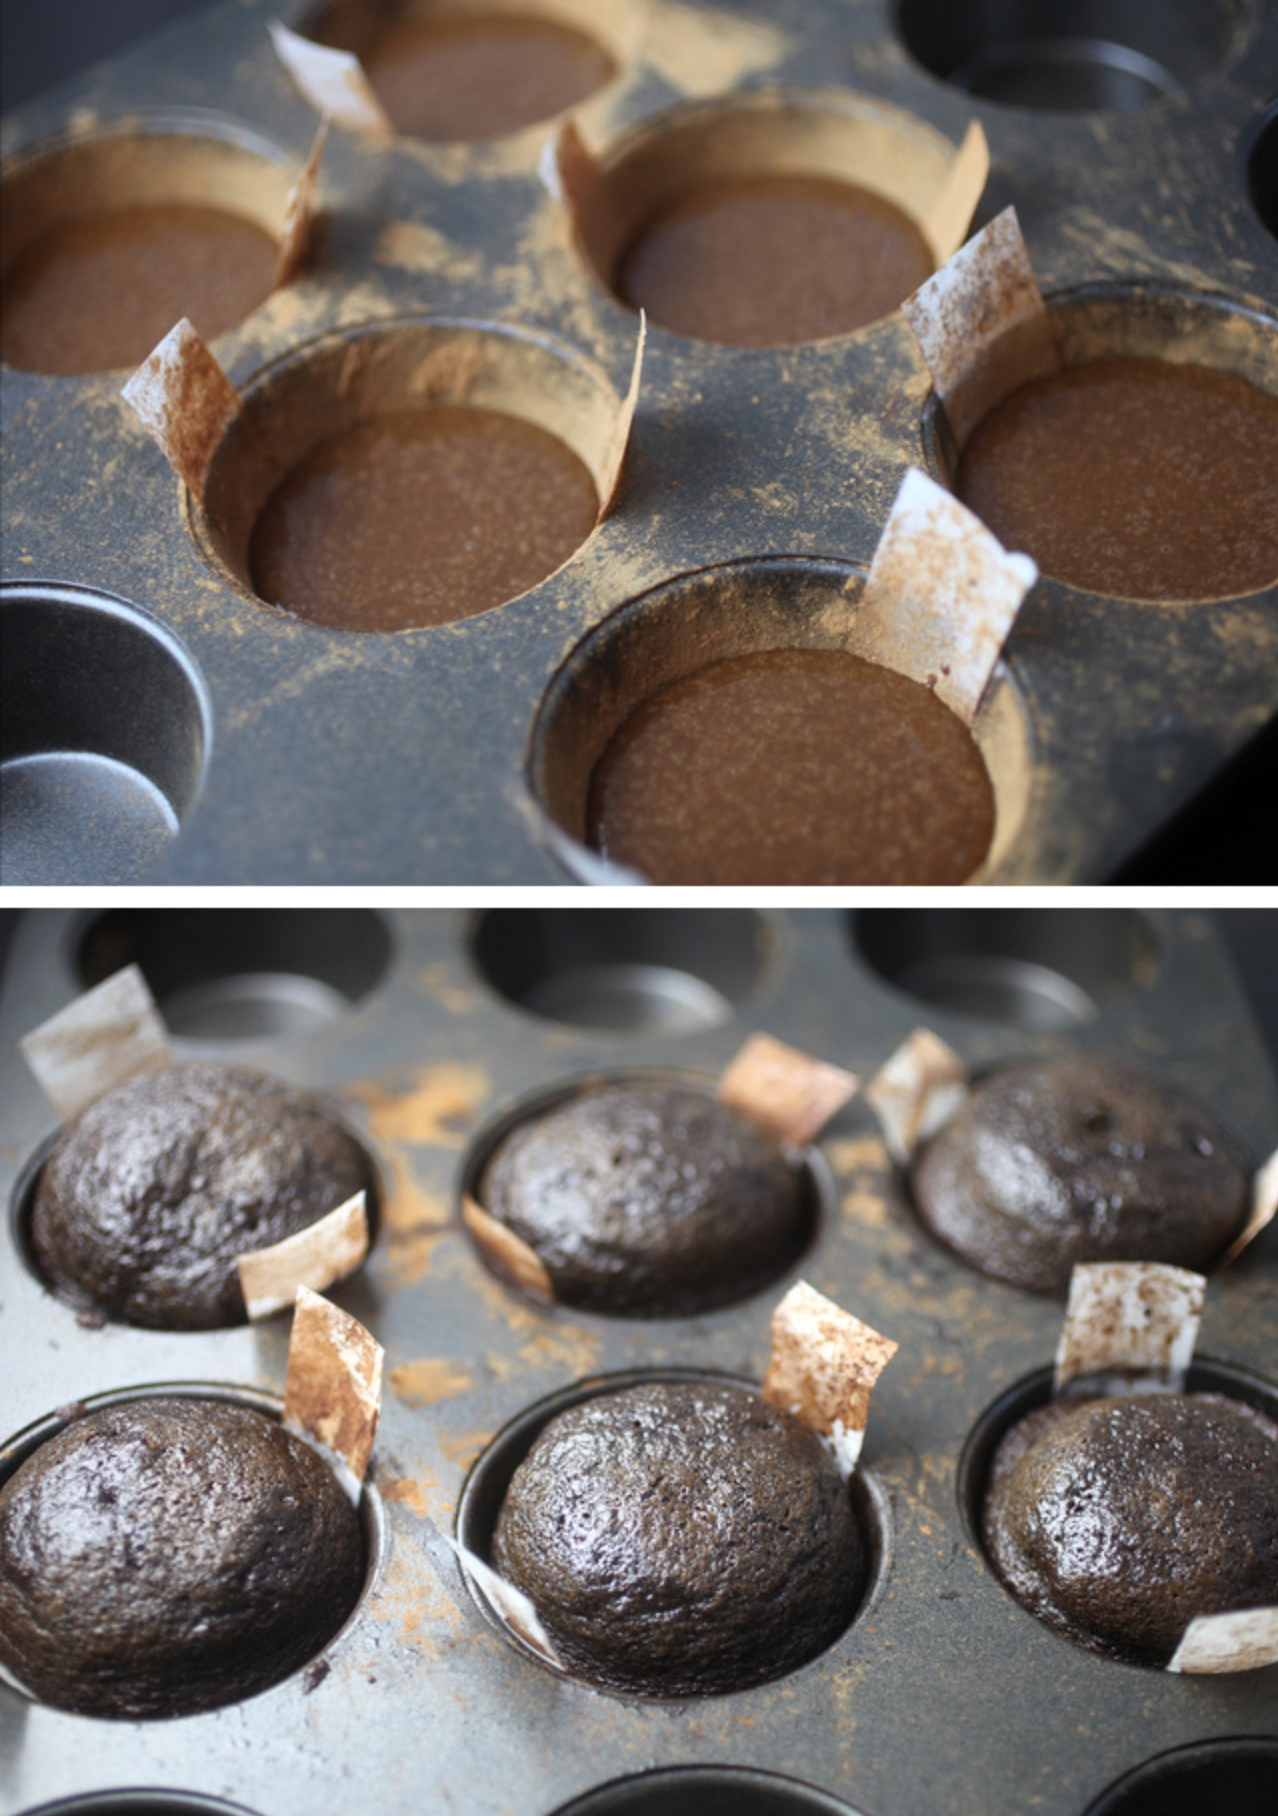
In the pic above, I baked the cupcakes without liners and greased the cupcake tin with shortening, placed strips of parchment paper inside and greased again to keep them in place. Then I coated it with cocoa to help prevent sticking.
You probably don’t need the strips, but I didn’t want to take any chances on having trouble removing a cupcake since I needed all six for the bear shape.
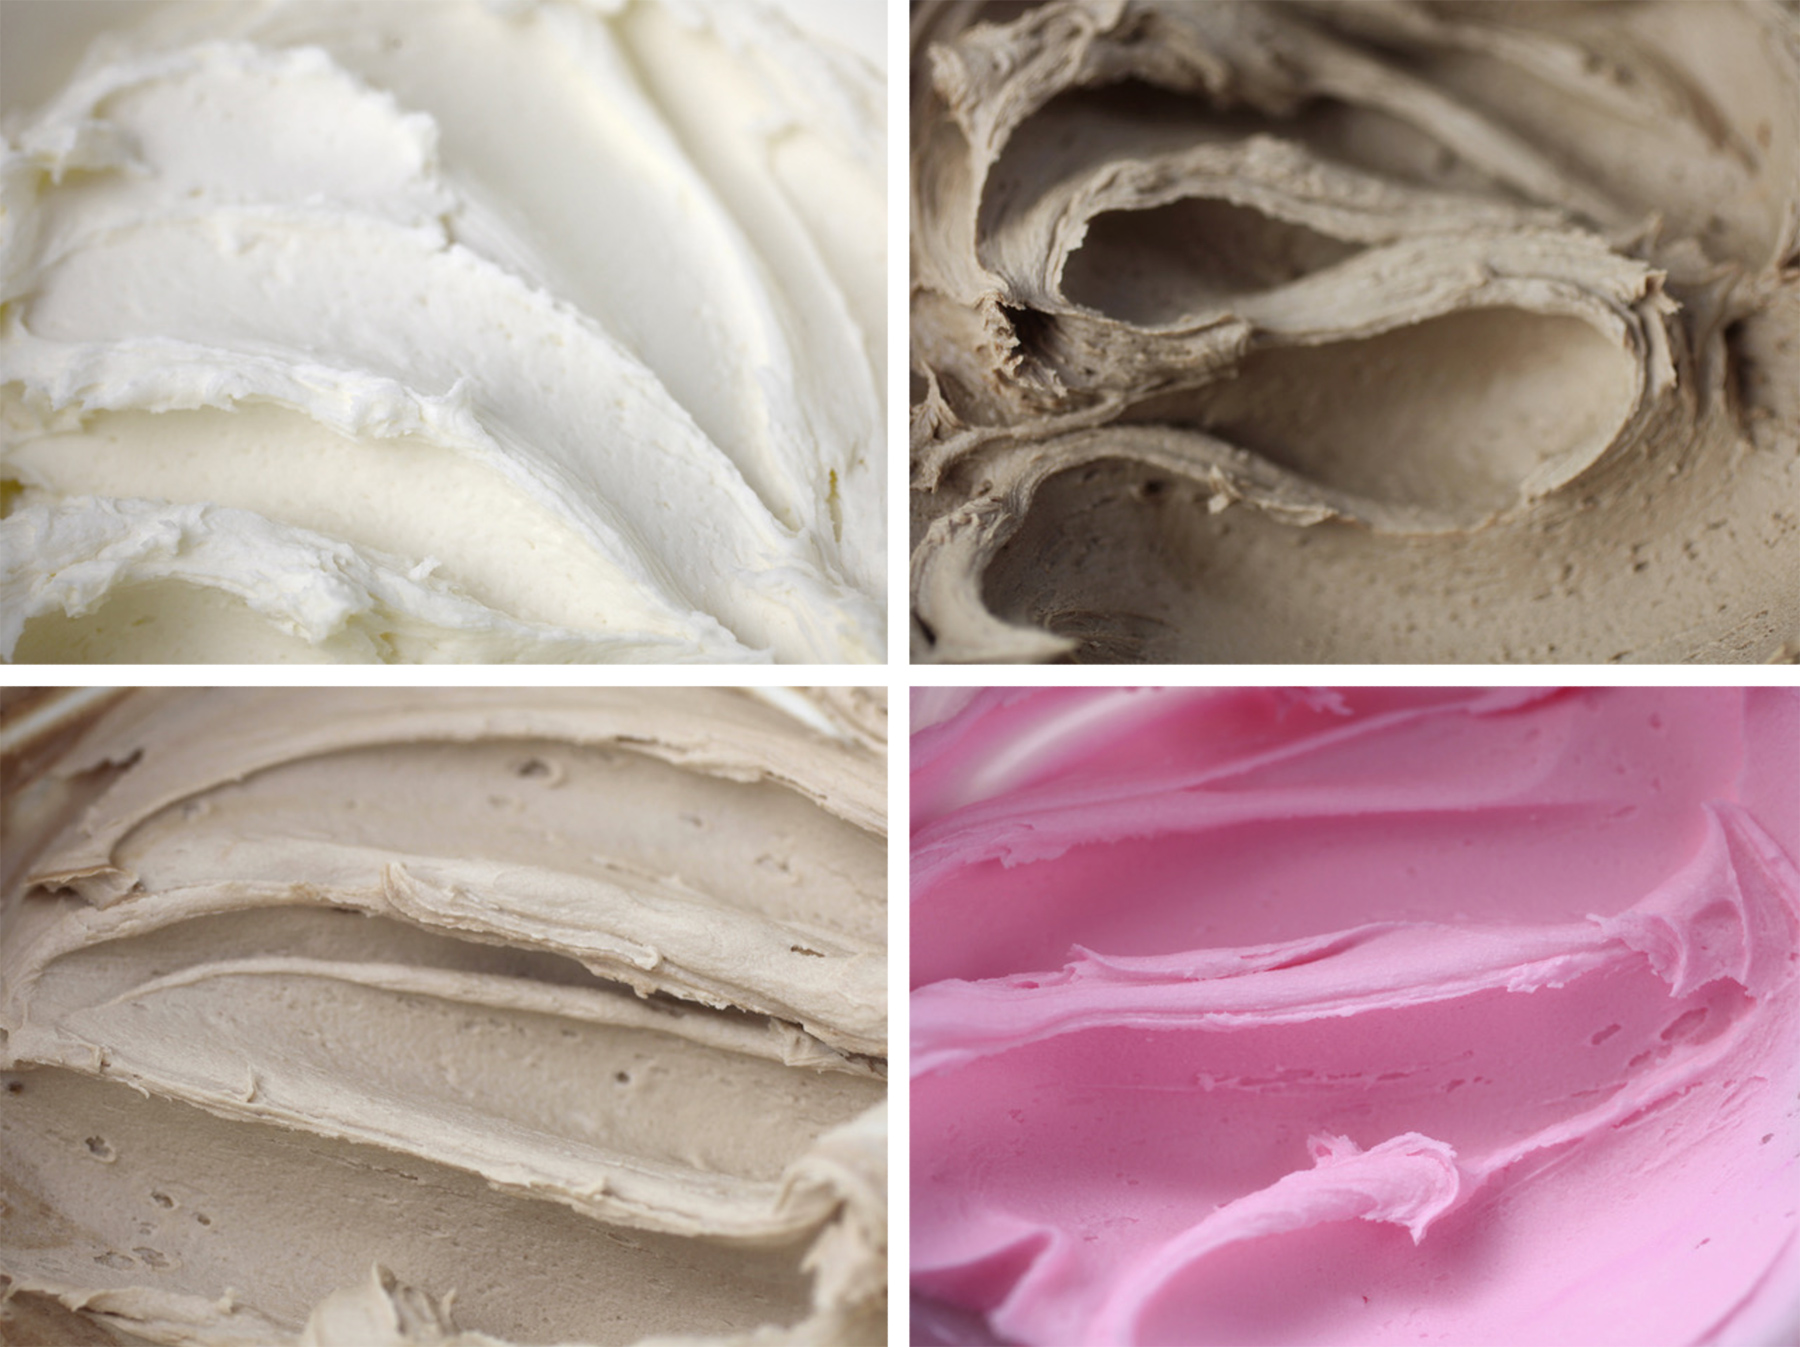
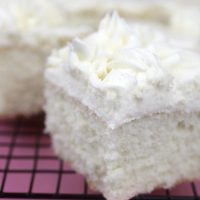
Once you have your cakes and cupcakes baked, go ahead and mix up some buttercream frosting.
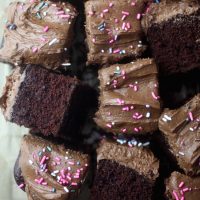
I used this frosting recipe to make one batch of vanilla buttercream and then made a second batch of buttercream and added 1/3 cup of unsweetened cocoa to the confectioner’s sugar to make chocolate frosting.
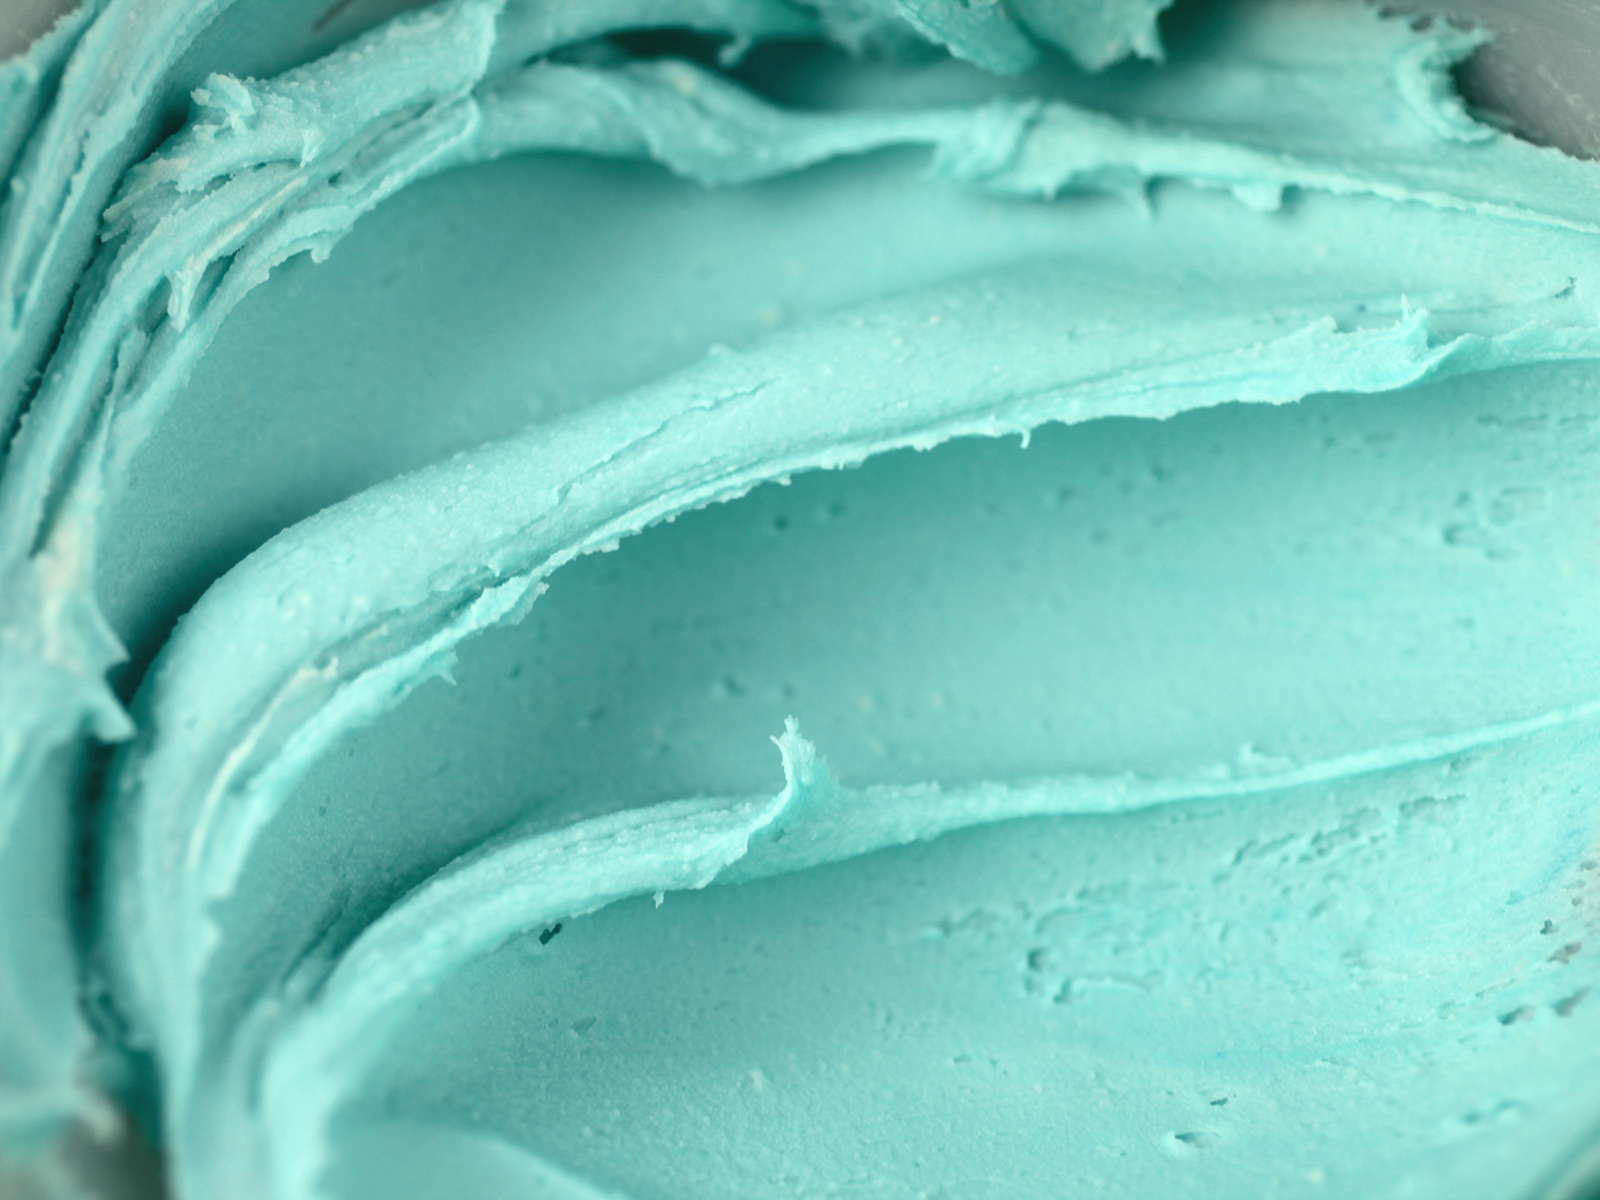
Tint a small amount from the batch of vanilla buttercream with pink icing color for cheeks, another small amount with blue for a bowtie, and save a little of the vanilla buttercream for the eyes.
Then use the remaining vanilla buttercream and mix in a small amount of the chocolate buttercream to create a lighter brown color for the belly, nose, paws and ears.
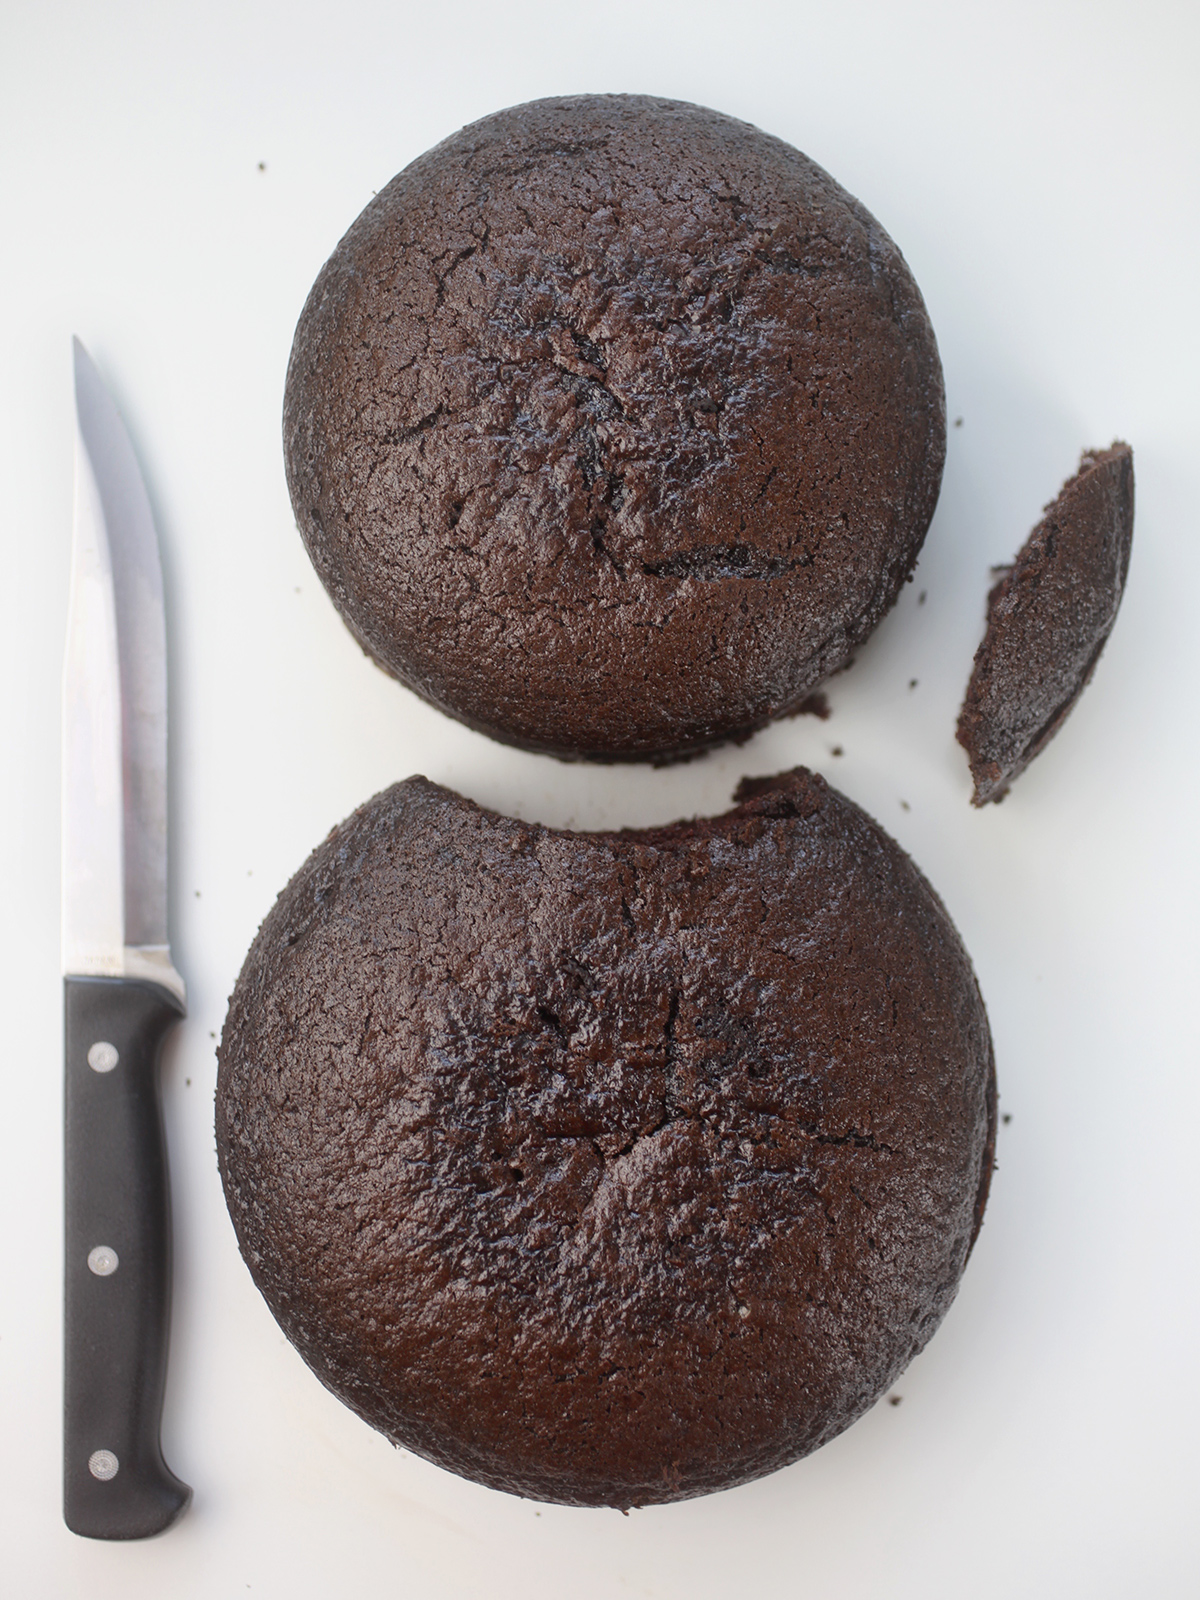
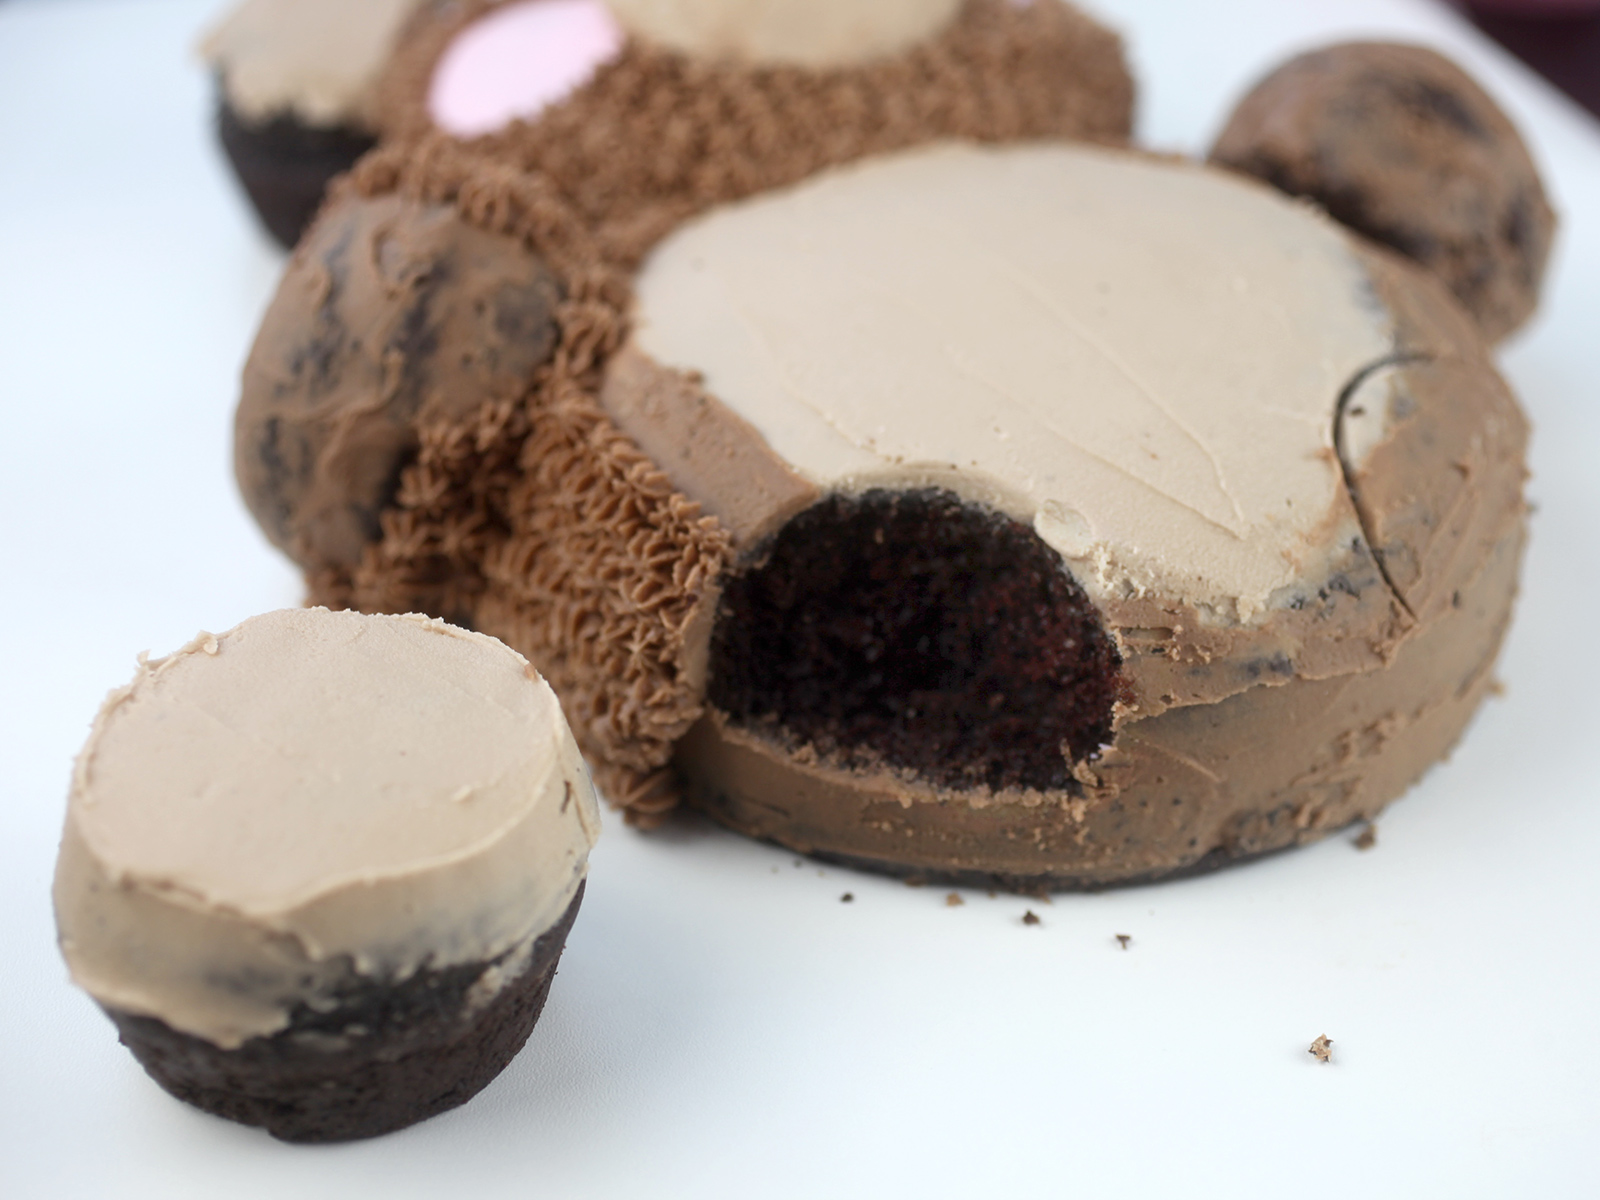
To start creating the bear shape, use a sharp knife to remove a small curved portion from the larger 6-inch cake layer. Save the curved cake scrap for use later.
Push the 5- and 6-inch cake layers together to form the head and body. Place them on a large rectangular sturdy surface. You can use a baking sheet for instance. I used a rectangular heavy-duty cake board.
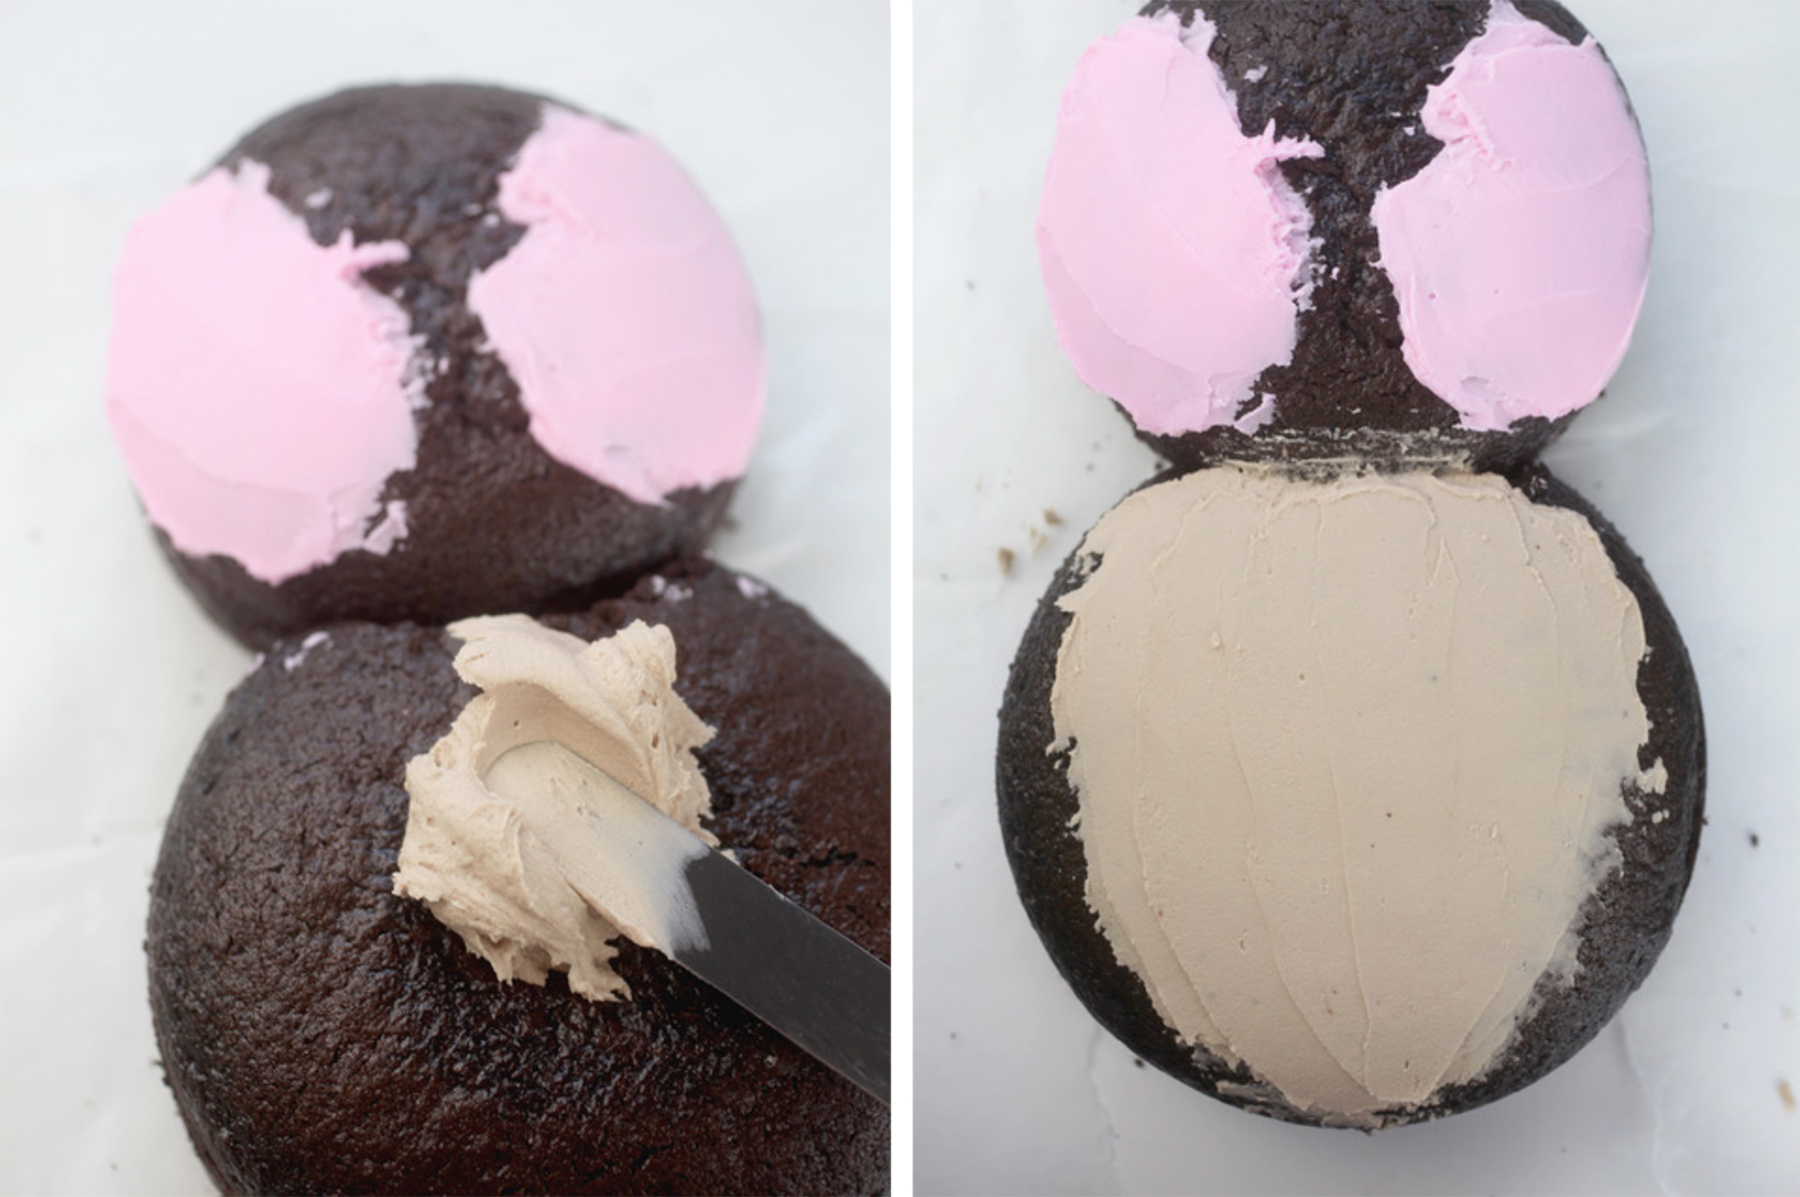
Frost an area for the cheeks with pink buttercream and the area for the belly with the light brown buttercream. Frost over a large area so you have the freedom to make the belly and cheeks any size you want when piping the furry frosting later.
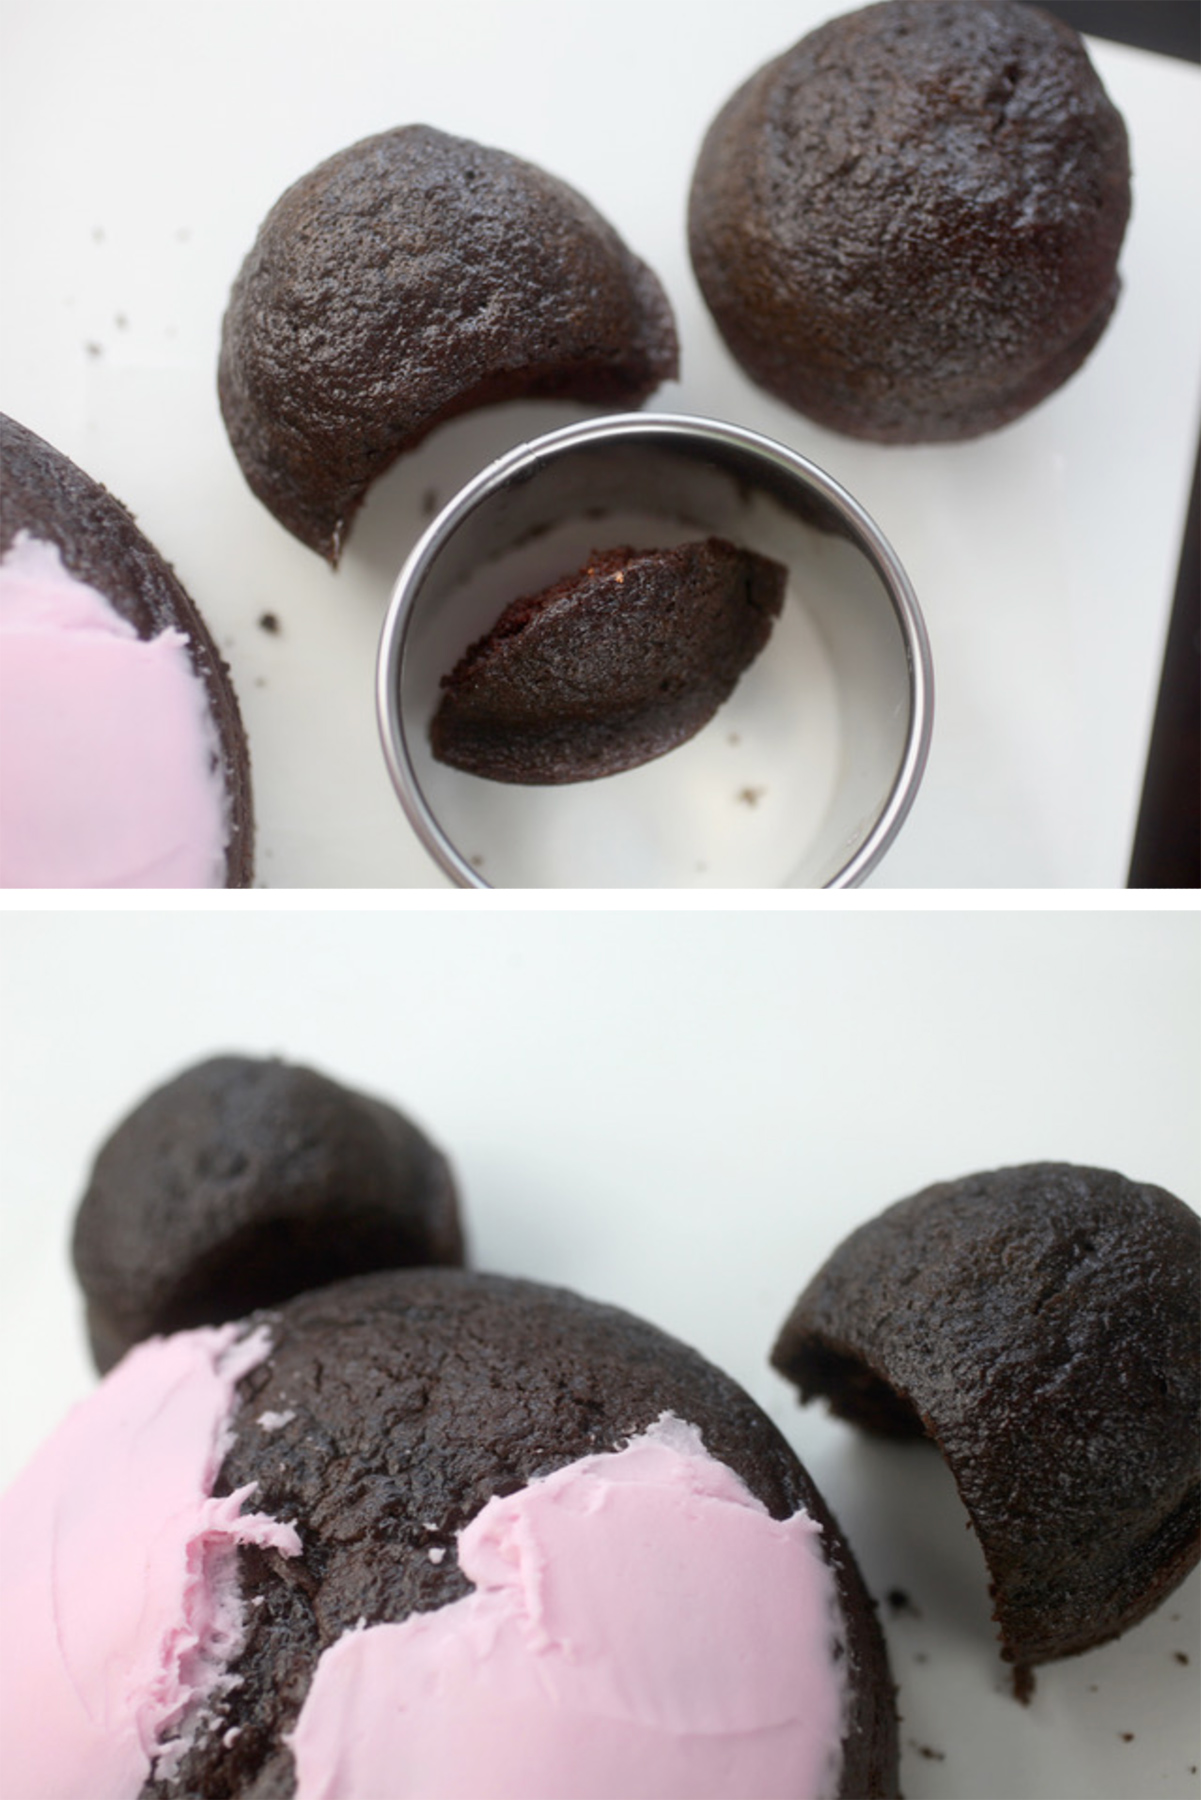
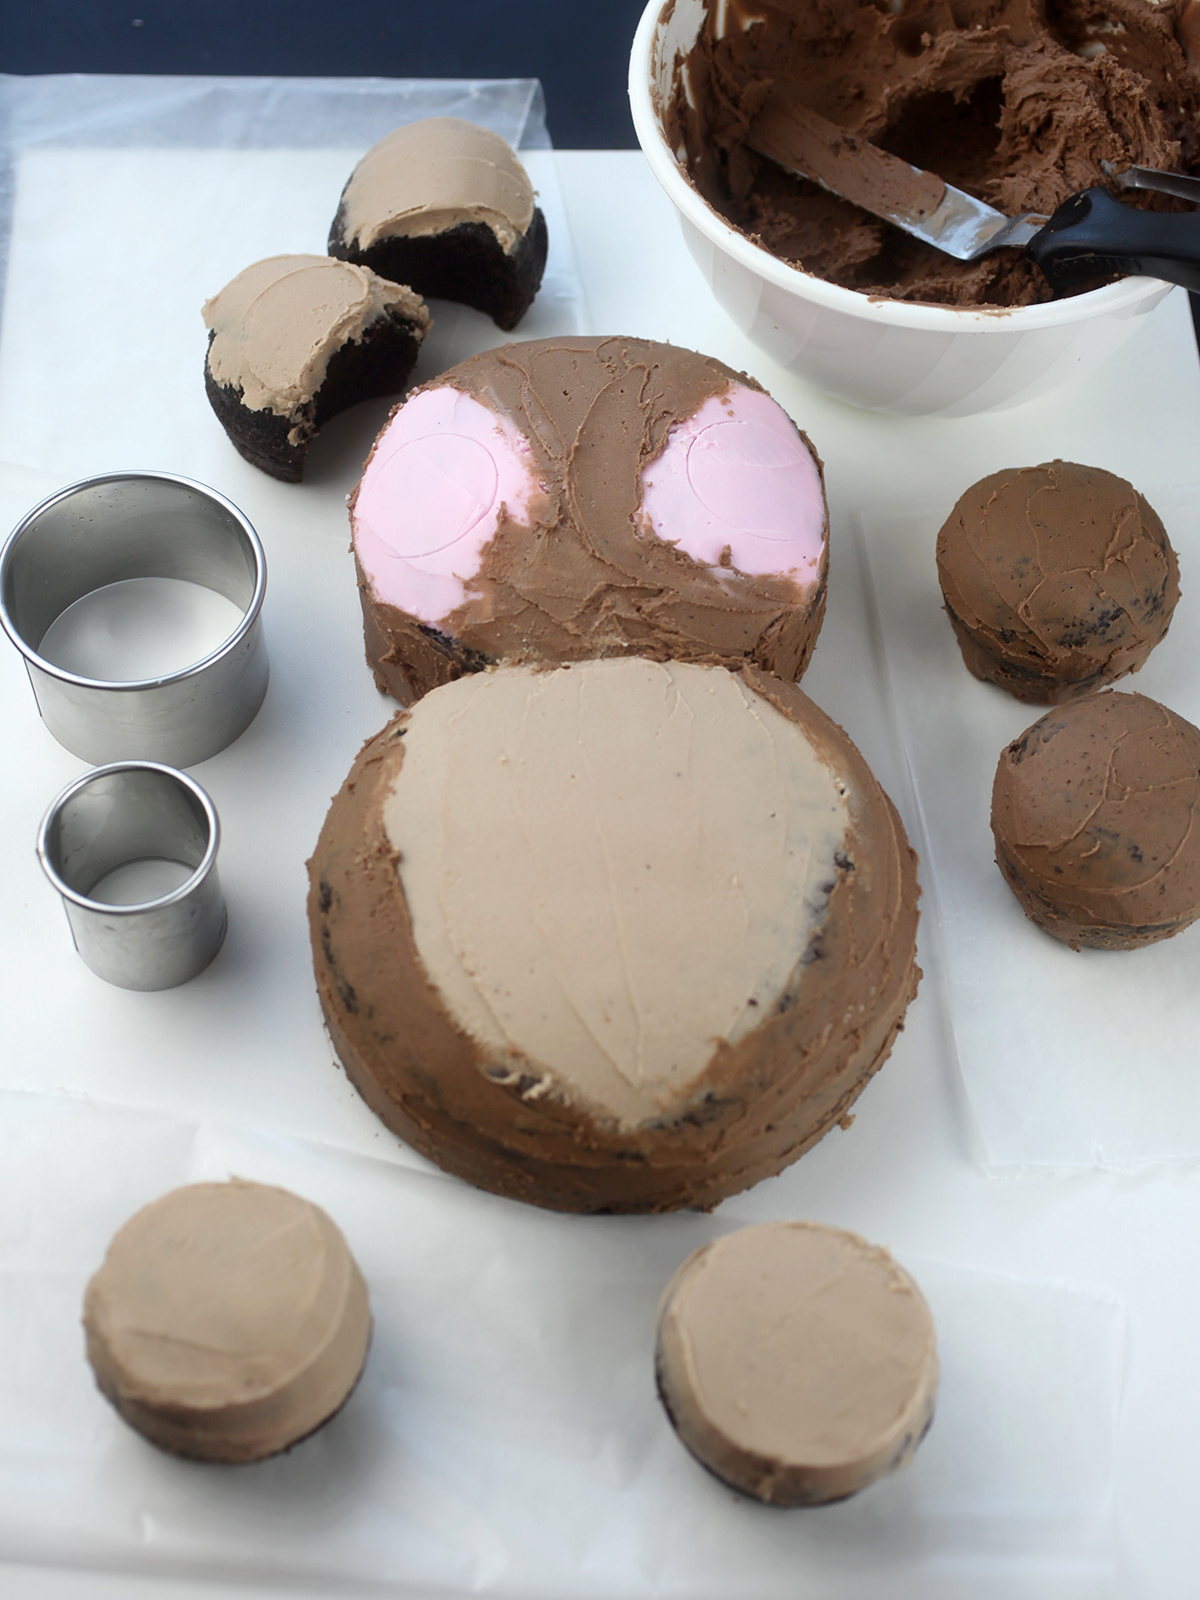
Use a round cutter to cut curved sections from two of the cupcakes. These will end up being placed on the head for ears. Save any scraps for use later.
Use a small round cutter to gently press into the pink frosting to mark where the cheeks will go.
Now to add more frosting. Go ahead and spread a thin layer of the chocolate frosting on the exposed cake layers. Then frost a thin layer on two more of the cupcakes.
Use the lighter brown frosting to frost the tops of the cut cupcakes to be used for the ears. Then frost the tops of the remaining two cupcakes to be used for the legs. For these, add more frosting to try and create a flat and smooth top.
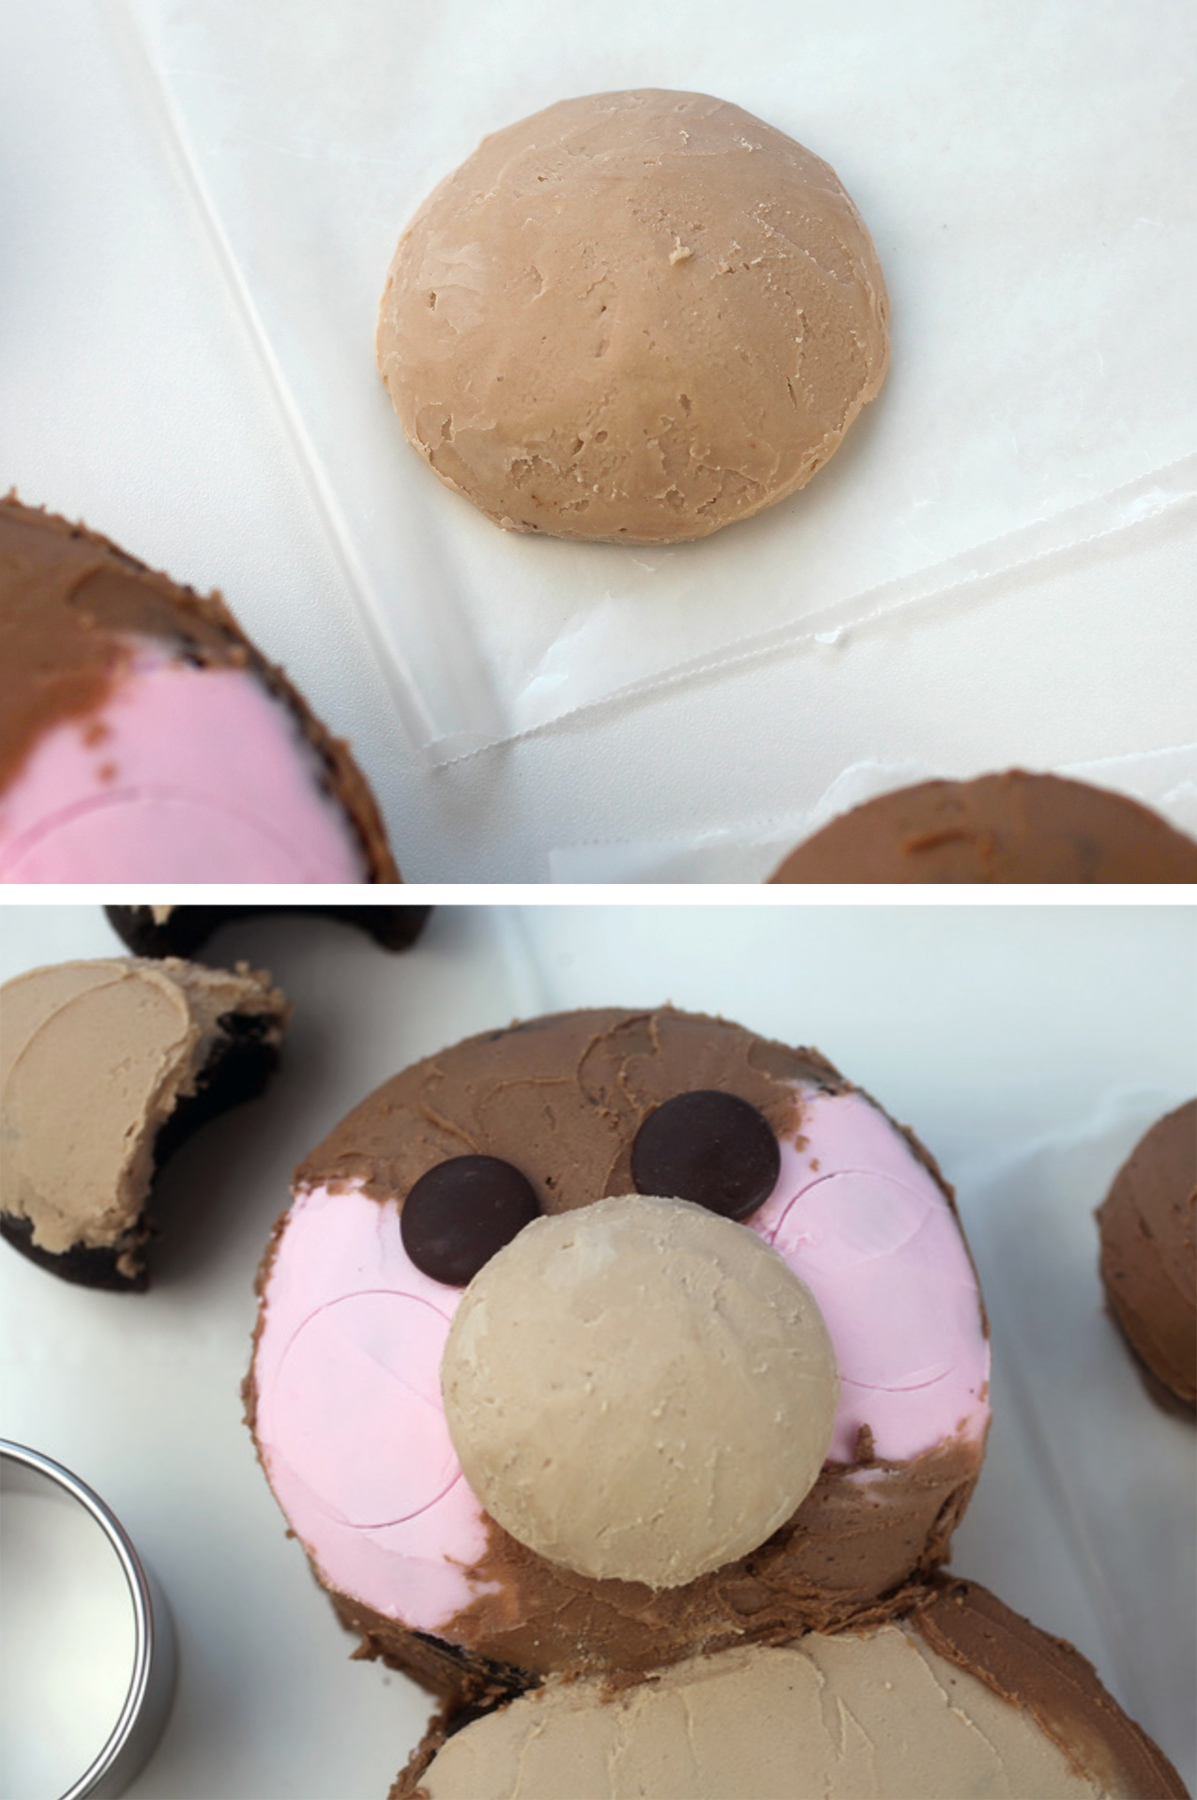
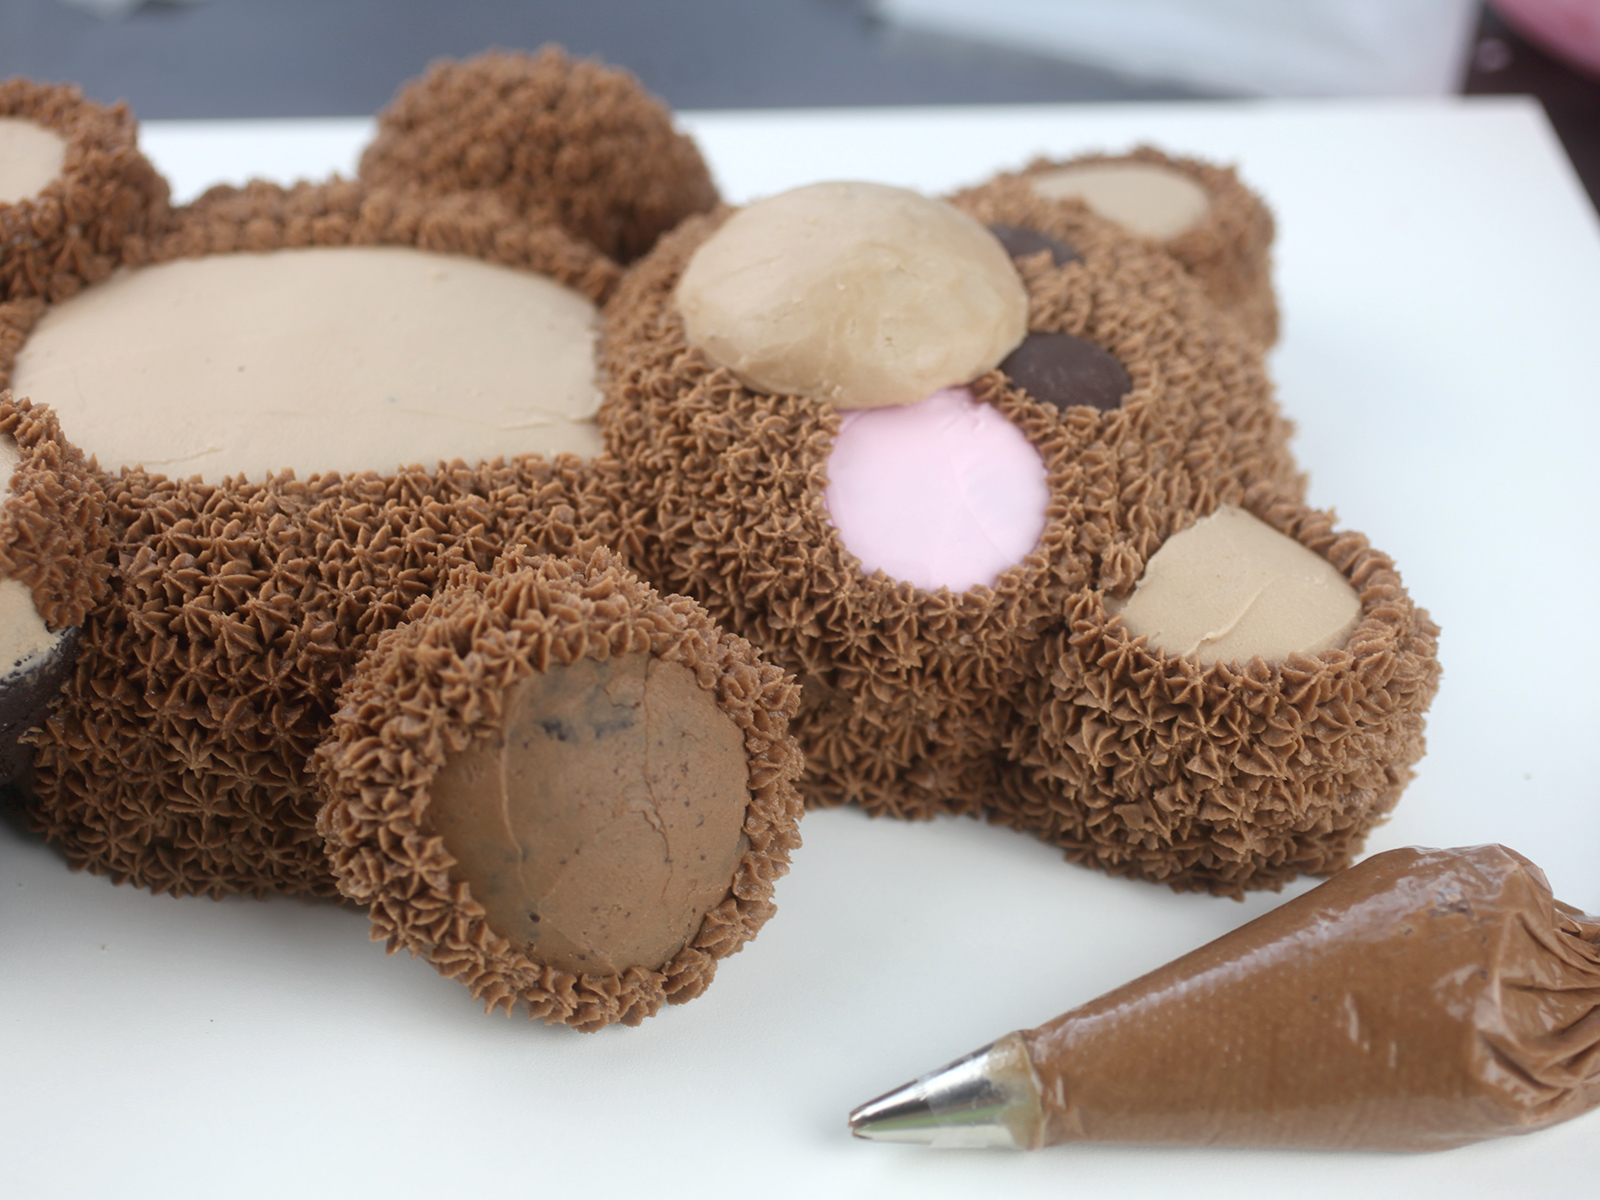
For the bear snout, I ended up piping a circular mound of the light brown frosting onto a sheet of wax paper and then used an offset spatula to help smooth it out. Place the mound of frosting in the freezer to firm up and you can use the spatula to help scrape and shape it even more.
Place the snout in position on the bear’s head and then slightly tuck two chocolate wafers underneath … in position for eyes.
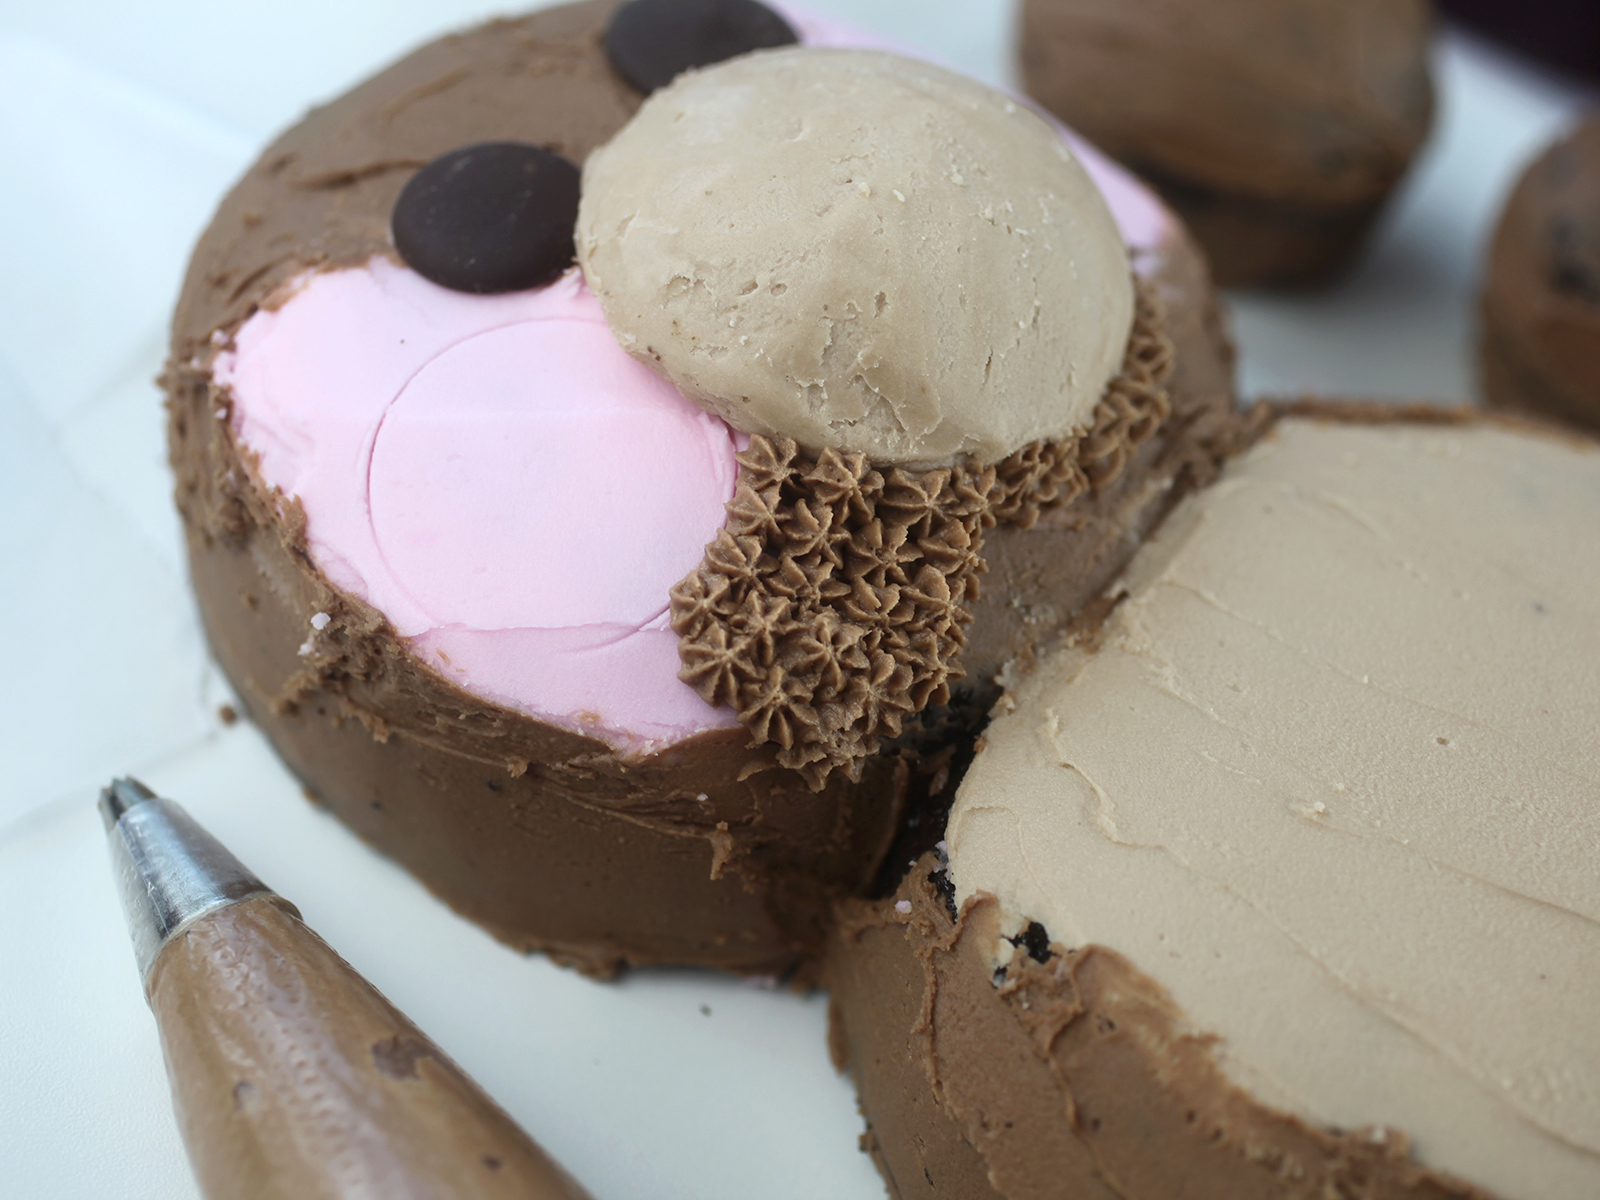
Now you can start piping the darker chocolate frosting using a Wilton #18 decorating tip for the bear’s fur. Use the circular impression as a guide to pipe around for perfectly shaped cheeks.
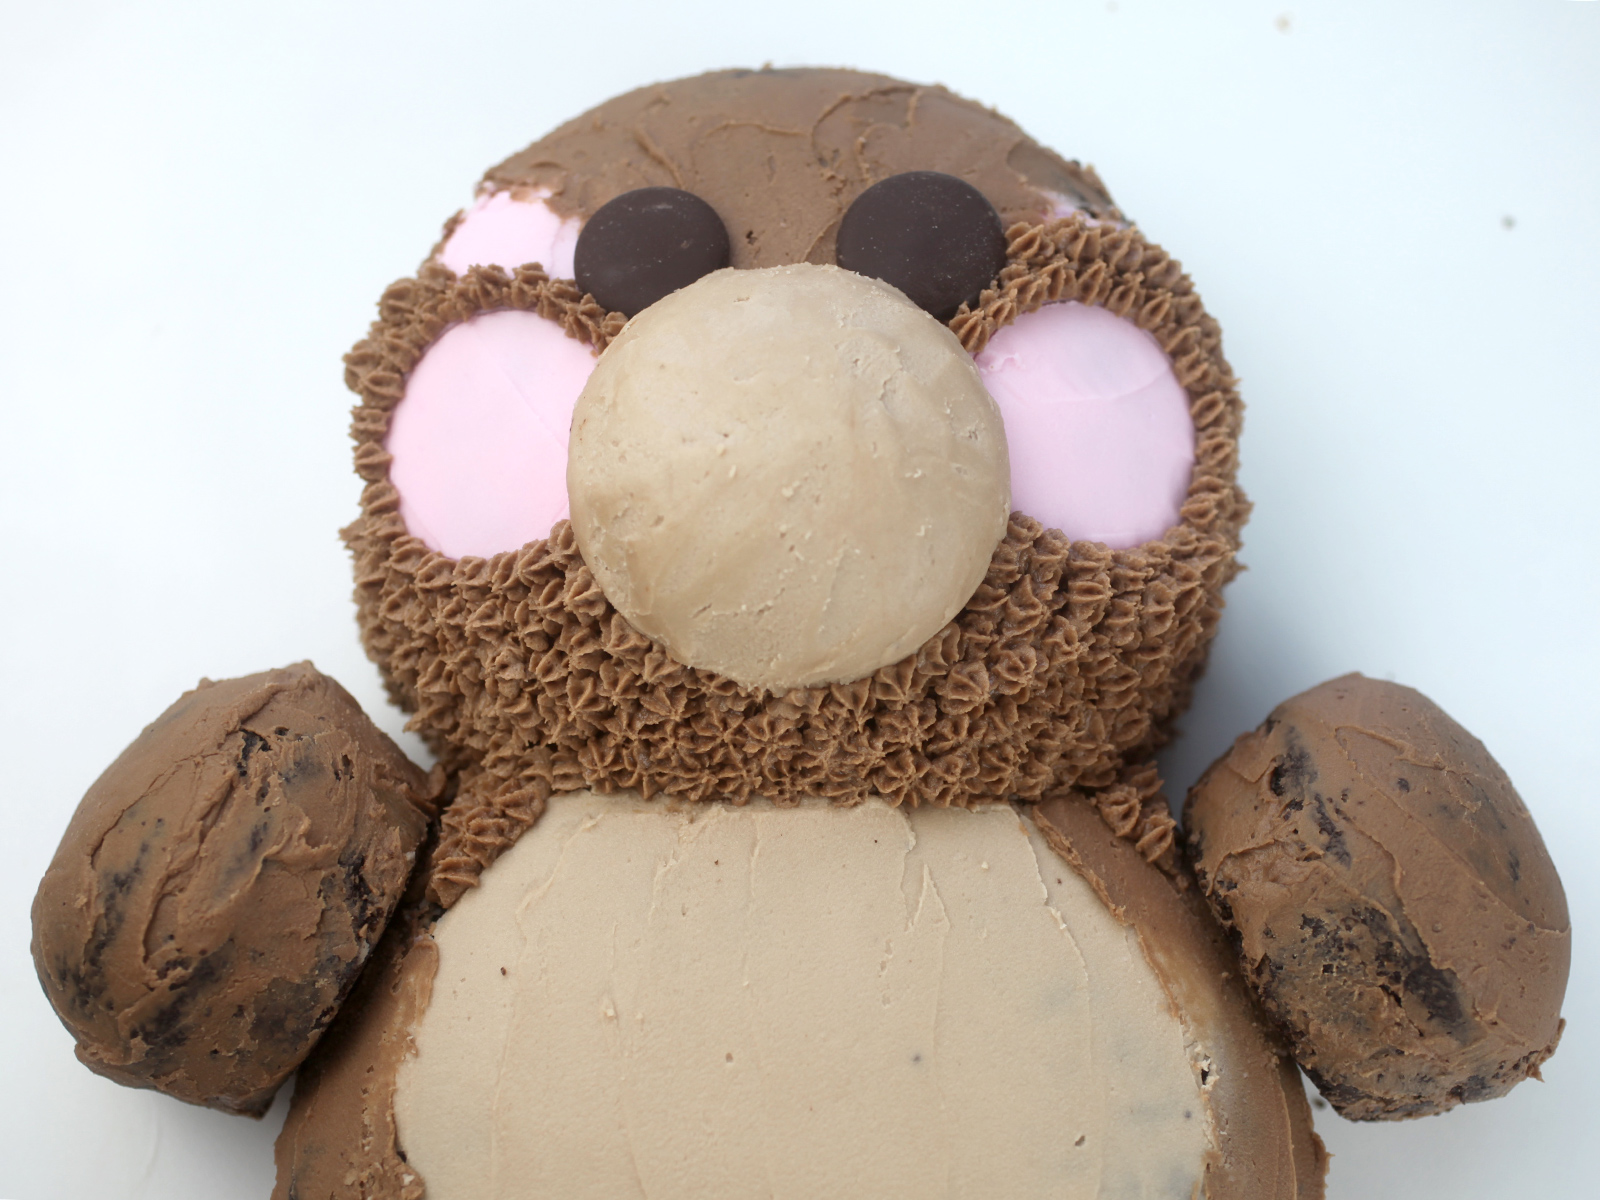
Pipe frosting near the bear’s neck and then place the two chocolate frosted cupcake arms in position. Apply frosting on the bottom of the cupcakes to help secure them to the body.
I wanted the legs to be facing forward/up, so I carved away some of the cake and then attached the cupcake to the cake with frosting and inserted a straw through the cupcake and into the cake to help secure it. It worked well enough, but the safest thing would be to cut all the way through the cake so the cupcake legs would be resting on the surface below.
Keep piping all around the body, making sure to leave the light brown frosting of the ears, round belly and bottom paws visible.
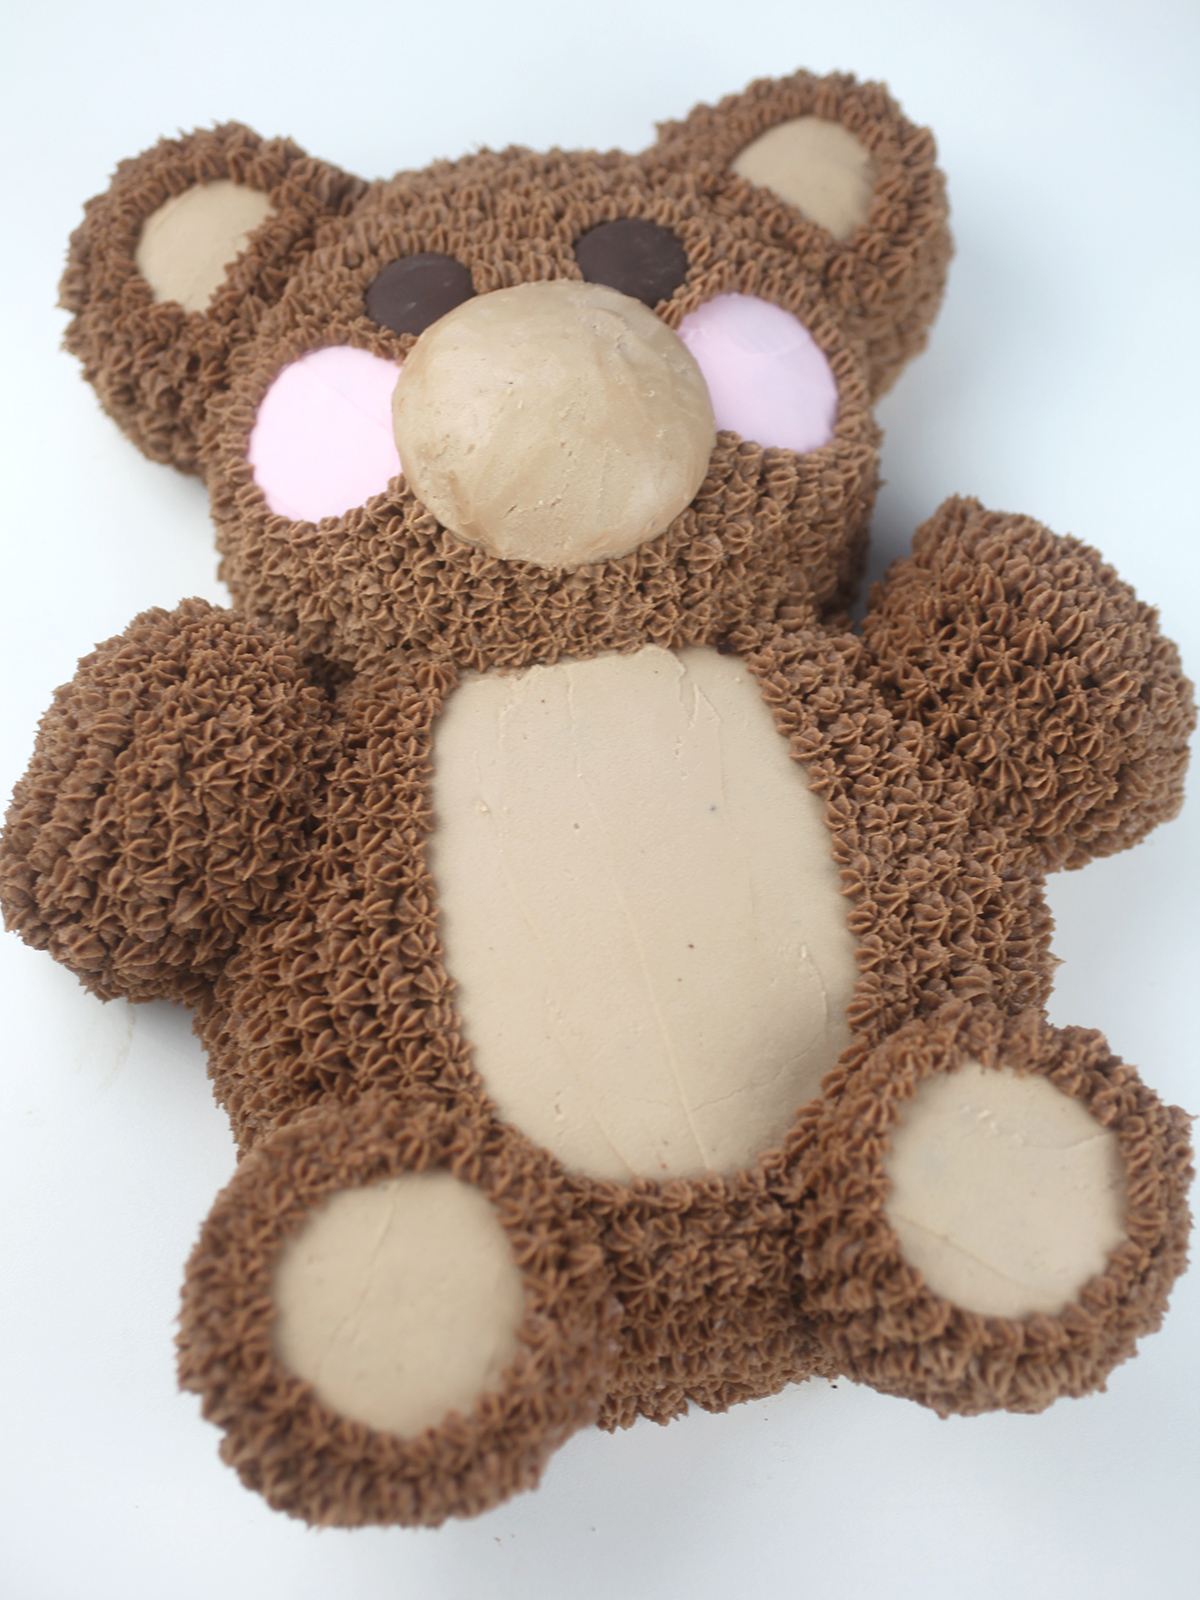
He’s coming together.
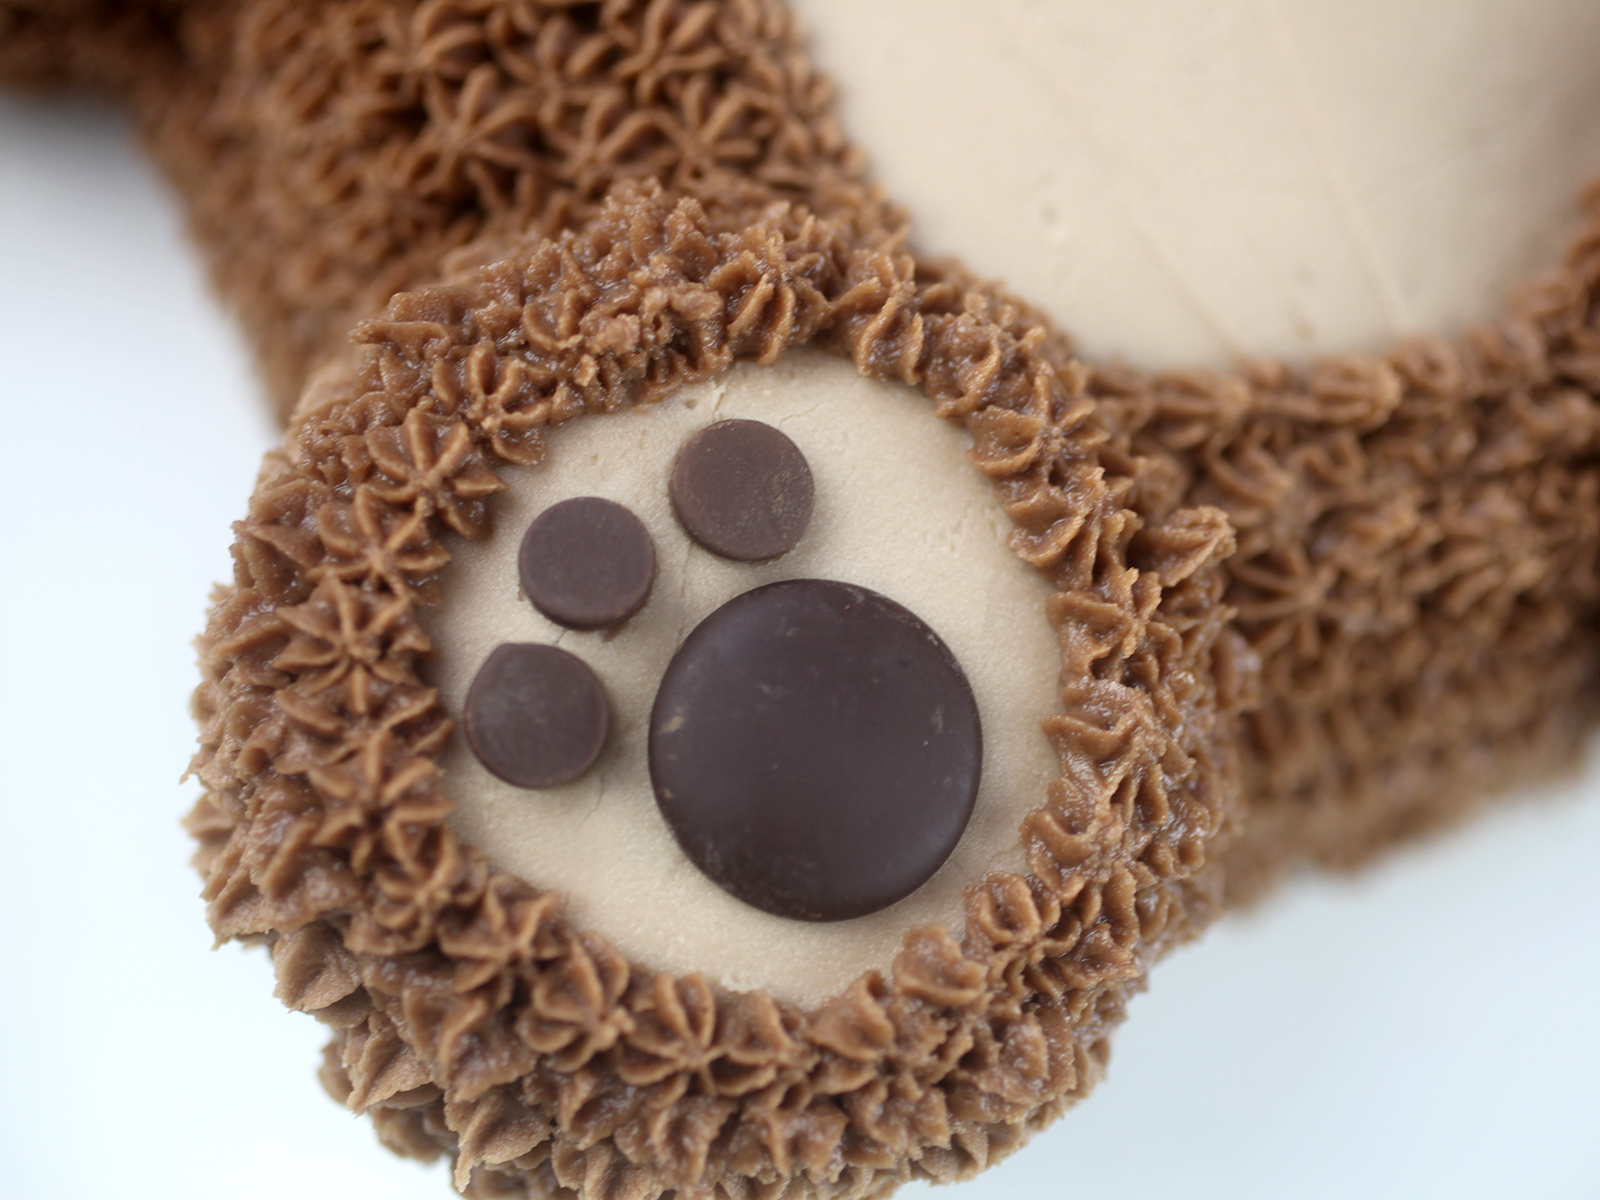
For each paw, gently press a chocolate wafer rounded side up and three chocolate morsels pointed side down into the frosting.
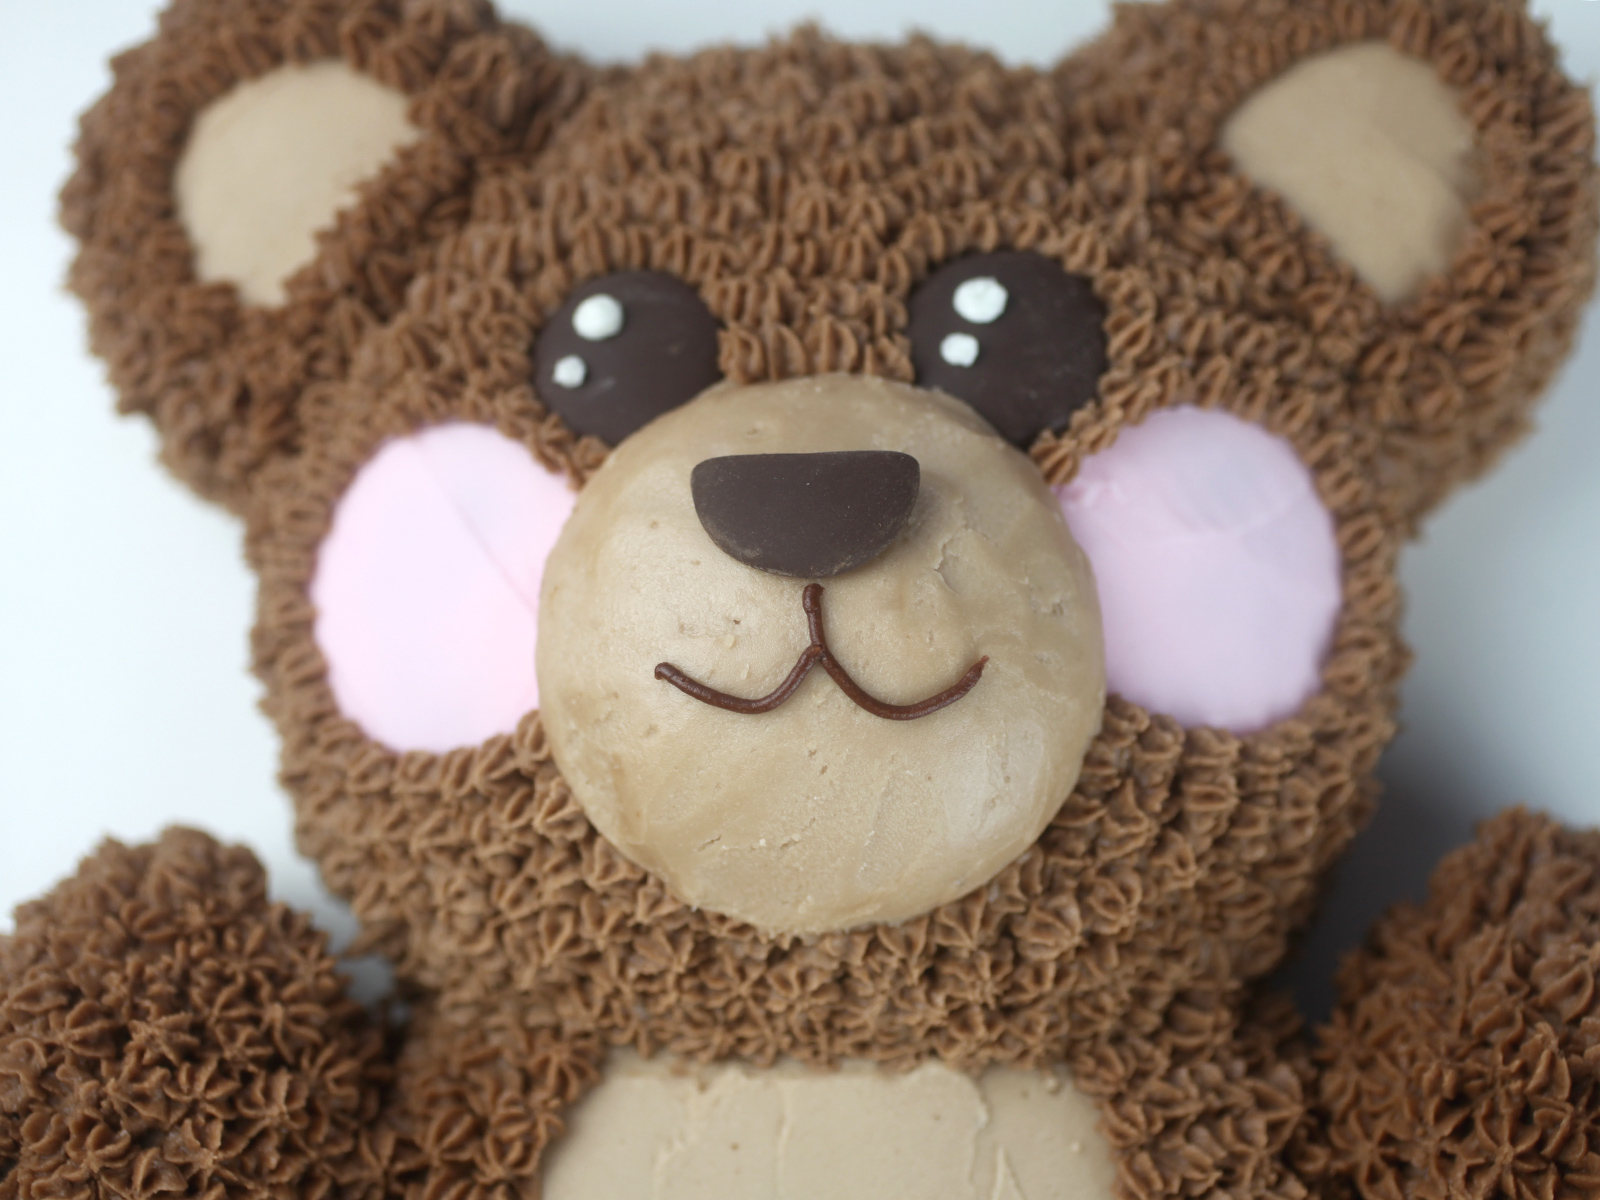
Cut one of the chocolate wafers almost in half and attach it in position for the nose with a small amount of frosting. Pipe small dots on the eyes with some of the reserved vanilla buttercream.
Then tint a small amount of the remaining chocolate frosting a darker brown and pipe on a sweet little smile.
Now let’s make a little bowtie with blue buttercream and some of the leftover cake scraps.
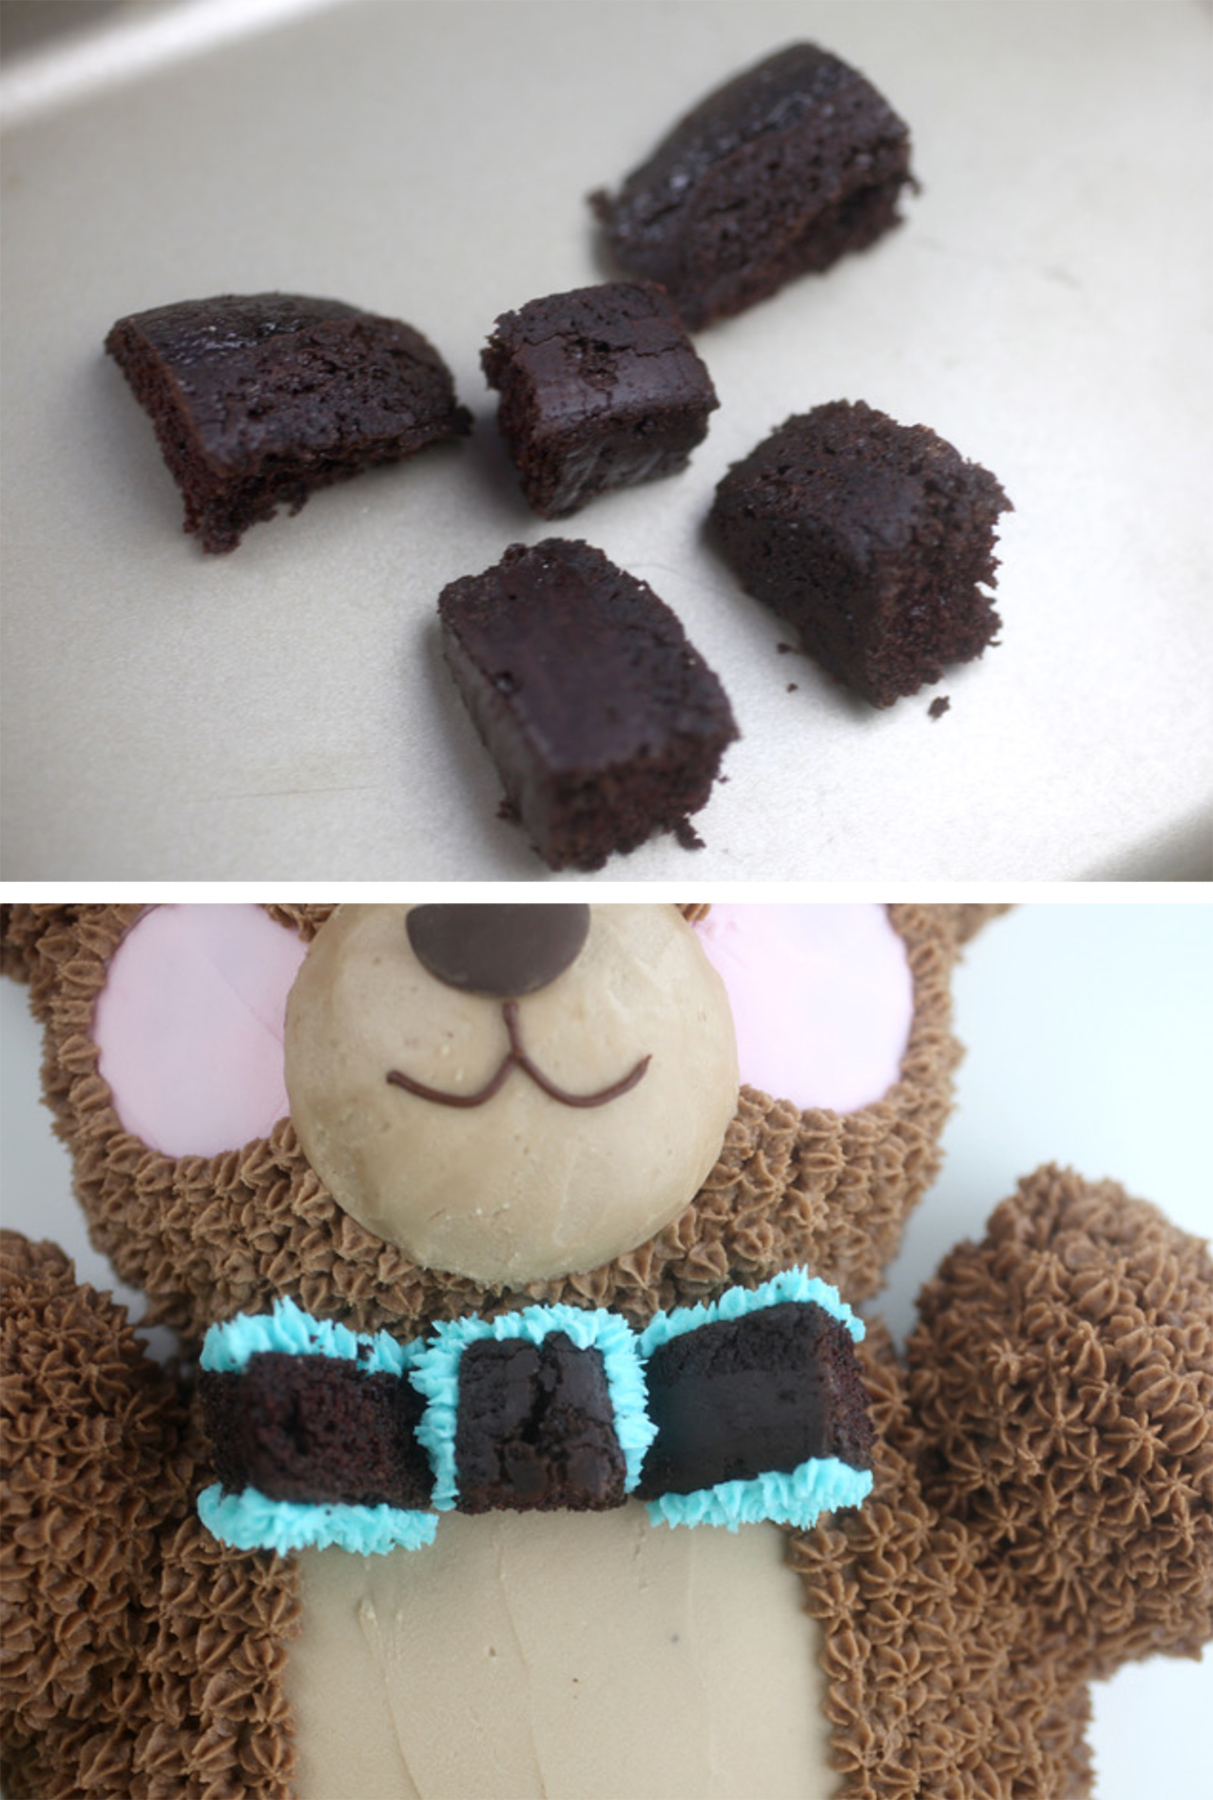
Cut the reserved cake scraps in sections and use them to make a little bowtie. Pipe the sides using a Wilton #16 decorating tip while holding each piece between your fingers. Once the sides are piped, place the pieces in position and then continue piping until the rest of the cake is covered in blue buttercream.

So unbearably cute I could squeeze him!


This teddy bear cake is absolutely adorable! The attention to detail is impressive, and the finished design looks both creative and professional. I especially appreciate the step-by-step photos, which make the decorating process easier to understand. Thanks for sharing such an inspiring cake project.
A bear-shaped cake created from cream and chocolate is incredibly endearing; it is evident that you have invested a significant amount of time and effort in its creation.
• “It always seems impossible until it’s done.”
I have learn a few just right stuff here. Definitely value bookmarking for revisiting.
I surprise how much attempt you place to create the
sort of fantastic informative web site.
I love the idea of using cupcakes for the ears and legs — such a clever way to create the bear shape without needing a specialty pan. The shading with the lighter brown buttercream for the belly and paws really makes him come to life.
“Your only limit is your mind.”
Wow, your teddy bear cake is adorable! I love how you tried a 3D cake for the first time and it turned out so cute. The pun ‘beary cute’ made me smile. Great job!
This teddy bear cake is absolutely adorable! The fur piping details and the little bow tie are so creative. I can’t imagine how much patience it took to decorate everything so perfectly. Thanks for sharing such a cute and inspiring cake idea!
This teddy bear cake is absolutely adorable and so creative! It’s amazing how baking can turn simple ingredients into such fun and detailed designs. This would be perfect for a kids’ birthday party or a special celebration.
watchseriesstreamrest
Wow, that teddy bear cake is adorable! I love how you made it three-dimensional. It looks so cute and cuddly. Great job for a first try!
Would you like some coffee? Or do you want some water?
Who’s your favorite movie star? I like the main character of Spider-Man.
My family always say that I am wasting my time here at web,
except I know I am getting know-how all the time by reading such nice posts.
I’m about to leave. Please hold for a moment.
????(Replica) ??? ???? ?? ???? ?? ???, ?? ?? ??? ???? ?? ?? ???? ????. ?? ‘??’?? ‘?? ??’? ???? ??? ?? ????, ???(???/?? ??)? ???? ???
This is such a charming idea! I love how you used the different pan sizes to create the shape—it looks much simpler than I would have imagined. I’m definitely saving this for my nephew’s next birthday.
With Blazing Bud Shop you can buy cannabis online dispensary easily in 2025. We are committed in providing you with fast cannabis delivery service. Get the nearest cannabis dispensary online with us, order cannabis now and get a fast cannabis delivery service with us.
The chocolate frosting fur texture is so impressive. You are incredibly talented!
Love that you used the extra batter from the recipe, genius idea to make cupcake legs and ears. Never thought of repurposing leftover batter like that, gonna have to try it out next time I bake.
???? ??? ??, ???, ?????? ??? ??????. ??? ???? ??? ??? ?? ?? ??? ?????.
Shop trusted cosmetics and supplements worldwide.
You have given very essential data for us. It is excellent and suitable for everyone. Keep posting always. I am very thankful to you.
Thank you for the design! So cute! I was able to make it with a 6-inch pan and a 9-inch pan, then 7 cupcakes (1 for the nose). I don’t have a decorating kit so I gave it furry texture by gently stroking it with a fork. Adorable!
It’s so cute :) kids would love it
What a cute bear!
Beautiful picture and great post thanks for sharing the informative.
Very awesome design.
Hi. I would love to bake this cake for my 1yo niece. May i know what is the size of the cake board that u use to place this lovely bear ? Thank you
I haven’t seen a bear cake like this since I was a kid! Down to the the piping, it reminds me of a cake you would have seen at a birthday party in the 70s or 80s.
Looks amazing! How many people would this size be suitable for?
cutest cake for children.
its was a nice post really i like it !
So cute :-)
Love him!!
Soooo adorable!!!
Oh my gosh he looks so cuddly!
So adorable! And I might actually be able to make a similar one :).
That’s the cutest cake!
Adorable with lots of patience.
They are awesome. Congrats to you all for your hard work.
Looks like real teddy bear. Fantastic!