
It’s been a little while since I’ve made character cake pops. I usually partner with an animated movie when I do. You can see some of them here. But this time, I was inspired by a super-fun memory and a cute little yellow Pokémon.
So, The other day I was talking with friends about some of the crazy adventures I’ve been on because of baking. And one of the most fun experiences was the time I made cake pops with Blake Lively at her home. Still to this day so surreal. Well, the next thing I know, I’m watching Entertainment Tonight and there’s Blake with her husband for the premiere of his new movie, Detective Pikachu. She was glowing and not just because she was wearing a dress made of sunshine and pregnant with her third child. I think she always glows and is just as beautiful on the inside as she is on the outside.
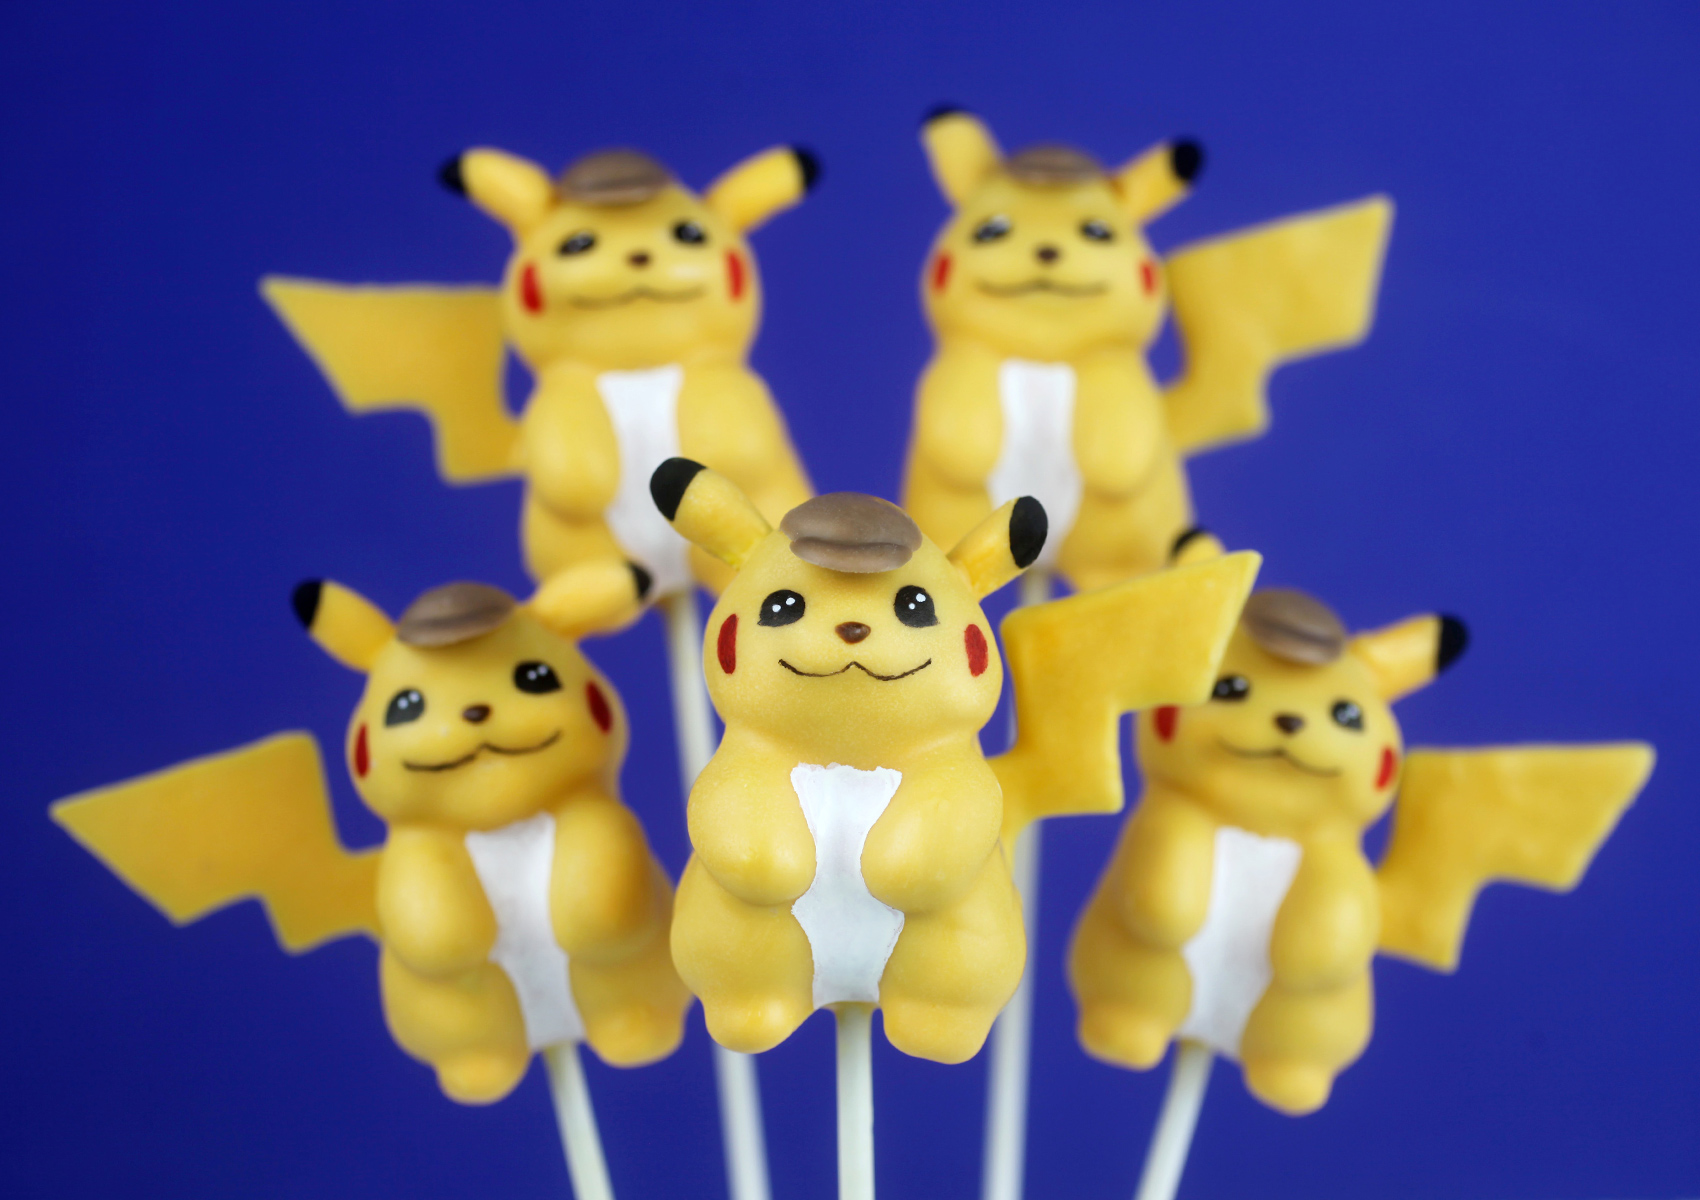
Anyway, while I was watching TV and thinking about what I should make next I was like… duh. It has to be Pikachus. Definitely Detective Pikachu to help celebrate her hubby’s movie.
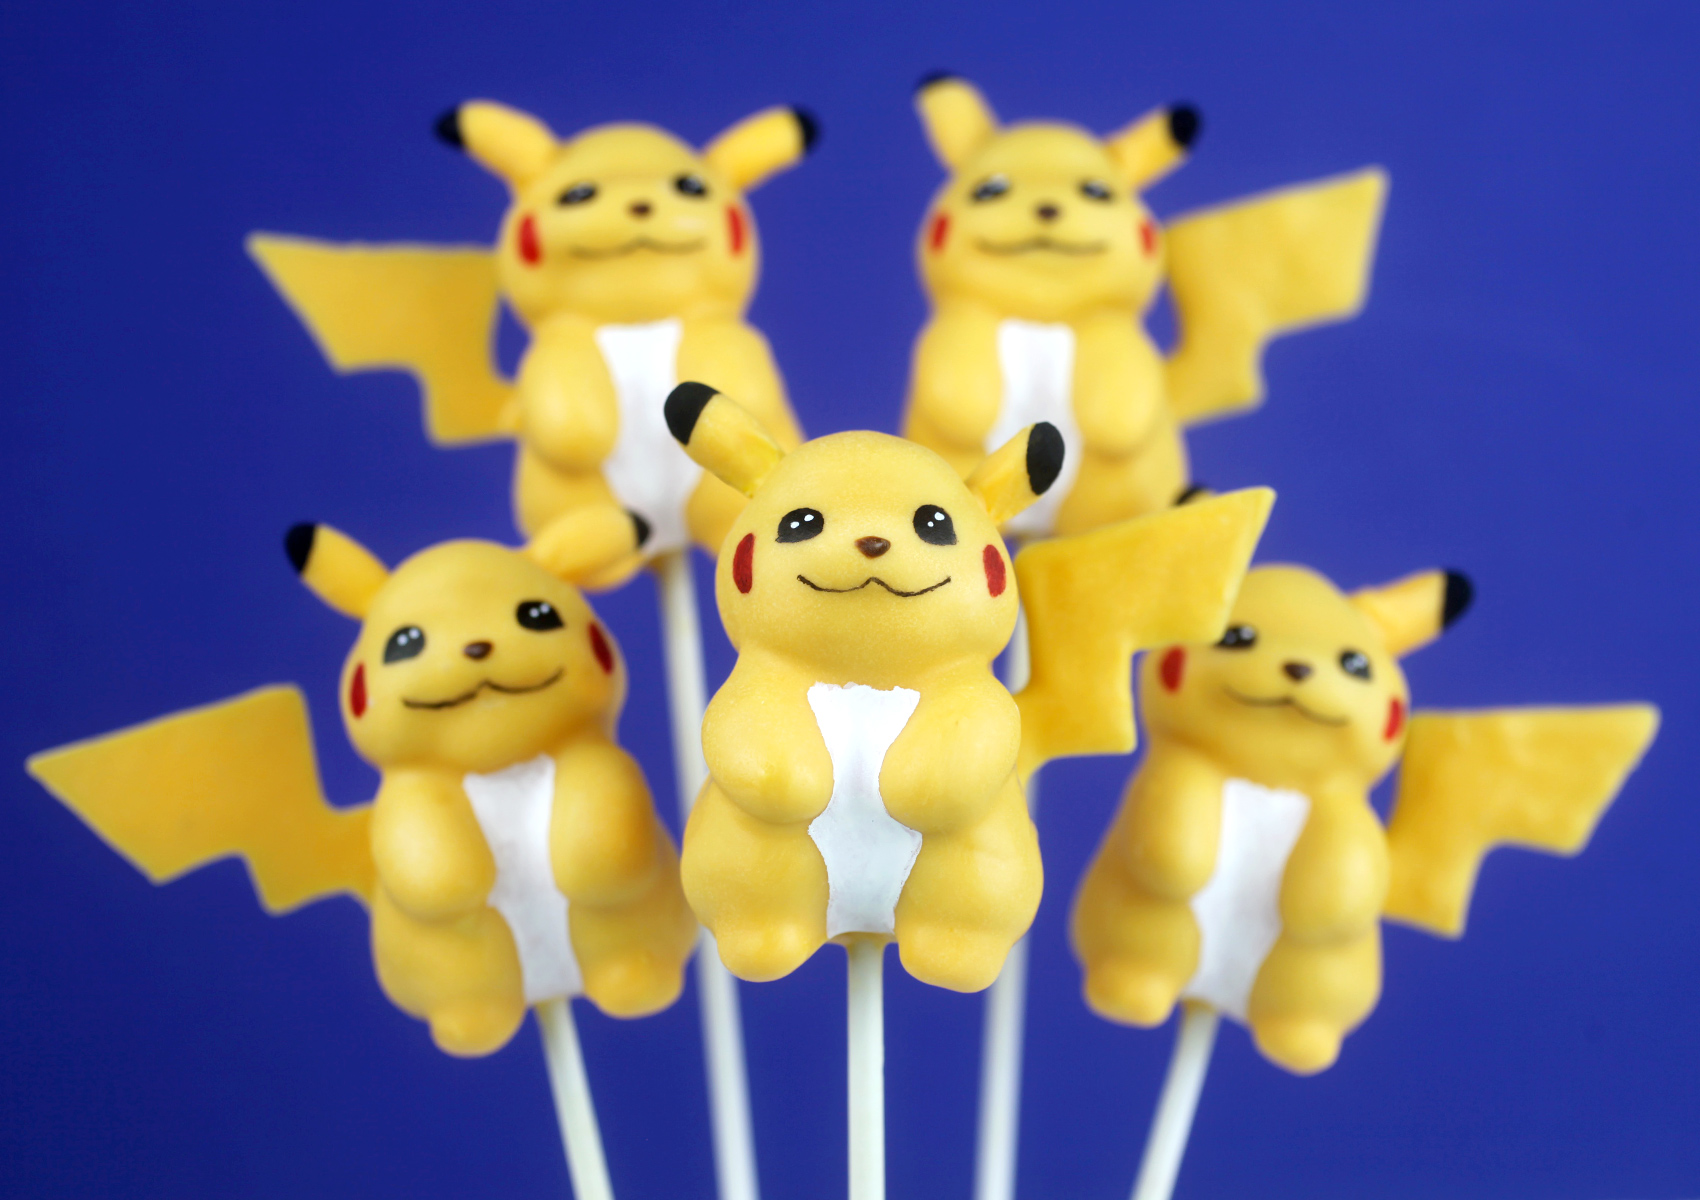
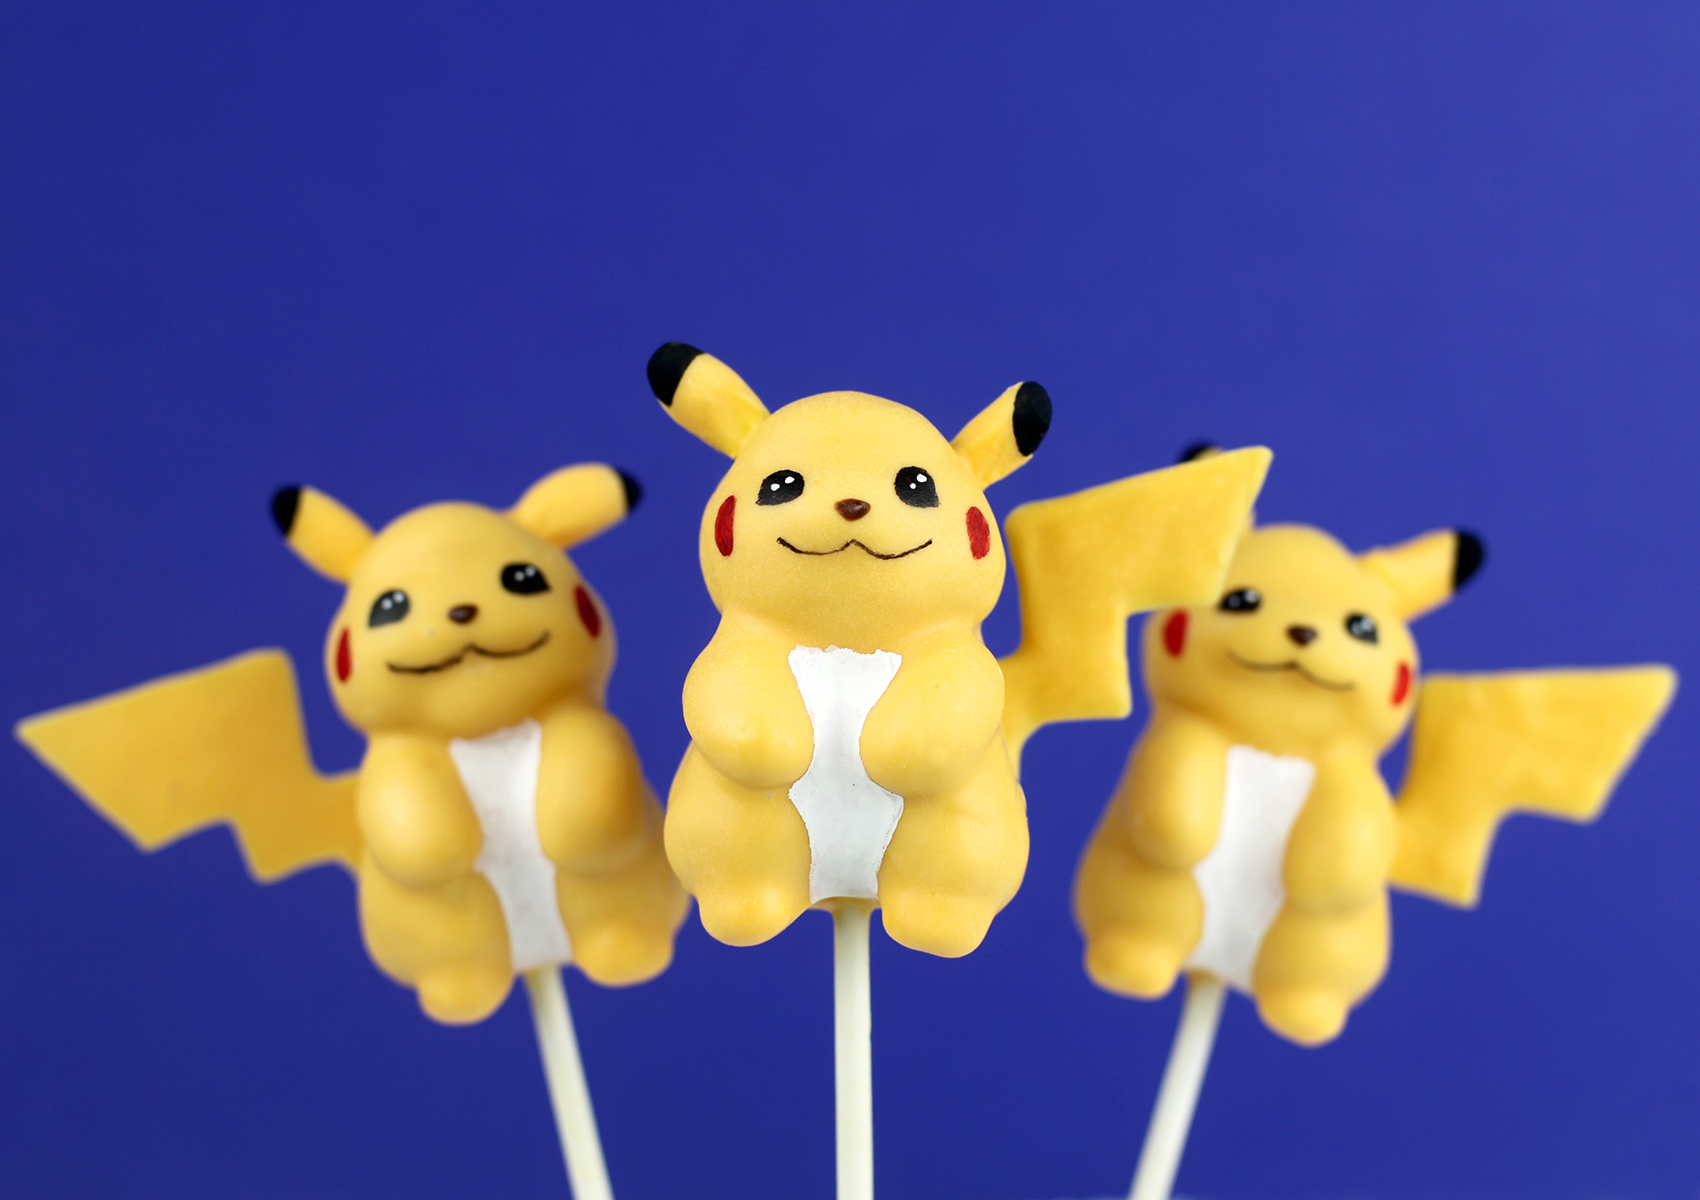
So, how do we go from big round cake balls to the pudgy little Pokemon character below?
Let’s investigate.
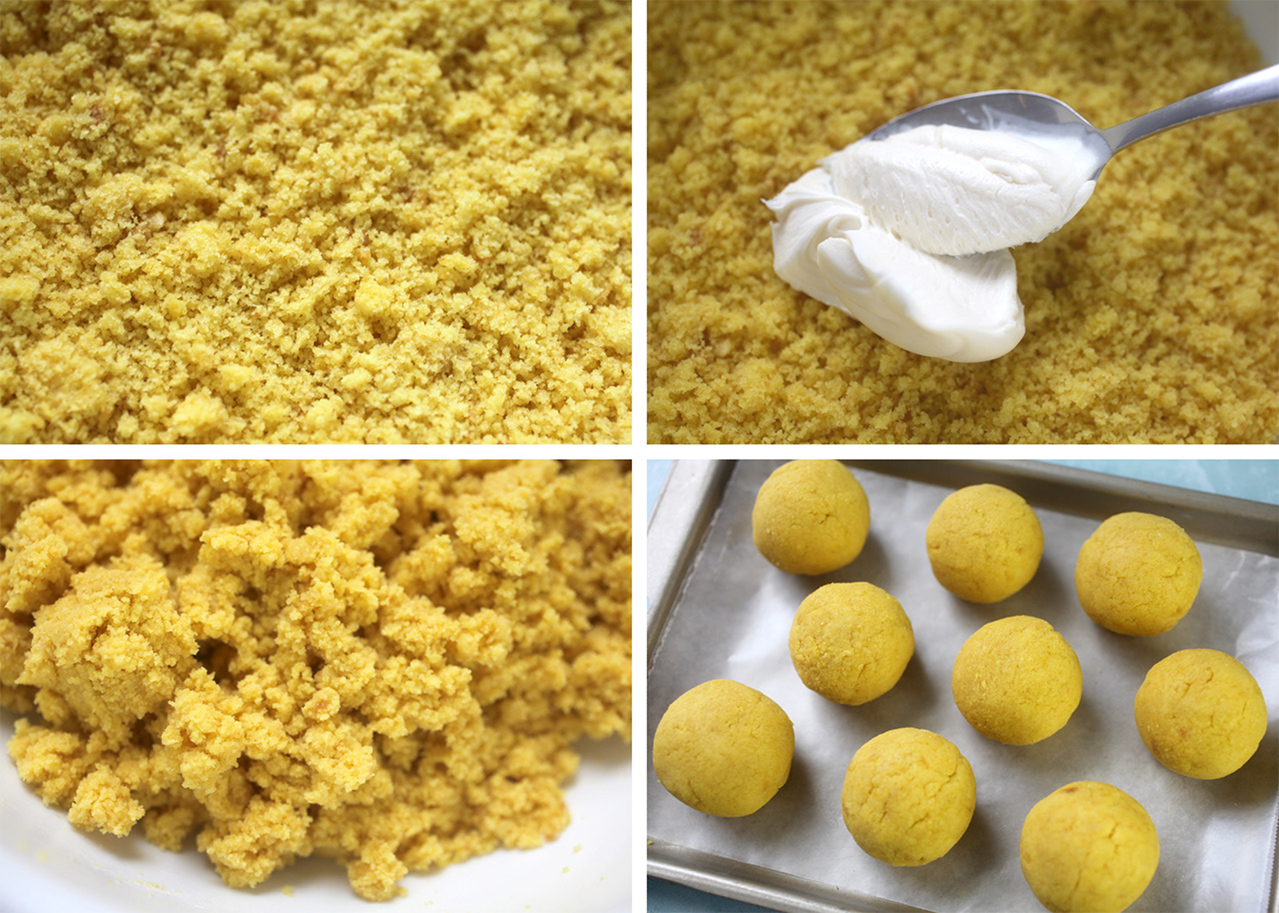
First … check out my basic cake pop instructions if you need them. Once you’ve rolled them into balls, use the instructions below to shape and decorate.
Now, I know most people won’t make these, but I always hope when I share more challenging designs, that there’s something in the process, a technique or new approach that you might see and want to try on your own creations. Because really, the possibilities are endless. And I realize these are not your everyday cake pops, but I tend to go over the top when I make a new design to see how far I can take it and what I can get away with. Hopefully you find some inspiration along the way.
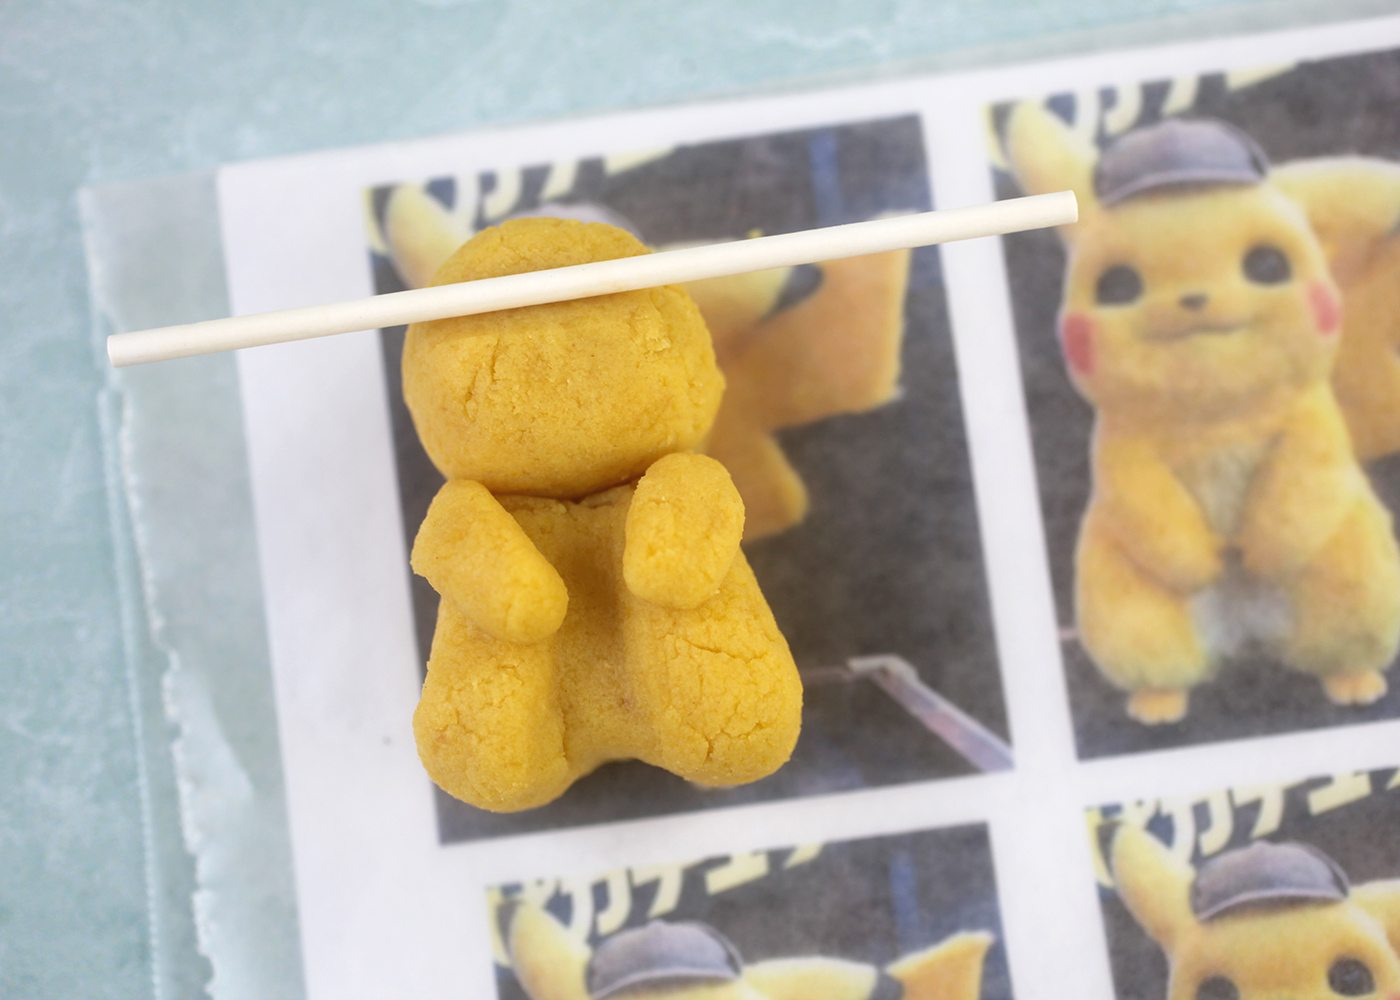
So, here’s a tip if you’re trying to make character cake pops that have a very specific look. Find an image of the character you’re making on google and print it out in different sizes. Place a piece of wax paper over it and use the best image underneath as a guide to shape your cake pop mixture and also to help find sprinkles and candies in the right size to help you decorate.
To shape the body, I started out with large rolled cake balls and divided the mixture in two parts. One part to shape for the body and one part to shape for the head. Separating the head and body will help create a more defined shape when dipped in candy coating.
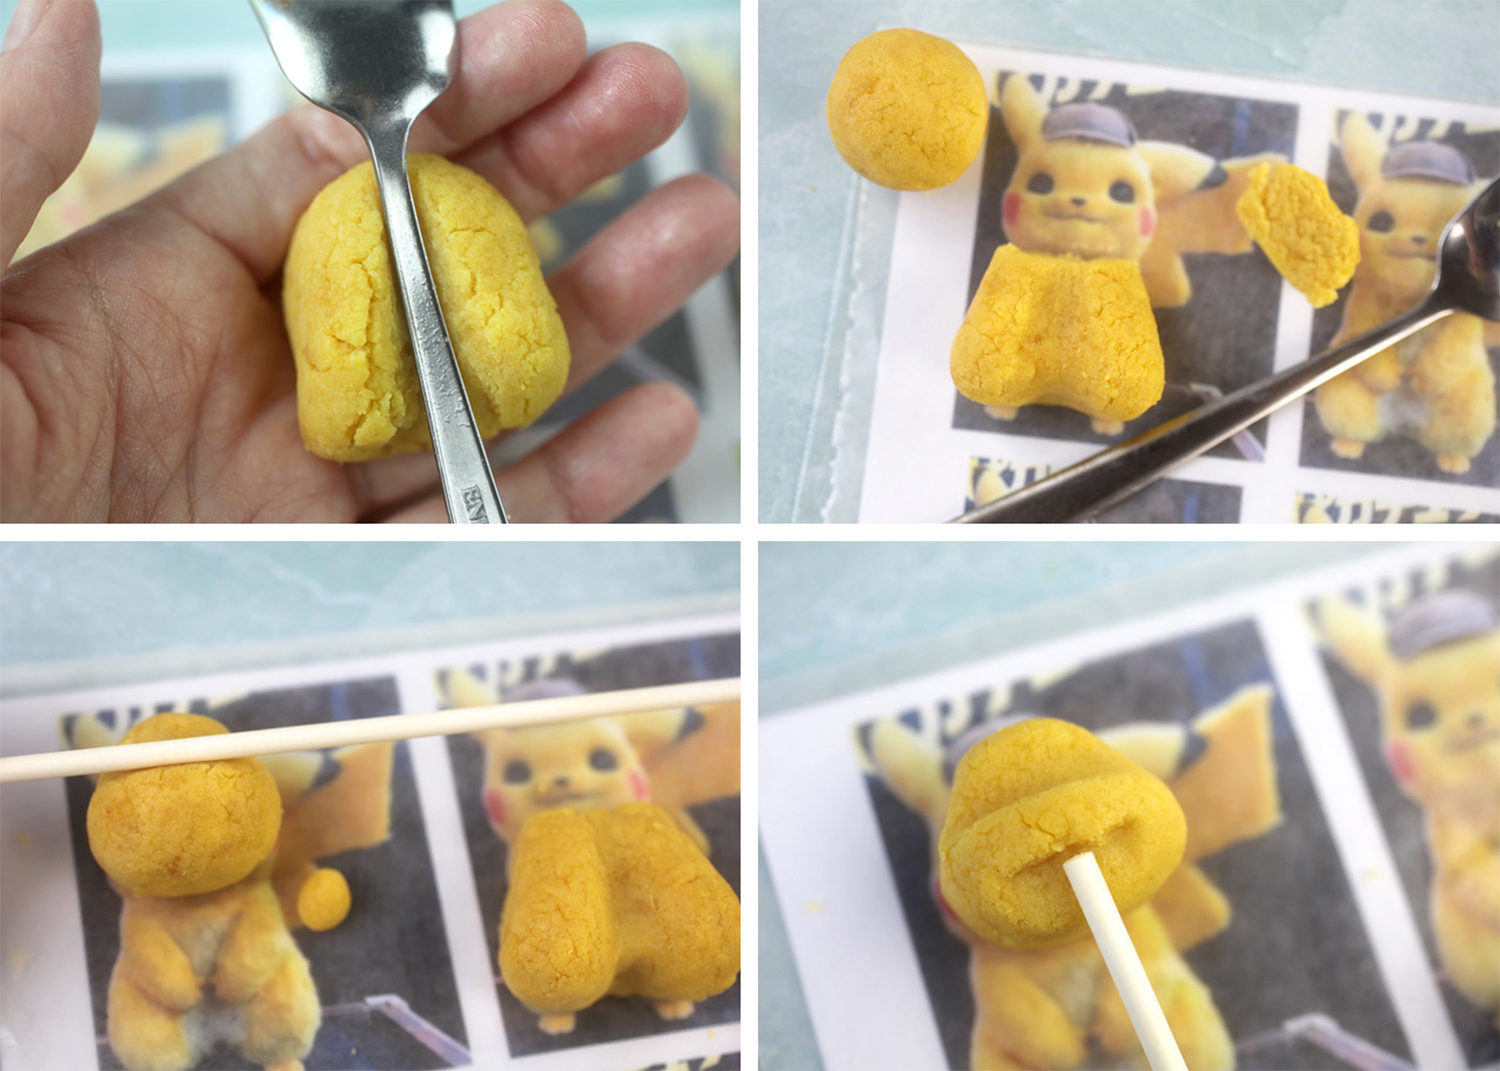
Shape the body using the image under wax paper as a template. Use smooth tools like a spoon handle or even a lollipop stick to help recreate the body like the image. Once the body is shaped to resemble Pikachu’s knees/legs, place it over the template and then use a spoon or knife to cut off the excess around the neck, leaving a curved edge to place the head on once it is shaped.
Roll a smaller ball for the head and use a lollipop stick to flatten where the eyes will be and then press the end into the front to define where the mouth will go.
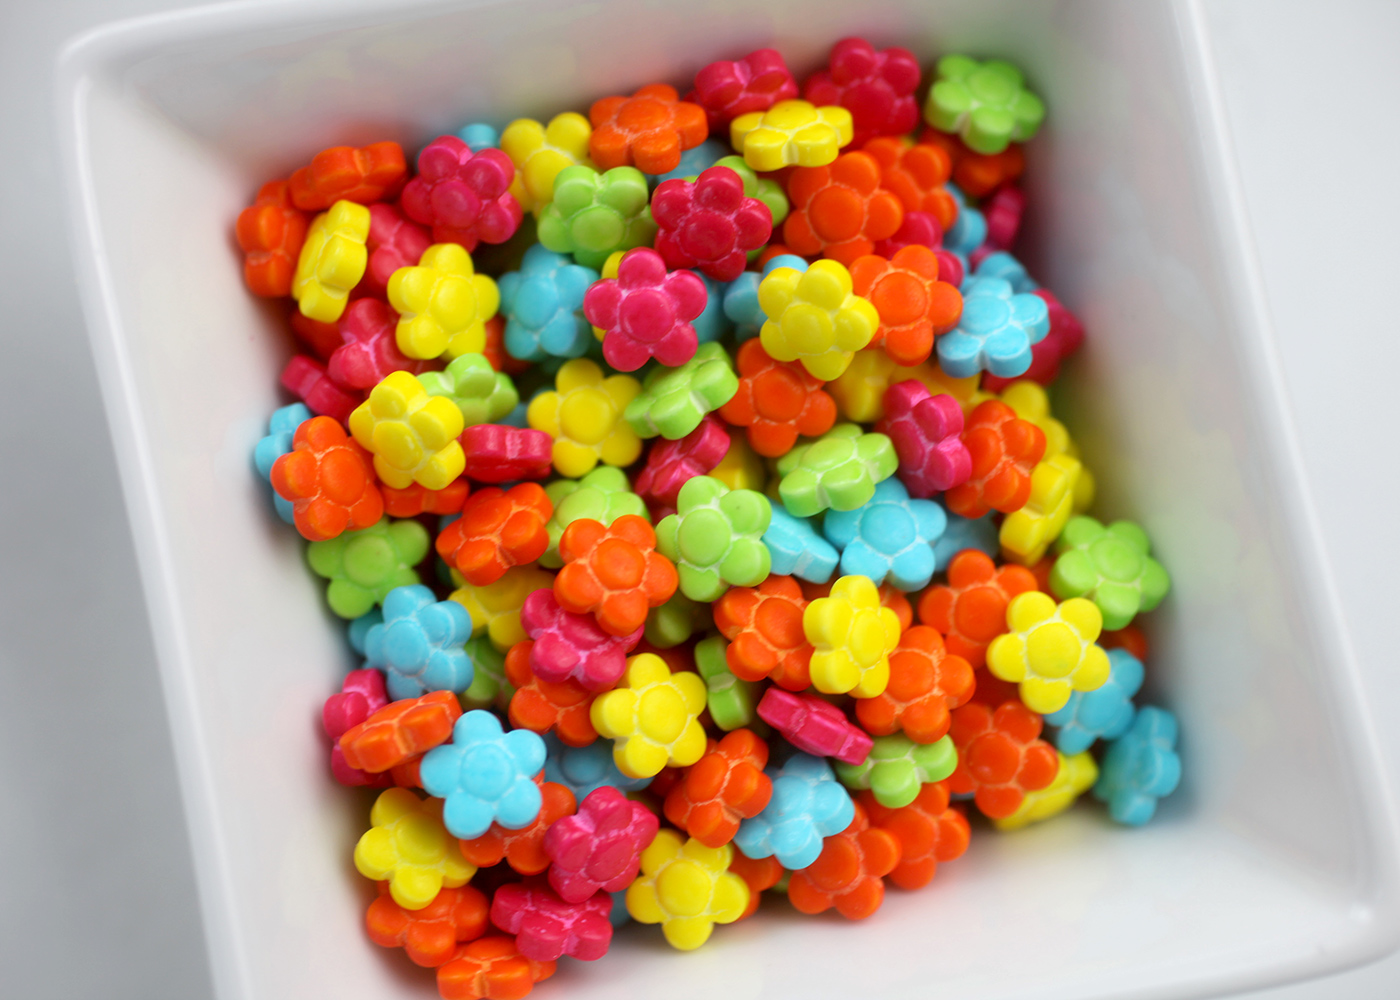
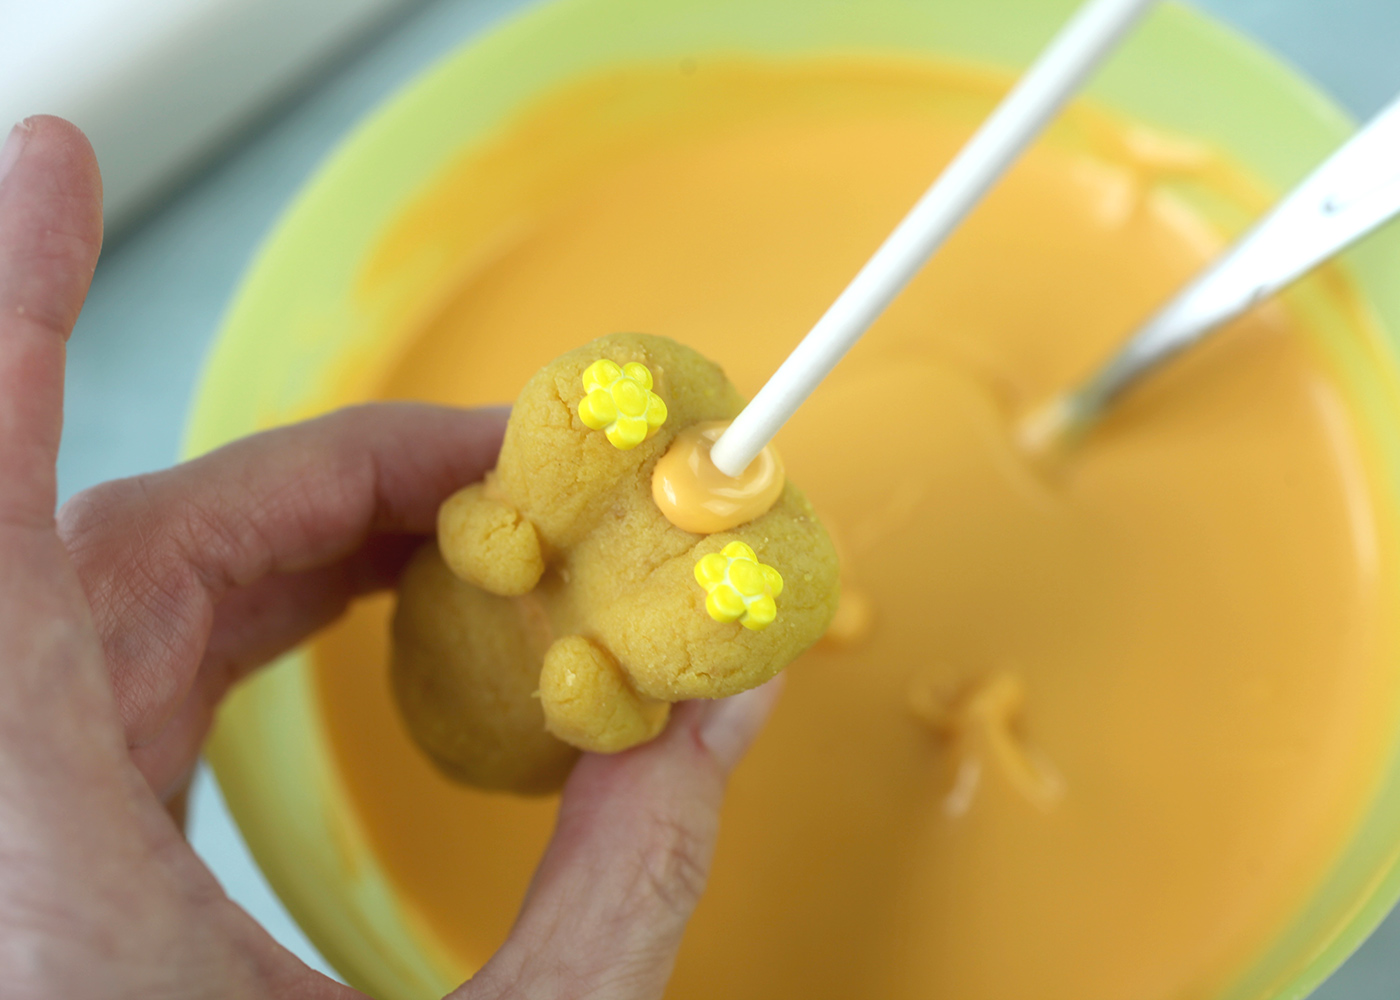
These flower sprinkles will be used for the feet. You could get away without doing this step, but it adds a little extra detail.
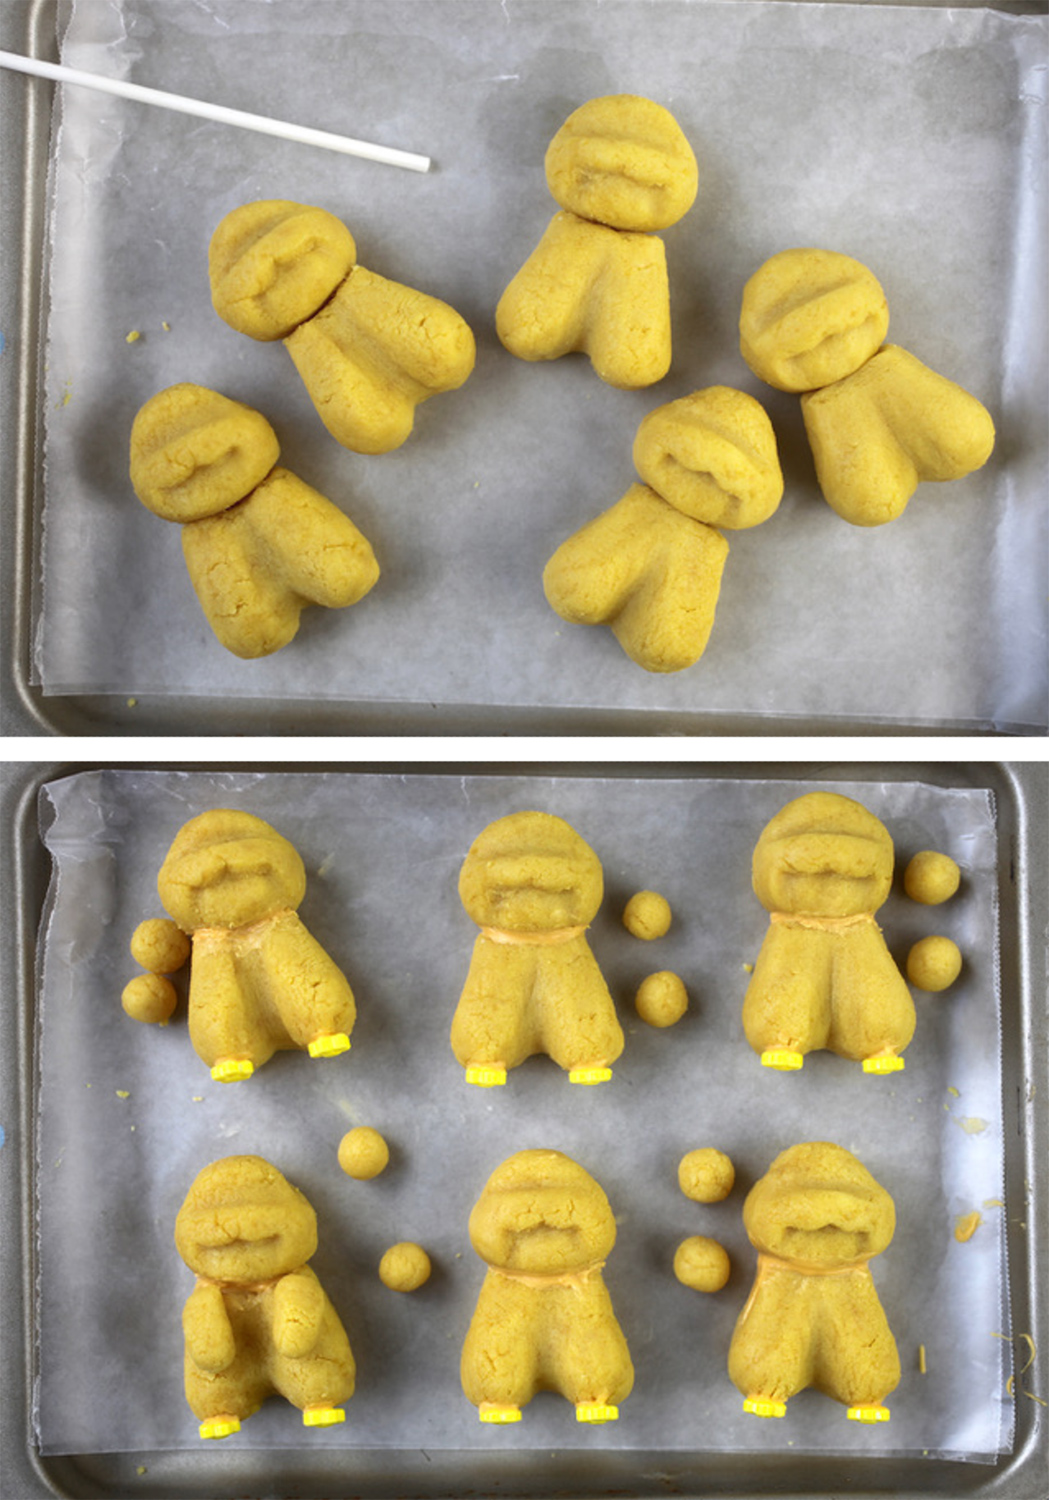
Use some melted yellow candy coating to attach the heads to the bodies. Then attach the flower sprinkles to the bottom of the legs for feet.
Roll small balls out of the cake pop mixture to then shape into tiny little arms. Attach them to the body with more melted candy coating and let dry completely.
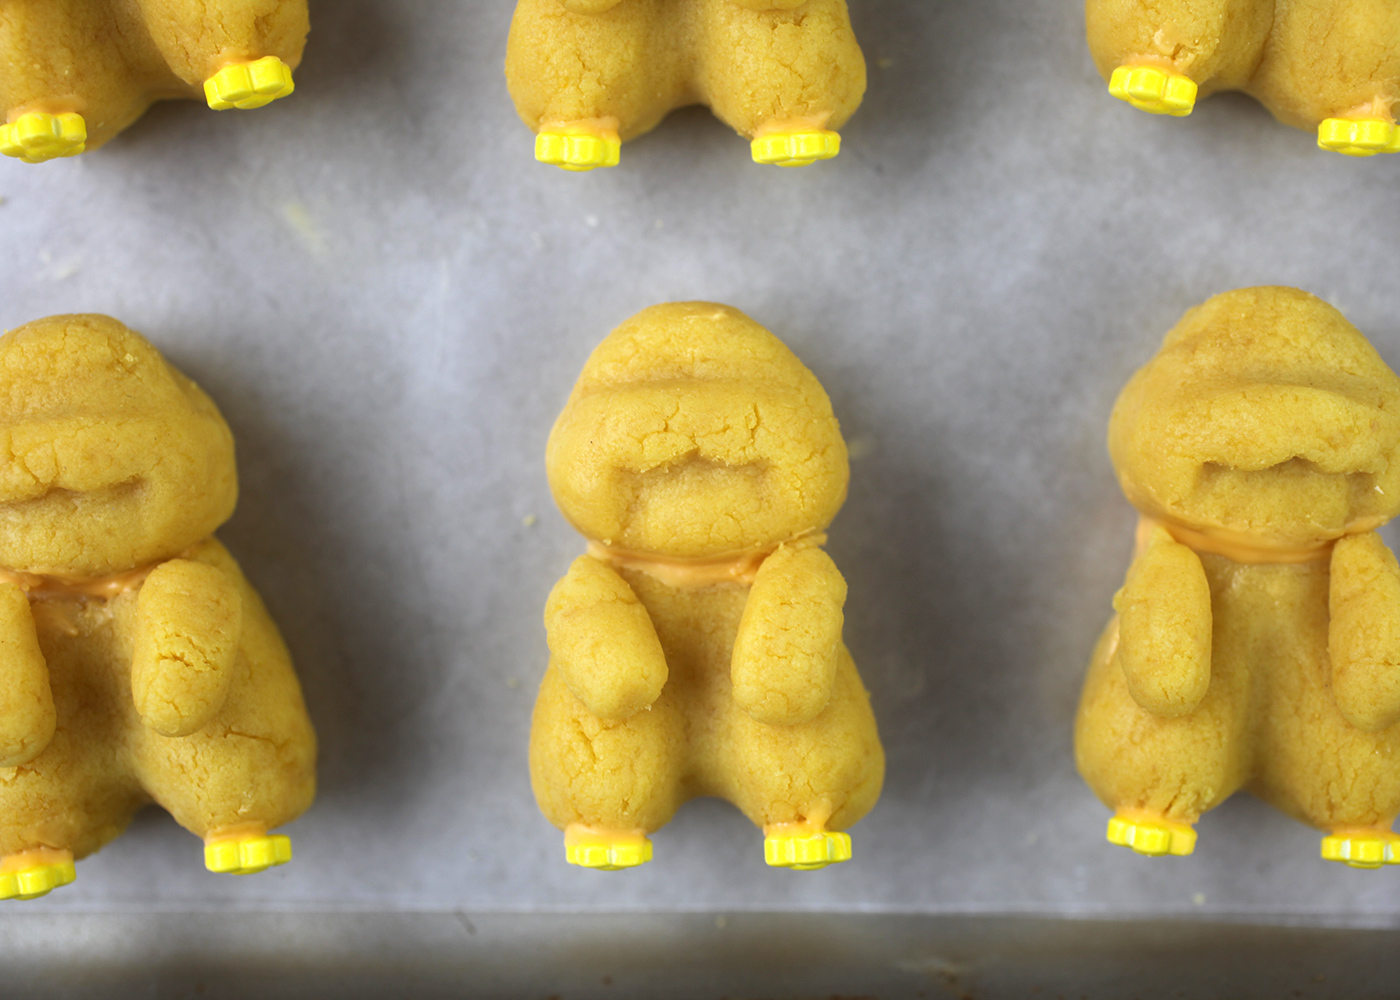
Yes, much better with arms. You can start to see the character coming together.
At this stage, you can place the shaped Pikachus in the fridge to chill and firm up for dipping and you can also prepare the ears.
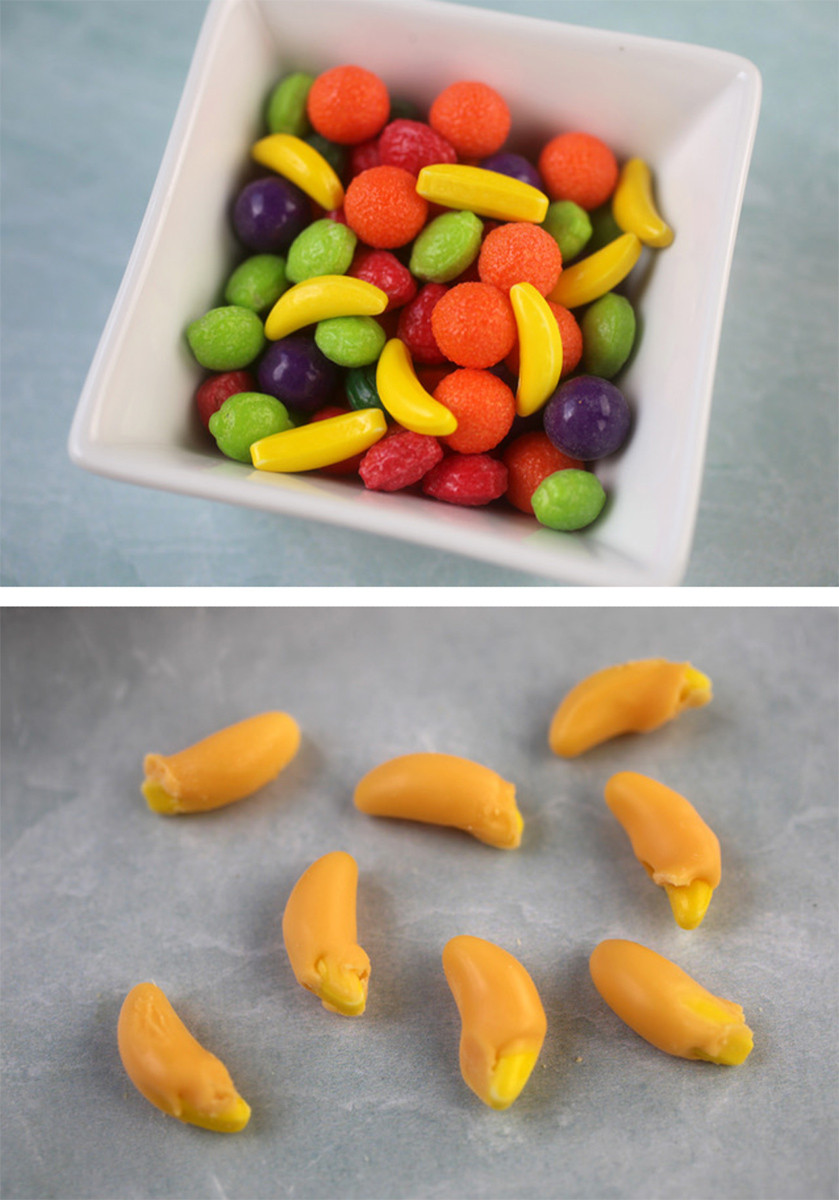
I used bananas from this fruit shaped candy sprinkle mixture for the ears. You could also use something like licorice pastilles. They just won’t have a pointy end. The bananas were a pretty good match, but they needed to be bulked up a bit and also to be the same color as Pikachu’s body, so I dipped them in melted yellow candy coating and once dry, set them on wax paper.
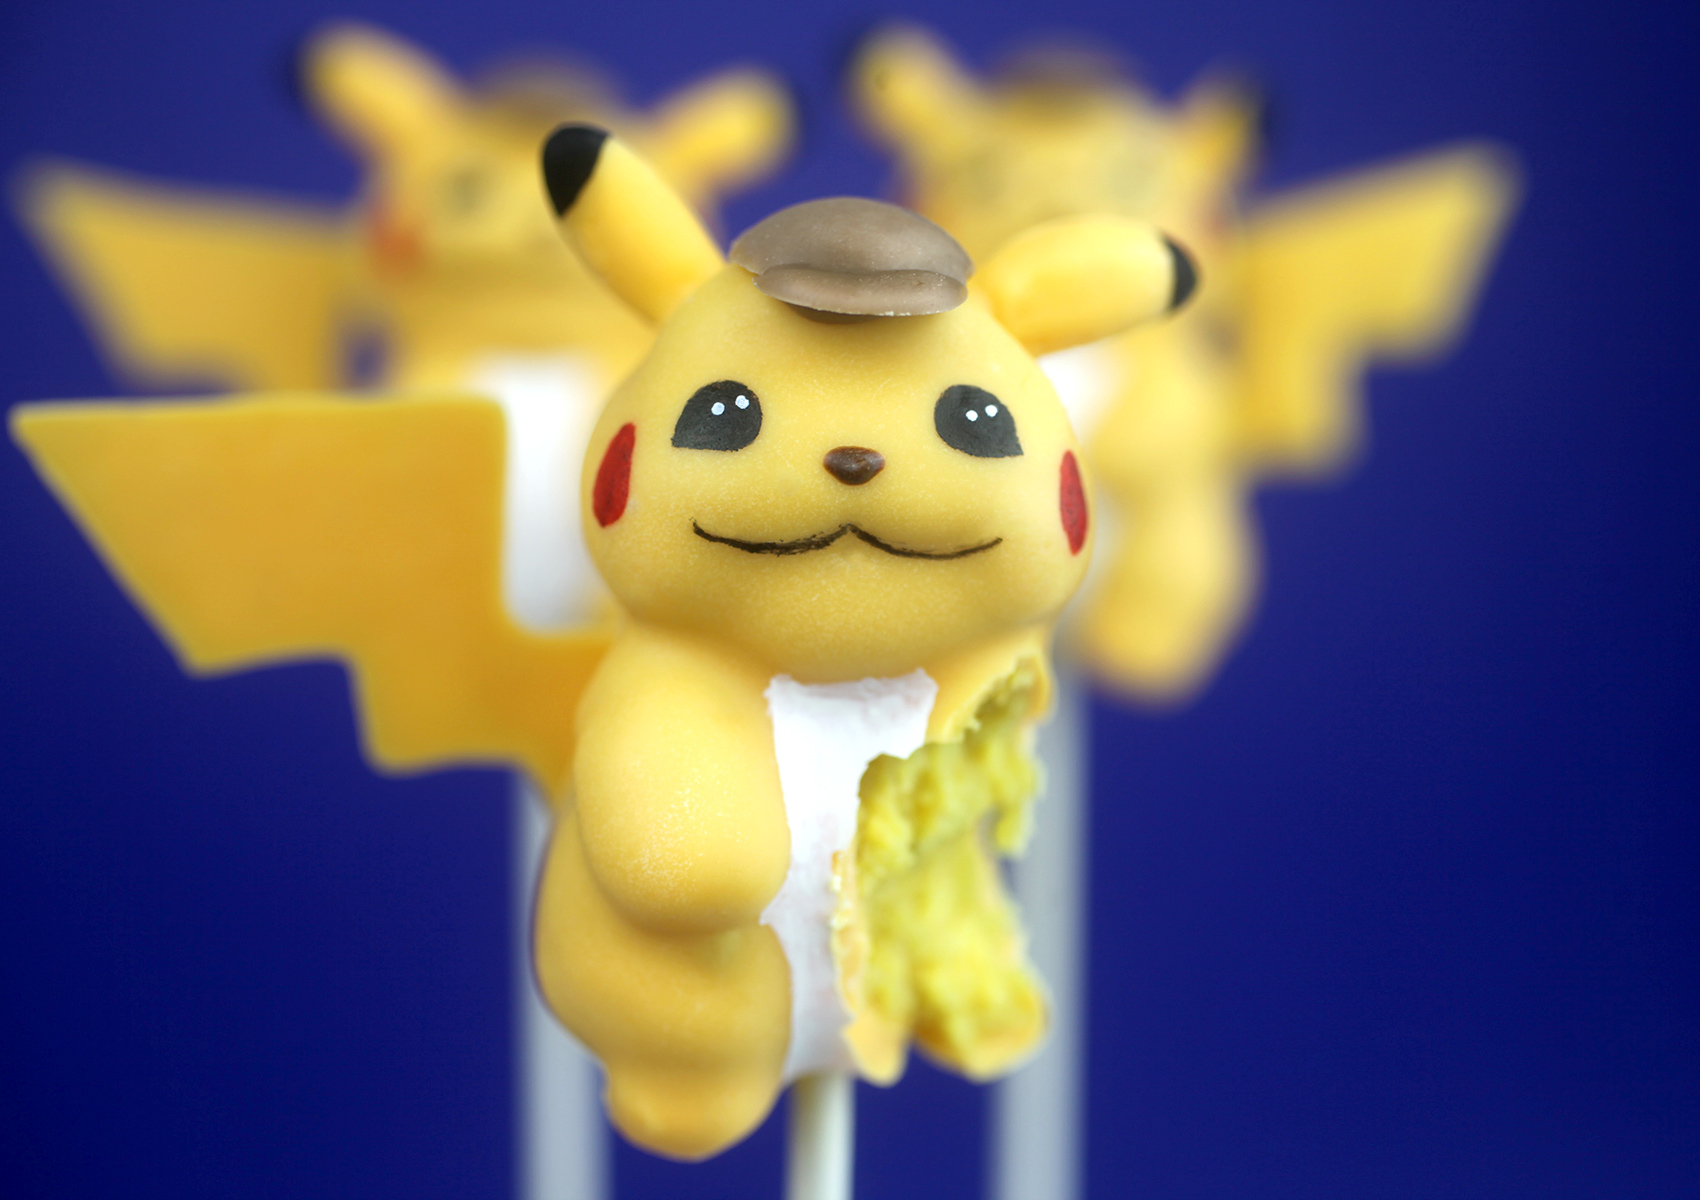
I’m sorry Pikachu :0
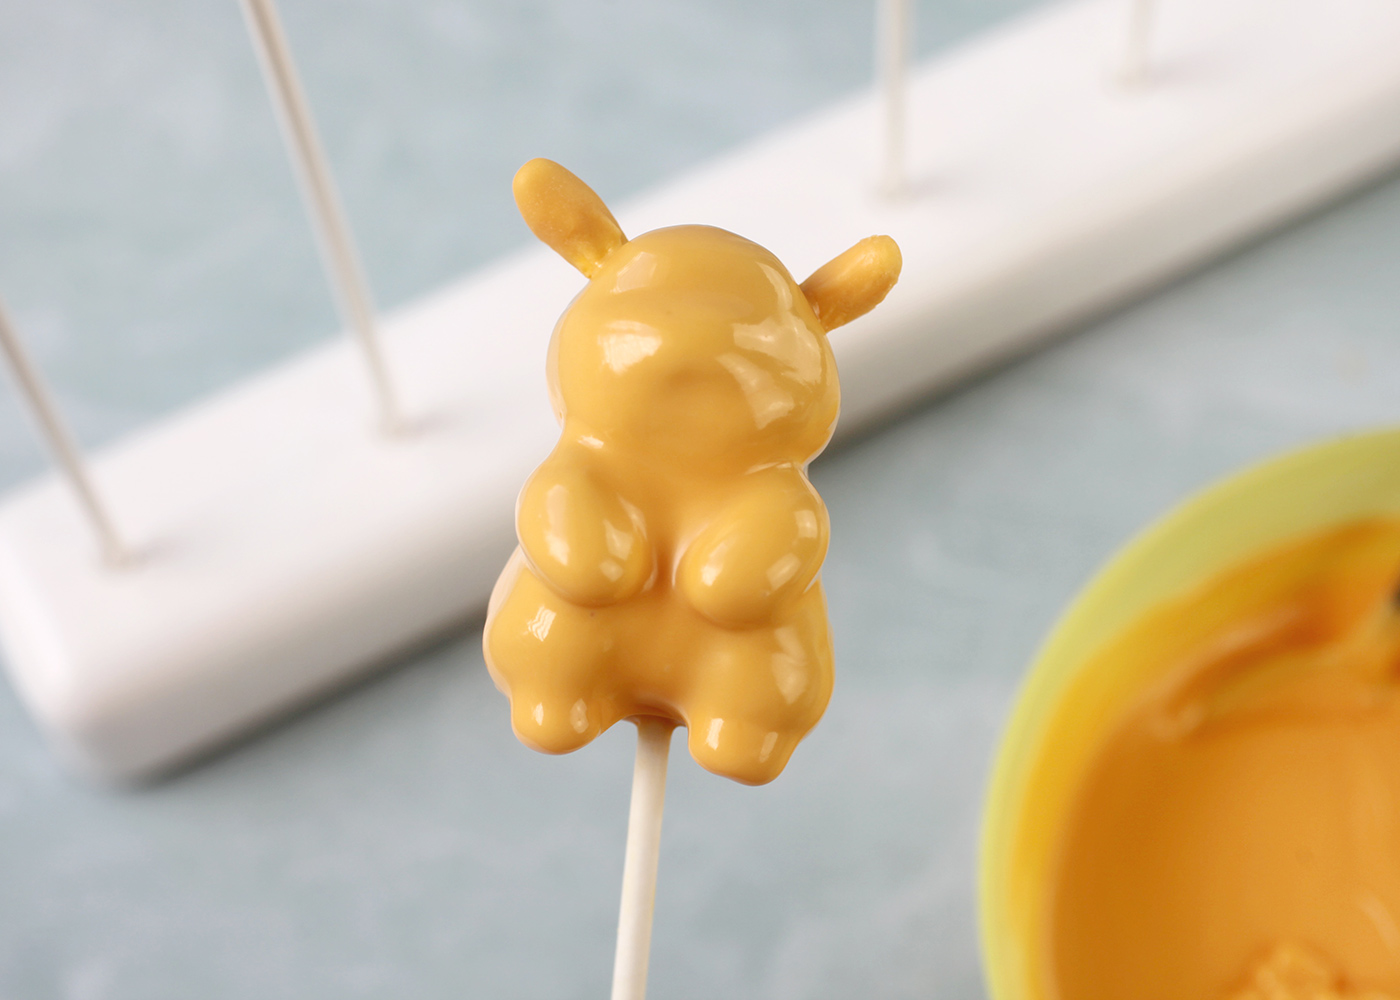
Dip Pikachu in a tall narrow bowl containing melted and fluid, yellow candy coating. Remove and gently tap off the excess. Before the coating, dries, place two of the coated banana candies in position for ears.
Once the bodies are dry, you can decorate.
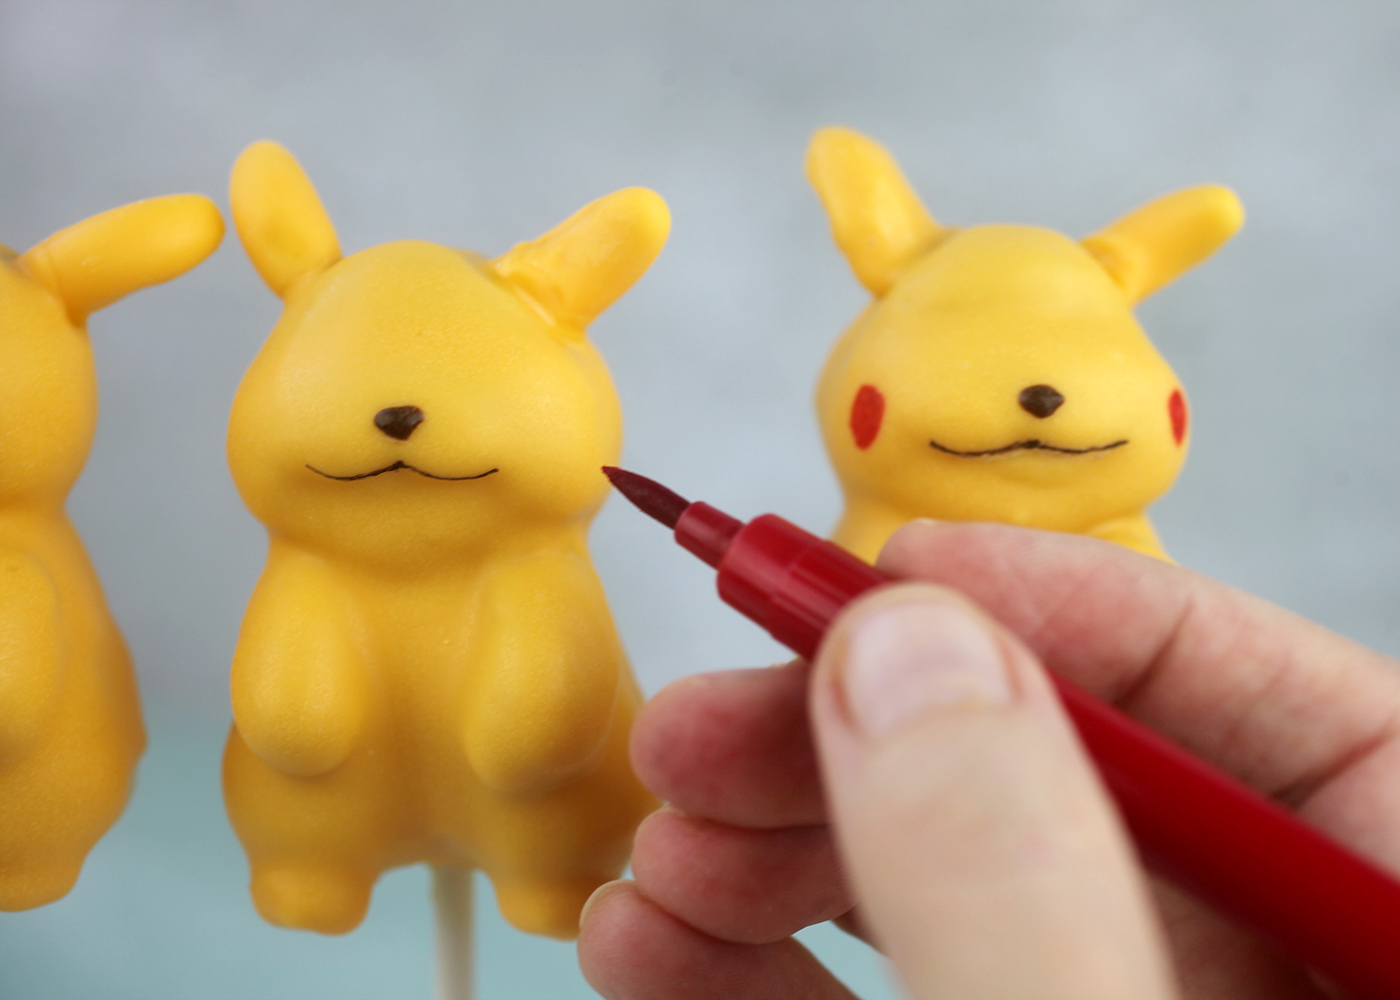
Dot on melted chocolate candy coating in position for the nose using a toothpick.
Use a black edible ink writing pen to draw on mouths and eyes. Use a red edible ink writing pen to draw on cheeks.
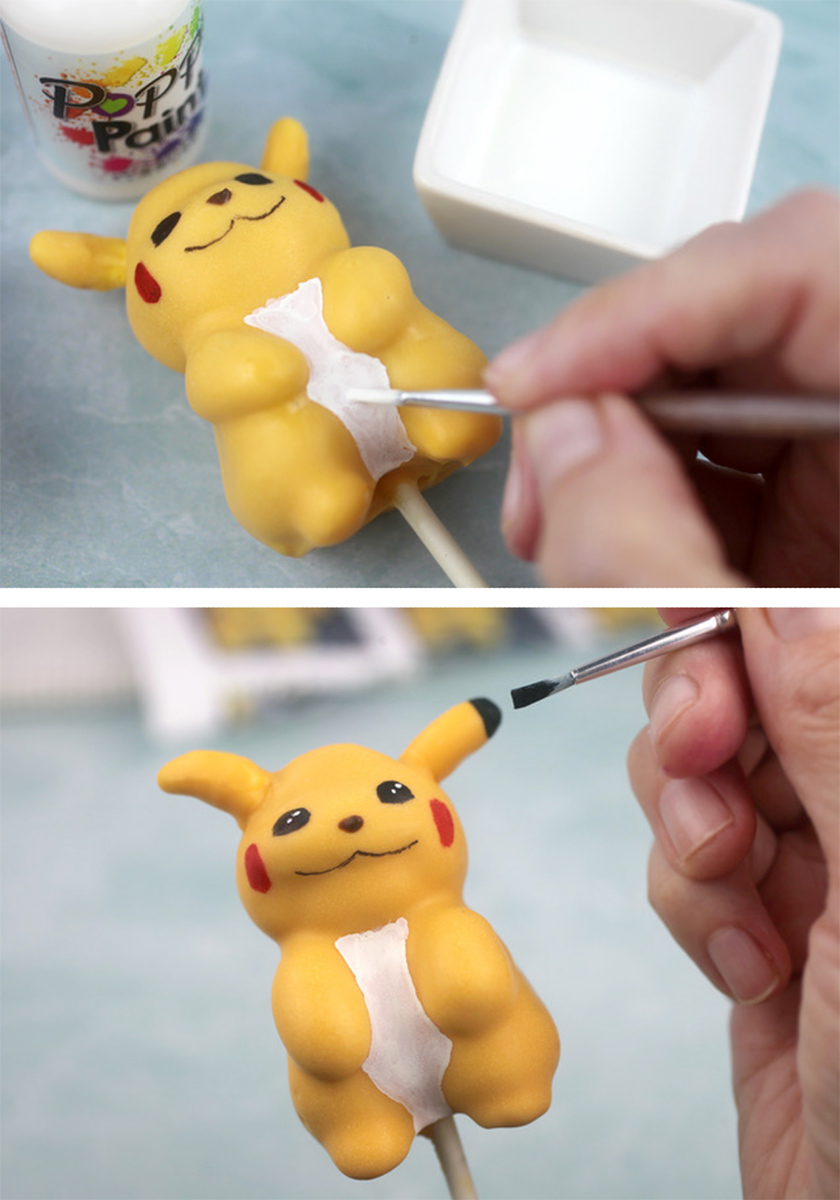
Paint his tummy white and the tips of his ears black with Poppy Paint.
Then use a toothpick to dot on more white for the sparkle in his eyes.
You could stop here, but I wanted to give him his lightning bolt-shaped tail.
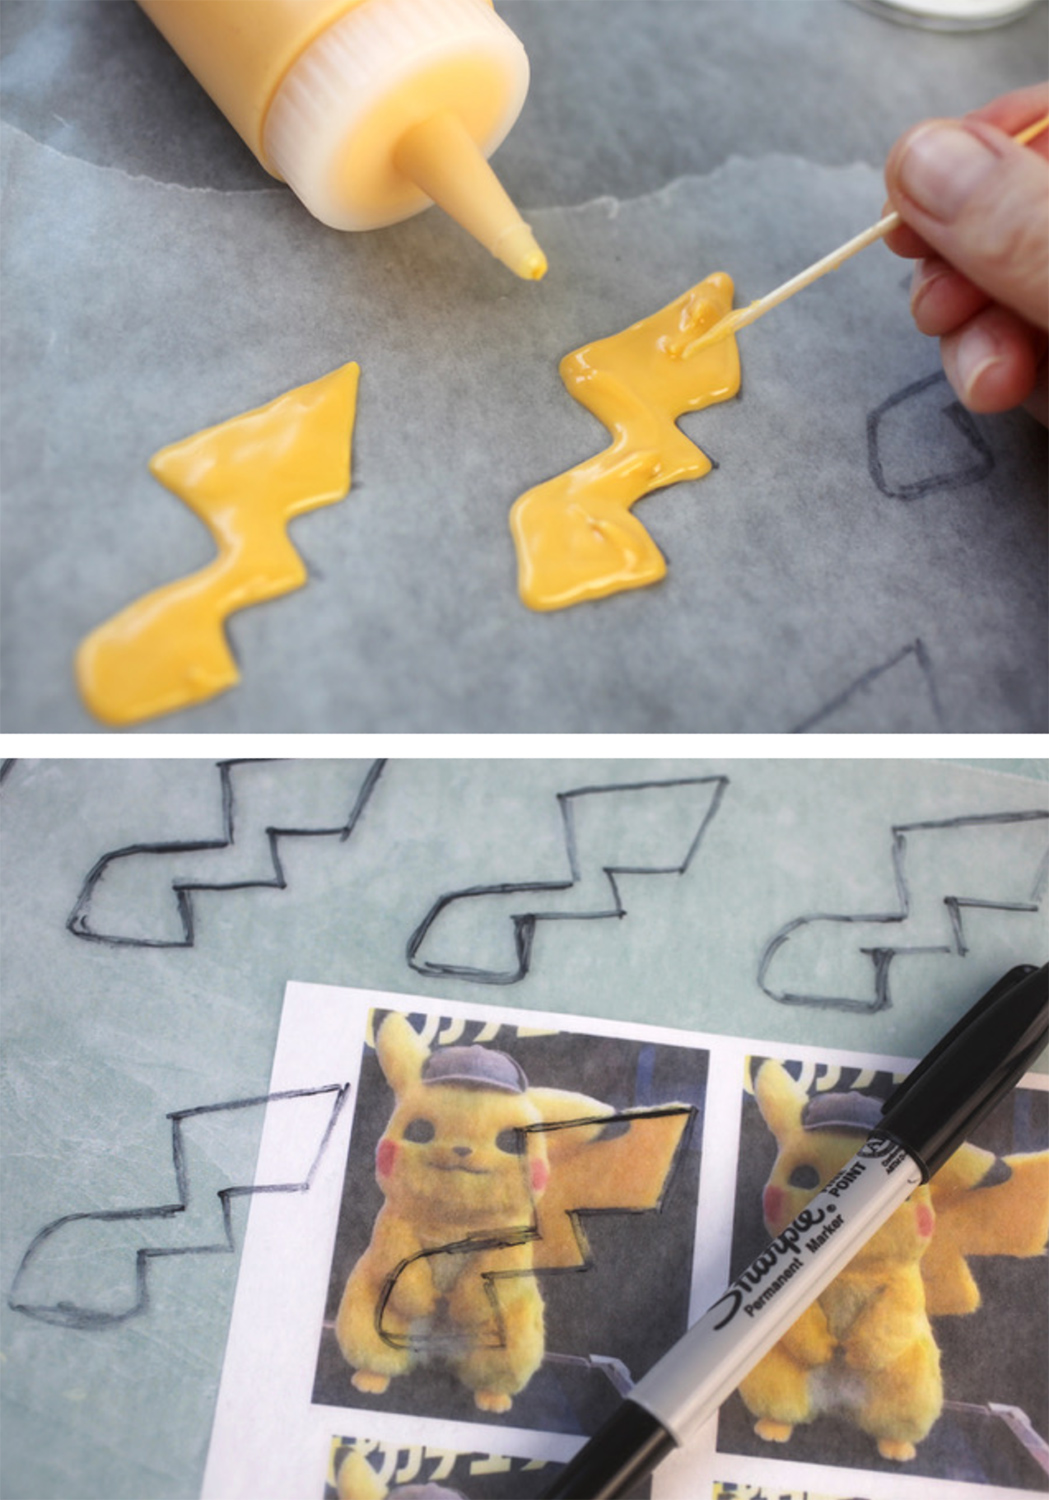
Use the same image and place it under wax paper. Use a sharpie to trace the tail shape. Then place a new clean piece of wax paper on top to pipe yellow candy coating on. Place the tails in the freezer for several minutes to dry.
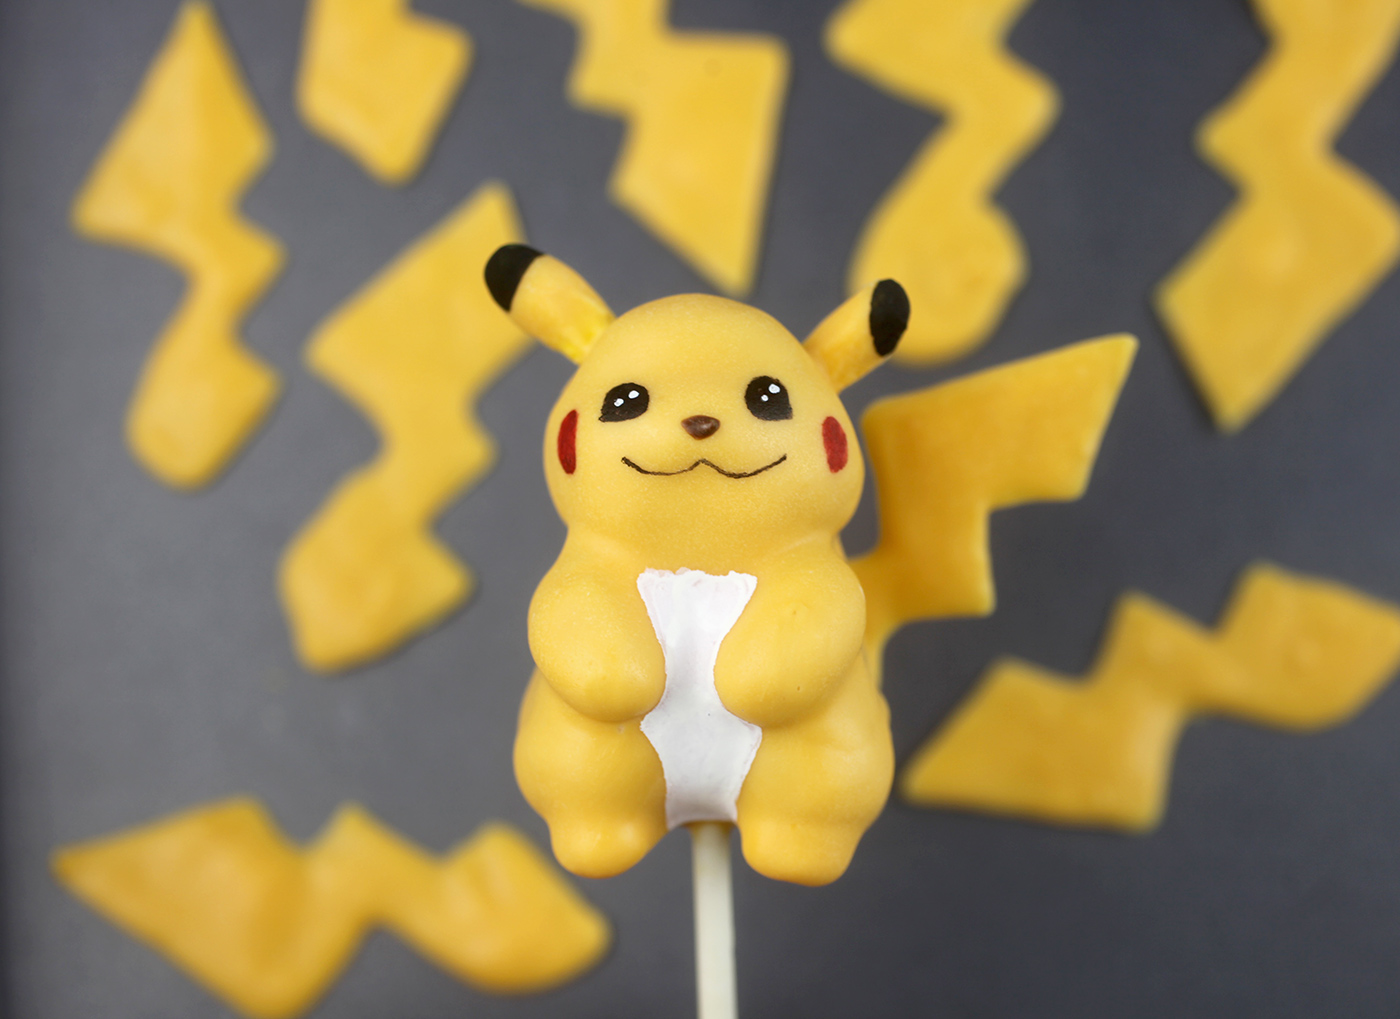
Carefully attach them to the body with more melted candy coating.
Too cute!
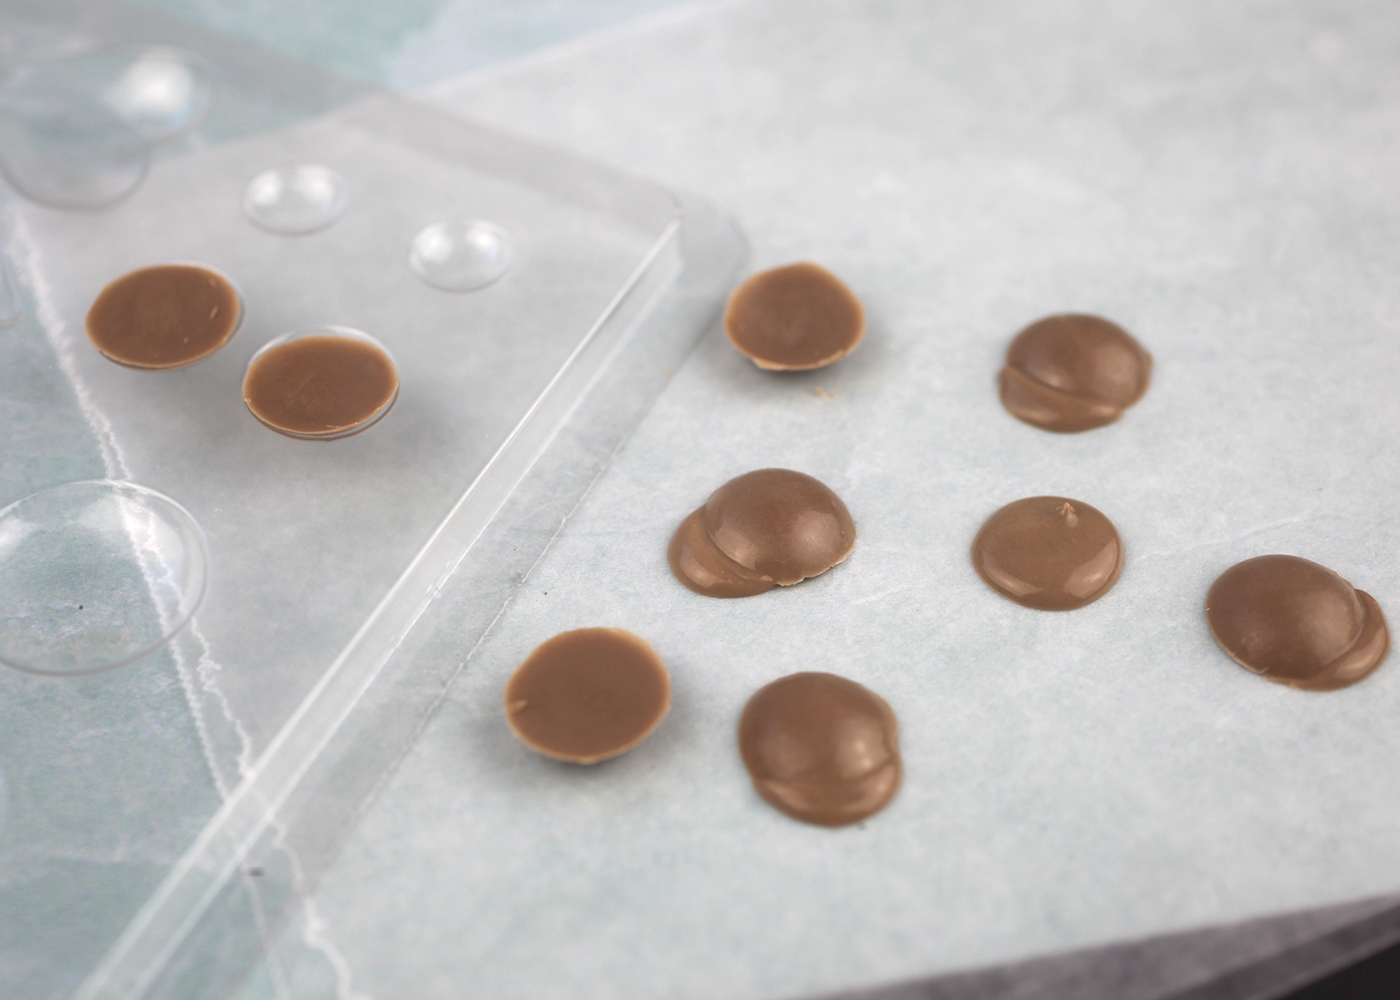
Now you’ll really think I am insane. I do too. I’m almost embarrassed. But obviously Detective Pikachu needs his super sleuth hat.
I used a candy mold to make chocolate buttons/discs and then placed them on top of a dollop of melted chocolate to create a lid effect.
This mold isn’t available anymore, but search candy drop mold for something similar.
OMG. Dying over here with these cute little caps.
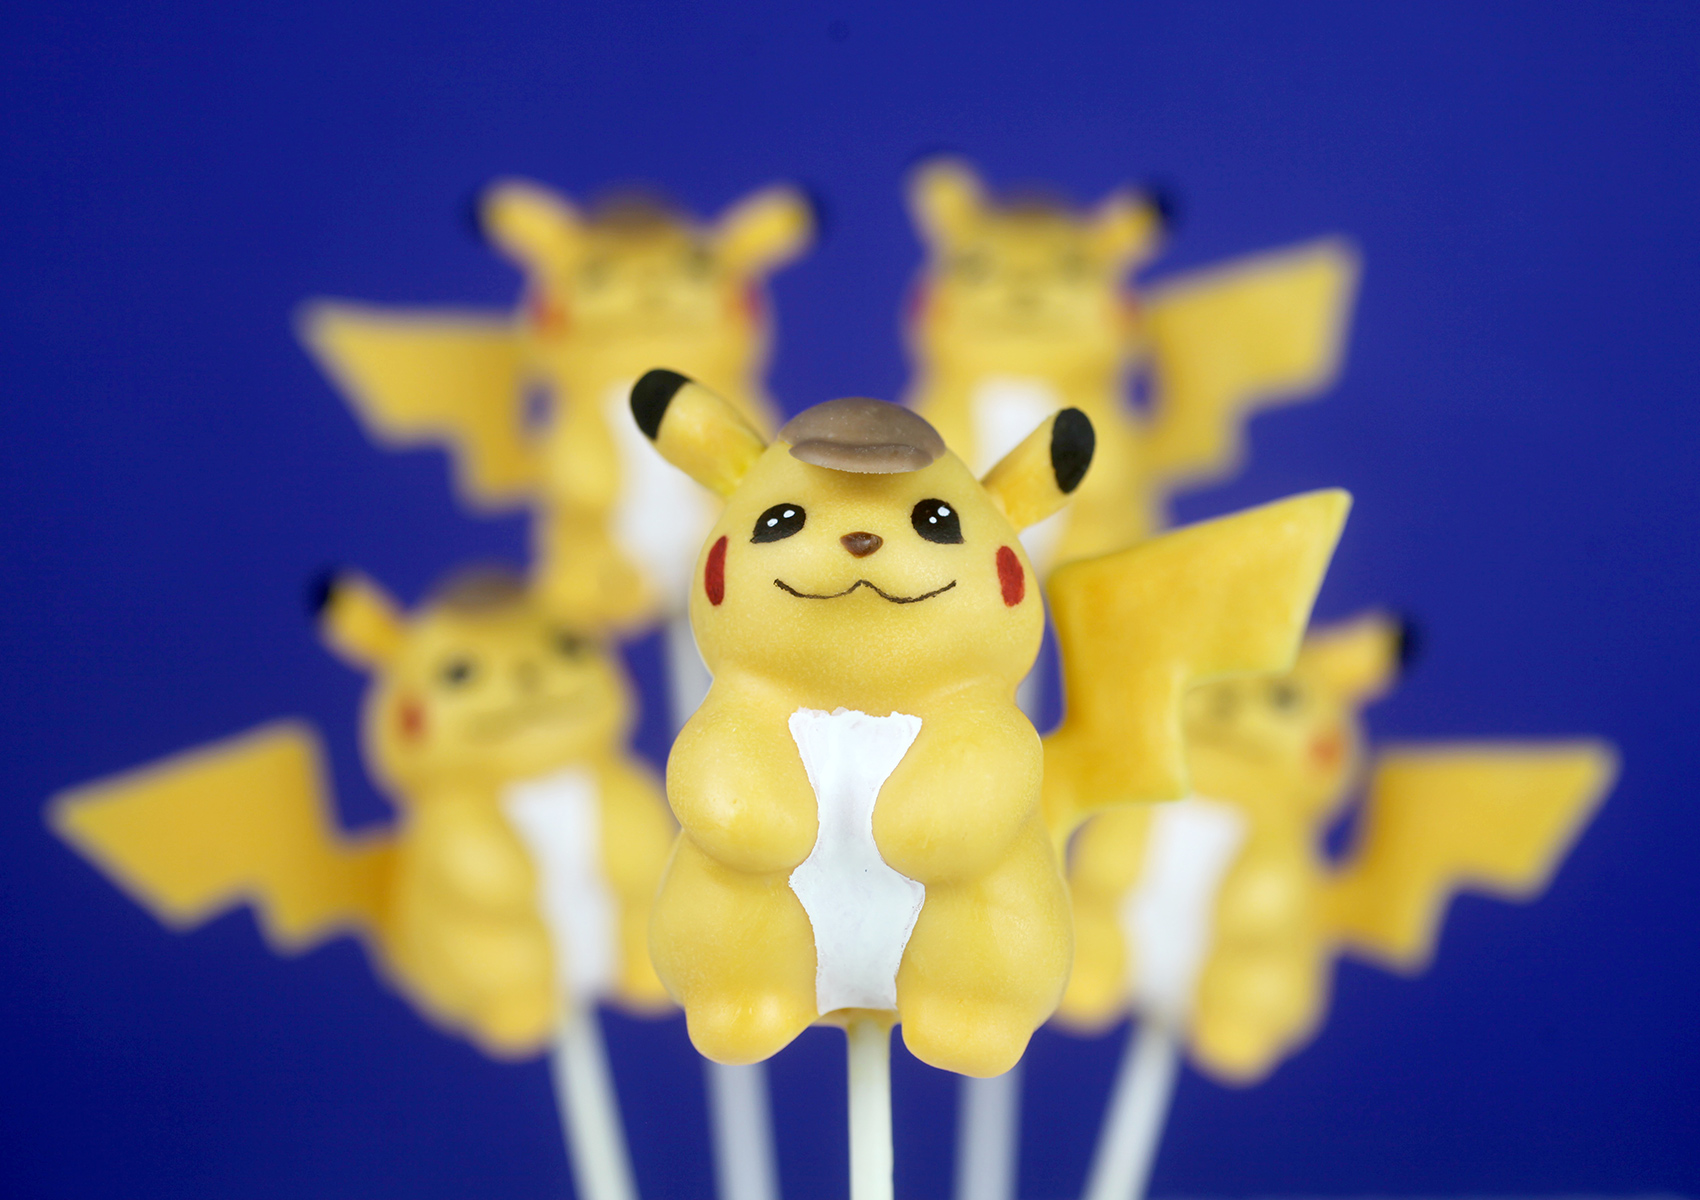
Stop it!
Sorry, I can’t help myself!
Hope you enjoy these and the movie, too! It’s in theaters this weekend starring Ryan Reynolds and Justice Smith.


That’s so cute pikachu pokemon toffe.
Hi I m Priyanka from India. I want to know which preservatives to be added to cake pops to store them atleast for 3-4 months without freezing them.
P.S : India is a hot and humid country.
Oh my goodness!!!! This is just cuteness overload!!!! I am always in awe with how you make these character cake pops! Any cake pop design really! Your creativity is just so amazing! It always makes me smile seeing what you come up with.
This is yummy. Thanks for receipe.
these are the cutest cake pops I have ever seen in my life!!! wow you are seriously a genius haha so talented! i mean the little tiny chocolate hats?? and using those tiny flower sprinkles for feet?! im speechless ?I have to give these a try ? thank you!??
I was a huge Pokemon fan the first time round in the 90’s and now my children love Pokemon too! I’ll definitely try to make these – they look absolutely amazing! xxx
These are so darling! I love that you share your beautiful elaborate projects. You are so talented and even if I never make cake pops, I love seeing your enthusiasm, passion, and skill shine through.
I almost lost it on the train when I read “Sorry Pikachu.” ?
That was a laughing emoji at the end, not a question mark. Must not be supported in comments.
Very genius creativity
Wow those are amazing! I love that you bit into one – I don’t think I could! But then again, I probably could bite into mine because mine would most certainly not look like yours! Beautiful job! I am in awe as always :)
You amaze me!!!!! You are so talented Angie!
Your genius, talent, creativity, AND PATIENCE know no bounds!!! QUEEN!
What kind of edible markers do you use? I’ve never had luck writing on Candy melts
I would like to know too. Trying to find edible markers that work on candy melts/ cake pops
YOU, BEAUTIFUL BAKER ARE A GENUIS!!!
They’re fantastic!
I have to say, I’m in awe of your skills. You really are amazingly talented!
You’re right! These are over the top and perfection. I don’t know how you do it. You’re definitely an artist. Such a gift.