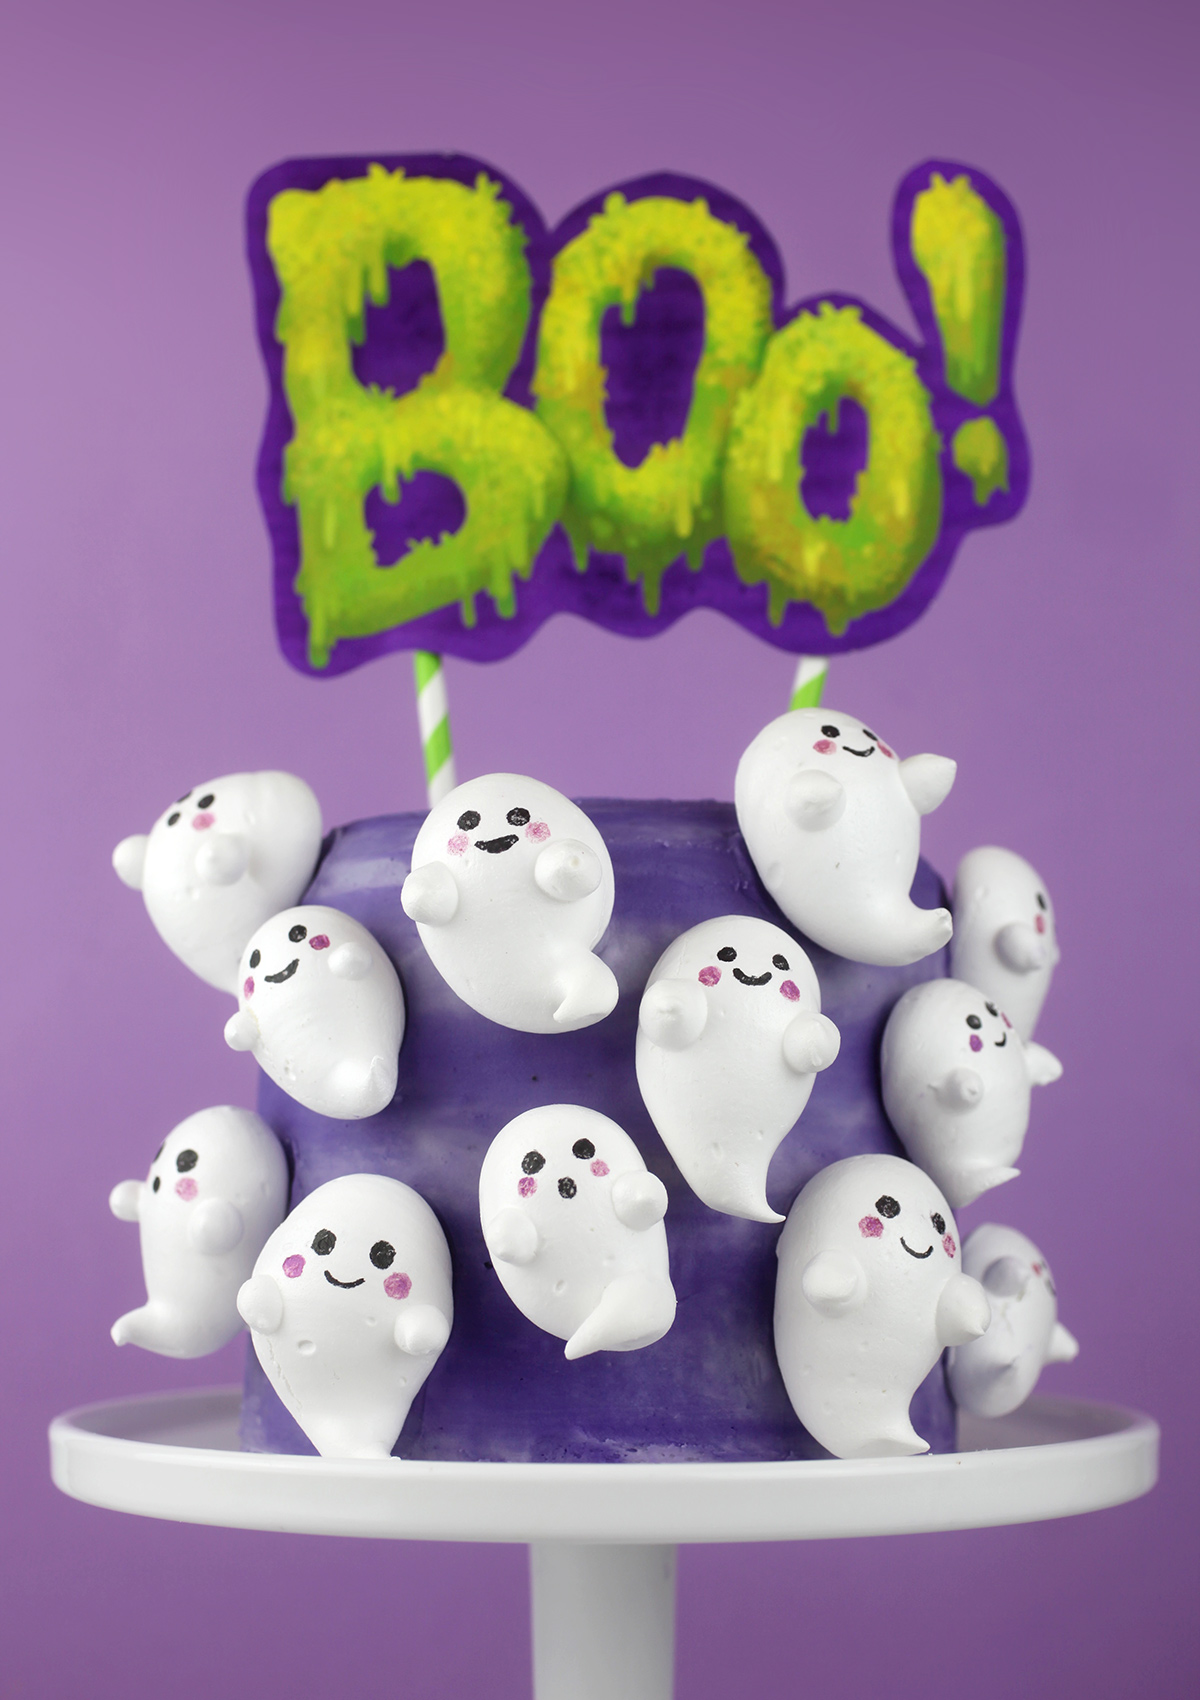
I guess you can tell I really liked the Boo-meringues I posted recently. I mean they do scream cute. And so much so, that I wanted to put them on display in a really sweet way.
So I made a small 6-inch layer cake for them to float on.
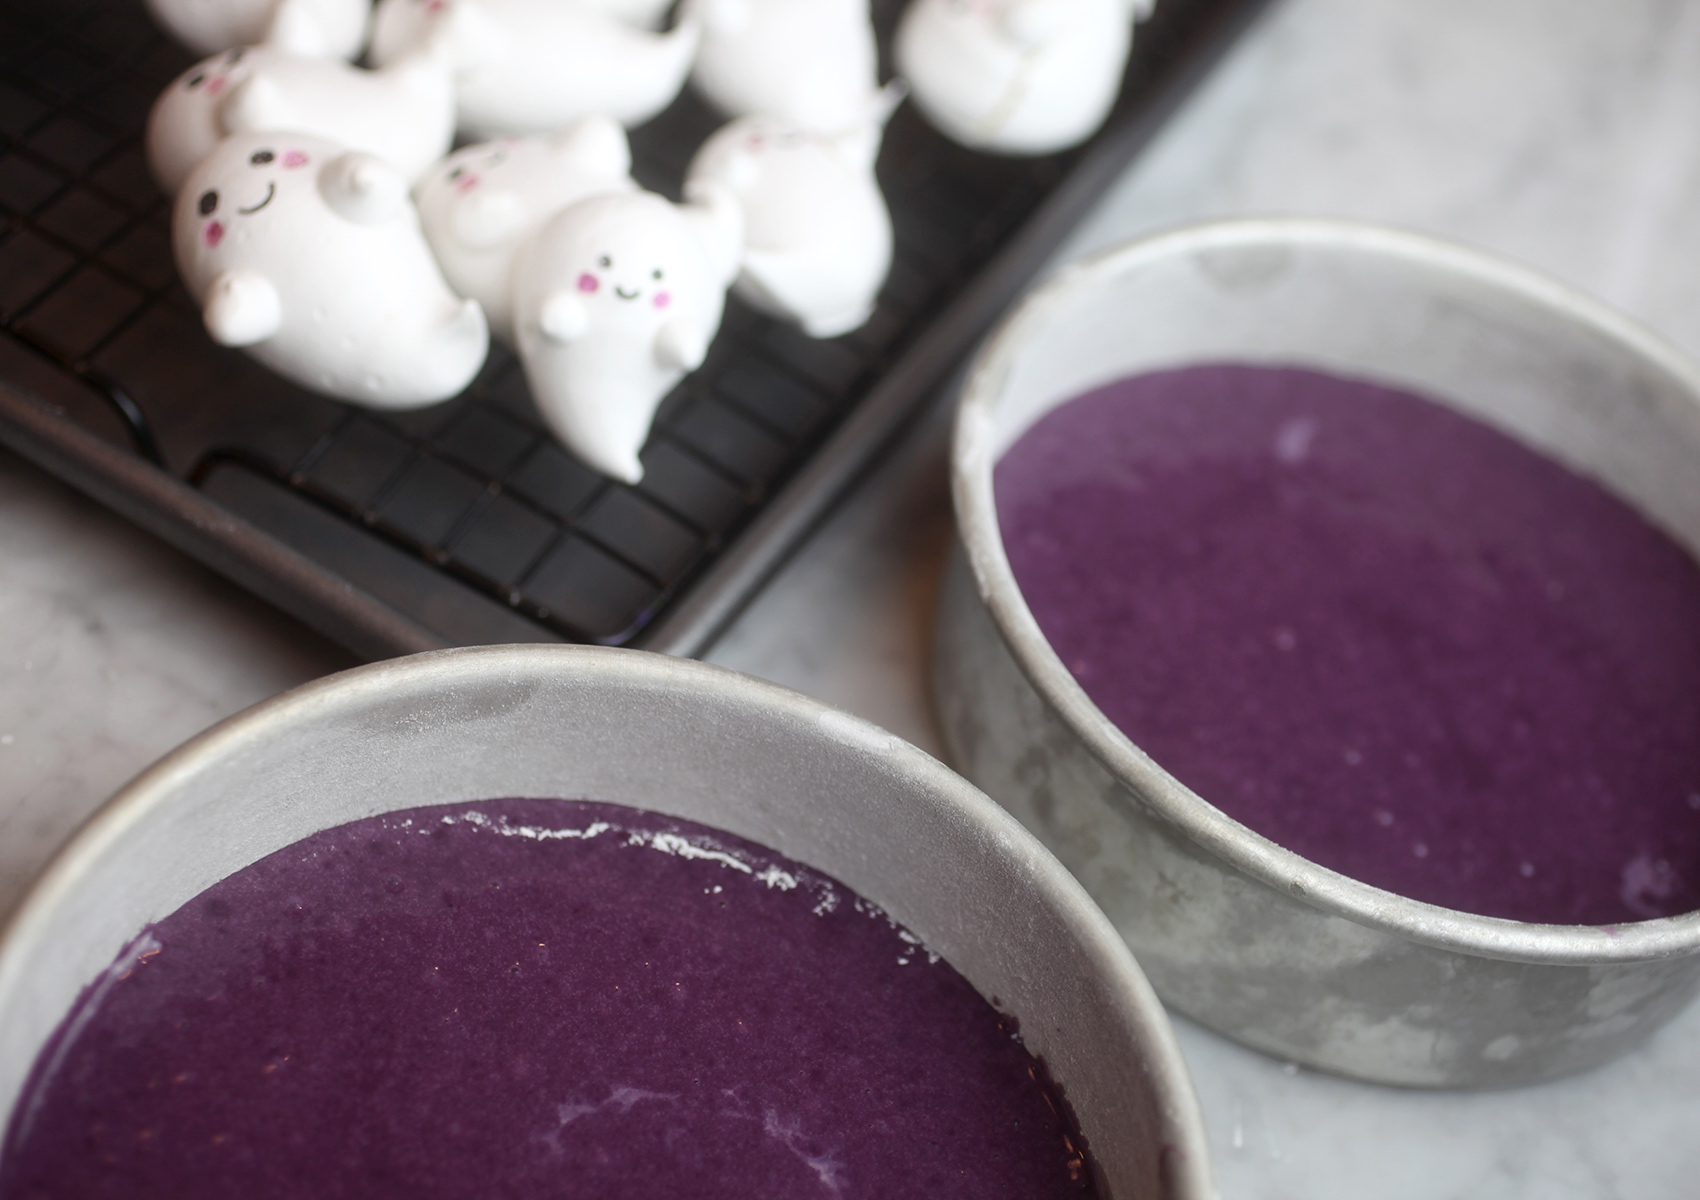
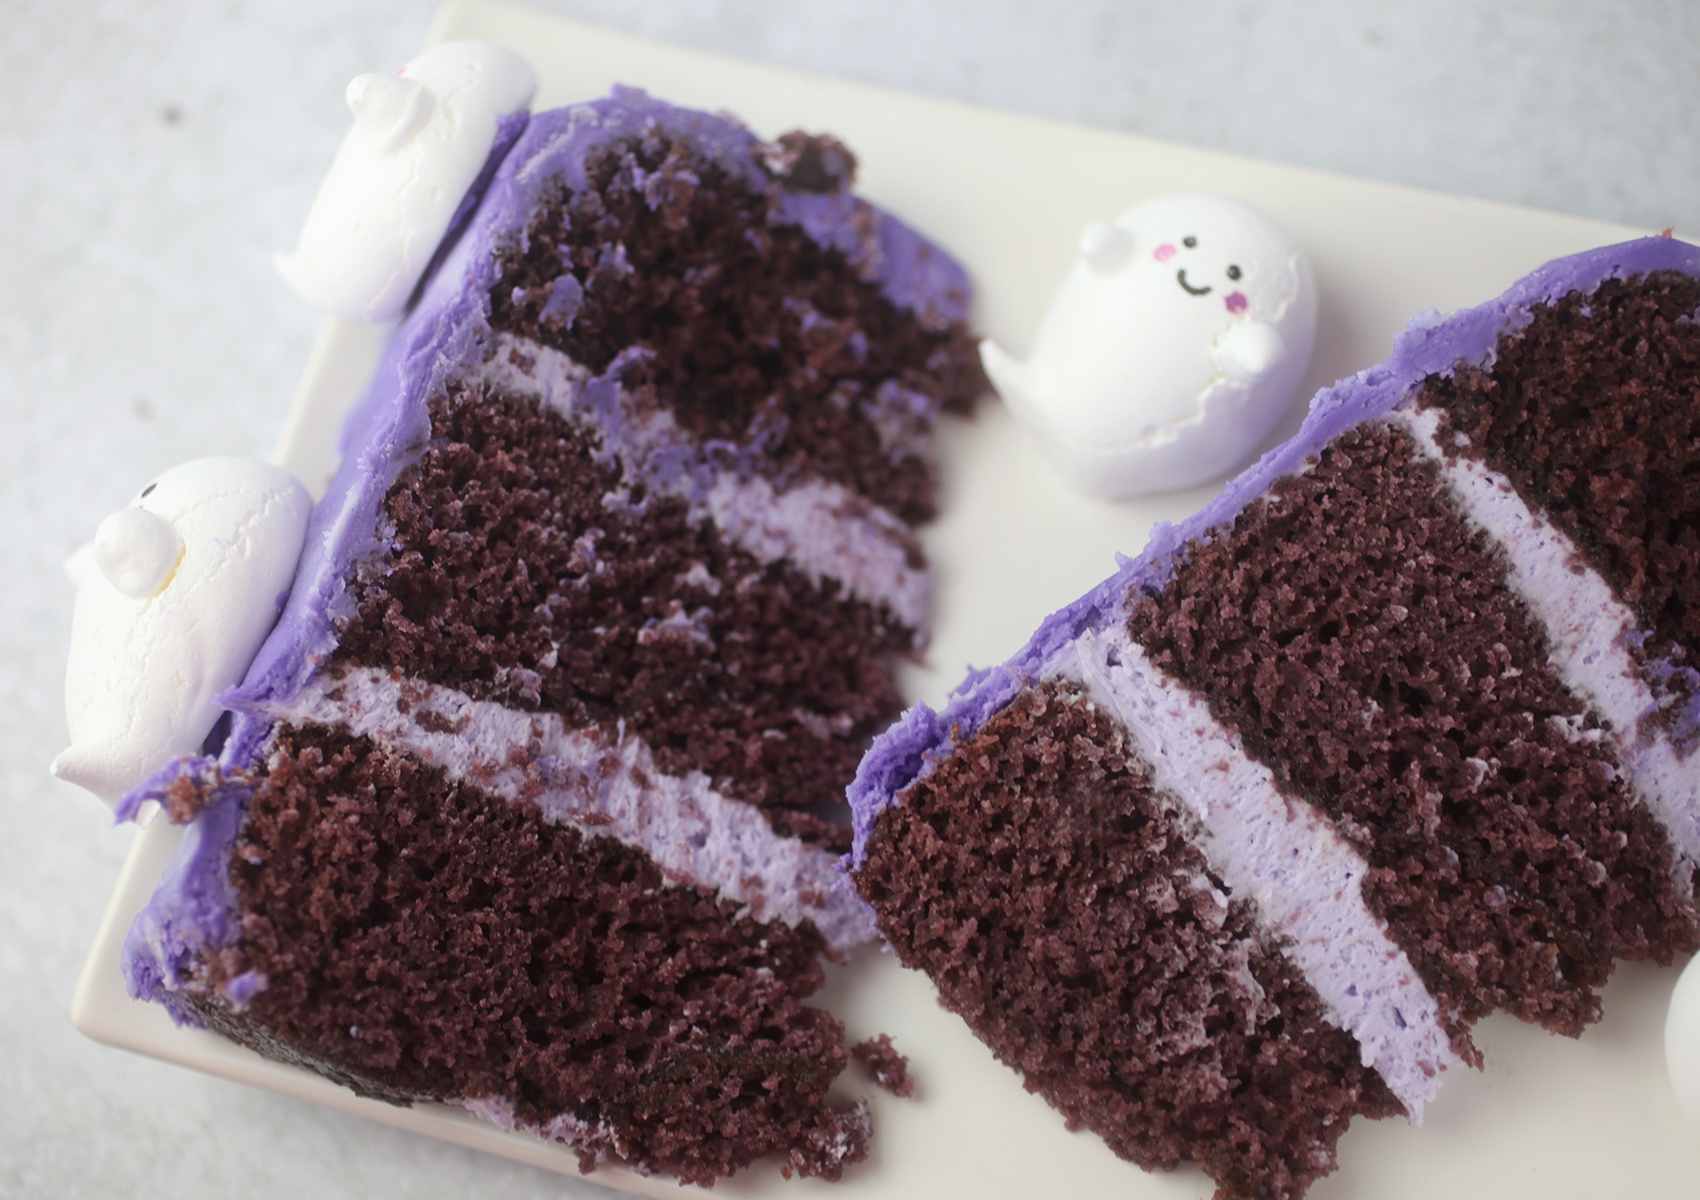
The recipe I used was this one for red velvet cupcakes. I just switched out the color to purple. In hindsight, the dark purple almost looks chocolate when baked. So next time I would use red or green food coloring for a pop of fun color inside.
The recipe will yield enough batter for three 6 inch layers.
And if you want to use a chocolate cake base. This chocolate cake recipe is really good and will also yield three 6 inch layers.
Just watch the baking time and check. I baked these for about 30 minutes at 350 degrees F.

Once baked and cooled, it’s time to frost and layer. I made two batches of buttercream (using this recipe). I tinted one batch a light purple and the other a much deeper shade of purple.
I used the light purple to pipe and fill in between the three layers with enough reserved to pipe on the exterior for some wispy streaks.
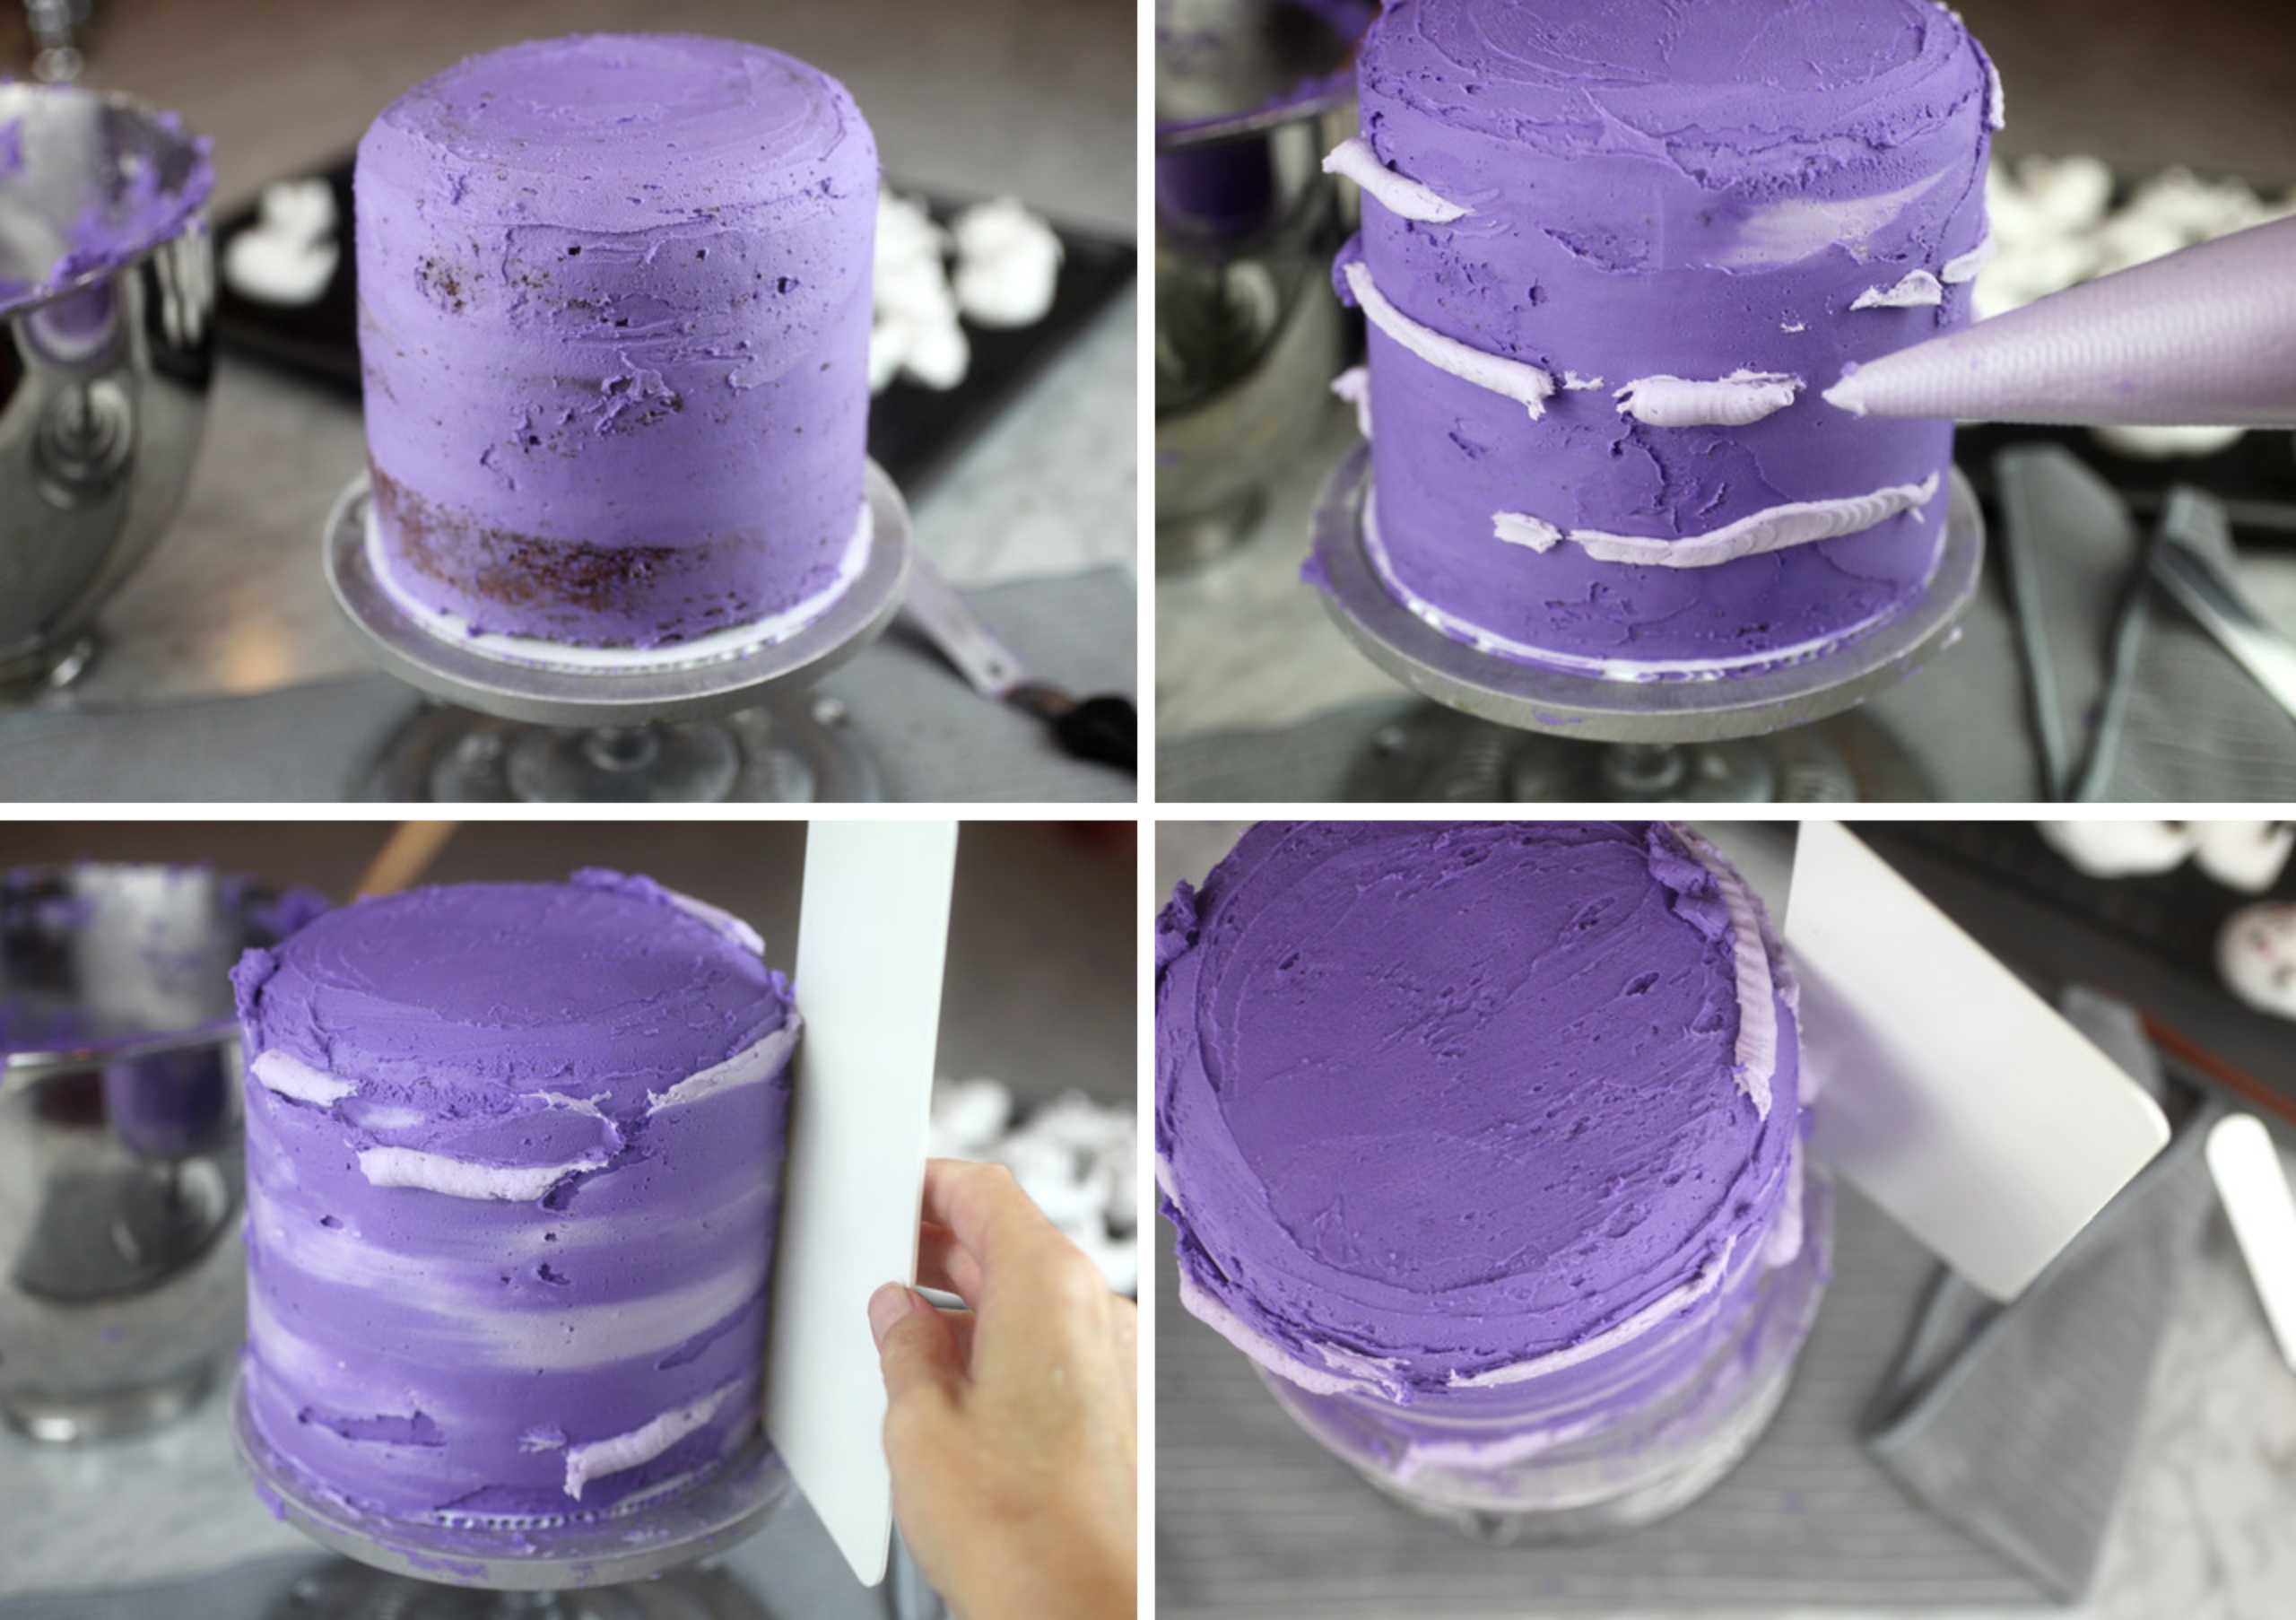
Once assembled, I used the darker purple to apply a crumb coat to the cake. Then I chilled the cake for about 20 minutes before applying the final crumb-free layer of frosting.
If you want to make wispy streaks like these, you can pipe random lines of the lighter purple frosting on the frosted cake and then use a tool like this one to create a smooth edge.
Pretty in purple.
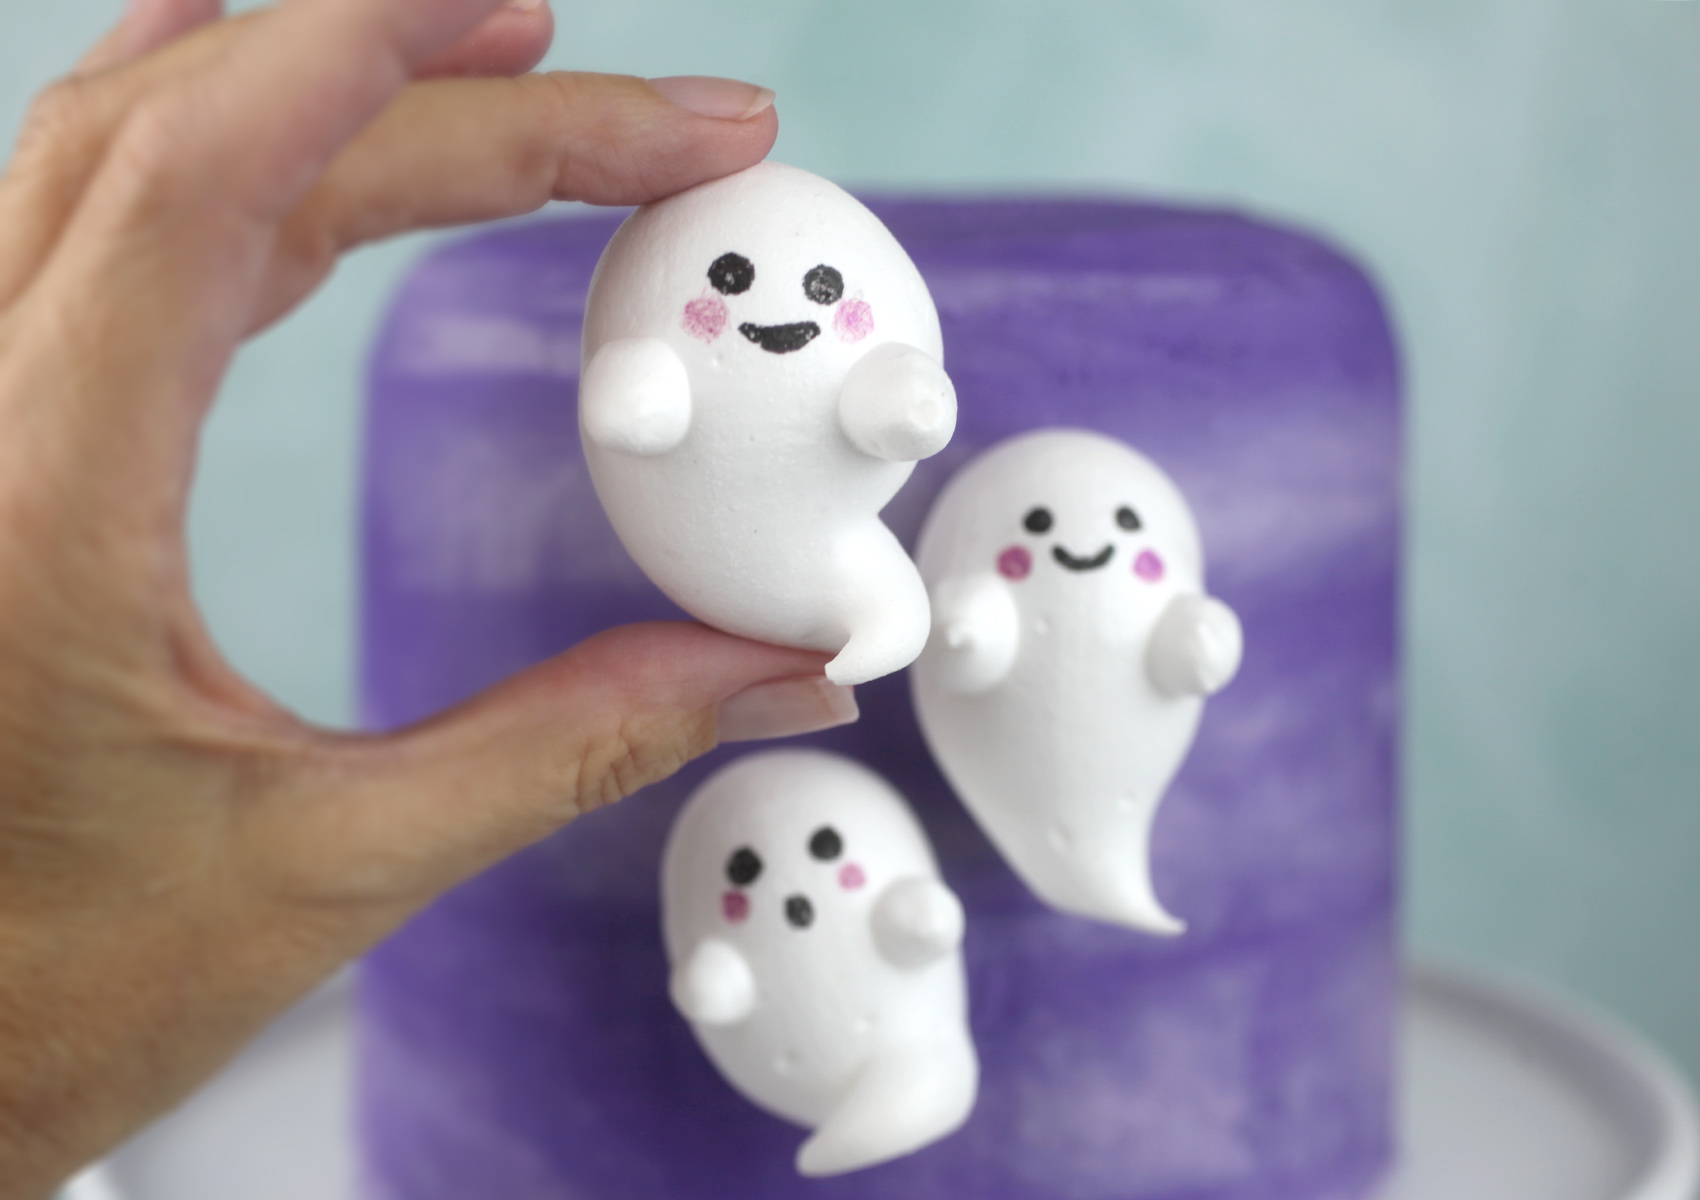
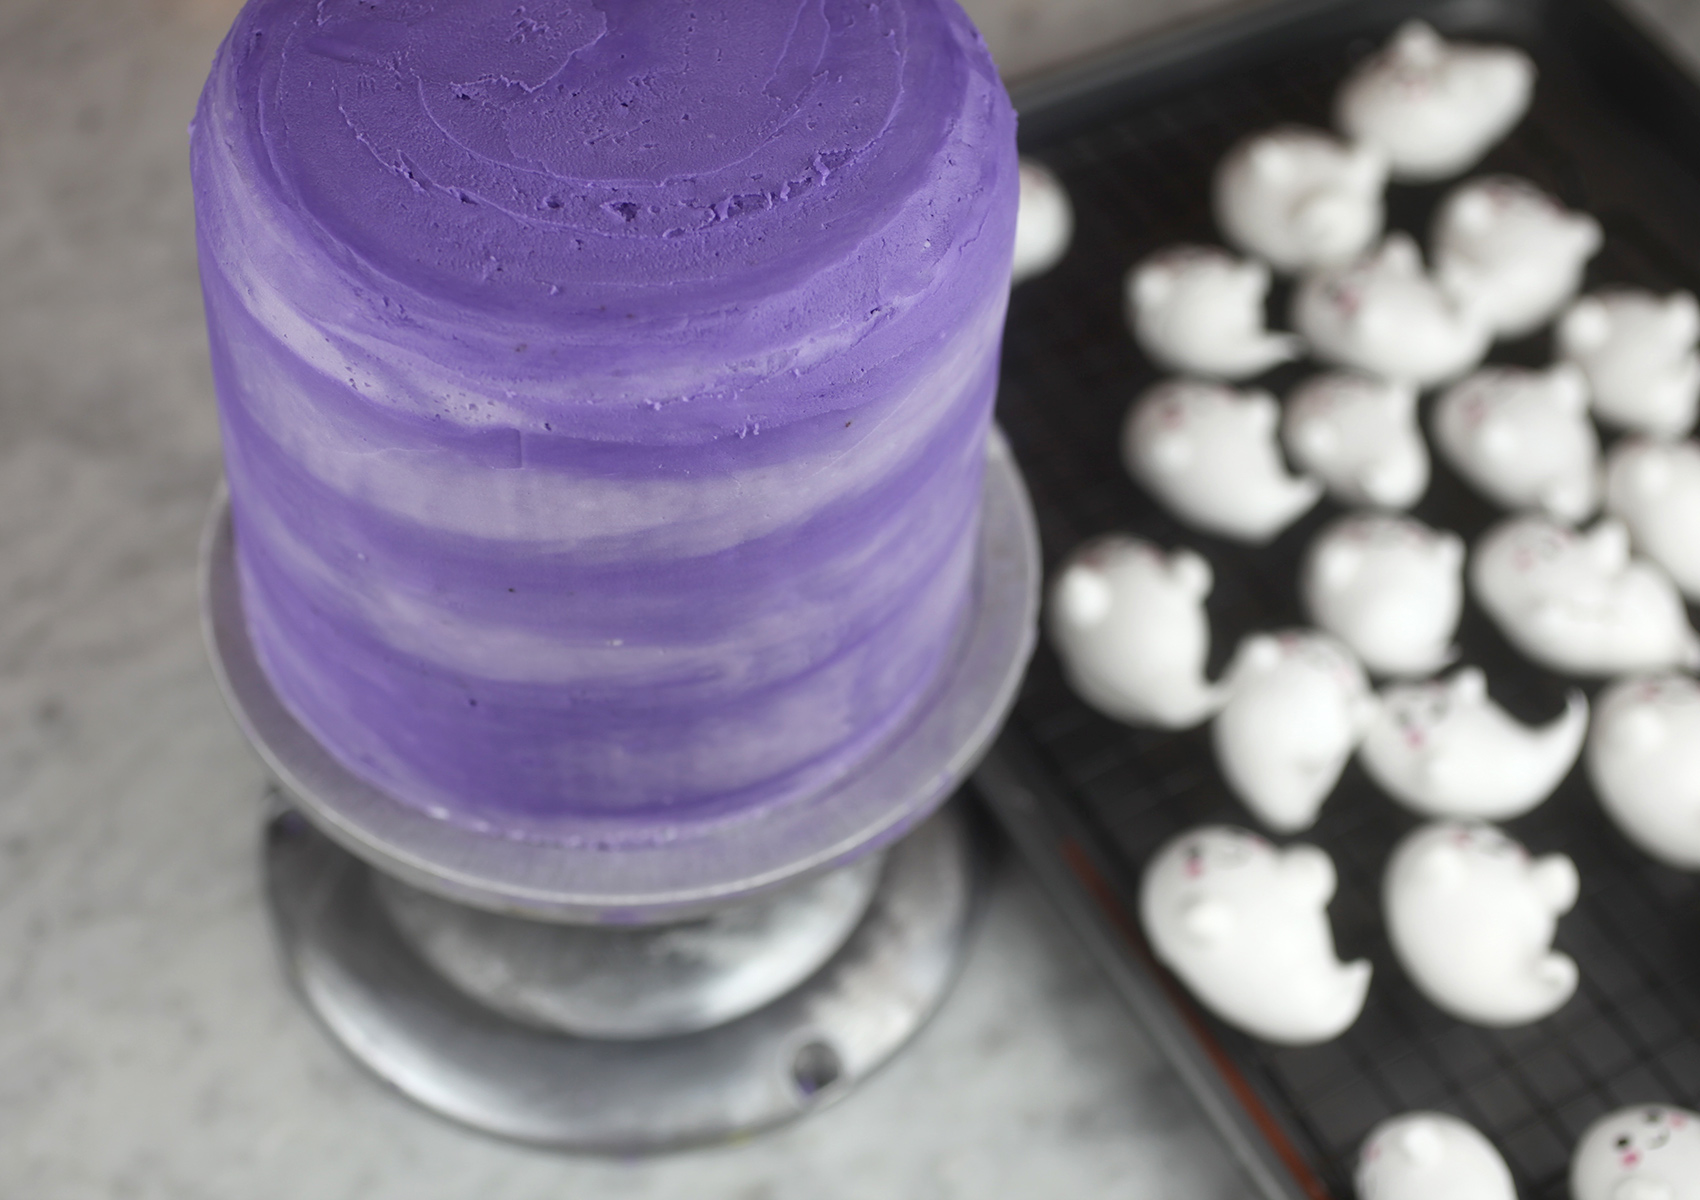
Now for the ghosts.
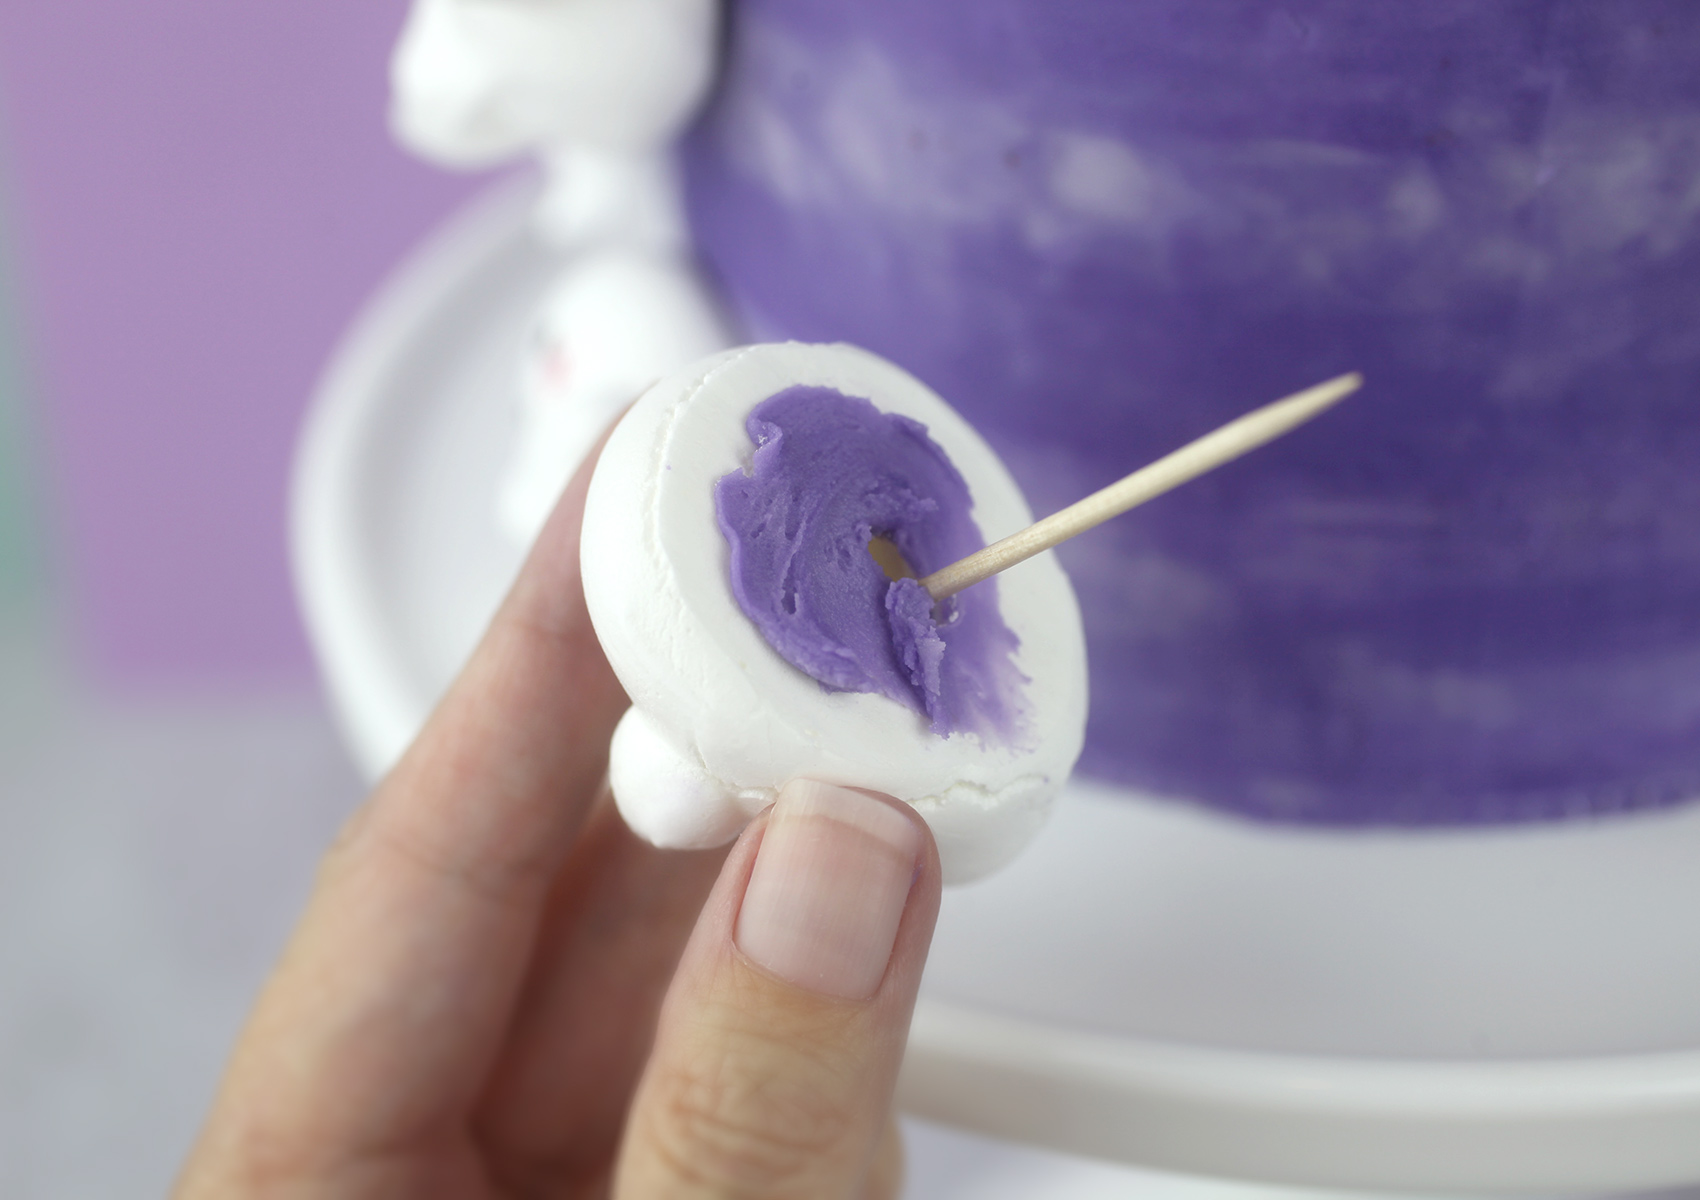
Use some of the frosting on the backside of each meringue to help attach them to the cake. You can also insert a toothpick gently into the back side of the meringue to help them stay in place on the cake.
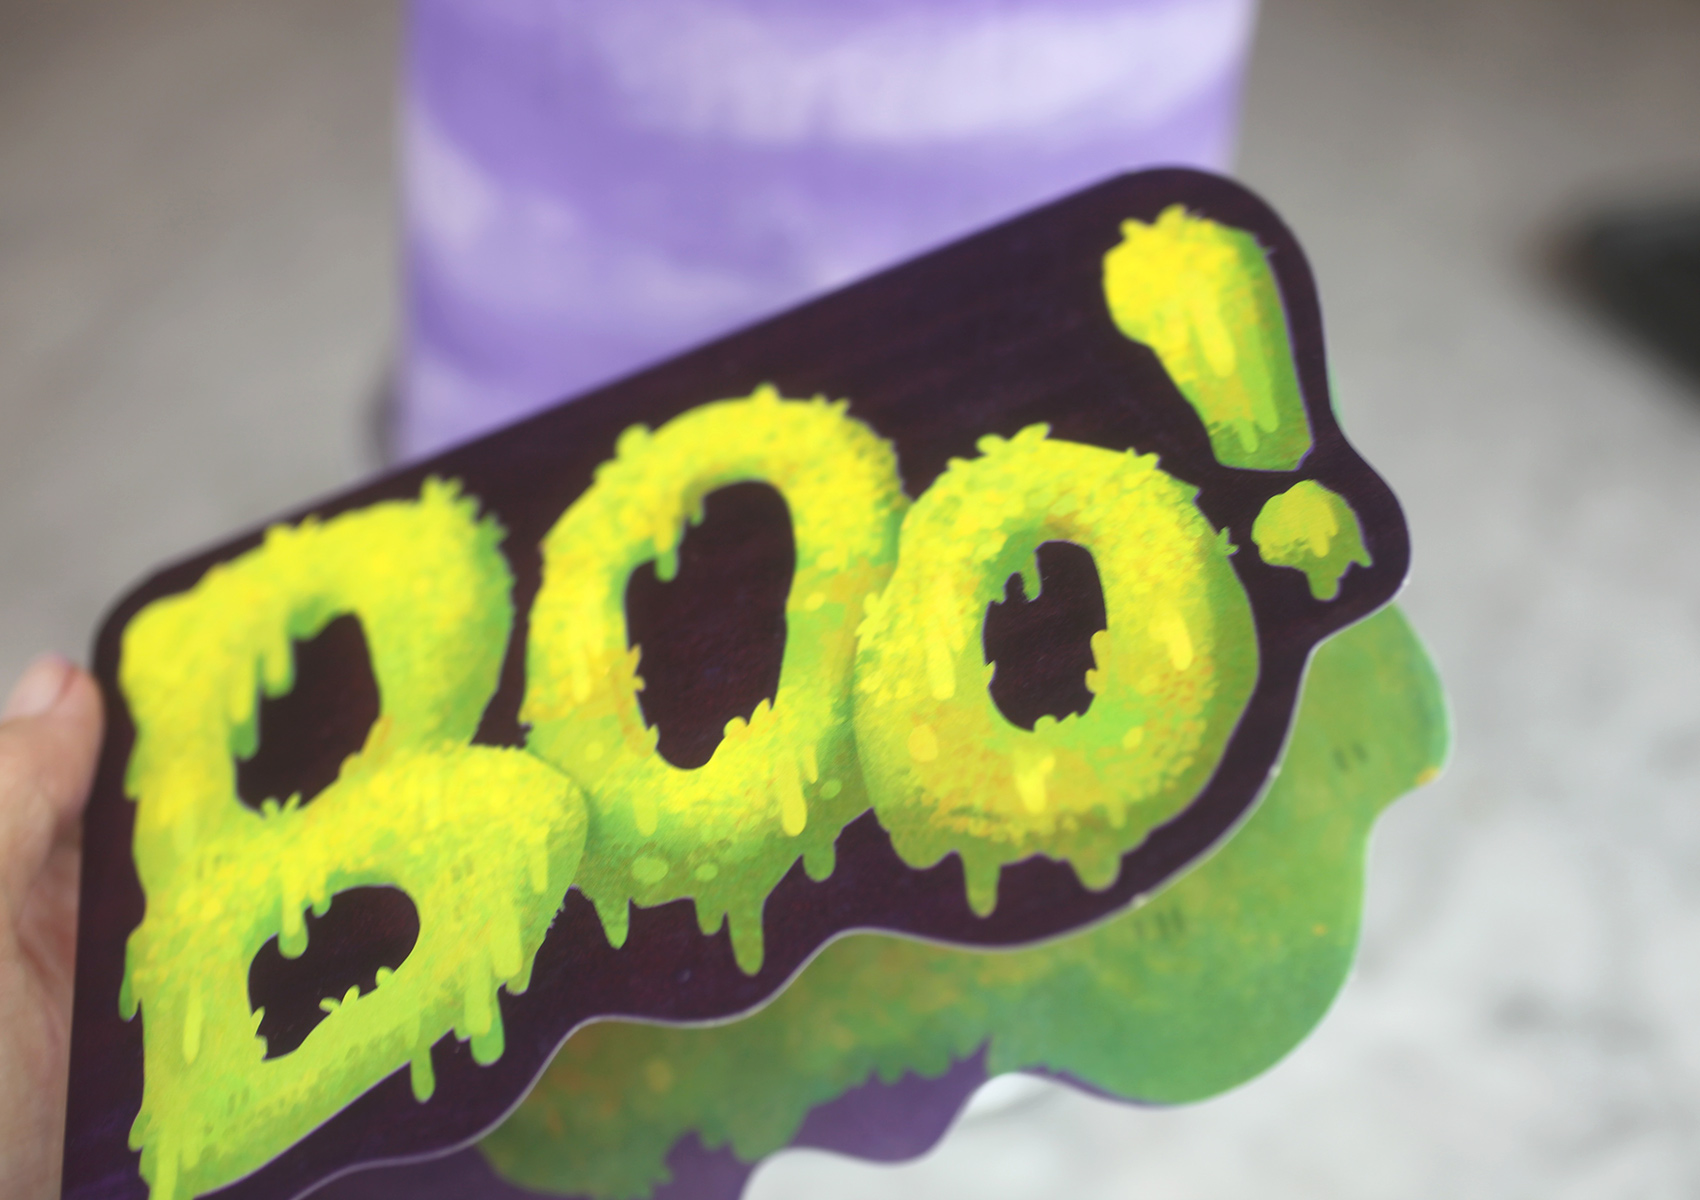
I think the cake is super cute on it’s own, but I had this idea to make a little sign for the top that says BOO! I was going to design one on the computer, print it out, etc. But then I found this card at Target and decided to take a short cut.
The great thing about using a card like this is that the paper stock is thicker and the print quality is much better than coming off of my always-almost-out-of-ink printer.
This probably would not have been my ideal design for this cake, but the colors and size went together with it pretty perfectly… so homerun!
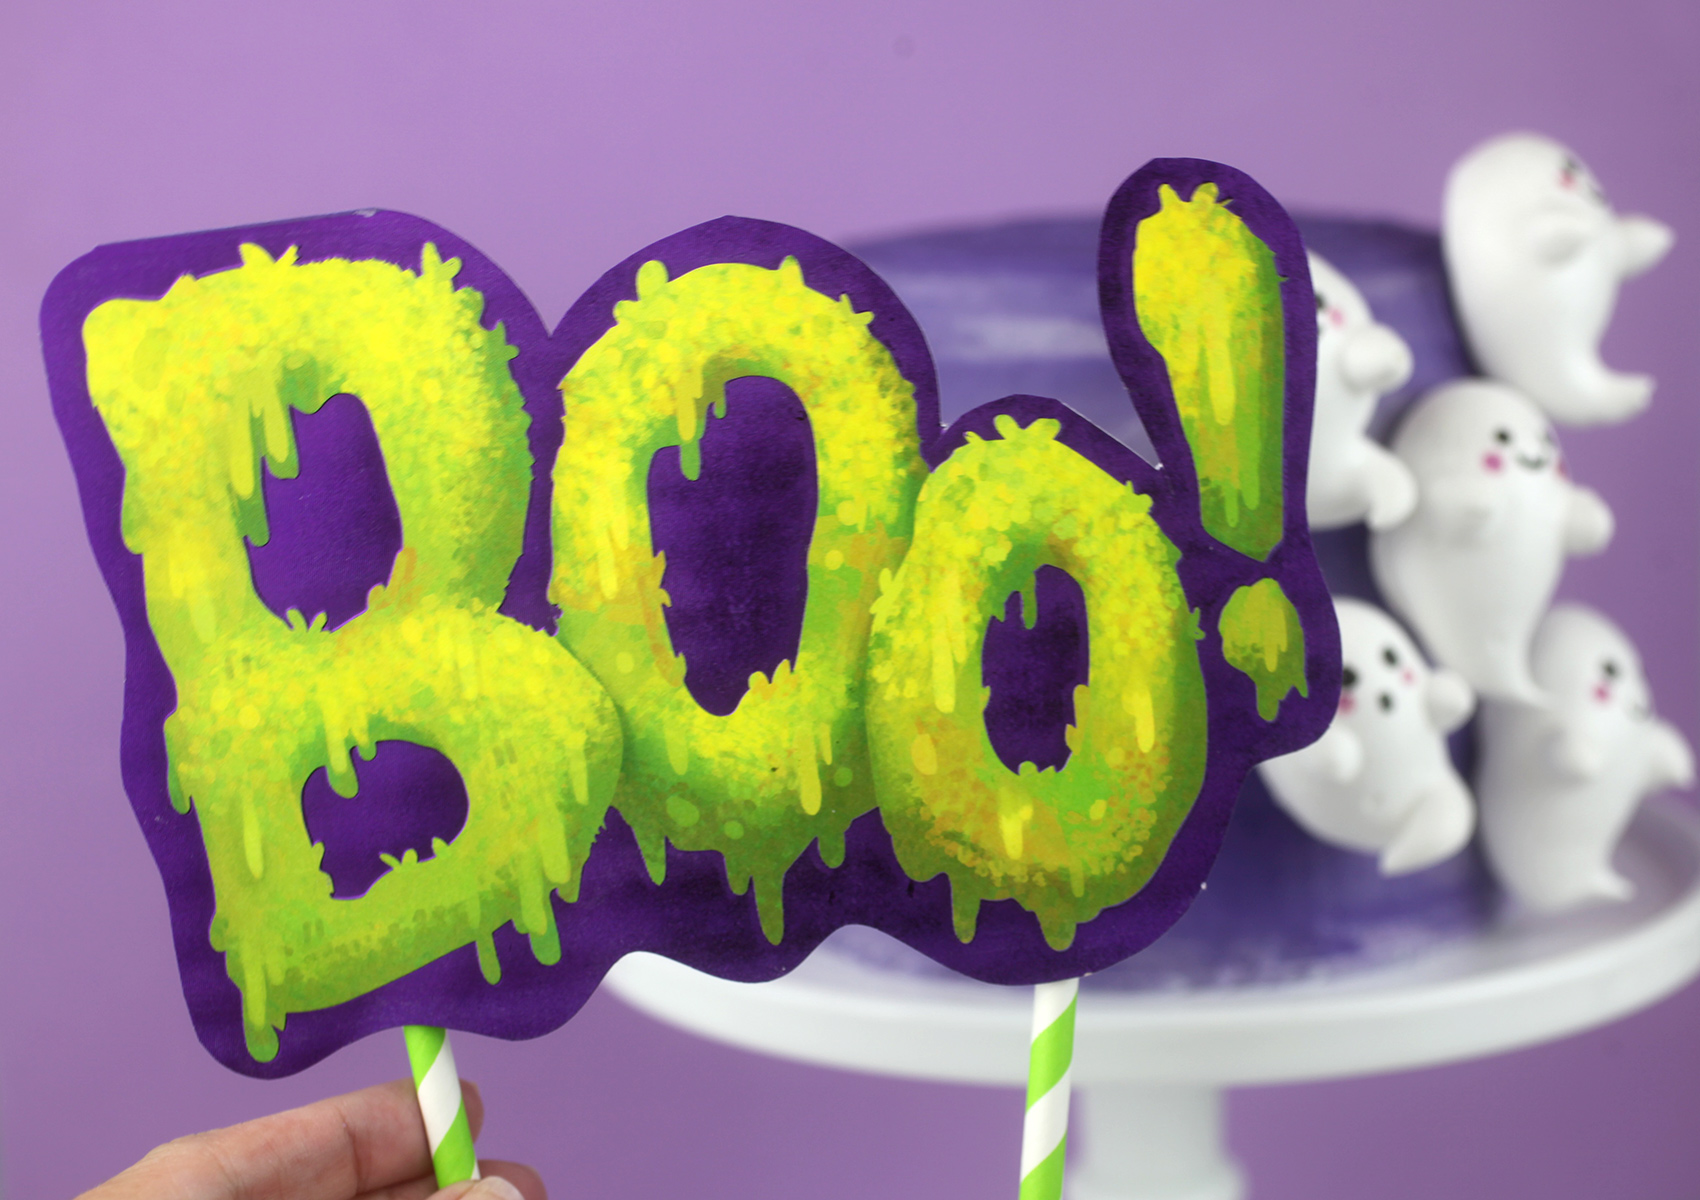
I just cut out the letters from the card and attached two paper straws to the back to make a Boo-tiful little cake topper sign.
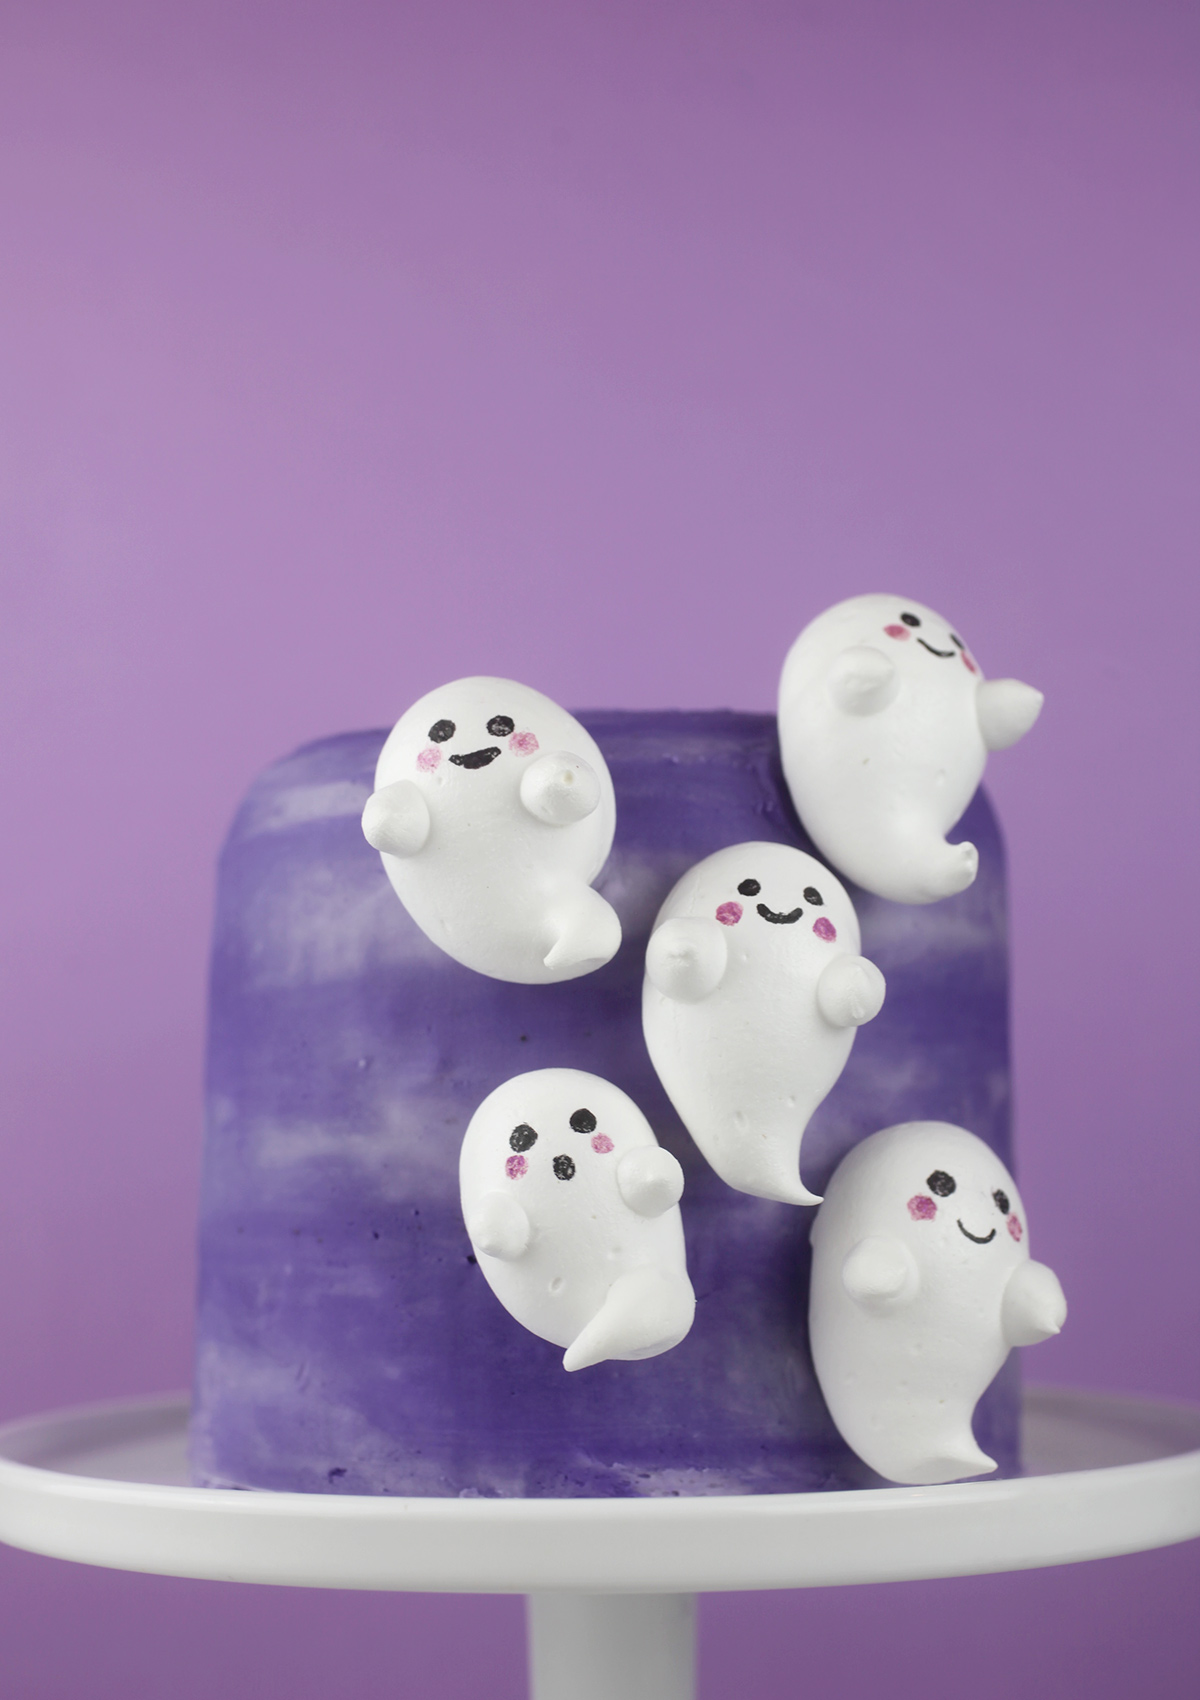
Here’s the cake with just a few floating ghosts.
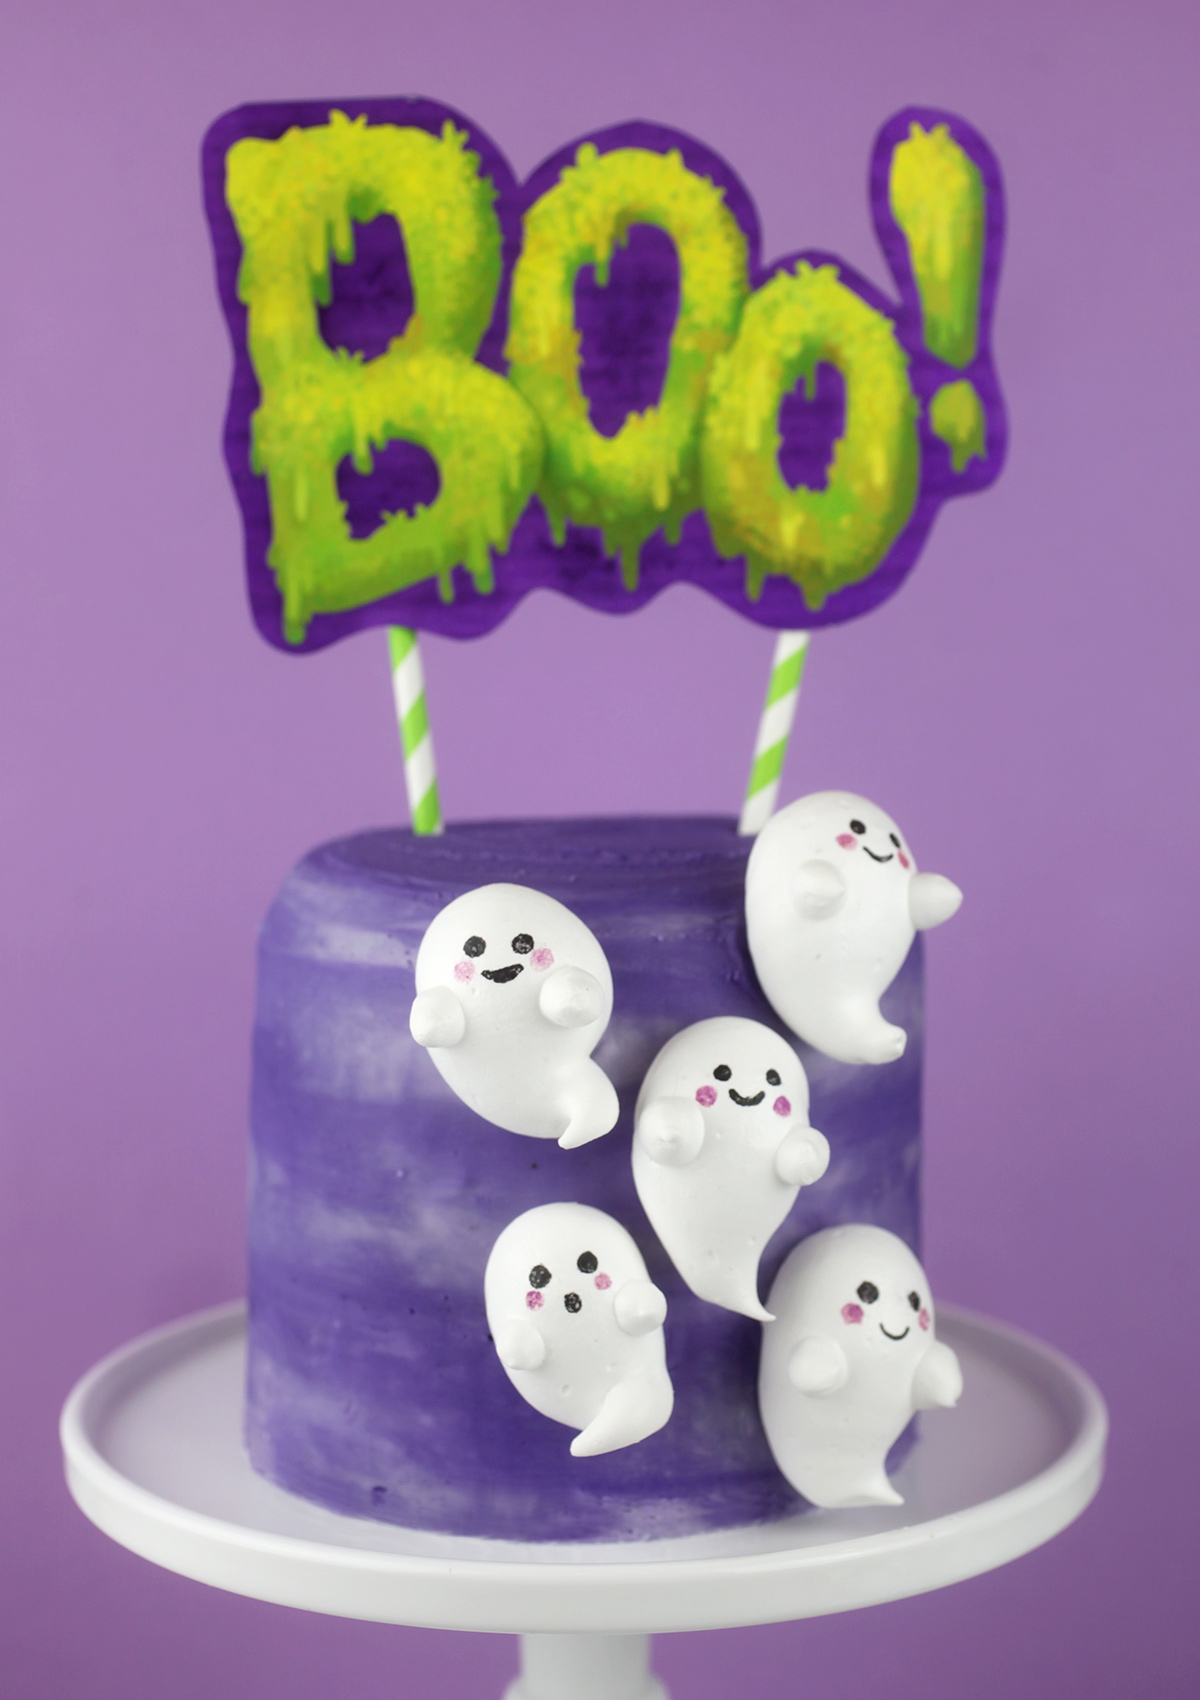
And with the sign…
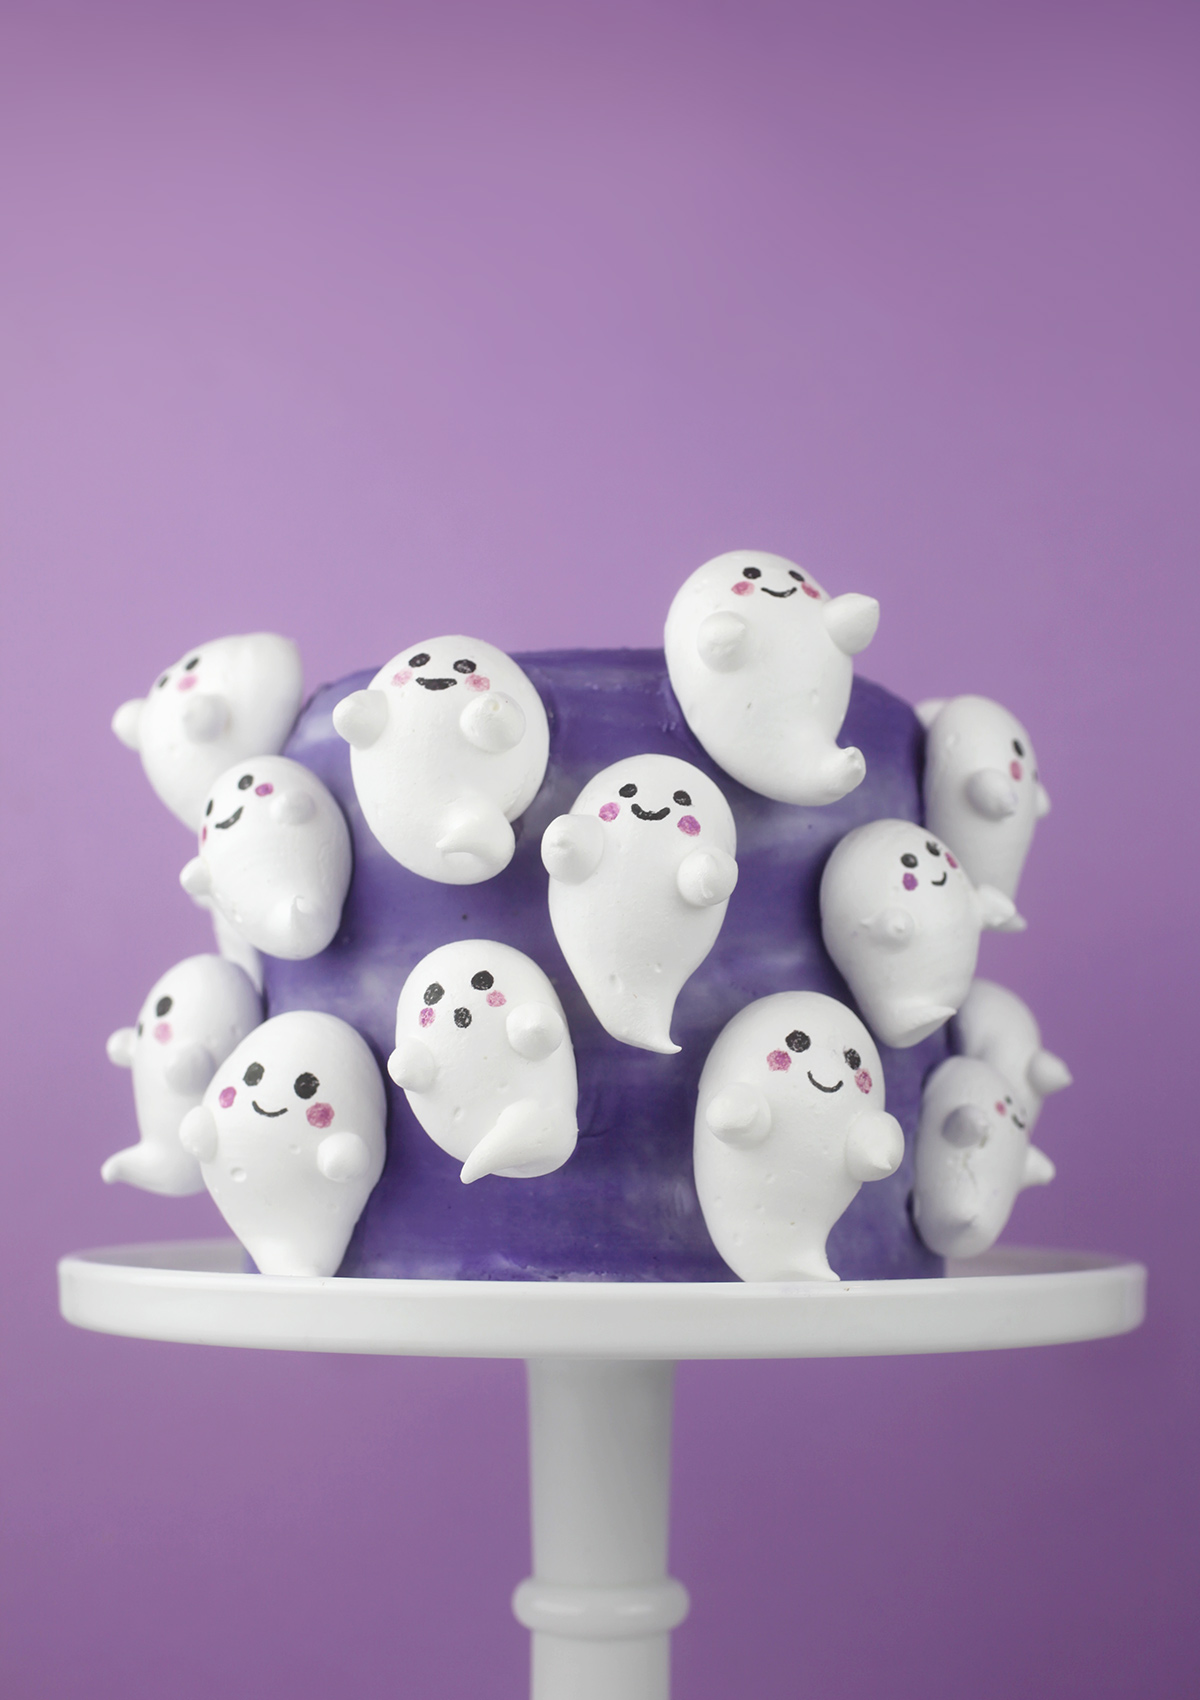
And with a bunch of boos!
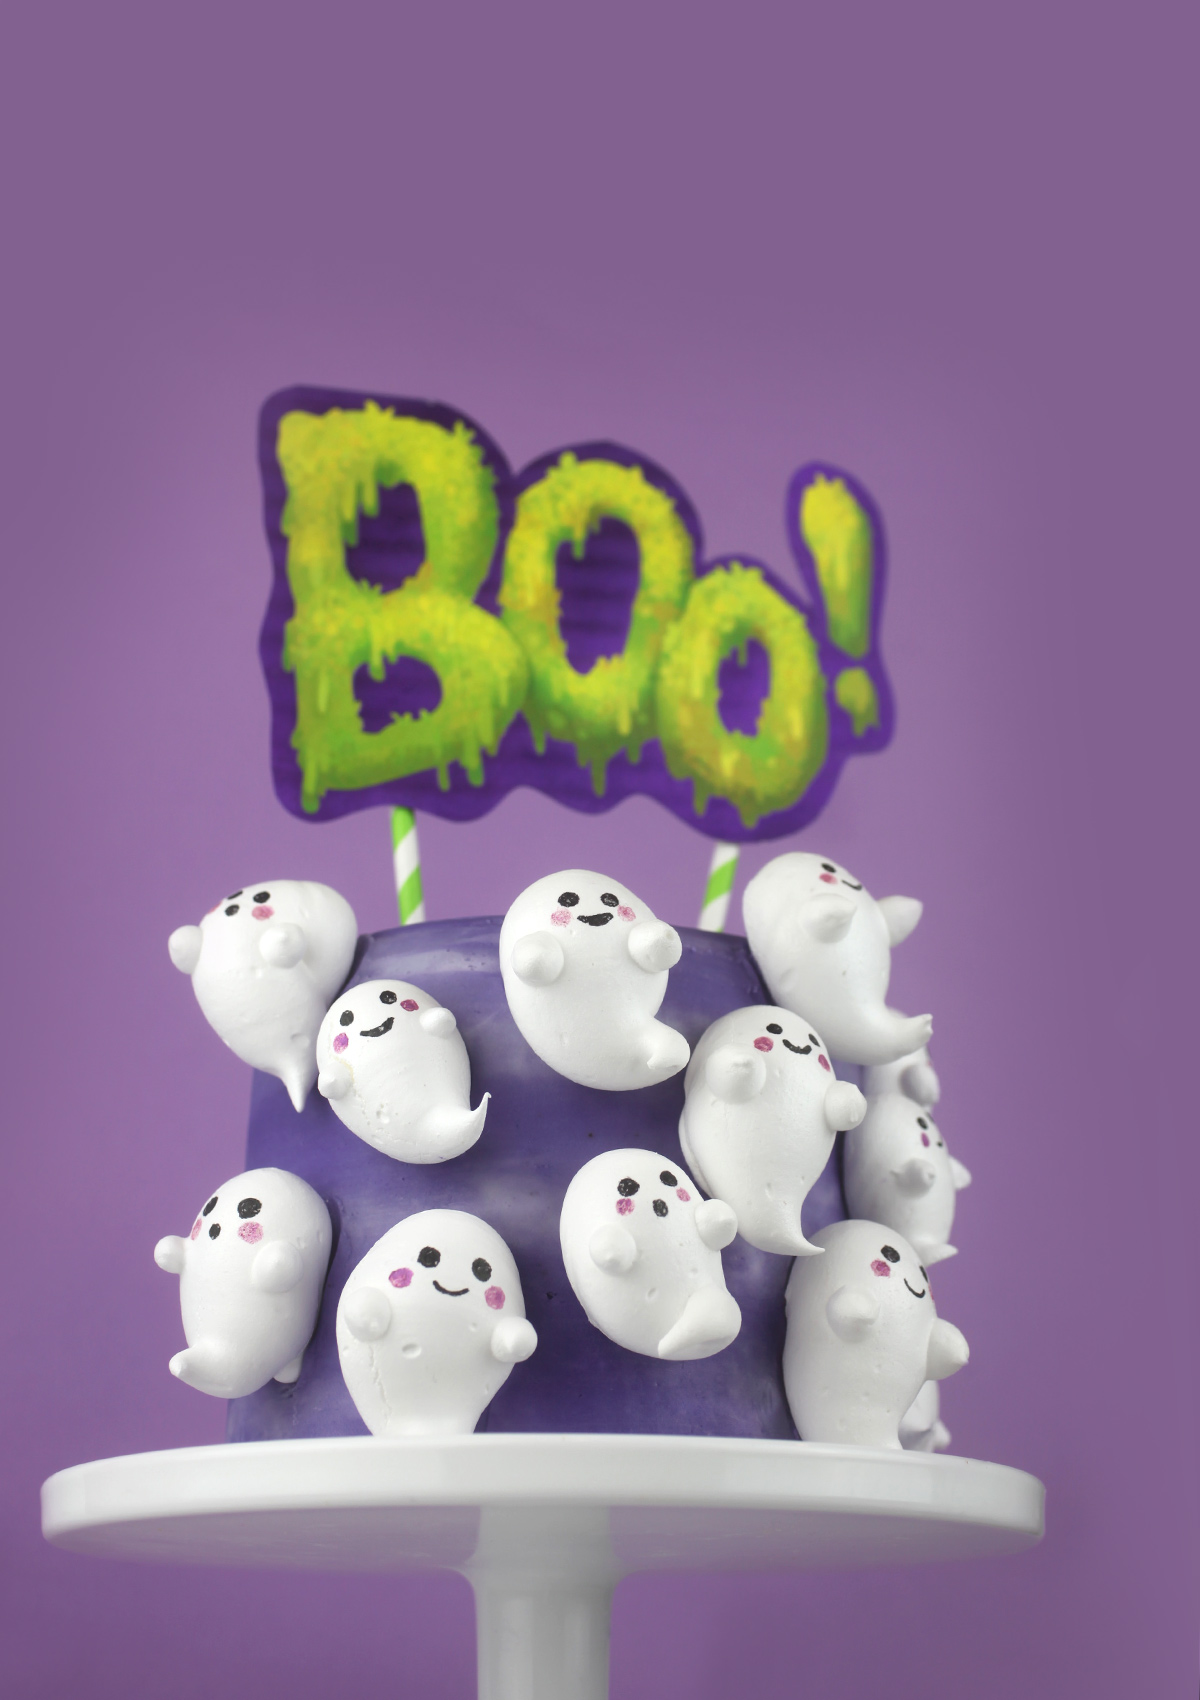
And the sign, too!
What’s your favorite look?

Besides the inside. I mean. Yum!
Hope you enjoy this cute way to display these Boo-meringues.


Boooo! Happy halloween
OMG!!! That looks so yummy. And those Caspers :D:D:D reminded me of my childhood. I definitely gonna try this. A lot of love for sharing this.
Boo!! ; )
Thanks for sharing this Angie.
Aw~ This is so cute~ A perfect Halloween cake! Thank you for the recipe, I will definitely try this!
Yeah! It looks so delish!!! But don’t know what was wrong with my ingredients measurement that the cake bread was less moist and a bit sticky from inside.. Can you suggest something to get it baked properly.
there are verry nice cakes
Cute and delicious! We switched to a laserjet printer because we got sick of running out of ink/going long stretches and the ink drying out.
I love love the ghosts and the cake looks super yummy!
Oh my God. It looks delicious! Ahh!