I had the most fun making this layer cake inspired by my blogging friend Sweetapolita’s new book.
Have you seen it yet? It’s full of all kinds of fun and yum. Page after page of recipes for luscious layer cakes and other gorgeous and adorable creations that make me want to get in the kitchen and play.
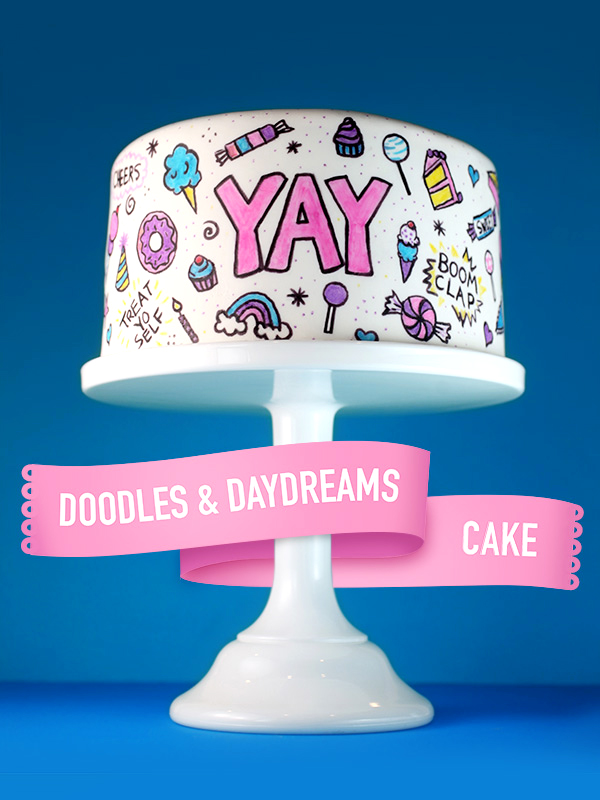
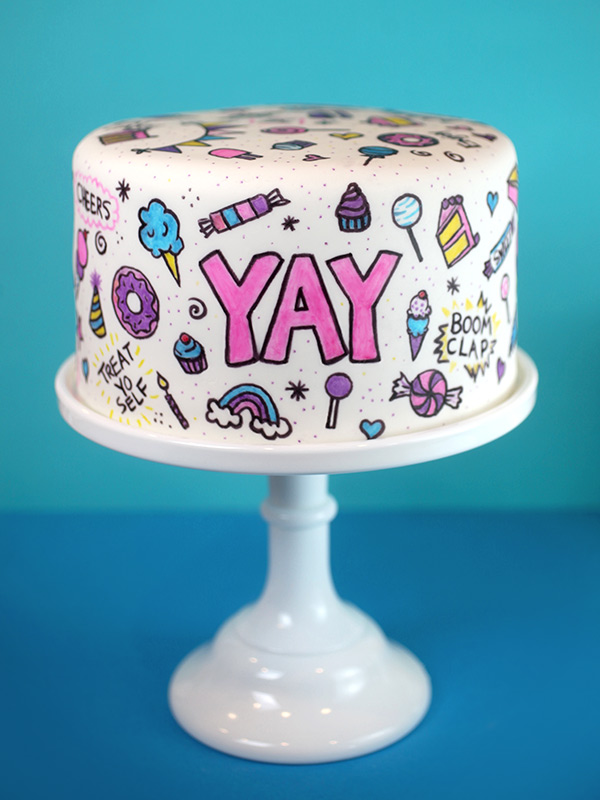
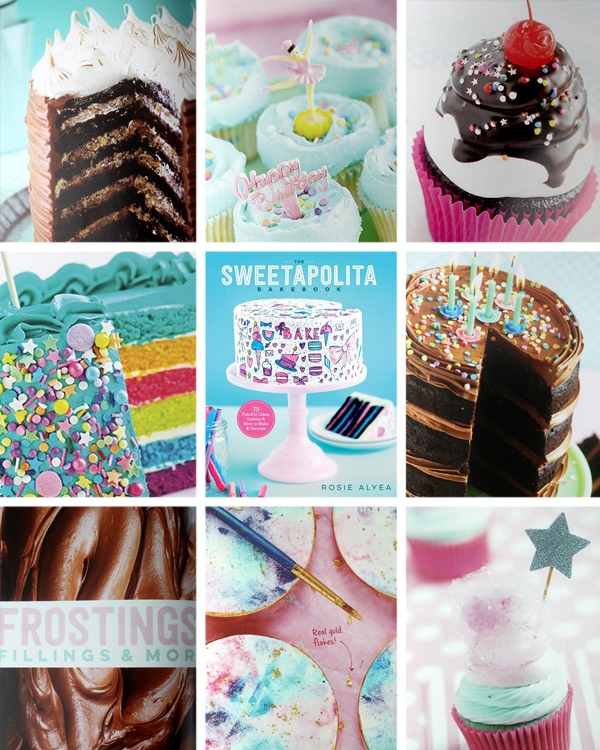
Here it is. The Sweetapolita Bakebook. When I saw the cover for the first time, I fell instantly in love. This cake spoke to me right away with it’s whimsical, playful design and I knew it would have to be one of the first things I tried.
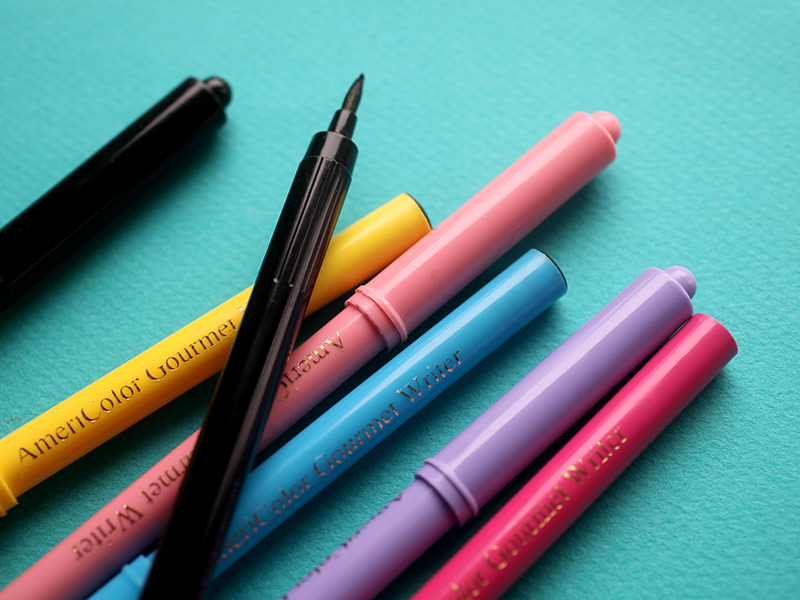
It also didn’t hurt that I already had more than my share of edible ink writing pens on hand so I basically had to make it.
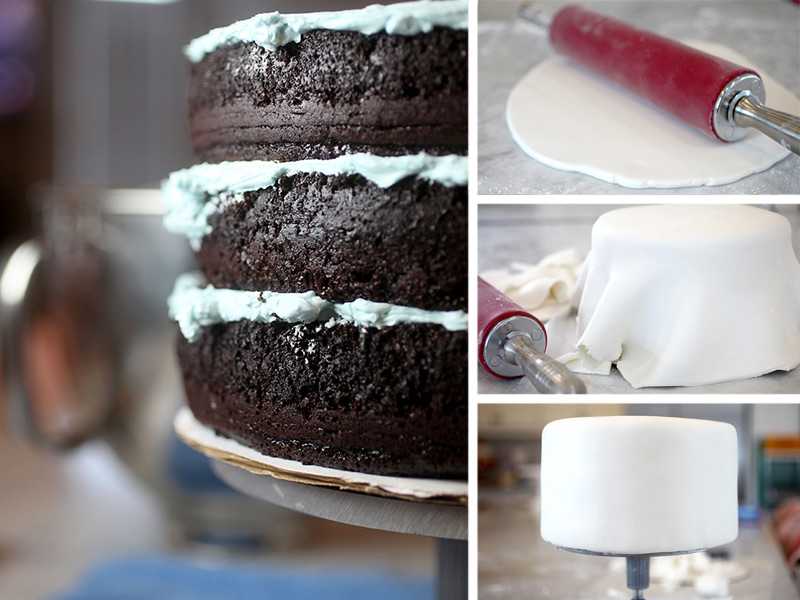
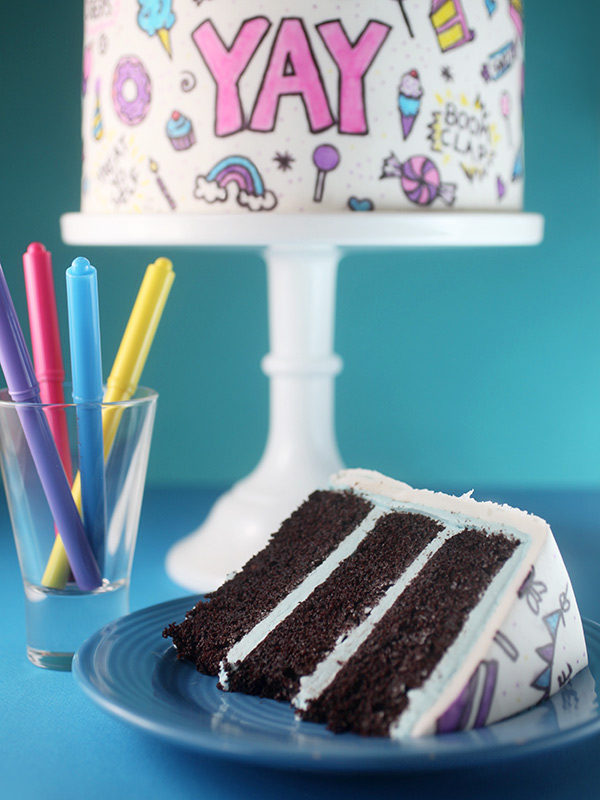
This is a big 8-inch triple layer chocolate cake filled with swiss meringue buttercream and covered in a layer of white fondant.
Basically, a big blank canvas for your creativity.
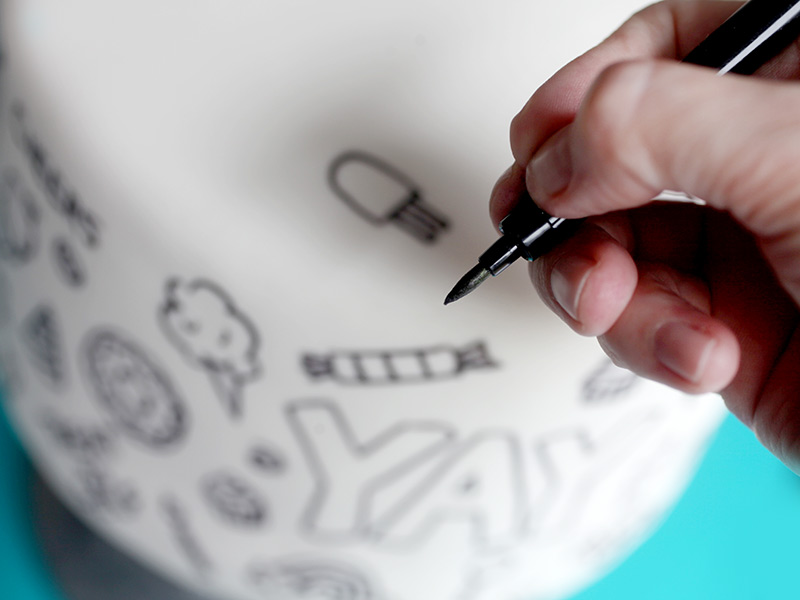
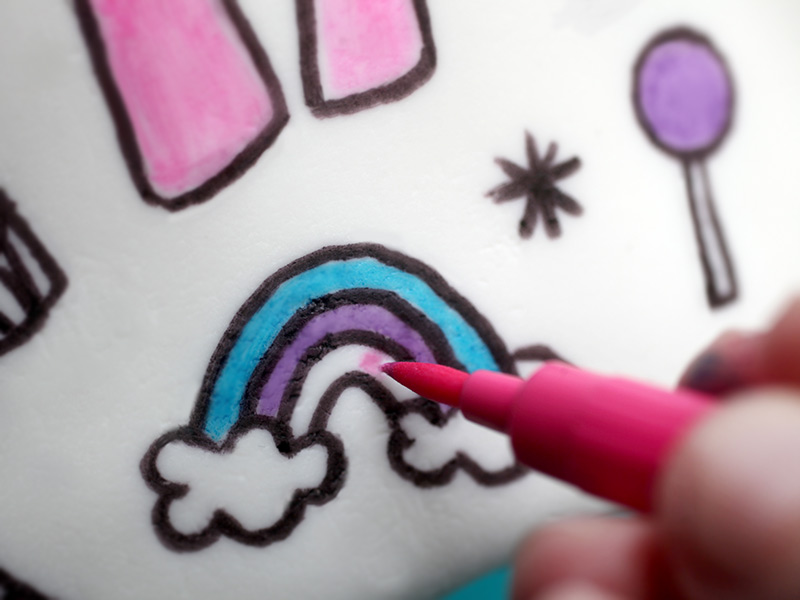
Once the cake is covered in fondant and the exterior has dried out a bit, you can start doodling. Outline or draw illustrations using the black edible ink pen first and let the ink completely dry before coloring in the shapes to help prevent the colors from mixing together.
It also helps to work in one area at a time instead of all over the place to help avoid smearing the black ink. For instance, if you accidentally rest your hand on the surface of the cake. Whoops. Yeah. That’s me. I’m a hand rester when I draw and I quickly realized that drawing at a 90-degree angle and trying not to rest my hand on the surface of the cake was a little harder than I had imagined. That’s ok though because I think some of my slightly wonky drawings add to the wonder and whimsy of this cake.
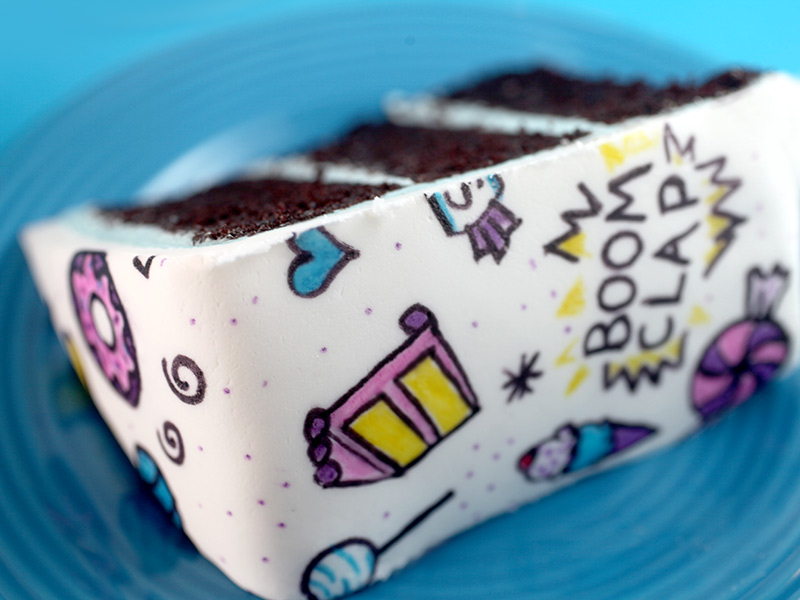
I drew simple sweets and things using pastel colors, but I could also easily see this transformed into a comic strip cake with words like POW and KABOOM and WHAM, etc. … all drawn in primary colors. It would be too much fun!
Once the black ink has dried, you can start coloring in the drawings. This was the fun part … to see it all come alive from black and white to bold and bright.
YAY. YAY. YAY. The super cutest cake. I love it. Thanks Rosie. And now, all I can think about is making another one. A fake styrofoam cake that I can cover in fondant to keep on display and look at every single day.
P.S. This cake is totally delicious. The project in the book calls for a black velvet cake recipe, but I switched it up a bit so I could try out Rosie’s Simple & Splendid Chocolate Cake and OMG………
Boom Clap! So. Soooooooo goooood!
Doodles and Daydreams Cake
Prep Time40 minutes
Cook Time25 minutes
Additional Time2 hours
Total Time3 hours5 minutes
Ingredients
Simple and Splendid Chocolate Cake
2-1/2 cups all purpose flour
2-1/2 cups superfine sugar
1 cup dutch process dark cocoa powder
2 teaspoons baking soda
2 teaspoons baking powder
1 teaspoon salt
1-1/2 cups buttermilk
1 cup hot coffee
3/4 cup vegetable oil
3 large eggs, room temperature
1 tablespoon pure vanilla extract
Swiss Meringue Buttercream
7 large egg whites
1-3/4 cups granulated sugar
2 cups unsalted butter, room temperature and cut into cubes
2 teaspoons pure vanilla extract
pinch of salt
Instructions
For the cake:
Preheat oven to 350 degrees fahrenheit. Grease the bottoms of three 8 X 2-inch round cake pans and line them with parchment paper.
Sift flour, sugar, cocoa powder, baking soda, baking powder and salt into the bowl of an electric stand mixer.
In a large spouted measuring glass, whisk together buttermilk, coffee, oil followed by the eggs, and vanilla.
With the mixer on low, gradually add the milk mixture and beat until smooth, about a minute. Use a rubber spatular to scrape the sides and bottom of the bowl. Divide batter evenly among prepared pans.
Bake the first two layers in the center of the oven for about 20-25 minutes or until a toothpick inserted comes out with a few crumbs. Repeat with final layer.
Let cakes cool in their pans on a wire rack for ten minutes. Using a knife, loosen the sides of the cakes. Place a large piece of plastic wrap over on top of the cake pan and then place a wire rack on top. Invert holding the cake board and wire rack together and place on the counter. Lift the pan and then peel off parchment paper from the cake. Wrap the cake layer with the plastic wrap and repeat with other two layers. Place layers in the freezer for about 15 minutes or fridge for 30 minutes while you make the frosting.
For the buttercream:
Add egg whites and sugar to the bowl of an electric stand mixer. Make sure it is wiped completely clean and dry first. Place bowl over a pot of simmering water. Cook, whisking gently and continuously until the temperature reaches 130 degrees fahrenheit.
Return the bowl to the mixer and fit it with the whisk attachment. Beat on medium high speed until it reaches the stiff peak stage (thick and glossy) about 2-3 minutes. Decrease the speed to medium and beat until the bottom of the bowl is cool, about 10 minutes.
Switch to the paddle attachment and with the mixer running on low speed, add the butter one piece at a time. Beat until the mixture is silky smooth, about a minute. Add the vanilla and salt, and beat on low speed for three more minutes. Tint frosting if desired.
To assemble and decorate:
Remove cake layers from the freezer or fridge and level each layer by trimming the tops of the cakes flat with a long serrated knife. Snack on trimmings while you finish the cake. : )
Place a dollop of frosting in the center of a cake board and place the first layer with the cut side down, on the cake board. The frosting will help keep it from sliding around. Place the cake board on a turntable for decorating. Spread frosting on top and then add the second cake layer, cut side down. Spread on more frosting and top with third layer, cut side down.
Apply more frosting on the top layer and down the sides for a crumb coat. The crumb coat is intended to catch any loose crumbs and to keep them from getting in your final layer of frosting. Once covered, you can use a bench scraper to easily smooth the sides.
Place the cake in the refrigerator for about 30 minutes for the frosting to firm up some. Then remove and apply a final coat of fluffy frosting on the top and sides. Make sure the surface is as smooth as possible. When frosted and smooth, return to the refrigerator at least one hour to set up before covering in fondant.
Roll out fondant to almost 1/4 inch thick with a diameter that equals at least the width of the top of the cake plus the height of the sides. In my case the cake was 5 inches tall X 2 plus 8 inches wide. So I rolled the fondant out until it was over 18 inches in total diameter.
Lift the fondant using your rolling pin and carefully unroll it on top of the cake. Smooth the fondant on top of the cake and down the sides with a fondant smoother and trim off the excess around the base. NOTE: I’d recommend Rosie’s book to get all her tips on working with frosting and fondant to help you out. She has lots of tips and goes into much more detail than I have here.
Place the fondant covered cake back in the fridge for 1-2 hours to dry out before drawing. When firm and the fondant is dry, doodle little drawings with a black edible ink writing pen. Return to the fridge for another 1-2 hours to allow the black ink to dry. Remove and fill in the drawings with the colored edible ink pens of your choosing.
The cake will keep at room temperature for 24 hours and up to 3 days in the refrigerator.
I would love to make this cake for a party I’ve got coming up, but I’m a little lost on how much fondant I need. Most charts say 8 inch rounds that are 4″ tall require 24 oz, but I have no idea how tall 3 layers of cake is! How much fondant did you use for this and/or how tall was your cake when finished? Thanks!
This has to be one of the coolest cakes i have ever seen. It is very funky and great for a regular party. The markers are so cool. Do you know where someone could find these markers. This is also a very detailed recipe and I appreciate all of the great pictures. This makes me hungry.
This cake is a creative twist on a universal theme – doodling! Merging classic chocolate cake with these handmade scribbles offers a unique way to decorate cakes. Even better is that the doodles are edible thanks to edible ink pens!
Hi,
This has to be one of the coolest cakes i have ever seen. It is very funky and great for a regular party. The markers are so cool. Do you know where someone could find these markers. This is also a very detailed recipe and I appreciate all of the great pictures. This makes me hungry.
Stunning and cute! However, with my drawing skills, I would be terrified to even TRY to draw on something so … so … public! (Which means I’d have to eat the entire cake in private by myself!)
Hi I love the look of this cake! It’s so creative and can easily be customized!
I have just started a blog of lifestyle and food and would really appreciate it if any of you could check it out!
Littlemiss-blogger.blogspot.co.uk
Thanks xx
Wow-what a stunning cake! It doen’t require any complicated piping either. I’m a newbie at baking-anyone got any suggestions for more stunning yet simple cakes?
I love Sweetapolita’s bakebook, best ever! You made a wonderful version, and it helped to take some of my fear about working with fondant. I love the buttercream. Terrific ideas on your blog!
Hey there Rebecca- sometimes comments get held up as spam and later when they get approved, they show up in the original order they were left, which makes your comment move back. Hope that helps and thank you!!!
That is so cute! and Bakerella, lets say I am comment number 8.
i post my comment and the next day, I am number 12 and i don’t
know why. well anyway, I love all your creations and i hope your creativity stays that way! :)
This is such a great idea! I can think of so many different themes for this. Who would have thought? Well Rosie and you of course! Thank you for sharing this!
I have this book too, and love it! You did a FANTASTIC job on your doodle cake! I may just try it for my husband’s birthday next Sunday. :) Looks so fun!
This site focuses on fun and easy baking. You’ll find ideas for cake pops (a Bakerella creation), cakes, cupcakes, cookies, and more. You may even find yourself smiling from all the sweetness.


What a delightful presentation. This is a great birthday gift and I think I’ll be trying this for my daughters upcoming birthday.
Great Work!
What a Lovely Cake. :)
I would love to make this cake for a party I’ve got coming up, but I’m a little lost on how much fondant I need. Most charts say 8 inch rounds that are 4″ tall require 24 oz, but I have no idea how tall 3 layers of cake is! How much fondant did you use for this and/or how tall was your cake when finished? Thanks!
WOW!
This has to be one of the coolest cakes i have ever seen. It is very funky and great for a regular party. The markers are so cool. Do you know where someone could find these markers. This is also a very detailed recipe and I appreciate all of the great pictures. This makes me hungry.
The cake is Wow!!! Amazing Artwork!!!
What an awesome idea!!! You should totally try this out with cake pops
This cake is a creative twist on a universal theme – doodling! Merging classic chocolate cake with these handmade scribbles offers a unique way to decorate cakes. Even better is that the doodles are edible thanks to edible ink pens!
Hi,
This has to be one of the coolest cakes i have ever seen. It is very funky and great for a regular party. The markers are so cool. Do you know where someone could find these markers. This is also a very detailed recipe and I appreciate all of the great pictures. This makes me hungry.
well done!
What a great cake and I LOVE all your photos! and yummi ice cream too! :)
That’s so cute! And I’m already in love with you’re cookbook! Thanks for the recipe :)
What an adorable cake! Definitely going to have to ask for the cookbook for Mother’s Day ;)
looks like an awesome book! I really want to have it…but I don’t think this is available on the other side of the globe :(
YAY for such awesome inspiration for your too cute cake. I mean, “treat yo self”..haha..I love it! You have made me need this sweet book! :)
Stunning and cute! However, with my drawing skills, I would be terrified to even TRY to draw on something so … so … public! (Which means I’d have to eat the entire cake in private by myself!)
Wooooow!!!
I love it!!
It looks amazing!
^_^
well, thank you for letting me know that!
Hi I love the look of this cake! It’s so creative and can easily be customized!
I have just started a blog of lifestyle and food and would really appreciate it if any of you could check it out!
Littlemiss-blogger.blogspot.co.uk
Thanks xx
Wow-what a stunning cake! It doen’t require any complicated piping either. I’m a newbie at baking-anyone got any suggestions for more stunning yet simple cakes?
I love Sweetapolita’s bakebook, best ever! You made a wonderful version, and it helped to take some of my fear about working with fondant. I love the buttercream. Terrific ideas on your blog!
Best cake idea ever especially for children.
I love the bright colors. I defiantly have to get this cookbook and some edible writing pens as well. LOVE IT!!!!!
so cute
That looks amazing! Almost sad to cut it :P
looks awesome :)
Hey there Rebecca- sometimes comments get held up as spam and later when they get approved, they show up in the original order they were left, which makes your comment move back. Hope that helps and thank you!!!
That is so cute! and Bakerella, lets say I am comment number 8.
i post my comment and the next day, I am number 12 and i don’t
know why. well anyway, I love all your creations and i hope your creativity stays that way! :)
Sue, Cindy, Jocelyn – Thank you so much!!!
mindy1, allie – there are too many ways to customize this idea. I really want to try a superhero theme.
Mira and Caroline – hope you try it out. Sweetapolita’s book will help you out a lot – so many good ideas.
I want to do this. Such a fun idea. Thank you for sharing that book. It looks amazing.
This is such a great idea! I can think of so many different themes for this. Who would have thought? Well Rosie and you of course! Thank you for sharing this!
You did an absolutely fantastic job with this!!!
Such a lovely idea! I have to try this out one day! x
I just got this book and love it. I can’t wait to the make homemade sprinkles. And love your cake.it is so cute!
What an awesome cake for a teen girl’s birthday. (Or MINE!) Boom clap!!! Thanks for the inspiration.
That would be so adorable for a kiddy party :D
I have this book too, and love it! You did a FANTASTIC job on your doodle cake! I may just try it for my husband’s birthday next Sunday. :) Looks so fun!