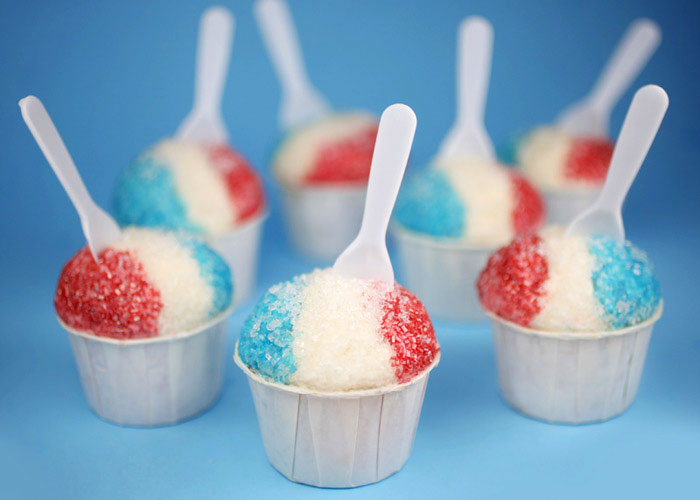
These snow cones won’t melt. Nope. They’re not icy… but they are frosted.
They’re snow cone cupcakes and they were a lot of fun to make.
I decorated them in red, white, and blue so you can see how cute they can be for Memorial Day or the Fourth.
When I made them, I wanted more than just the tops to resemble snow cones though. I wanted the cupcake to be tri-colored too. But not the usual layered look you see from bottom to top.
No. These should be layered vertically to match the frosted tops, right?
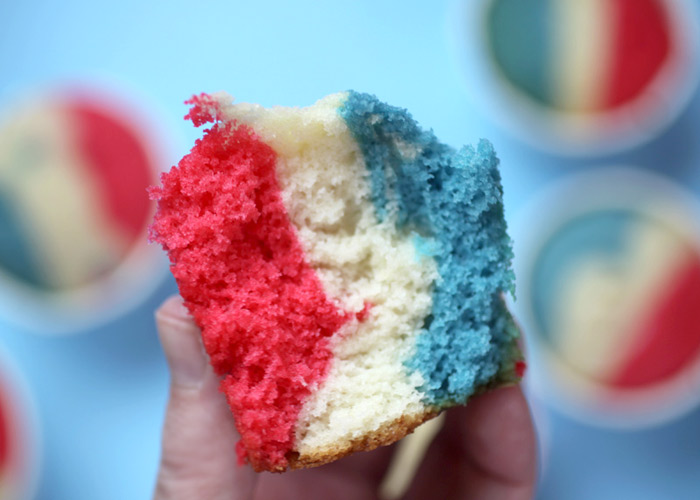
Yes and Yay!
To be honest, I’m glad it actually worked so well. I wasn’t sure when I first started thinking about it, but they came out just like I had hoped.
And they’re an added little surprise when you bite into them.
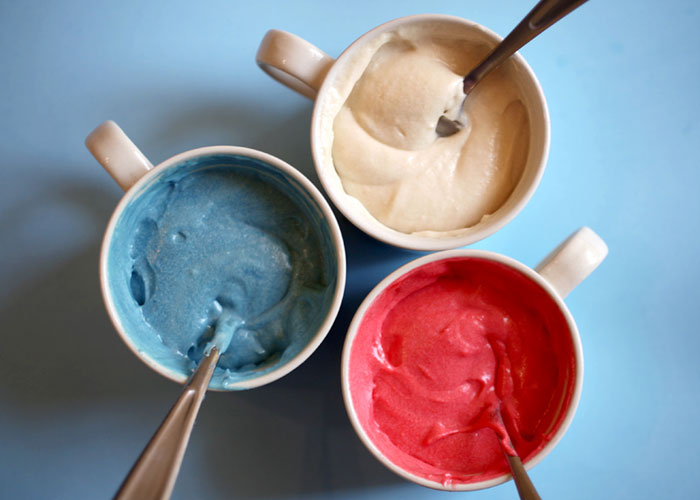
Divide the cake batter equally and then tint a third blue and another third red.
The plain batter is good to go.
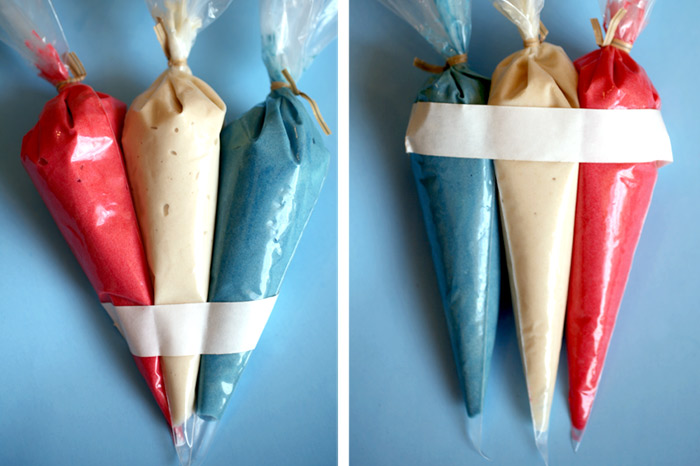
Now the fun part. Spoon each color of batter into a decorating bag and tie the end with a twist tie. For this to work well, you need the colors to fill the baking cups at the same time.
I taped the bags together so I could hold them as one unit. The photo on the right is no good. Taping them at the top causes the tips to separate and you’ll make a mess trying to fill the baking cups this way. Trust me. : )
Instead tape the bottoms so the ends are closer together. Lay the bags on a flat surface and tape them so they are in a row. This will give you a lot more control when you pipe.
Prepare baking cups… Take a deep breath … and cut the ends off the decorator bags at the same time. Try to hold the bags at the top so you can apply even pressure to all three and slowly fill each baking cup with batter. Move the tips of the bags back and forth as you apply pressure so they fill evenly with batter.
Then bake!
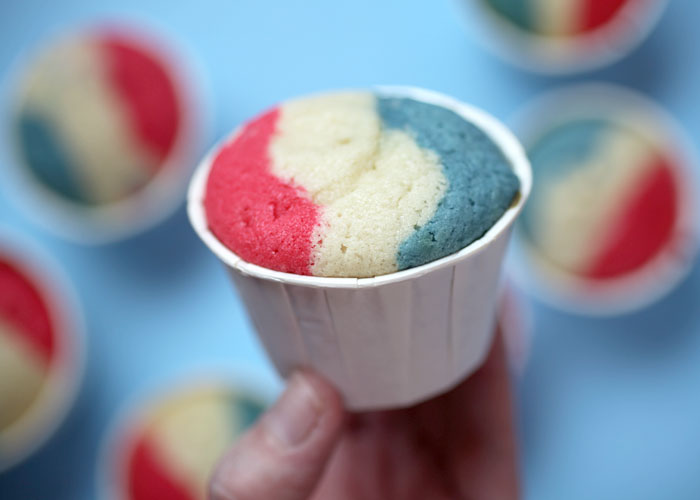
And voila – vertically tri-colored cupcakes. Yippee!
All you have to do now is decorate.
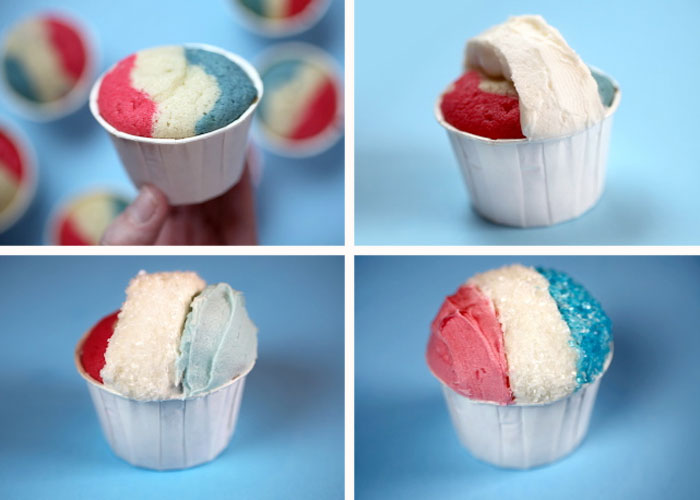
I baked these in candy cups and then frosted and decorated them in sections. Middle first – dipped in sugar crystals. Then blue with blue sugar crystals and then the red. I like sugar crystals for this project instead of sanding sugar because the size of the crystals are bigger and look a little more icy, but you can use either. And technically, if your frosting is tinted the right color, you could just sprinkle the entire tops with white crystals.

Once frosted and covered in crystals, use a toothpick to manipulate the frosting and make sure the rim of the paper cup shows. This will help pull off the look.

Note: You can bake these in candy cups or regular baking cups. If you use candy cups, make sure you find the ones that aren't wax coated on the inside. Here are some I found online that are meant for baking in. Most of the ones I've seen in stores have the coating on the inside. And if they are hard to find, you can also just bake them in regular baking cups and place them in the candy cup before you decorate.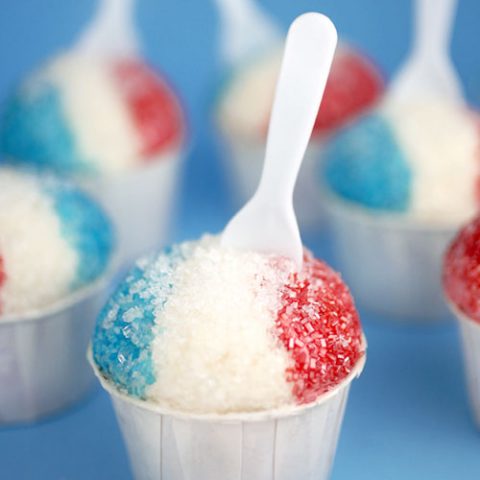
Snow Cone Cupcakes
Ingredients
Red white and blue cupcakes
Frosting
Instructions
Remove and cool. Makes about 16 cupcakes.
Scrape down the sides and add milk. Mix until smooth and creamy. You can also add a couple of drops cherry oil for extra snow cone flavor.
Makes enough to frost about 8 cupcakes with high domes of frosting. Double the amount for this cupcake recipe unless you don't plan on frosting your cupcakes this high.Notes

Serve with little plastic spoons for full effect and see who you can fool!


Where did you find the candy cups
Love these Snow Cone Cakes, seems super delicious and amazing . Will love to try these, super excited to try these cupcakes.
amazing content!
Great recipe! I made it according to your recipe and the taste is great! Everyone in the family likes it, it makes me happy. Thank you
Your writing always makes me smile! Lovely snow cones!! Thanks!
Cute! These are great for parties. Thanks for sharing!
Oh my gosh, I’m so glad I found this snow cone recipe, my grand kids are going to love doing this for the 4th of July!
my company wanted Moneygram Money Order Claim Card last year and found a great service with a lot of sample forms . If others are requiring Moneygram Money Order Claim Card too , here’s a
https://goo.gl/ZfKNaH.You are so creative. These look really great. I can’t wait to try these out this 4th of July. I know everyone will love them!
My kids are going to love these, love the colours…
Wow, these are super cute! I can’t wait to make these. How far in advance can you make these cuties?
Thank you for your brilliant mind! :)
I can’t wait to try these for the 4th of July this Friday.
Absolutely adorable! Found this through a Google Image search and Im glad I took a double look! I was browsing American Flag Dessert ideas for decorating the top of my brownies for a upcoming party. I told hubby what if I made these? He said Good Luck finding a way to keep them frozen! These cupcakes completely fooled him as well. I cant wait to make these for the party. The hunt is on to find the cups! Thanks again!!!
they are adorable when a creative idea works bakeralla it is such a joy for everyone.
Super cute! Making them this weekend! Do I bake these in a mini muffin pan? They don’t look like reg size cupcakes. Thanks!
cute! good for july 4th!!!
These look delicious, and I really thought that they were snow cones at first!
These are adorable. I have been looking for ideas for my 7 year old daughter’s B-day party treats and these are a definite possibility. I tested them out over the weekend and they were a hit. Thanks for all of the lovely ideas.
These are cute! You can find these same little cups at our website as well. We sell them in groups of 250 instead of the 350. http://www.freshwatersystems.com/p-321-pleated-souffleportion-paper-cup-325-oz-sleeve-of-250.aspx
this really looks like snow cones
You are the most talented baker i know ,followed by Buddy from Cake Boss
That’s a lot of frosting.. but there’s never too much of it! Love the idea~ :D
Soooo many comments…..looks like you have a real winner here. So appropriate for upcoming Patriotic Holiday too.
QUESTION – Do you have to do anything to the inside of the party cup? Does it come away when time to eat with no sticking? Isn’t it hard to tear that rolled edge to open it? Please help. Thanks so much.
I love your idea Bakerella! They’re so creative and cute! I hope one day I’ll be like you. Because your so creative!
Thank you for sharing an awesome idea! I have a question. Did you buy the Solo or the GenPak cups on the website you linked to?
Thanks,
Adorable! So cute! You are amazing!
looks cute
Hi! LOVE this recipe!
I just wanted you to know – I featured this recipe in my Memorial Day Recipe Round Up here -> http://www.momsmenuplanning.com/2013/05/memorial-day-recipe-round-up.html
I love them
That is so awesome
OMG i really thought those were snowcones GOOD JOB you fooled me
My coworkers would love these! I think the Polka-dot cake I just found–based on this technique shown here–would be a great thing for them, too. We need cheerful things in the Intensive Care Unit–it gets depressing in there many times!
I am from USA but have been living in Chile for 26 years. I LOVE this site and all you’re creative ideas! I’ve just recently been trying to start a little business including selling cupcakes. However, NONE of the “cake” part of my cupcake is as soft and fluffy and tender as what I remember from the states. What am I doing wrong? The cake is denser, and a bit heavier. Also, I tried making 2 color cupcakes the other day, and it seems like the food coloring leaves a bitter taste? Any suggestions? Thanks!
I love your blog and everything you teach. I want to thank you because you inspired me to make these cupcakes with the colors of Mexico to celebrate its Independence day.
Kind regards.
Gaby.
Would love to make these for my son’t birthday coming up in Sept. Could you tell me where you got the baking cups? Thank you!
these are amazing im going to try them tomorrow for my friends sons birthday party i just loove them
i think they r the size of a mini cupcake so u should probably get double and give everybody two
Bakerella-
What is the approximant size of these? I am making them for my sons party and wanted to know if it was the same size as a cupcake before I ordered them.
Thank you!!
How cool! Great idea!!
How did you frost them with the different colors, every time I try they just get smushed together and mix with each other and it looks ugly? Please help.
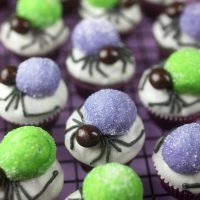
These are adorable and taste great, too! For the less ambitious, they look great in single colors, too. I made purple (“grape”), pink (“strawberry”), and green (“lime”).
Hi! I’m an amateur baker and loved these cupcakes as soon as I saw them. I made them for the fourth of July. Everyone at the BBQ events nuts and loved them! :) thanks for the creative and fun design!
Fabulously adorable snowcone cupcakes!
How did you get the top rounded like that? Is it just frosting piled high or is there a marshmallow or something tucked under the icing? Thanks for your sweet ideas!
I was just flipping through your blog and came across these. The picture caught my attention and I had to read on to see how you found a way to make snow cones at home, because these looked very authentic. Well, I’m even more impressed now that I know that these aren’t even snow cones.
Making these was definitely a challenge; thank you for the inspiration! However, they taste exactly like sugar cookies….not cupcakes…is that normal or did I do something wrong?
nvm. just spotted it! lol
how full did you fill each paper cup? I don’t wanna risk overflowing!
Where can I purchase the paper cups and plastic spoons?
We made these for Memorial Day, and I am blogging about that tomorrow. These were some of the very best tasting cupcakes ever, and super-cute! Not even that difficult to make, though everyone thought they were. ;-) Thanks so much for the recipe!!
sooo cute and creative! i love it!
Those are great! And I found a good way to get a small quantity of spoons. I went into a local ice cream parlor, showed the guy behind the counter the picture of the cupcakes, and asked if he had any idea where I could get a dozen or so of those spoons. Thankfully, he just gave them to me for free! (I went ahead an bought ice cream and tipped him, too, for his help.) Might not be a bad idea for others to try!
wow!!! this is amazing….now I’m hungry!!!
my friend recommended this website to me. She also has her own baking website pls pls pls check it out
@ jaspere.wordpress.com
She would truly appreciate it. however, she only just created the website and therefore, its going to develop. PLS PLS PLS at least have a look.
Bakerella you make me feel like Cinderella when i’m eating your “ideas”
Do you make these up?
‘Cause they are simply MAGICAL
Emphesis on the MAGICAL!!
Please reply back-
Aaliyah-
Love it! The idea is so awesome.
What a fantastic idea. They really do look like snow cones!
I love the three-color technique! These look absolutely stunning!
You are awesome!! AWESOME :)
Love these cupcakes! I just baked all my cupcakes and will b frosting them shortly. One thing I discovered when my 4 &5 yr olds were taste tasting :)was that the cupcakes do not come out of the cups very easily. But we used the little spoons so they r both pretty and useful.
You are just too cool! I love these—even though I’m not eating sugar, or flour! It just isn’t fair!
What a beautiful blog! :)
You have the bestest, cutest ideas!!!
That is so cute and it looks like a lot of fun to frost (and just messy enough to make it extra fun for many kids).
I saw the sno cone cupcakes on the cover of Food Network magazine, which were done by JustJenn. She made them 2 years ago for a friend’s baby’s first birthday and we were all so excited to see her featured on the magazine cover! Striping the batter is a fun twist on JustJenn’s design.
These are FANTASTIC! I am absolutely making them for the 4th of July!
so freaking cute!! I’m going to do this for 4th of July!!
Haha. What a great idea :D
I LOVE these! I’m definitely making them this year!
These look great! I love how the cake itself is tri-colored as well as the sprinkles! My girls and I made snowcone cupcakes last summer by baking the batter right in to a paper snowcone cone. We made our own colored sprinkles, but the Wilton ones you used look much more like ice crystals. I’ll have to combine our two ideas and give it another spin! Thanks, as always, for being an inspiration! Jenn/Rook No. 17 (http://www.rookno17.com/2011/06/snow-cone-cupcakes.html)
This makes me want shave ice! Too cute
Hello bakerella I amreally big fan. Would u know which is the biggest piping tips is it the ateco ones or the Wilton 1M? Please help. I have been hunting for the biggest ones to decorate cupcakes.
Oh my goodness I have been looking for candy cups to bake with for YEARS! Thanks for including your source!!
Are you kidding me? These look great!
SO cute! My daughter works at an Italian Ice place, and she will love these!
I always wonder if you will ever run out of ideas…and it seems like the answer is no!! I sure hope not!
Made these for Memorial Day BBQ…..what a hit! I had to make a second batch for my office and they are going crazy over them. Thanks for the great idea and great instructions. The only problem I ran into is by filling the cups they overflowed. I then started not to fill them and they came out just right. Again, thank you for such a great idea! Truly a great hit!!!
Ok this is seriously the CUTEST idea ever. How is it that I am just now finding your site? Love it!
I am a snow cone freak, and even though these aren’t the real thing I LOVE this!
You are a super cool genius!!! :)
Hello Angie, I really enjoyed making the cupcake pops and cupcake bites and I have just posted them on my blog. if you want have a look I would be glad!
Thank you,
Annalisa
How DELIGHTFUL! Whenever I see an email from you, I become automatically HAPPY! I sorta do a little “Happy Dance”. Sometimes, like today, I go through and clean out my Blah, Blah, Blah emails and save the best for last. Which is YOU! And, once again you never disappoint. Another “little Happy Dance” Today! Thanks!
I tried making these cupcakes for memorial day and they came out great. Thanks for the great recipe. Except I saw these at the last minute so I didn’t have time to order cupcake liners online. I just found cute ones from JoAnn’s that were Wilton. They were blue and red and had little white stars on them. They did have wax coating so I just made mini cupcakes in cupcake liners and put them in it. Since I made mini cupcakes I just made each cupcake a different color. I also couldn’t find little plastic spoons so I cut up straws and put them in. They looked so adorable.
wow wow wow amaizing
What if you buy the frosting instead of making it? Will it still turn out good??
ok so I thought you could take soup cans put the cone shaped snow cone papers in them and bake … red at the bottom, followed by white layer, and then blue … you could ice and decorate the way you demonstrated or just one color… right?
I have to say I’ve been to this blog a lot but never commented. I have to say you are one talented women! I wish I could do things like this.
I made these today! They took up a good amount of time due to the frosting and sprinkling 3 times. HAHa! But they turned out amazing! I can’t wait to take them to my Memorial Day Picnic! Thanks for the great idea! I will be mentioning you on my Cupcake Facebook page!
Im going to use box cake how many boxes do you suggest getting i have now will it be enough
OMG! This looks so much fun! I’m going to make this with the ‘European Champion’ soccer this june. I’m from Holland, so this looks so much fun to make, and eat!
Those are adorable! Love, love the idea so much.
These are SO great! I can’t believe how much they resemble snow cones!
Wow, these look like real snow-cones! They are AMAZING!
Ahhhh! I LOVE THESE! You are so creative!
Thank you so much for posting this – you are always so creative! I referenced these cupcakes in my blog post today:
http://essenceofkate.com/2012/05/25/if-you-are-what-you-eat/
They looked too good not to share!