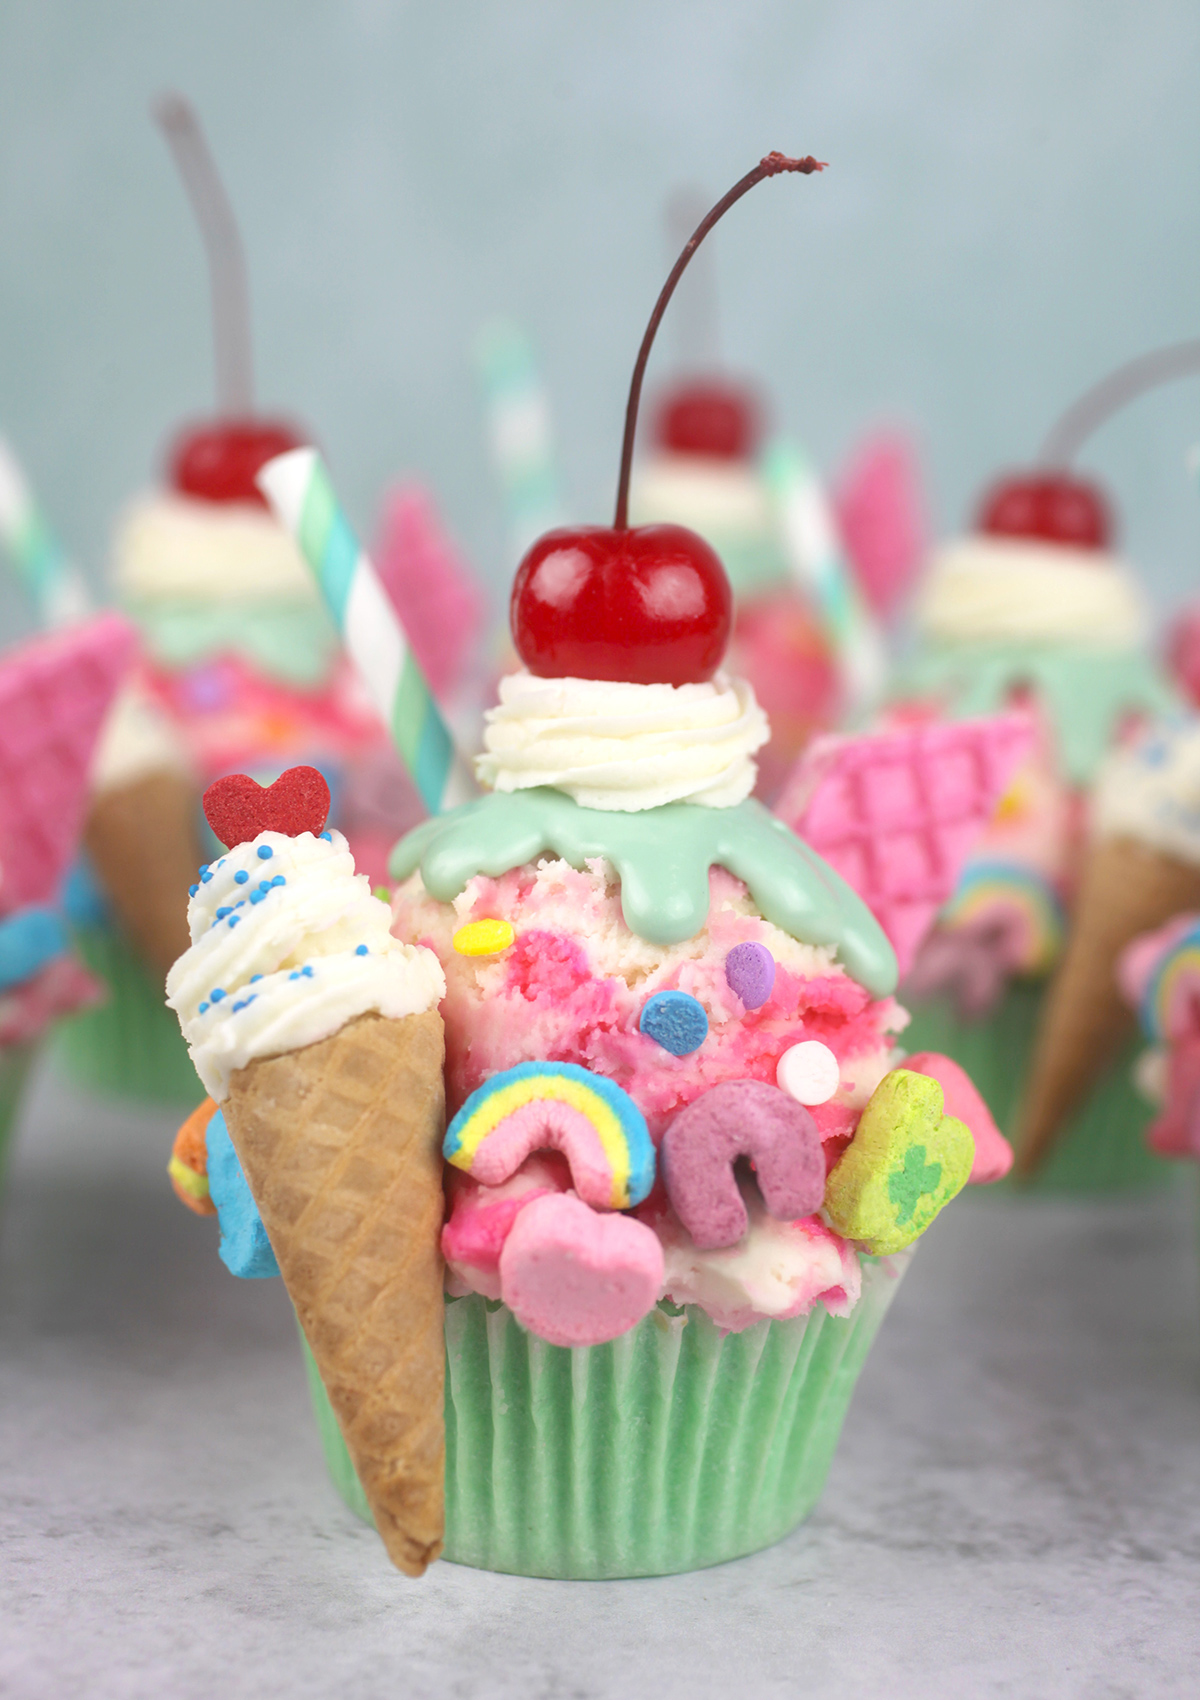
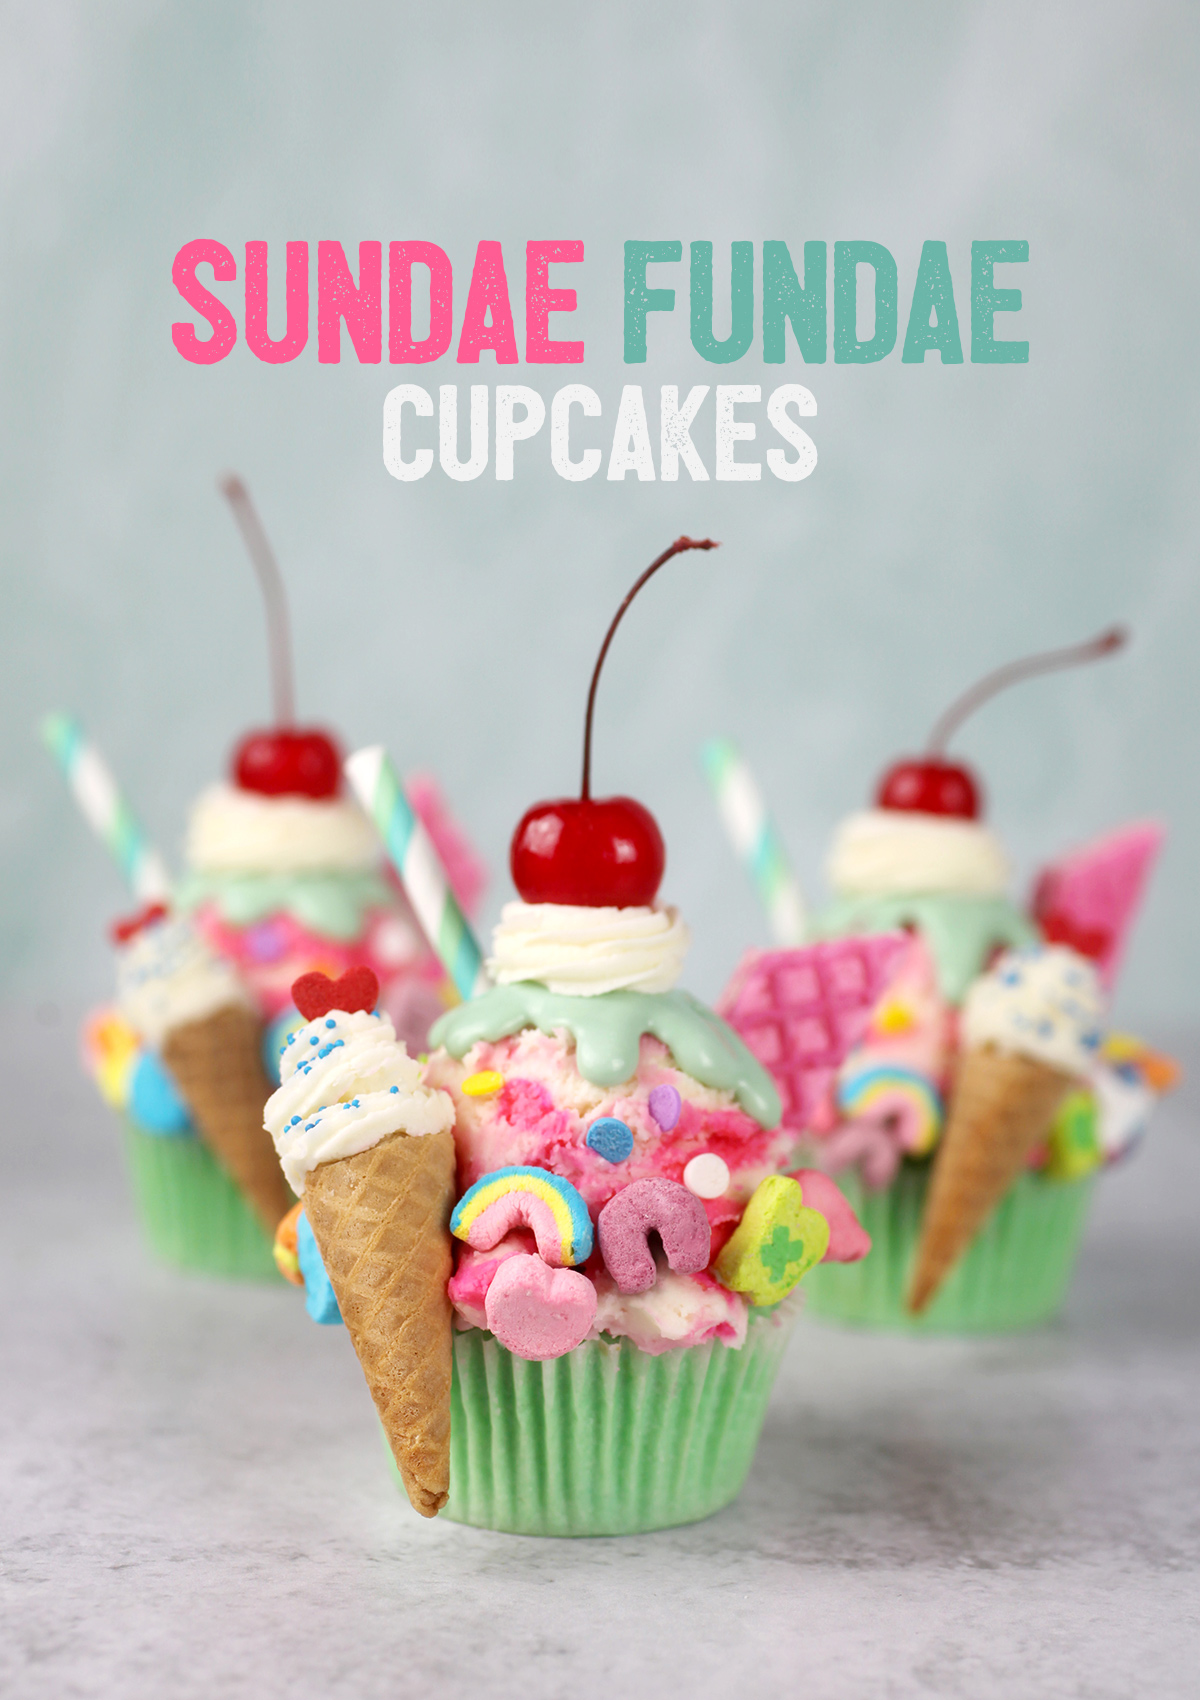
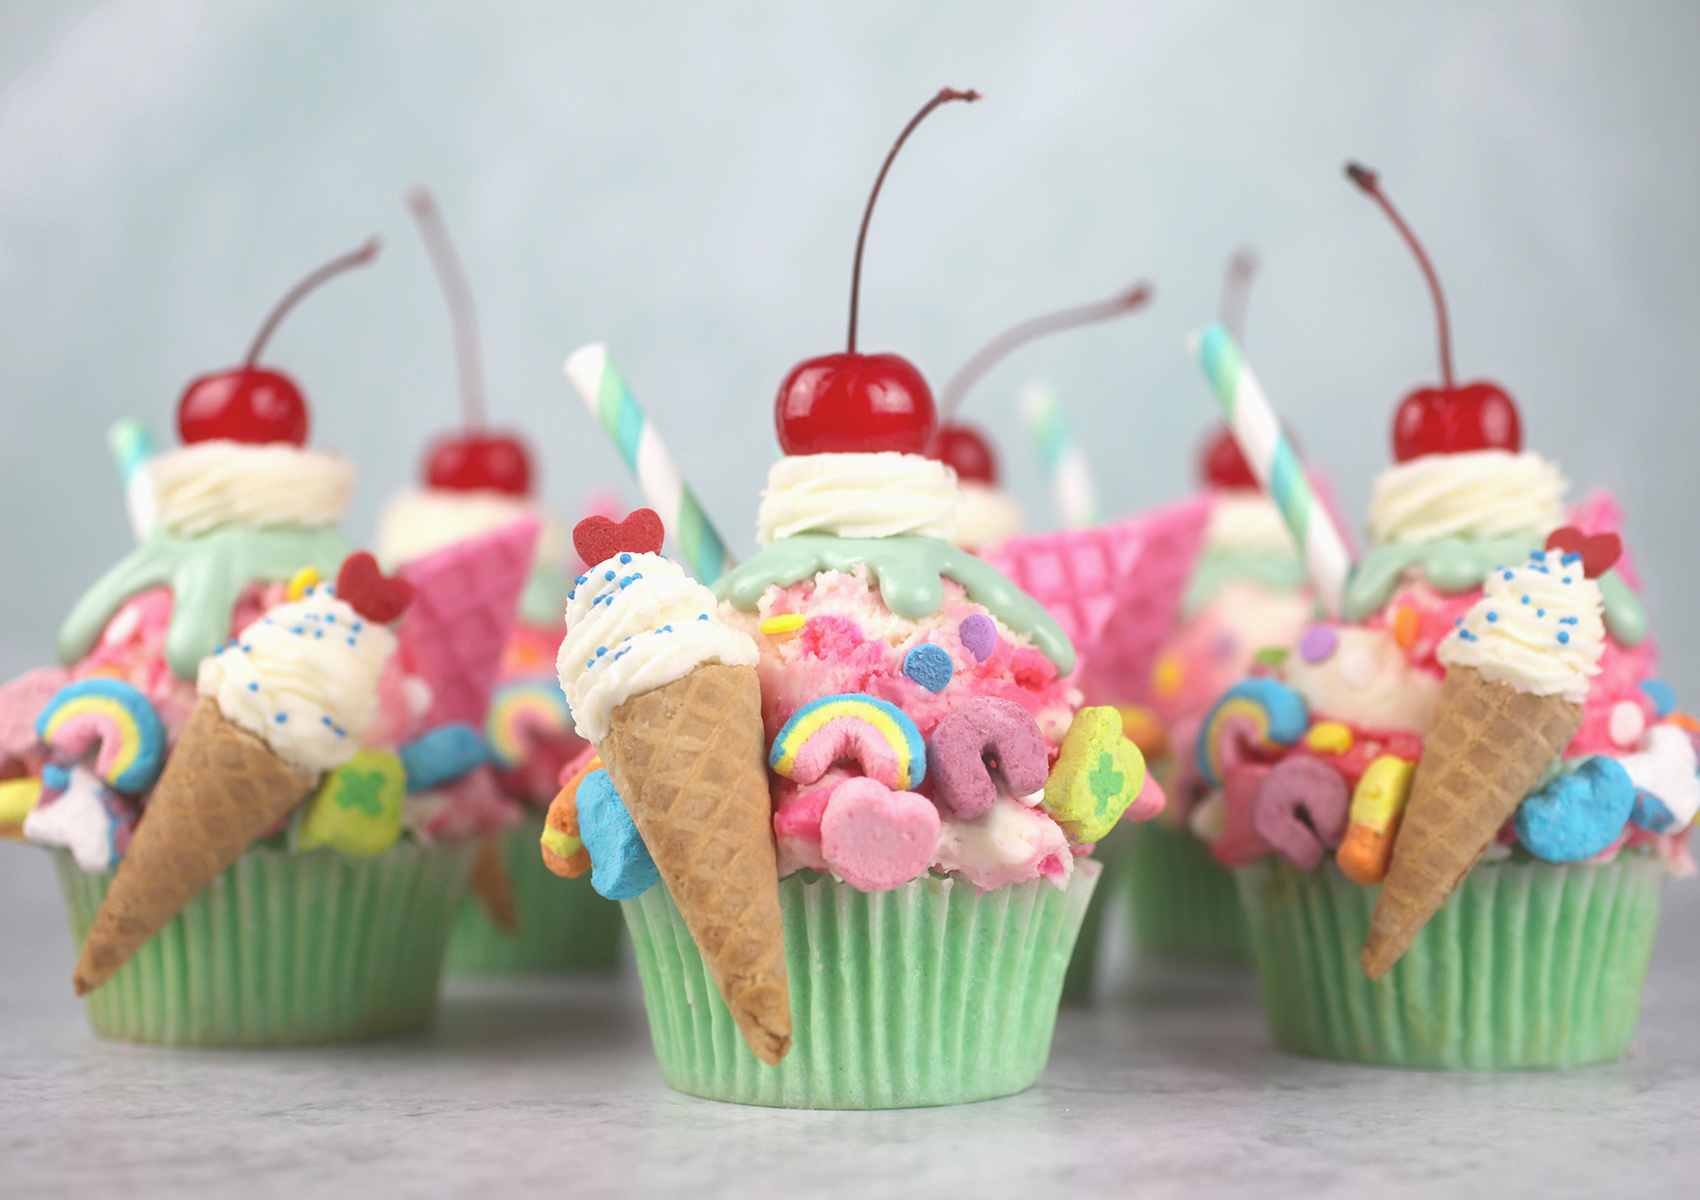
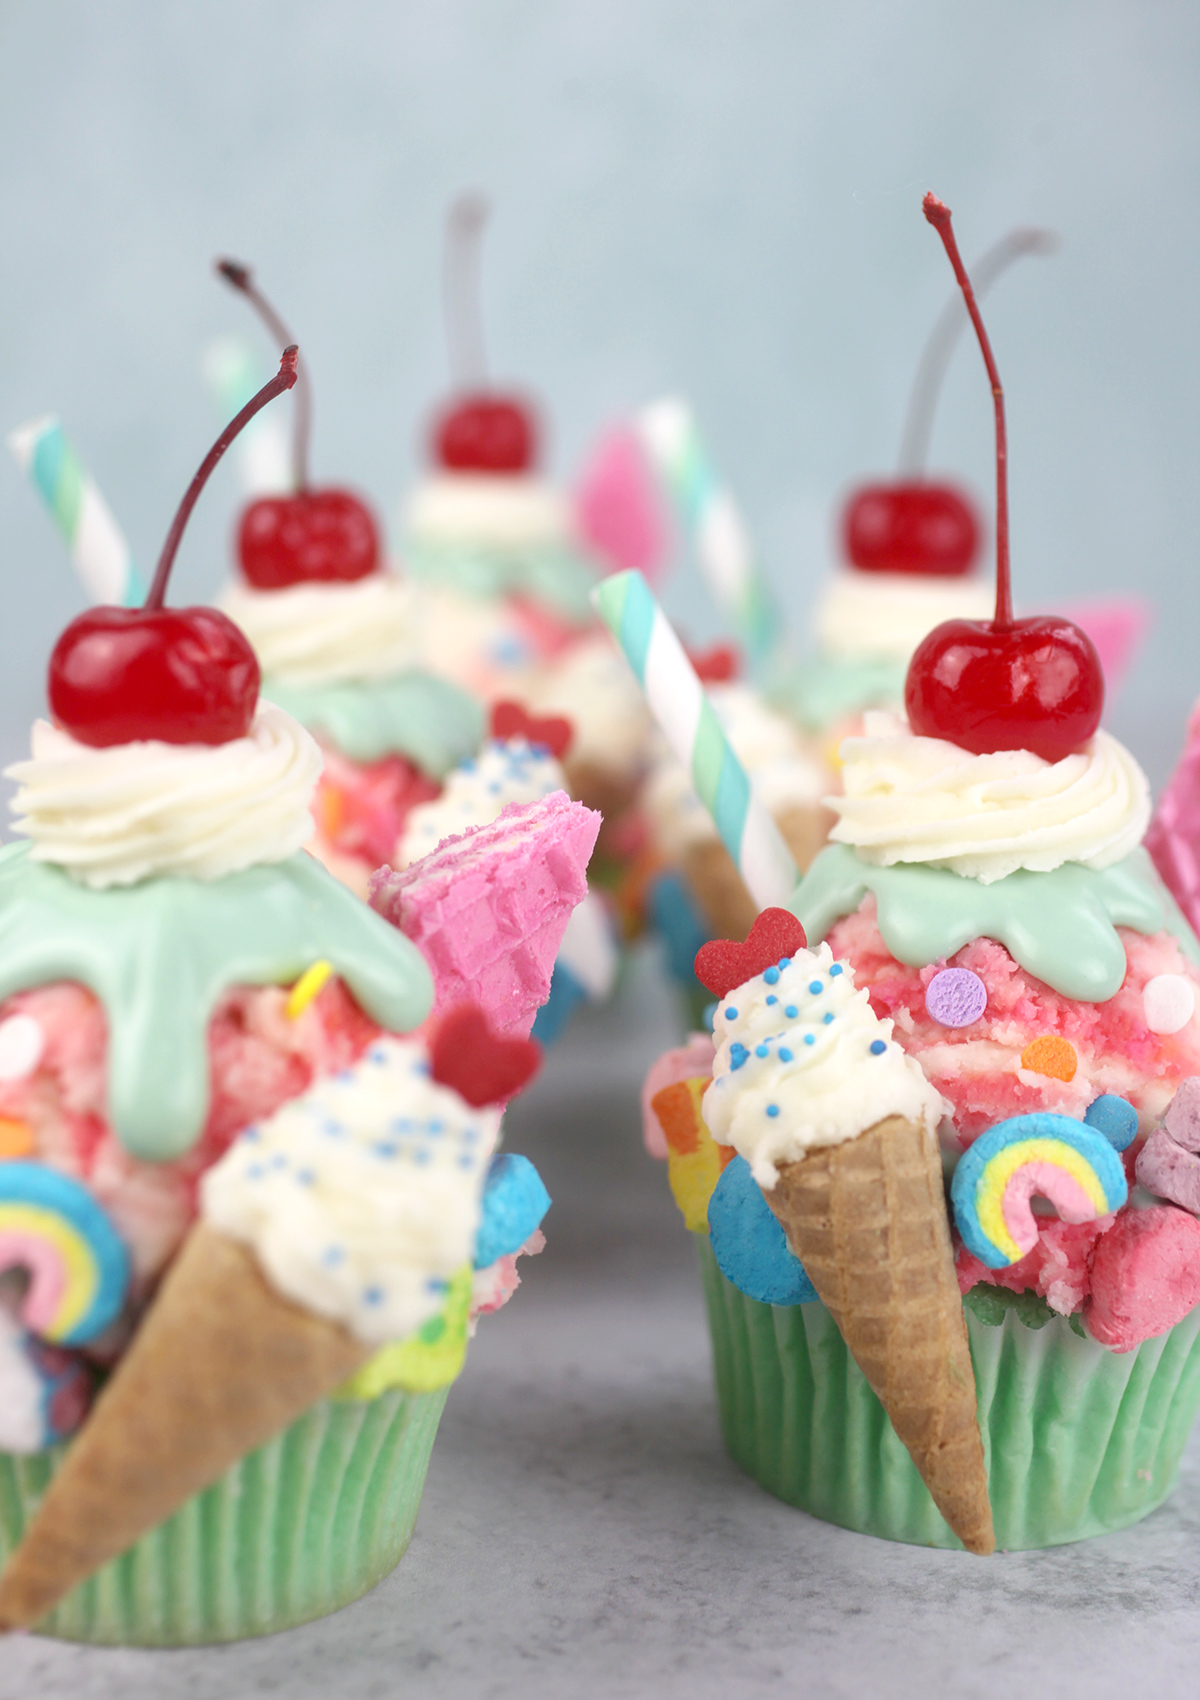
Look at this super sweet explosion of color and sugar all wrapped up in the cutest cupcake creation. It’s like the happiest little cupcake I’ve ever seen and it just screams celebration.
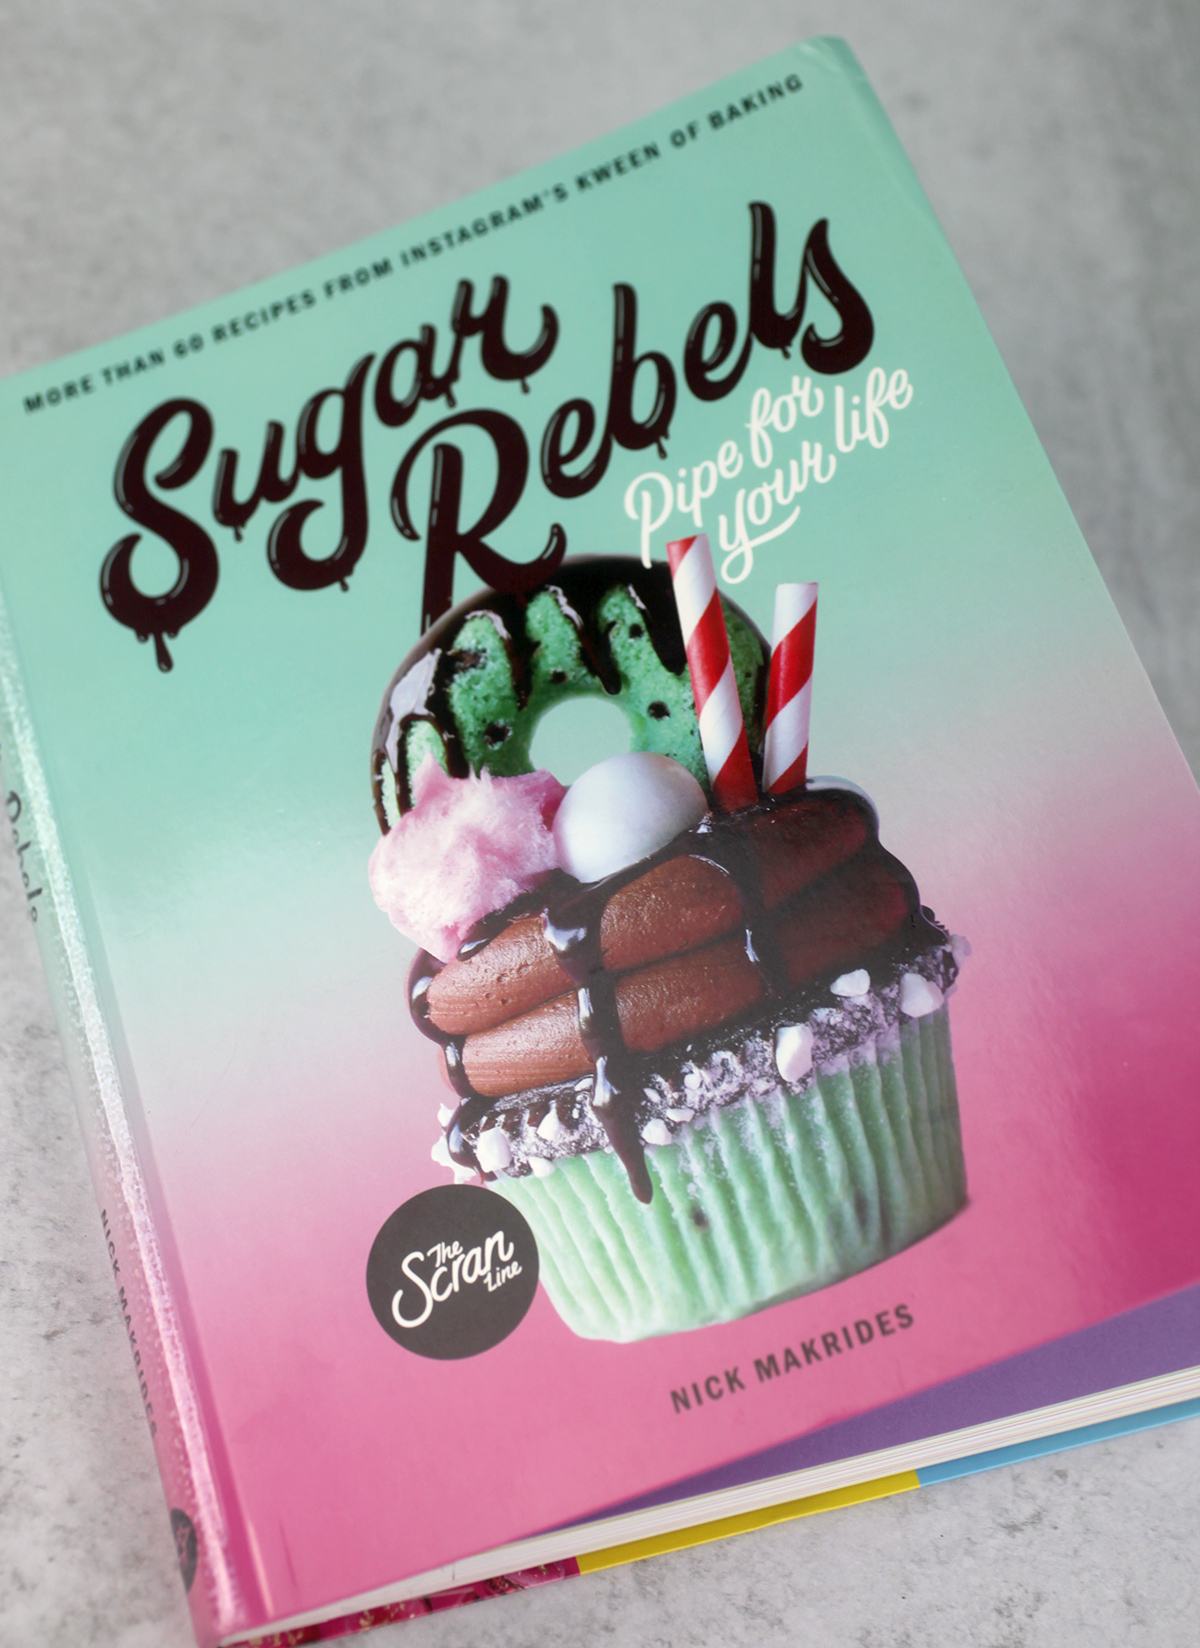
I wish I could say I designed it, but I didn’t. I made it from my baking friend, Nick Makrides’ awesome baking book, Sugar Rebels.
This one. I mean look at that cover cupcake. So creative! So fun! Now, if you love sweets and play around on instagram or youtube, then you know him by the name, TheScranLine. He makes the most spectacular combinations of cupcakes, colors and flavors. Check him out.
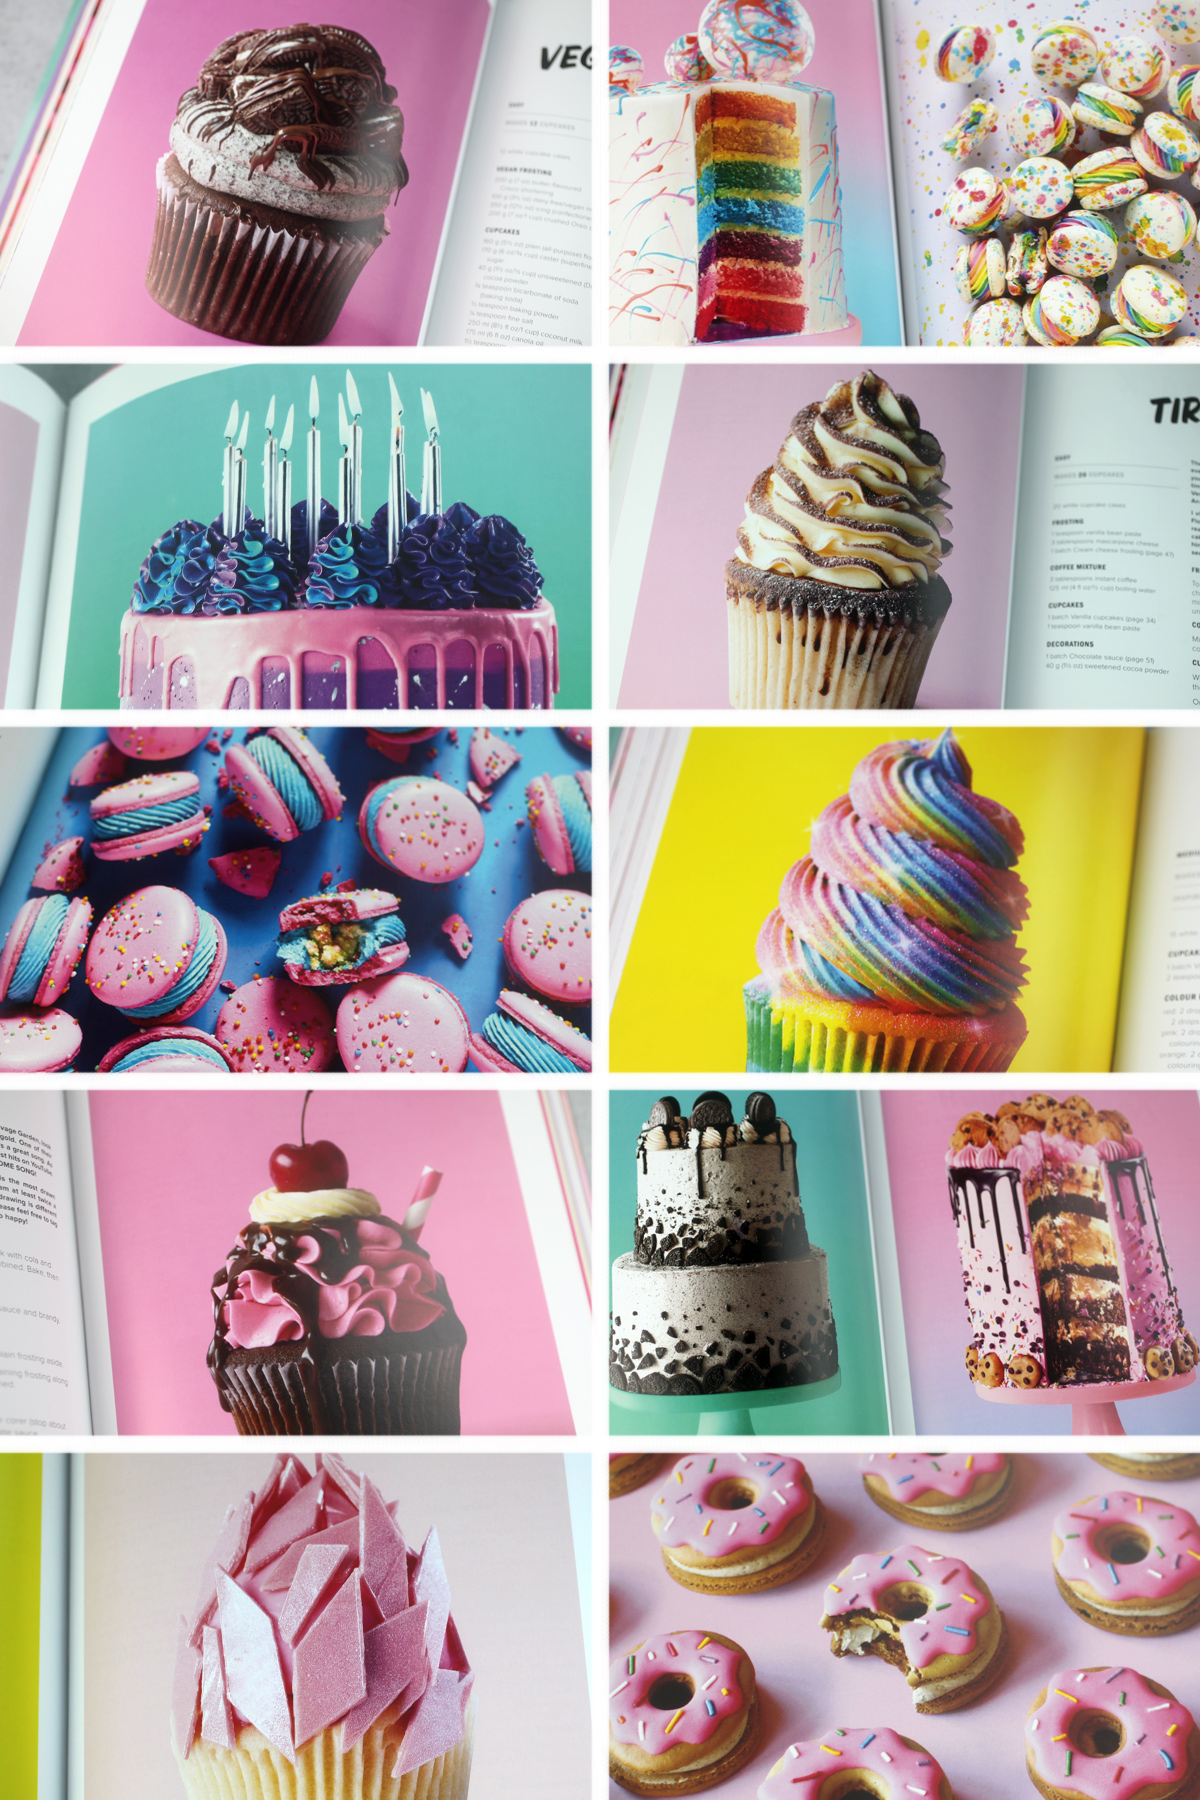
Here’s a peek inside his book of some of the amazing desserts he makes.
When I flipped through all of his projects, it was difficult to decide which one I wanted to make, but then I came across the Sundae Fundae cupcake and I knew immediately that was the one. I mean, those colors. They are right up my alley.
So let me walk you through decorating them and then I’ll share the full recipe at the end.
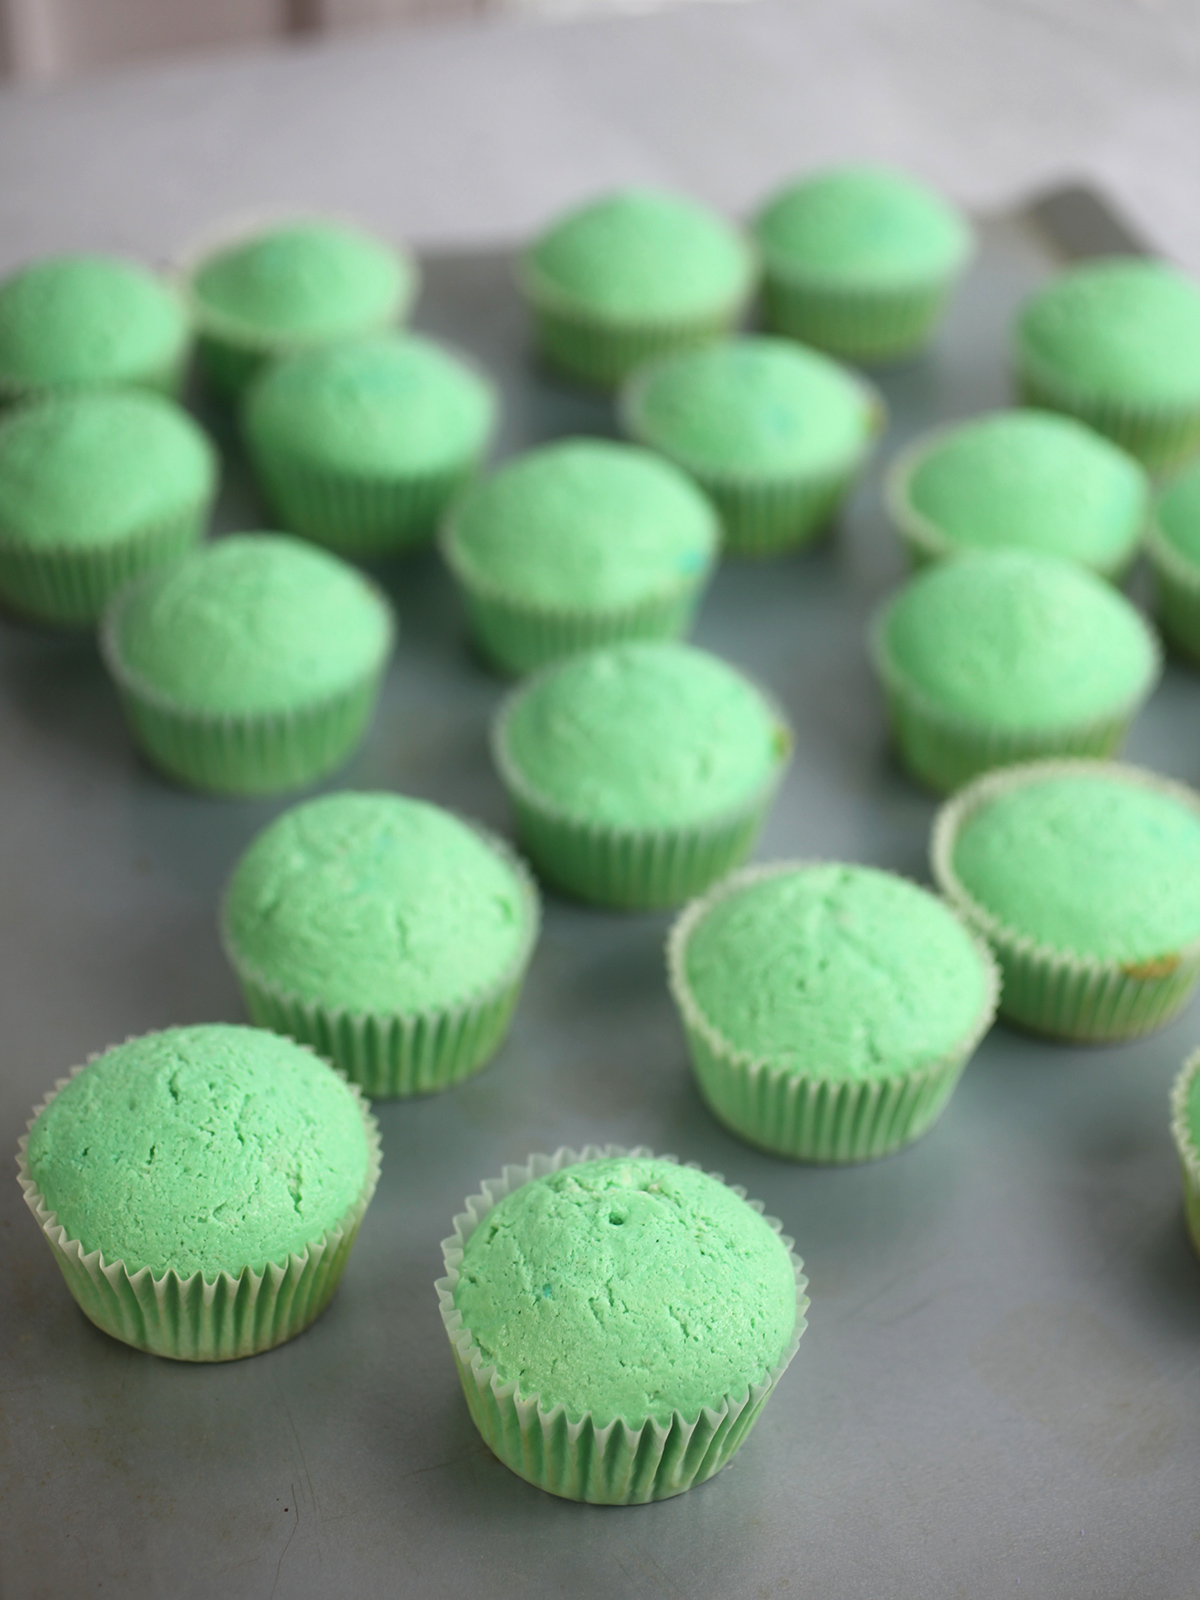
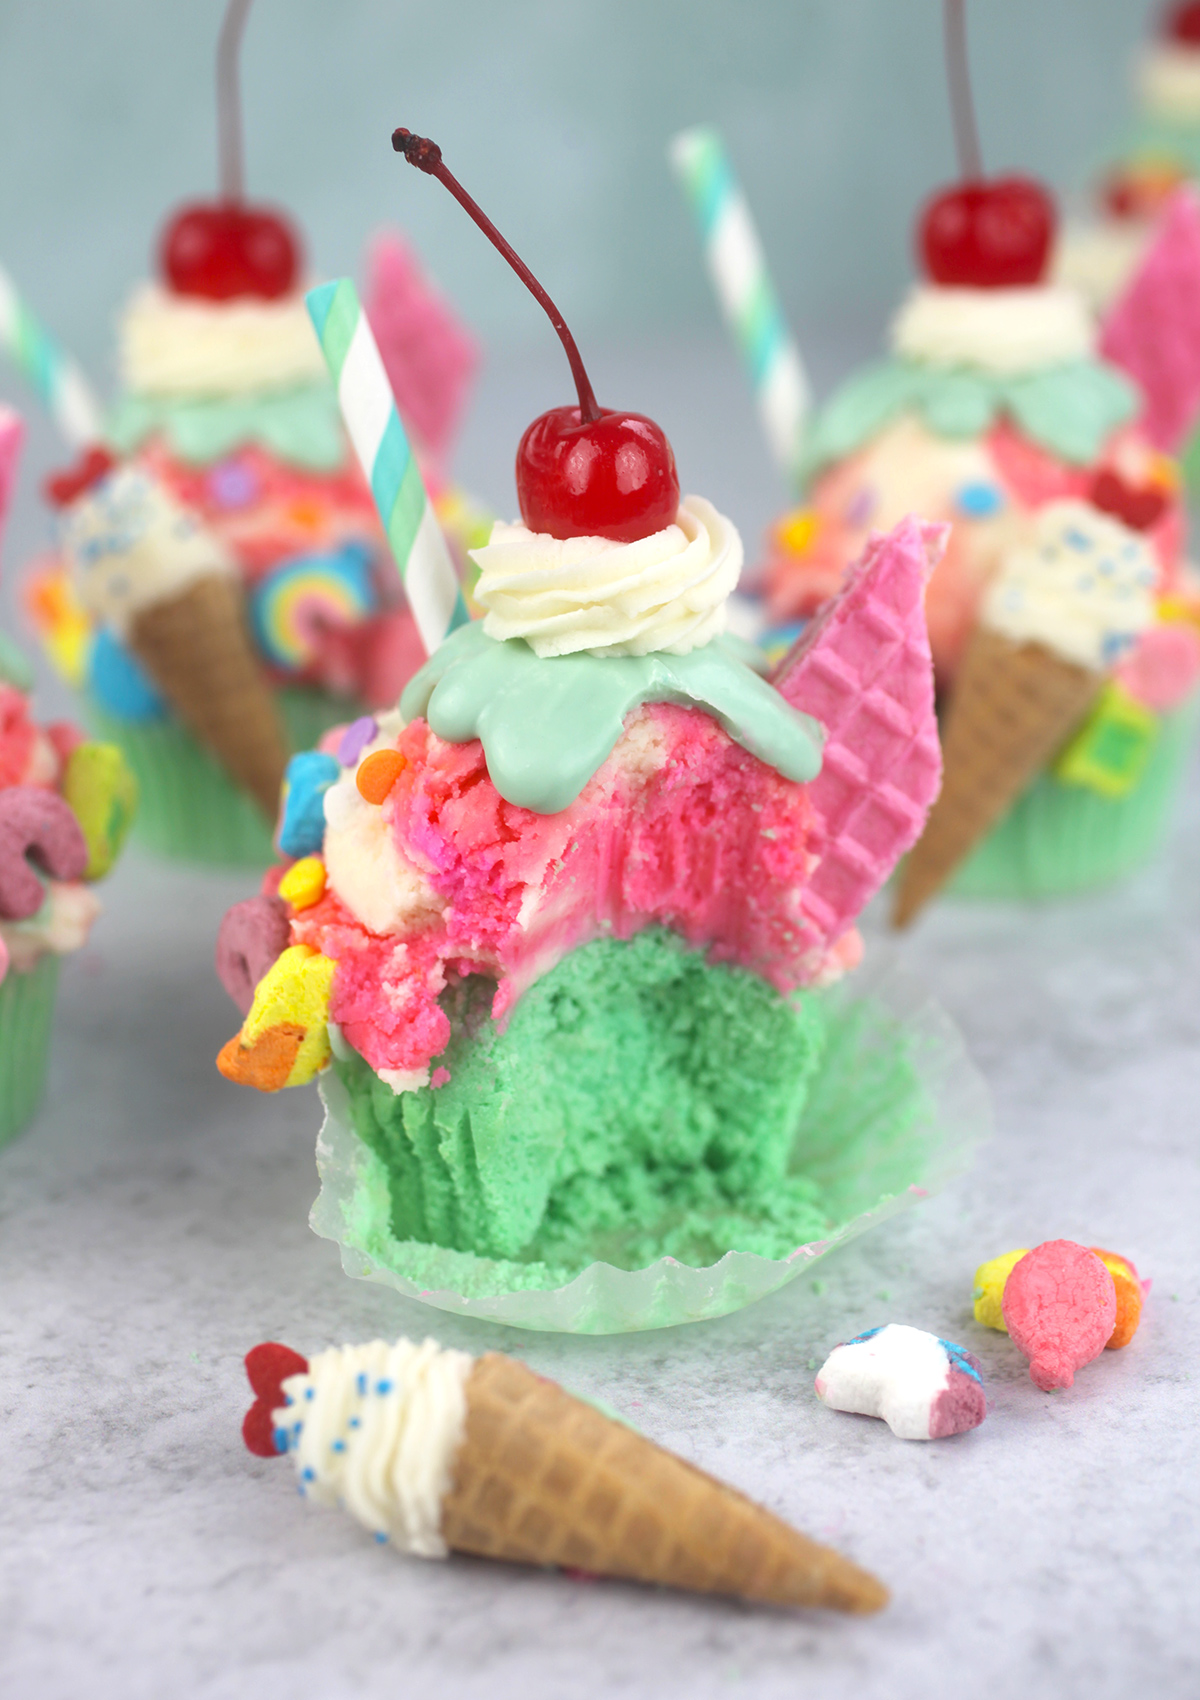
First, bake some vanilla cupcakes, tinted a fun color. Teal/turquoise in this case.
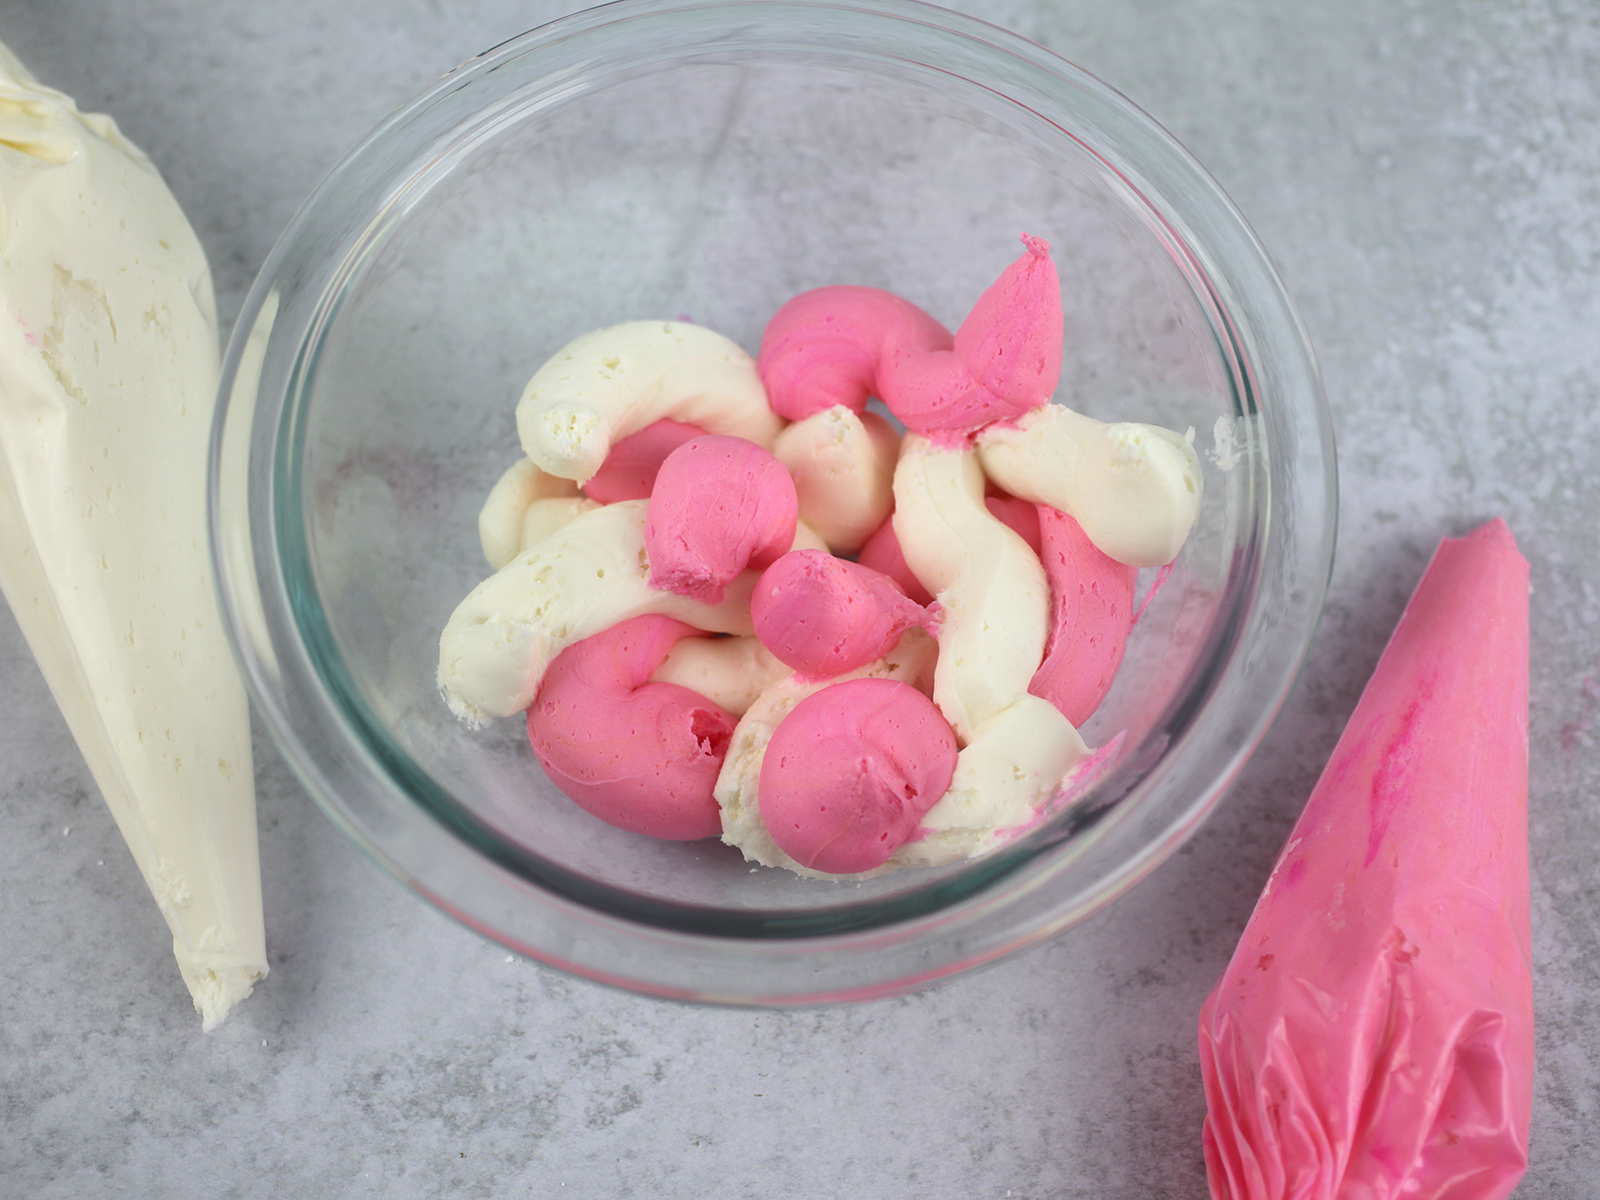
Then make some buttercream frosting, divided in two portions with one tinted a bright pink.
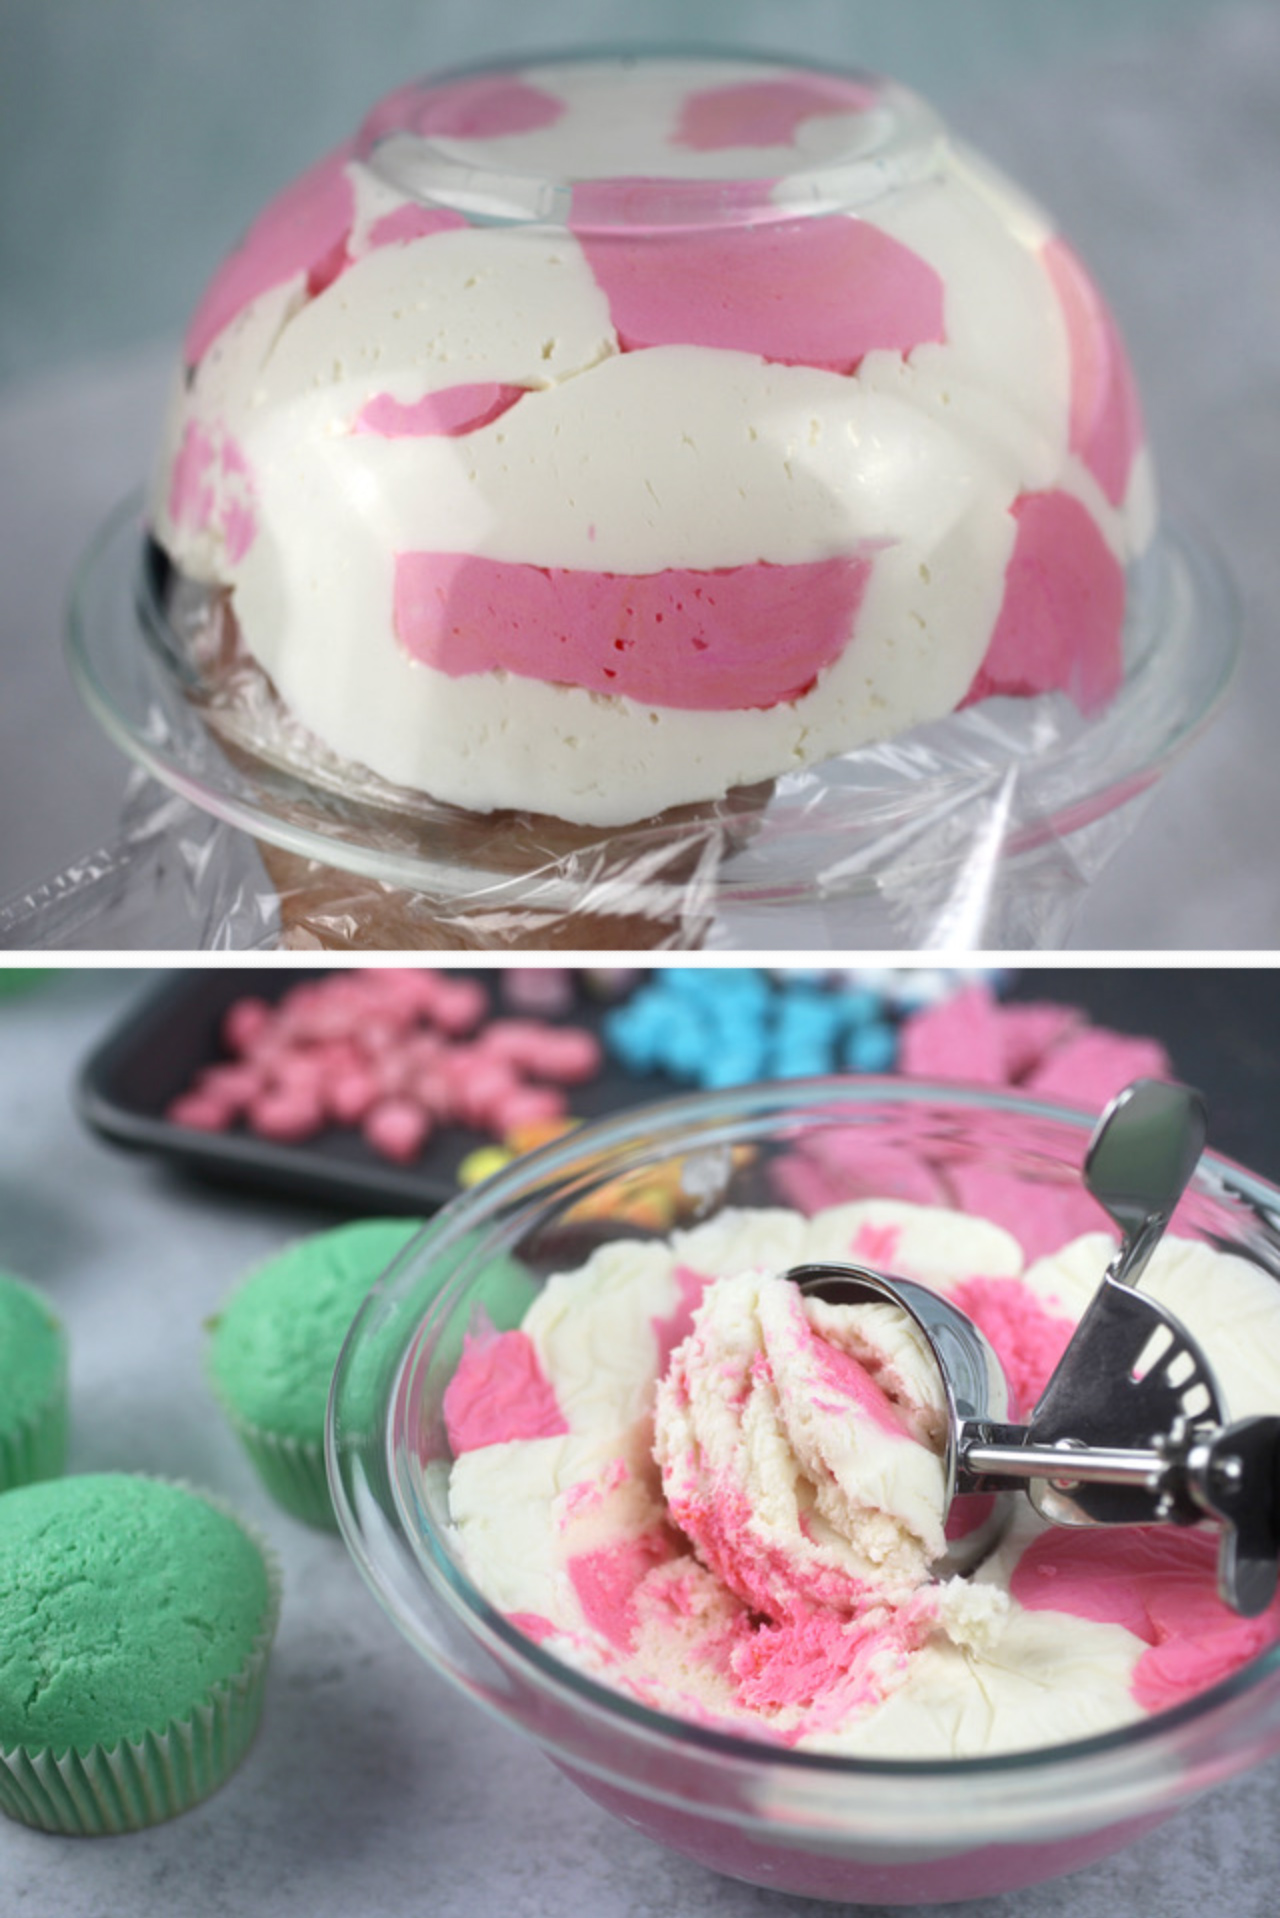
Place a sheet of plastic wrap on top and press down to flatten the frosting together. Then chill until firm. Once the frosting is firm, you can scoop it out with a large 2-1/2 inch scoop and it will totally look like rippled ice cream.
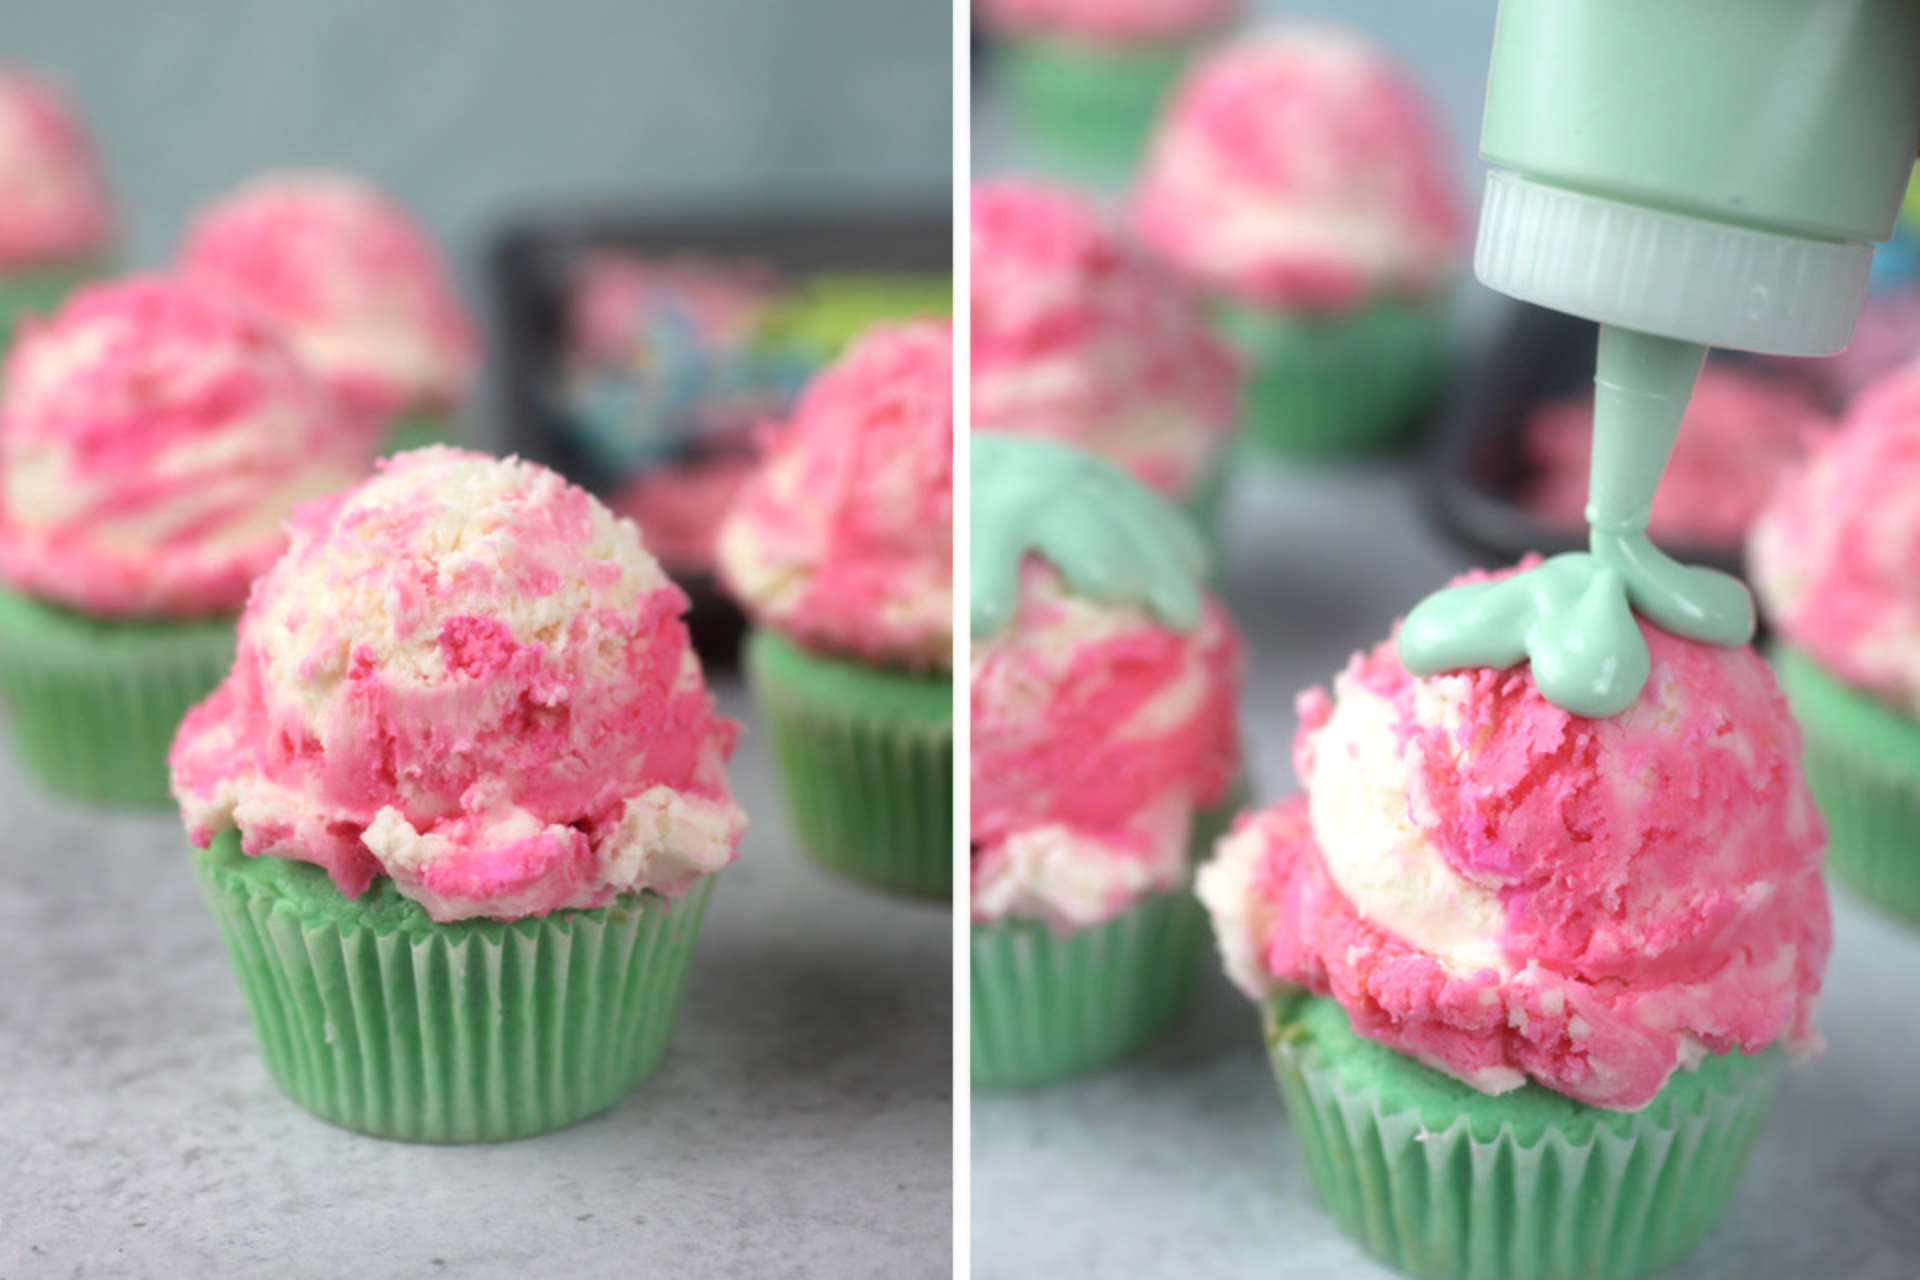
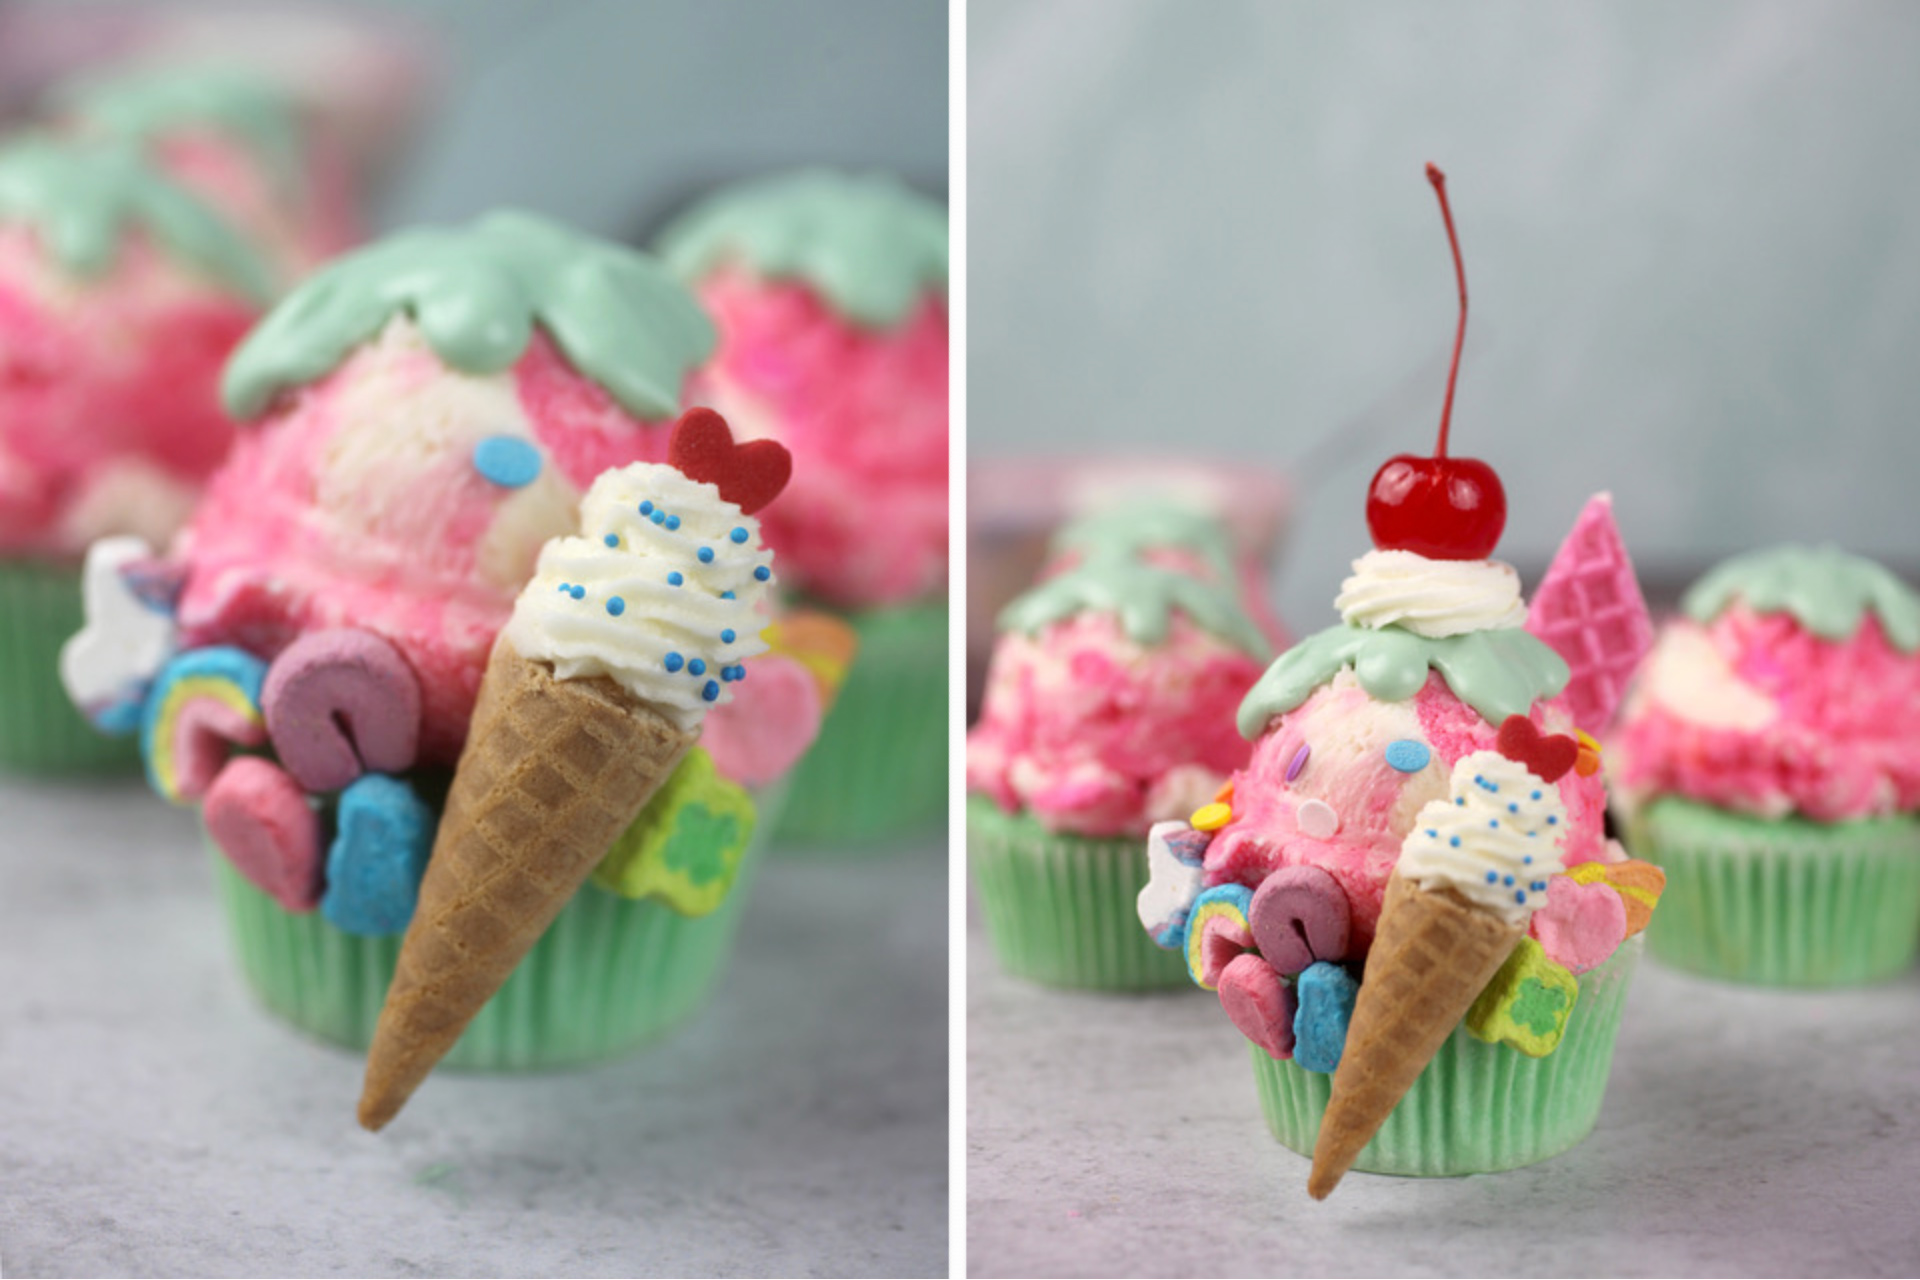
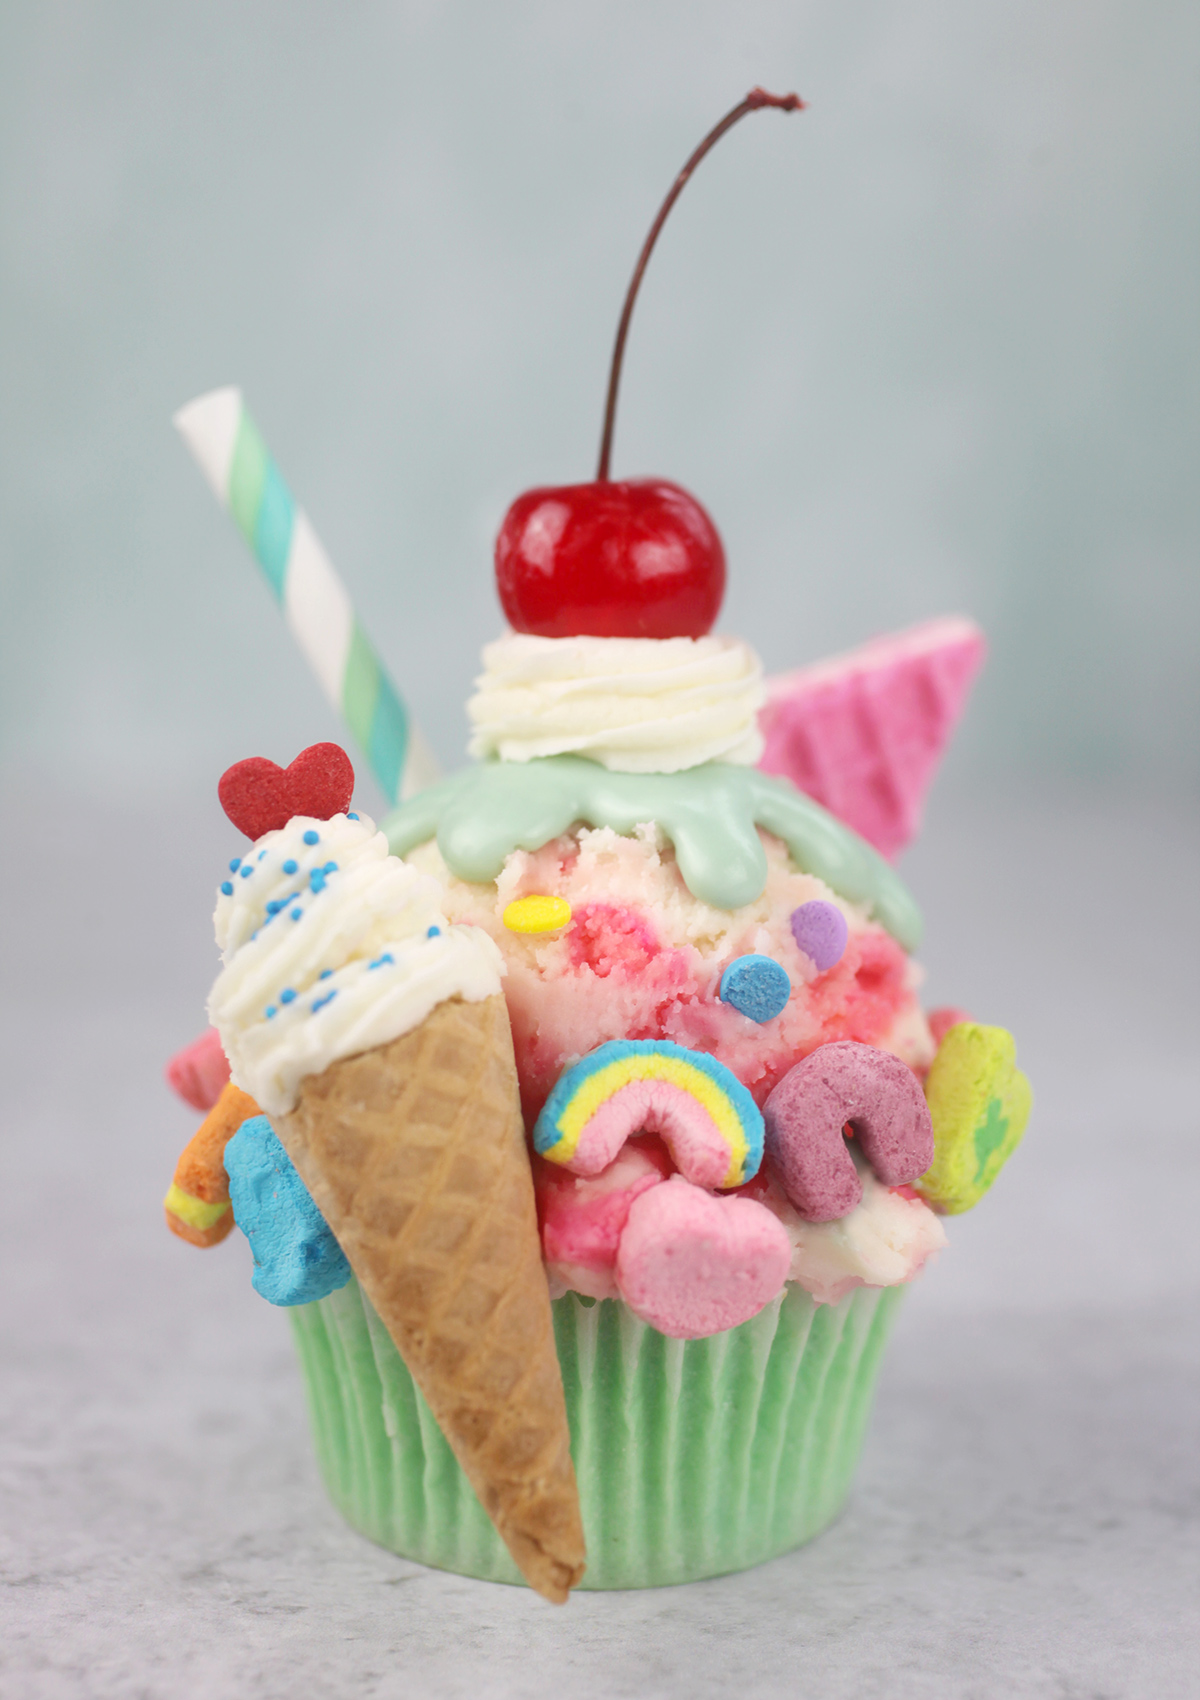
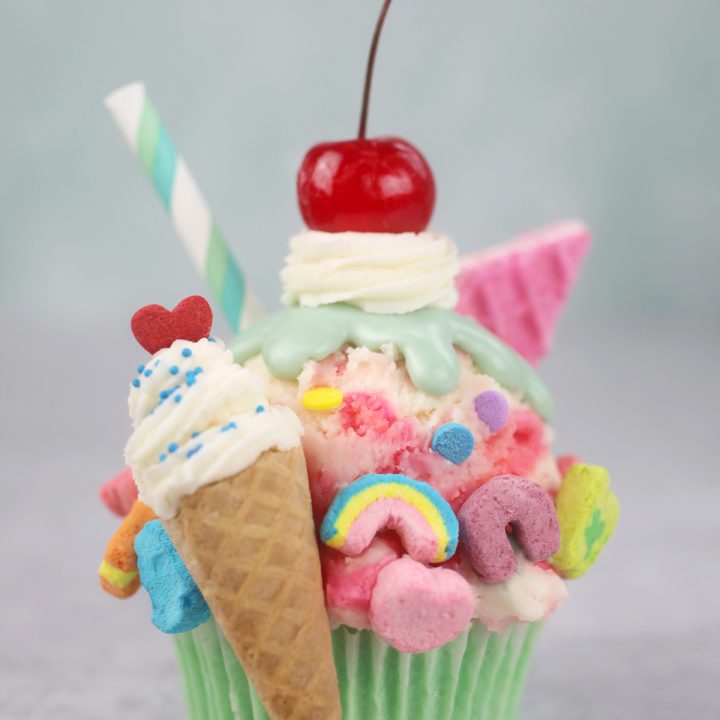
See. Just place that big scoop right on top of a cupcake. Then drip or drizzle some melted candy coating on top of the buttercream. Nick, used tinted ganache, but I ended up just using melted candy wafers since I had some already tinted teal and on hand.
Now, the really fun part. It’s time to cover the cupcake in cookies and sprinkles and marshmallows and more!
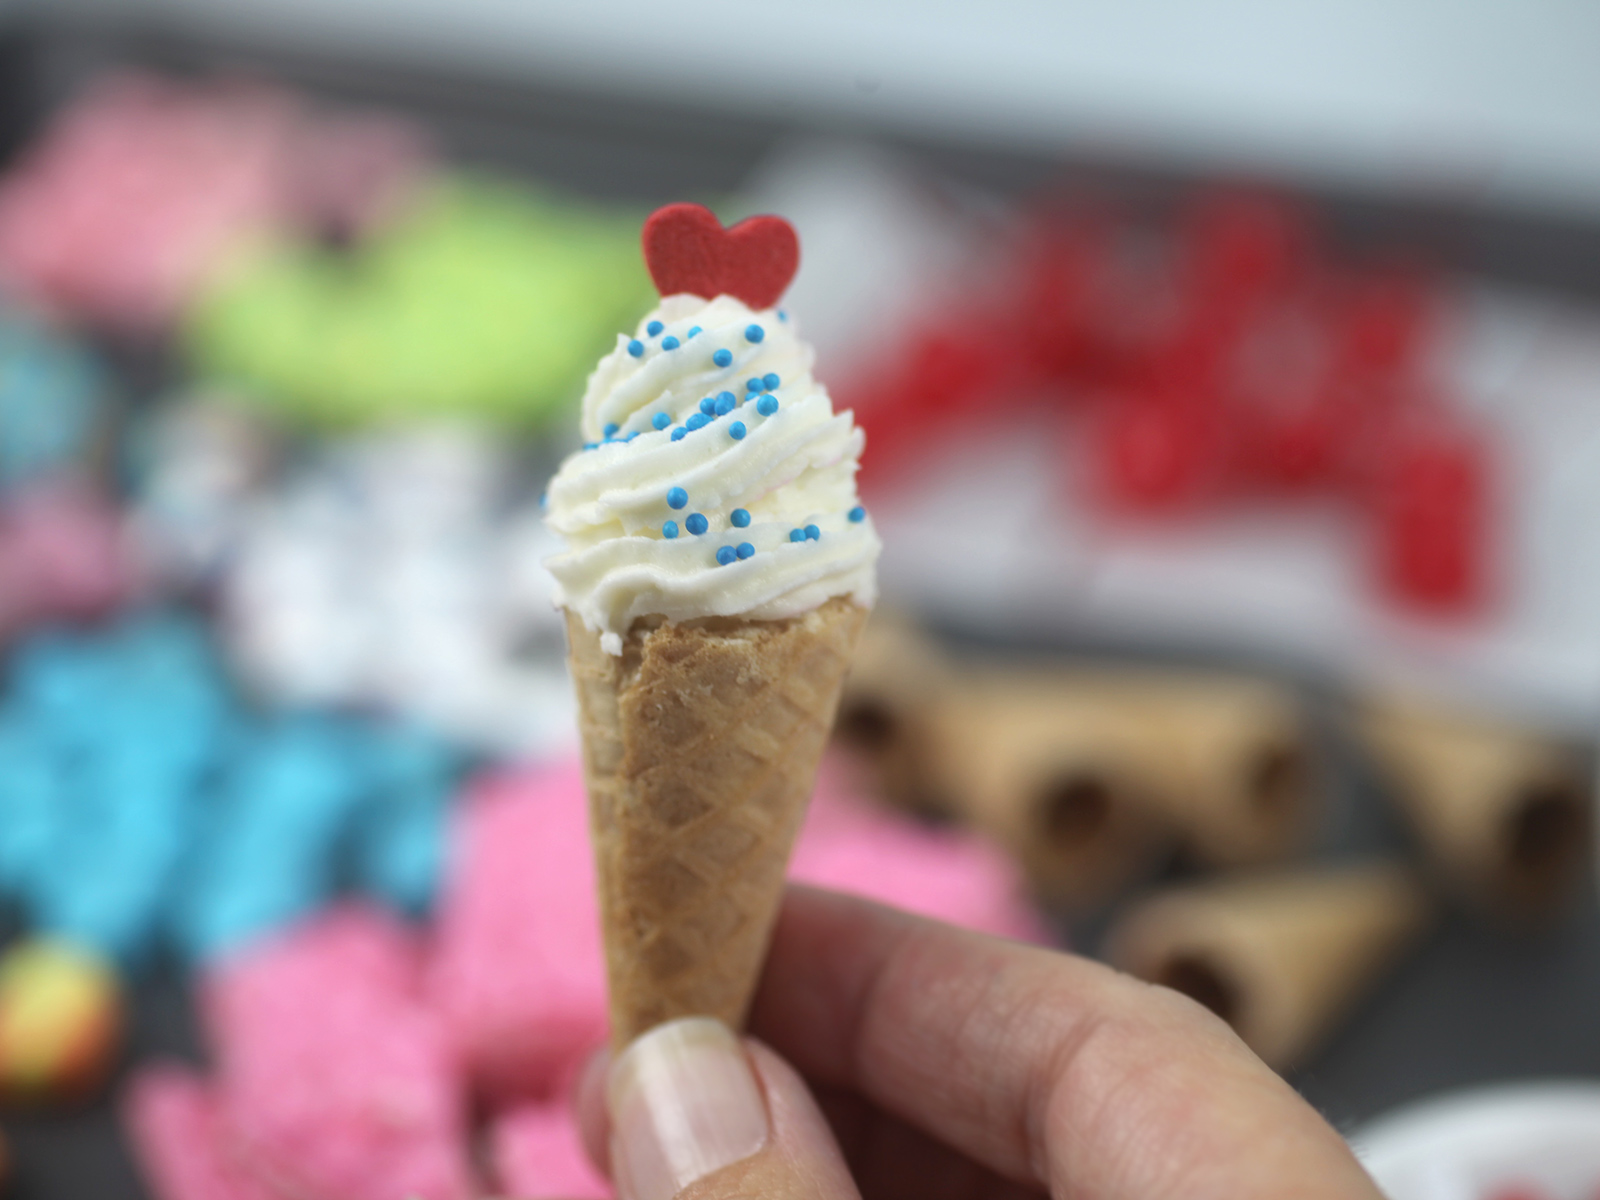
And yes, even a tiny, itty-bitty ice cream cone.
For these, I used a serrated knife to cut down regular size waffle cones so I just had about 2-inch tall cones. Then with some reserved vanilla buttercream, I piped them to look like ice cream, sprinkled with non-pareils and topped off with a jumbo heart sprinkle.
To attach the marshmallows and cones, I used some more of the melted candy coating on the back of each piece and attached them to the side of the cupcake. When it dries it will hold the pieces in place like glue.
Then top the frosting with some pastel confetti sprinkles, pipe a dollop of frosting on the very top, add a cherry … and don’t forget a fun pink wafer cookie for kicks.
Then because I also had some teal striped straws, I had to add those too.
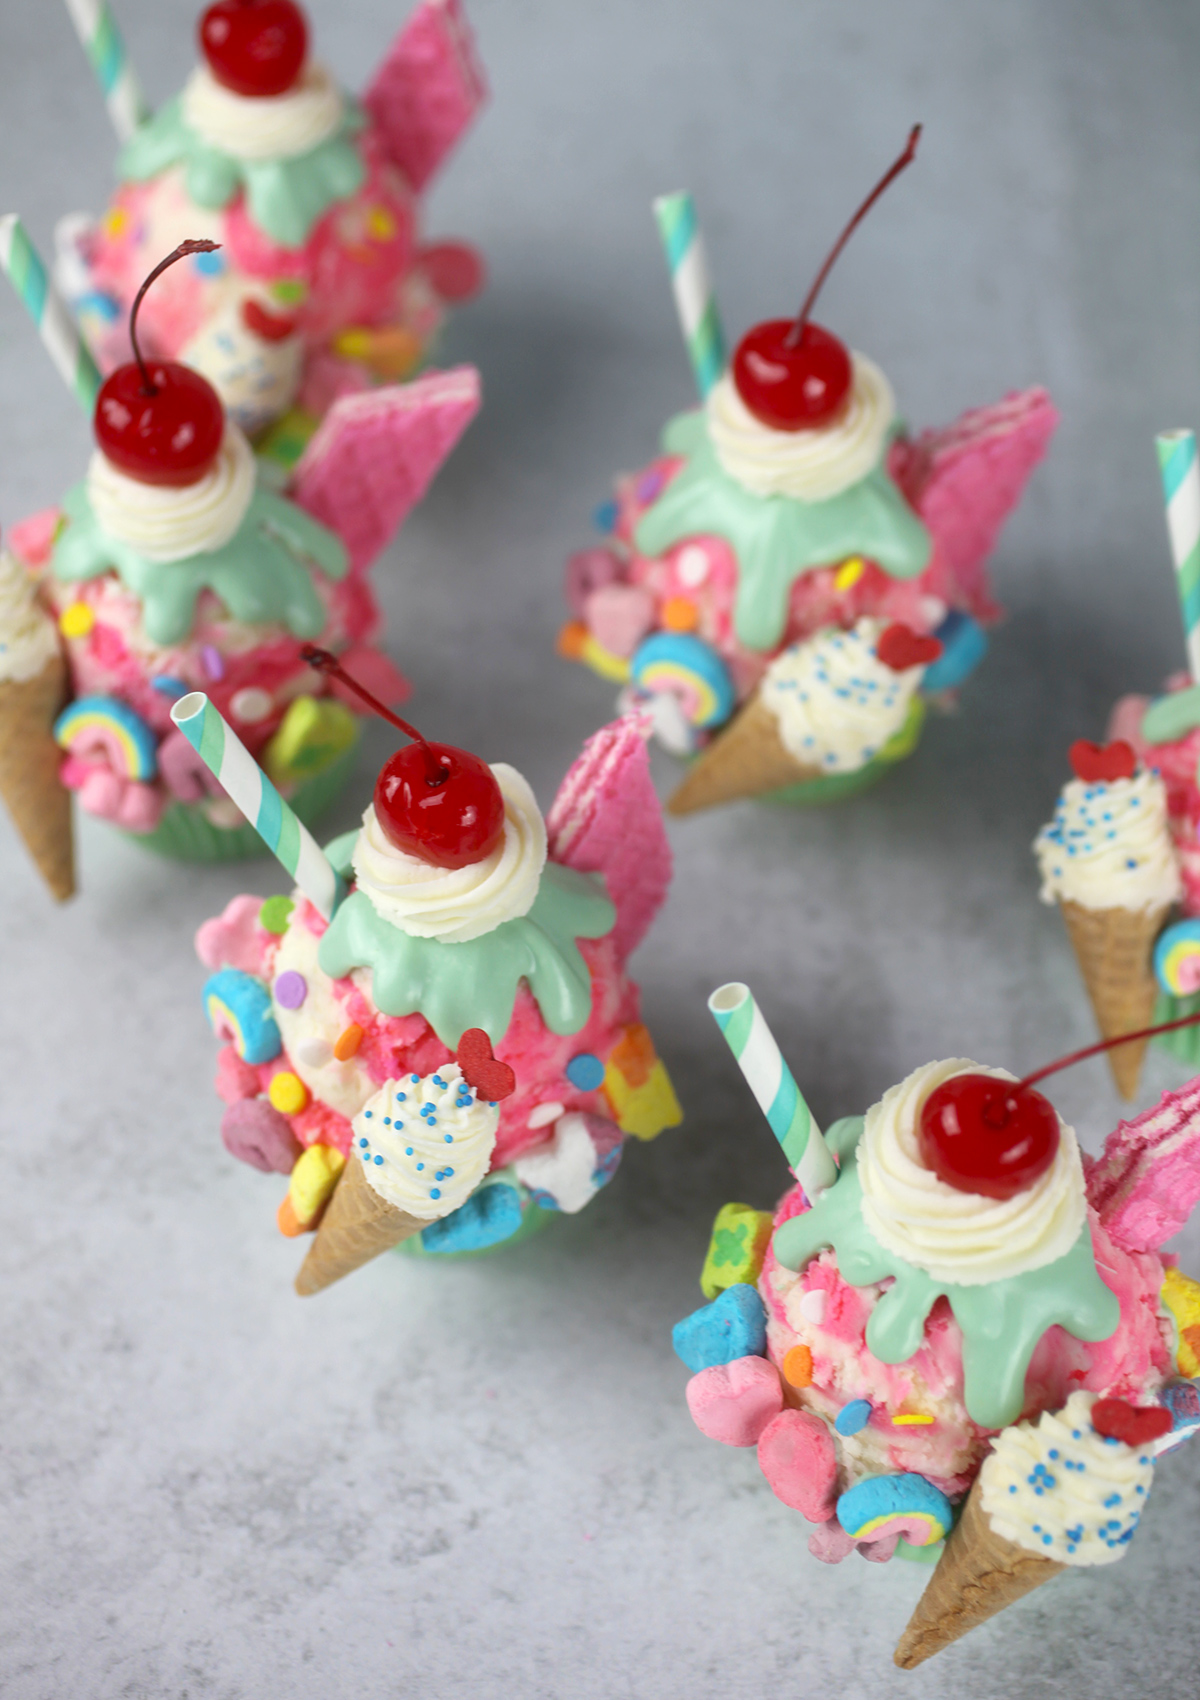
They are just so cute. Let’s take a closer look.
Yes. Definitely adorable.
They just make me smile … they are so bright and cheery.
Yield: 20 cupcakes
Sundae Fundae Cupcakes
Prep Time30 minutes
Cook Time20 minutes
Additional Time1 hour
Total Time1 hour50 minutes
Ingredients
Vanilla Cupcakes
430g (15 oz) all-purpose flour
265 g (9 1/2 oz) superfine sugar
3 teaspoons baking powder
1/2 teaspoon fine salt
125 g (4 1/2 oz/1/2 cup) unsalted butter, softened
2 large eggs
375 ml (12-1/2 fl oz/1-1/2 cups) whole milk
125 ml (4 fl oz/1/2 cup) vegetable oil
2 tablespoons sour cream
1 teaspoon vanilla extract
2 drops turquoise gel food coloring
4 drops white gel food coloring
American Buttercream (make two batches of the below for 20 cupcakes)
American Buttercream (make two batches of the below for 20 cupcakes)
500 g (1 lb. 2 oz/2 cups) unsalted butter, softened
500 g (1 lb. 2 oz/4 cups) confectioners’ sugar
2-4 teaspoons vanilla extract
2 tablespoons whole milk, room temperature
6 drops pink gel food coloring
1 teaspoon raspberry, strawberry or even cotton candy flavoring
Decorations
Decorations
20 waffle ice cream cones
20 red heart sprinkles
confetti sprinkles
non-pareils
2 cups Lucky Charms Marshmallows
10 pink wafer cookies, halved diagonally
20 maraschino cherries, well drained
8 oz candy wafers
Striped straws, cut in half
Instructions
Make the cupcakes: Preheat oven to 320 degrees Fahrenheit. Line two cupcake trays with cupcake liners.
Add the flour, sugar, baking powder and salt to a large mixing bowl and mix until well combined using a stand mixer.
Next, add the softened butter and mix on low speed until the mixture reaches a crumbly, sand-like texture.
Add the eggs, milk, oil, sour cream, and vanilla, and food coloring. Mix on low speed until all the dry ingredients are incorporated. Scrape down the side of the bowl, and mix for a final 20 seconds.
Fill each cupcake liner three-fourths of the way full. Use an ice cream scoop to transfer the batter. Bake for 18-20 minutes or until a toothpick inserted comes out clean. Cool completely on a wire rack before frosting. Note: The original recipe calls for baking these for 40 minutes. Mine were completely done at 18. I am guessing it’s some kind of conversion issue from the equipment Nick uses in Australia.
Make the frosting: Add the softened butter to the bowl of a stand mixer fitted with the paddle attachment. Mix the butter on low speed to begin with and then switch to high and mix for 5 minutes until the butter is light and fluffy.
Stop the mixer and scrape down the side of the bowl using a spatula. Add the confectioners’ sugar and vanilla and mix again on low speed to avoid a dust storm.
Once incorporated, increase the speed to high again and beat for another 5 minutes until the butter becomes fluffy again. Add milk if necessary, a teaspoon at a time to make smoother.
Assemble and Decorate: To prepare the frosting, divide 3/4 of the frosting between two separate bowls. Add the pink food coloring and flavoring to one bowl and mix until well combined. Leave the second bowl of frosting plain. Reserve the remaining 1/4 of frosting for filling the ice cream cones and topping the cupcakes.
Transfer the divided pink and plain frostings to separate piping bags, snip off the ends and pipe squiggles of each color into a large deep glass bowl. Tap the bowl on a flat surface to compress the frostings together. Cover with plastic wrap and gently press on top to help flatten even more. Refrigerate for 30 minutes to chill.
Use a serrated knife to cut the waffle cones down to about 2 inches tall. Using half of the reserved frosting, pipe a tall swirl into each cone. Add a red heart sprinkle on top and sprinkle with nonpareils. Sit the frosted cones upright and chill. Try placing them in the grid of a cookie sheet that is sitting above the cupcake trays to hold them upright.
Use a 2-1/2 inch scoop to scoop out the rippled frosting the same way you would ice cream. Remove frosting from fridge a few minutes before scooping. Place a scoop of frosting on each cupcake.
Drizzle or pipe melted candy wafers on top of the frosting and let dry. You can tint white wafers to your desired color by using candy coloring or even mixing in pre-colored candy wafers when melting.
Insert a pink wafer cookie toward what will be the backside of each cupcake
Use more of the melted candy wafers to attach the cone to the side of the cupcake by gently pressing it into the frosting or to the surface of the liner. Hold in place until the melted wafers are set. Use melted wafers to attach the marshmallows as well.
Sprinkle the top with confetti sprinkles. You may need to gently press sprinkles into the frosting so they don’t bounce off.
Pipe the remaining vanilla frosting on the very top of each cupcake and top off with a drained maraschino cherry.
Insert a striped straw if desired.
Nick’s recipe also called for coring the center of the cupcake to add more marshmallows, but I left that part out so I could really taste the cupcake flavor. He uses a reverse creaming technique and I love it. So good and not super sweet.
Hope you enjoy and check out his book for more crazy cute creations!
I LOVE The Scran Line! Makes me so happy to see this collab between the two of you. :)
I made an ice cream inspired Neapolitan cake last year, and made my buttercream “scoopable” by adding a LOT of powdered sugar to it until it was stiff enough to act like ice cream. The refrigeration method is so much easier and turned out so realistic… will definitely do it this way instead next time.
This site focuses on fun and easy baking. You’ll find ideas for cake pops (a Bakerella creation), cakes, cupcakes, cookies, and more. You may even find yourself smiling from all the sweetness.


Have you ever heard of Muddy Bites? They would be perfect for your mini cones.
These are beyond cute and totally put a smile on my face :)
OMG those just scream cheery :D
I LOVE The Scran Line! Makes me so happy to see this collab between the two of you. :)
I made an ice cream inspired Neapolitan cake last year, and made my buttercream “scoopable” by adding a LOT of powdered sugar to it until it was stiff enough to act like ice cream. The refrigeration method is so much easier and turned out so realistic… will definitely do it this way instead next time.
Your mini ice cream cones turned out super cute!
Cute overload. Love these!
These should be called carnival cupcakes bc they are all fun!